
15 Kitchen Backsplash Ideas for a Bright, Warm Kitchen
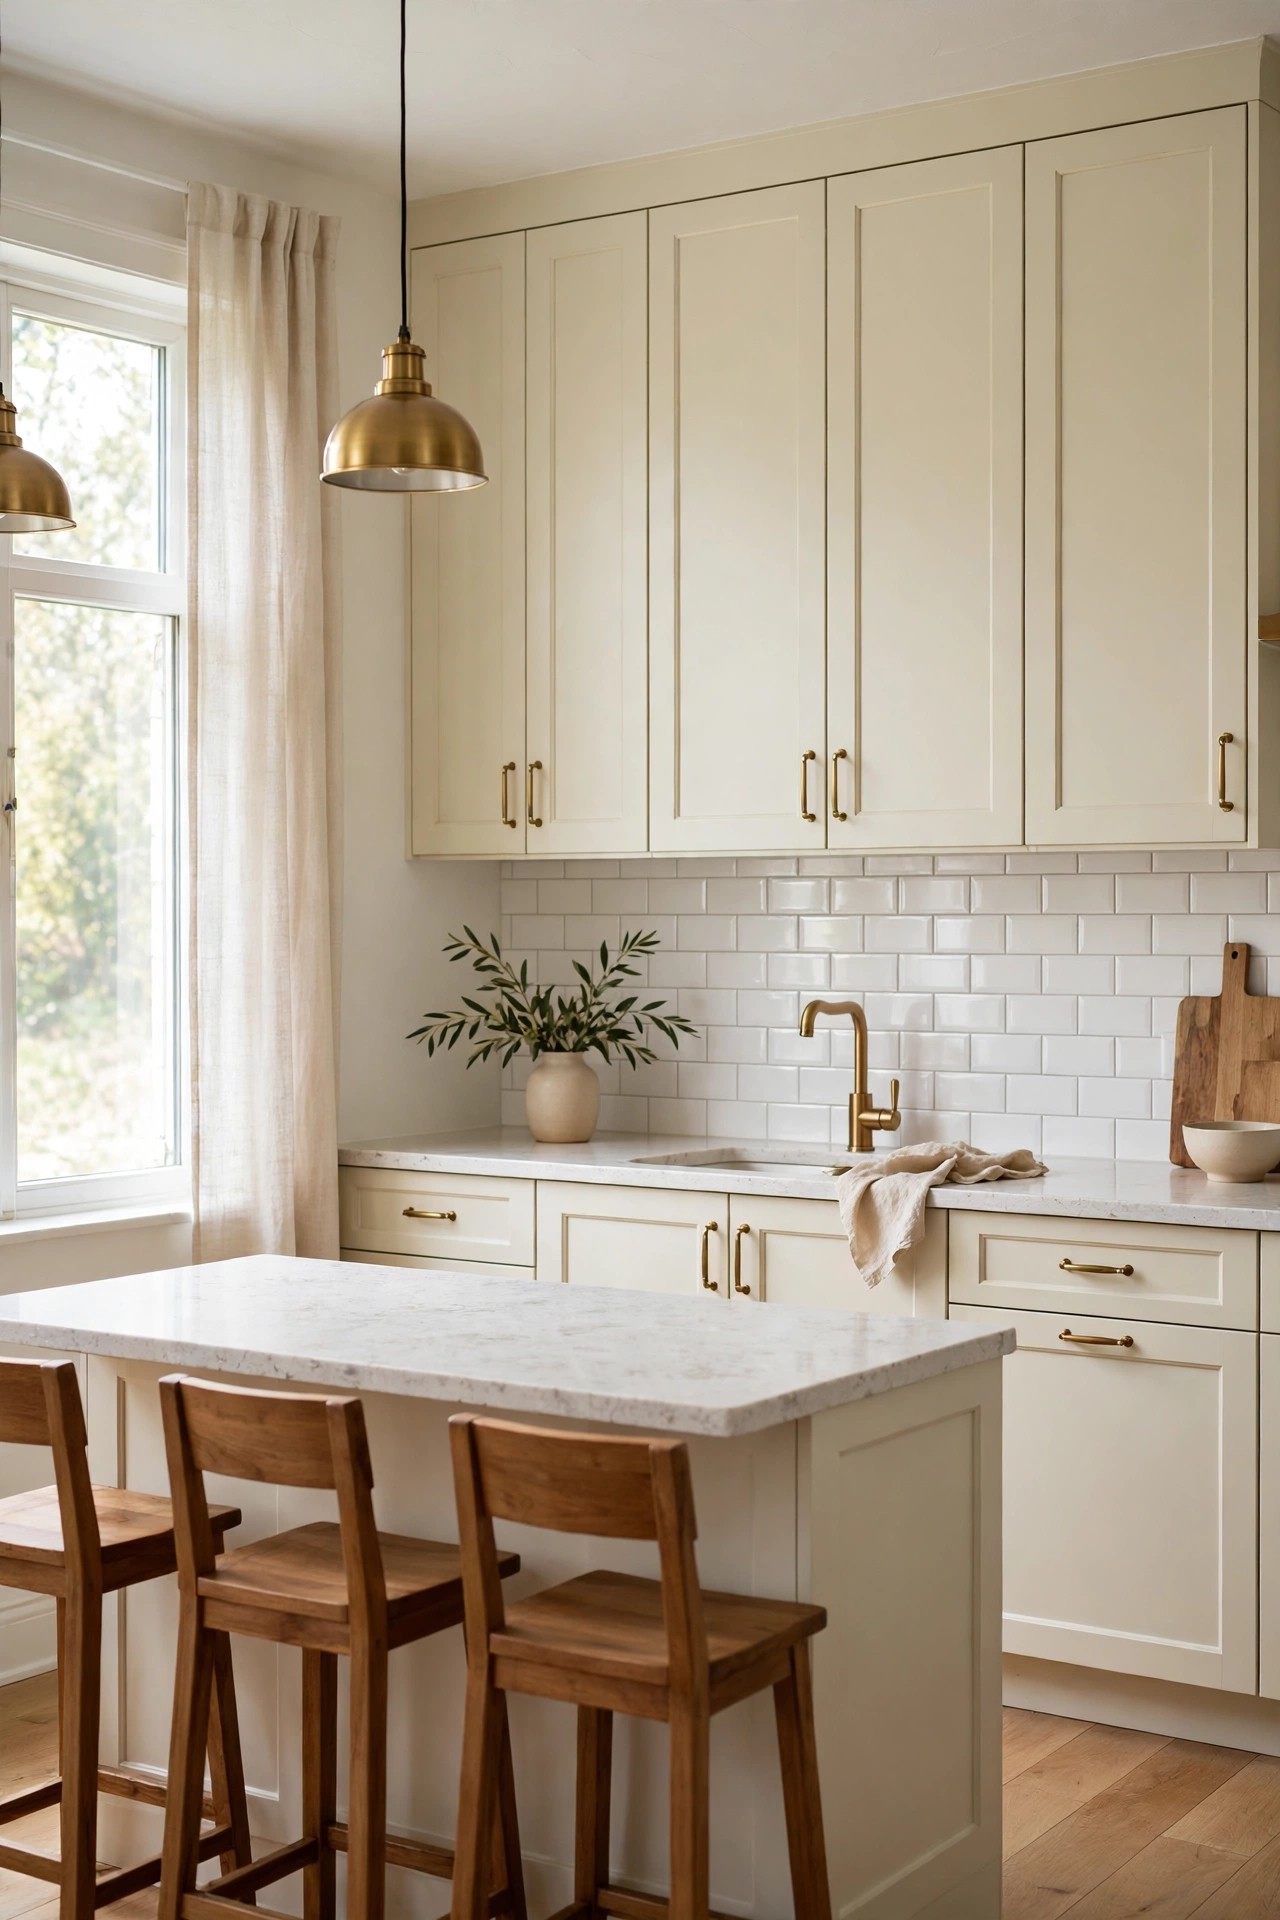
The wall between your countertop and your cabinets is small, but it decides how the whole kitchen reads. A dated or damaged backsplash makes good cabinets look tired, and the right surface makes a plain kitchen look planned. These 15 kitchen backsplash ideas cover real tile, natural stone, peel-and-stick sheets, paint, and panel options, with honest notes on cost, cleaning, and renter limits for each one. Some are weekend projects and some are proper renovation work, so you can match the idea to your budget and your lease before you fall for a photo. For the wider room plan, start with our full guide to kitchen ideas and then come back here for the wall itself.
1. Classic White Subway Tile in a Running Bond
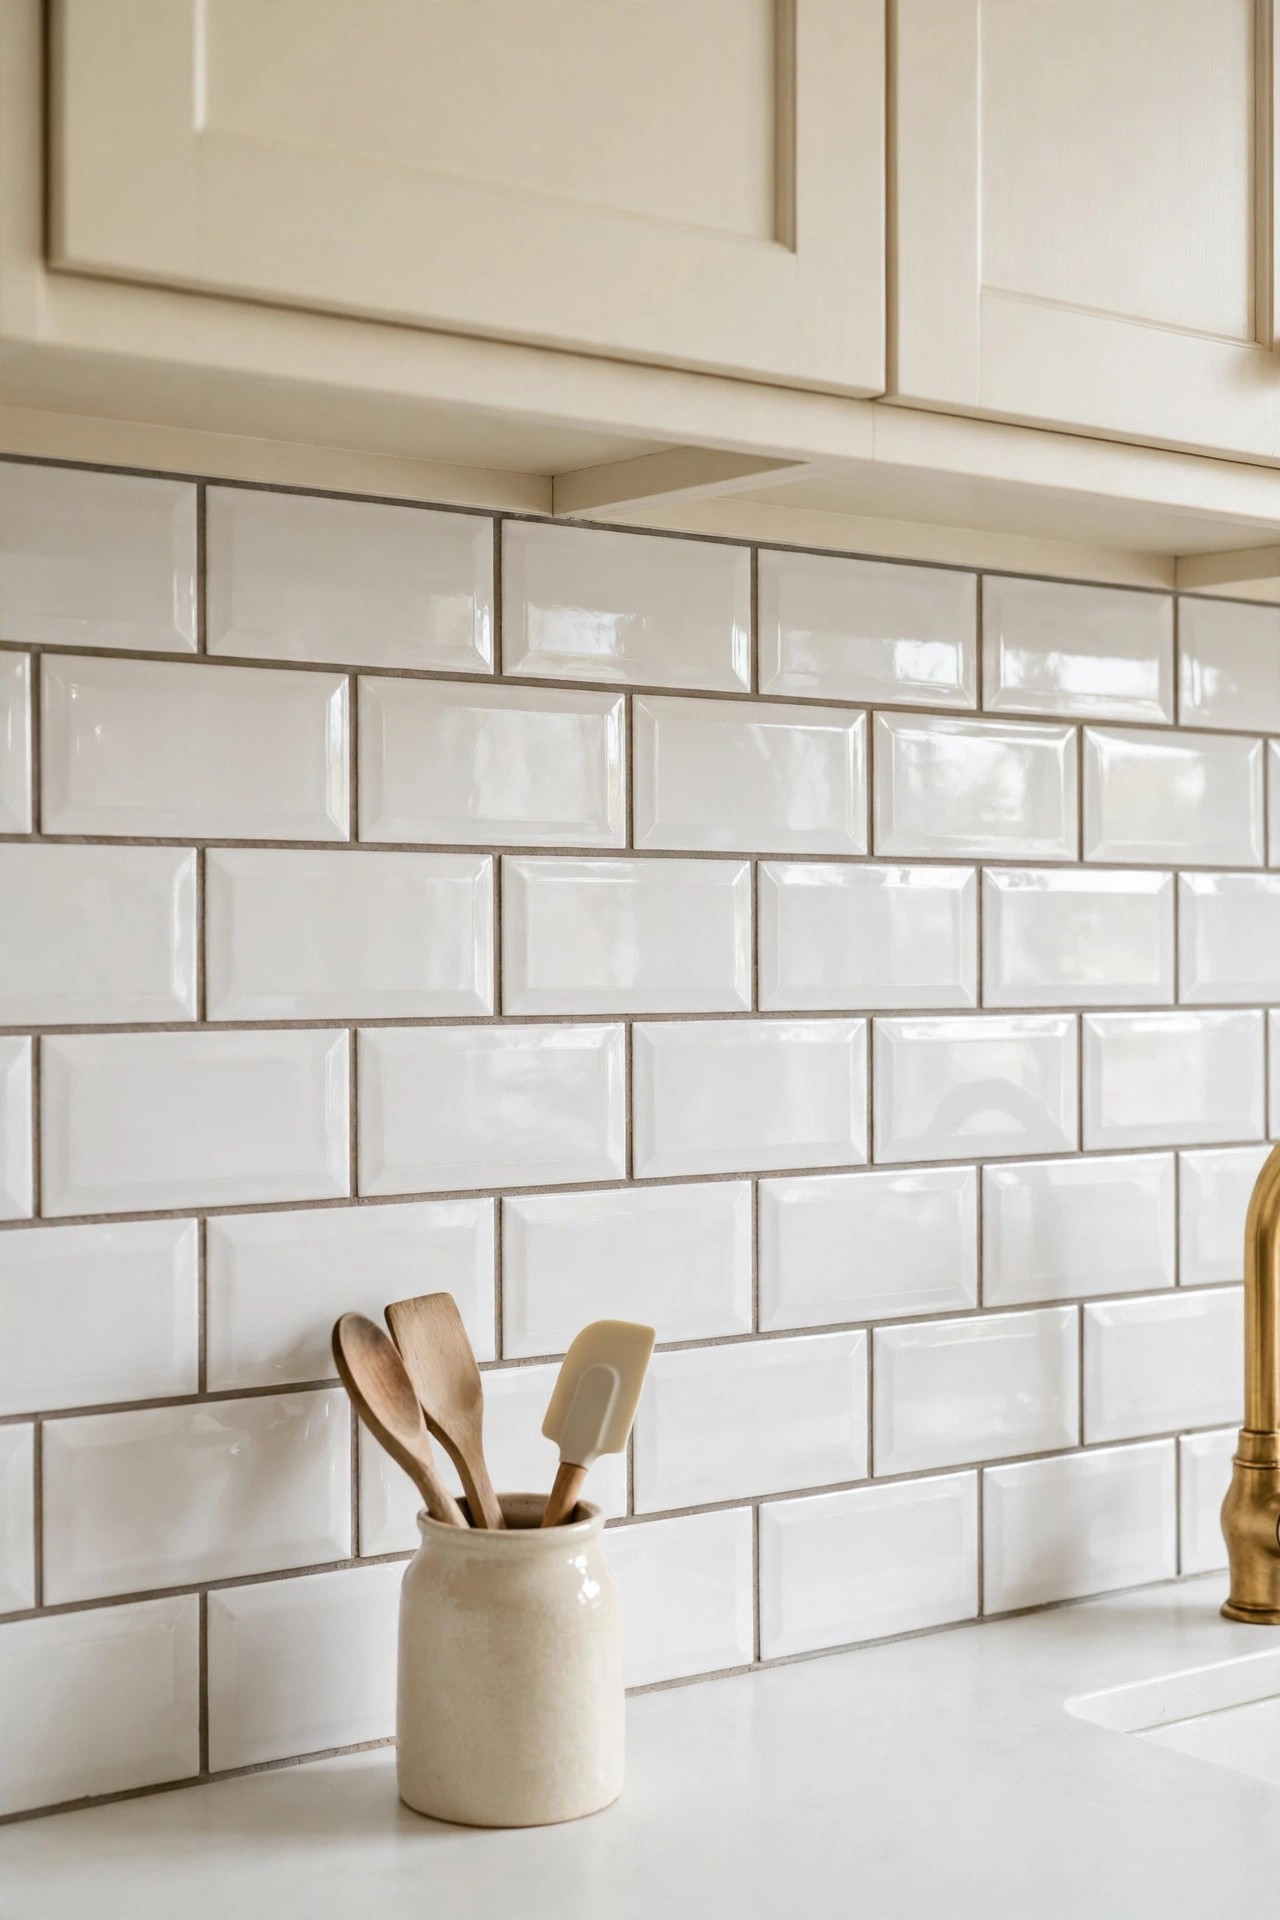
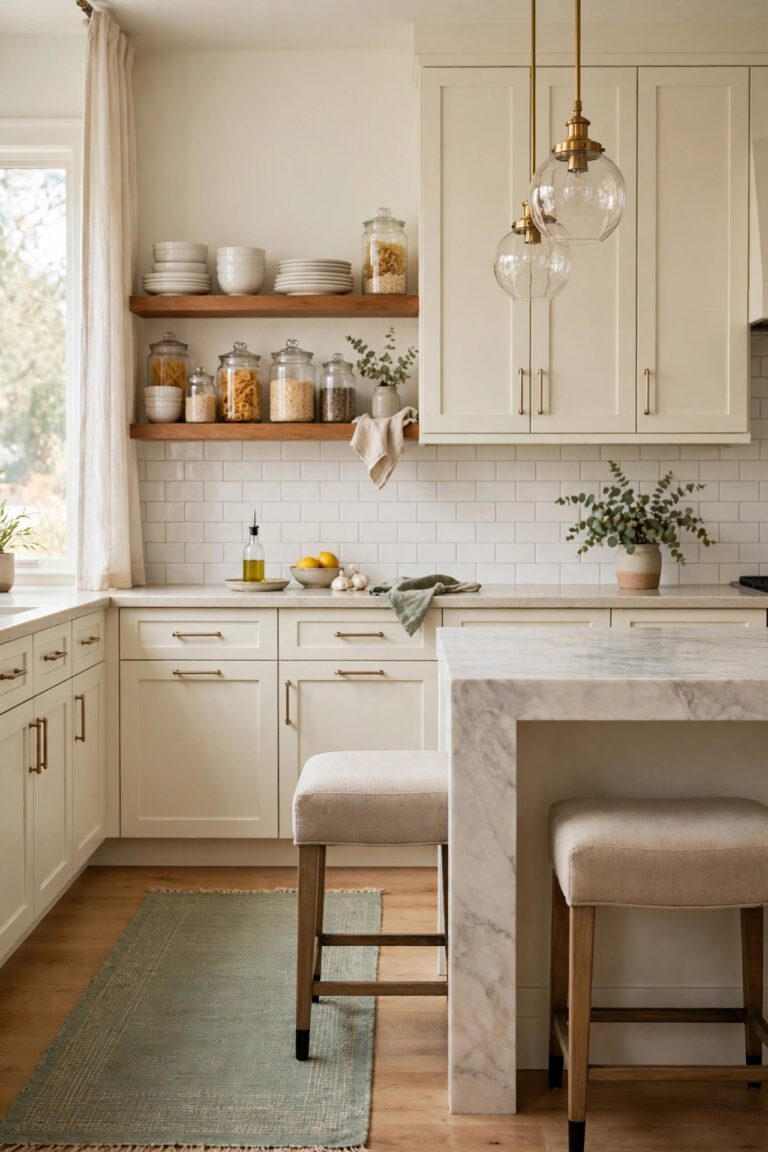
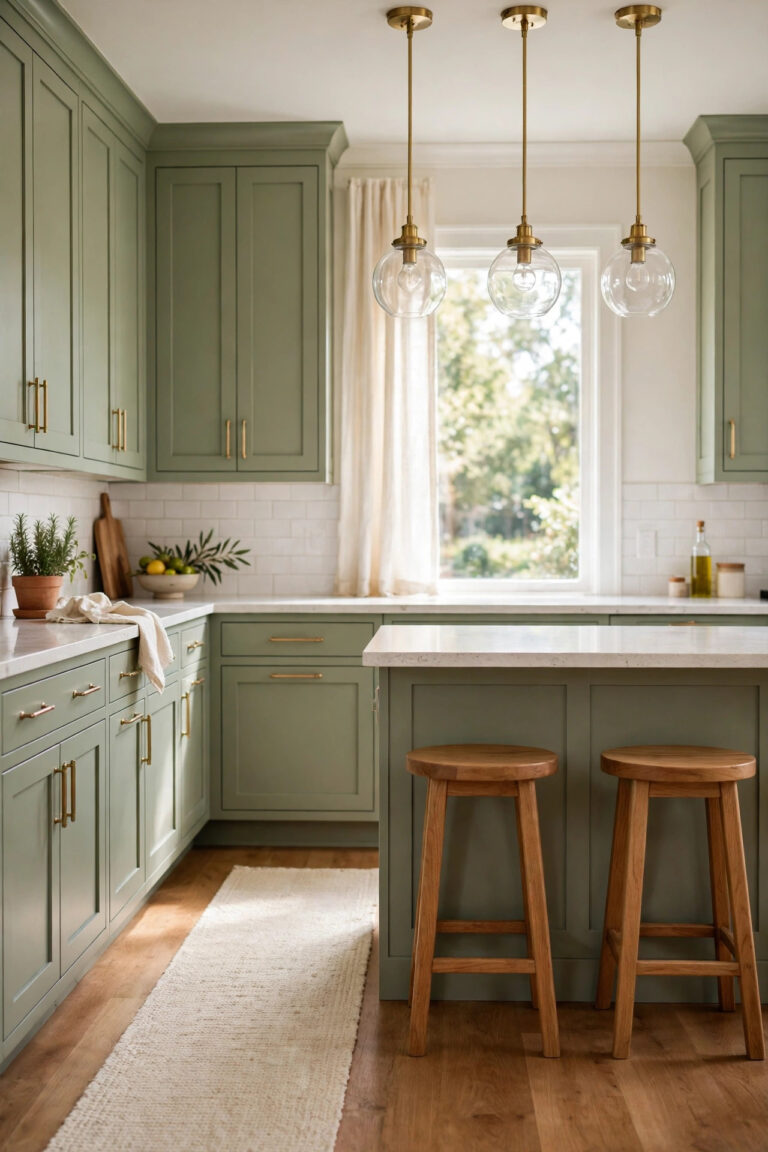
Description: A 3 by 6 inch glossy white ceramic tile in a simple running bond pattern is the backsplash most kitchens can rely on. The gloss finish bounces light around the room, the small format suits short walls between counters and cabinets, and a warm gray grout keeps the grid soft instead of stark. It pairs cleanly with cream cabinets, white counters, and brass or black hardware, and it rarely fights with flooring or paint colors nearby.
Best For: Small and standard kitchens that need a bright, low-risk finish.
Not Ideal For: Anyone who wants a strong pattern or a dark, moody wall.
Estimated Cost: $ (estimate: about $90 to $250 in materials for a 30 square foot backsplash, covering tile, thinset, and grout)
Budget Note: This is one of the lowest material costs per square foot of any real tile option in this list.
Renter Friendly: No
Renter Note: Real tile is set in thinset and grouted, so it is a permanent change that needs the property owner’s written approval first.
What You Need
White ceramic subway tile, 3 by 6 inches, with about 10 percent extra for cuts
Thinset mortar and a notched trowel
Warm gray grout and tile spacers
A wet saw or manual tile cutter
Caulk matched to the countertop for the bottom joint
Product recommendation (partially verified): Tenedos White Ceramic 3×6 Glossy Subway Wall Tile, box of 80 pieces covering 10 square feet
Why it fits: It is true ceramic with a glossy finish in the classic 3 by 6 proportion, sold in a full 10 square foot box, which keeps ordering simple for a standard backsplash.
Retailer/product page: https://decor-mosaics.myshopify.com/products/white-ceramic-subway-tile-80-pieces-box-of-10-sq-ft
How To Do It
Measure the wall area in square feet and order tile with about 10 percent extra for cuts and breakage.
Wash and dry the wall, then mark a level starting line just above the countertop.
Spread thinset with a notched trowel and set the tiles in a running bond pattern using spacers.
Cut the edge pieces with a wet saw or tile cutter and let the wall set for 24 hours.
Grout the joints, wipe off the haze, and seal the counter joint with caulk instead of grout.
Pro Tip
Pick grout one shade warmer than the tile. Bright white grout shows every splash mark near the stove within a few weeks.
2. Peel-and-Stick Subway Tile Sheets
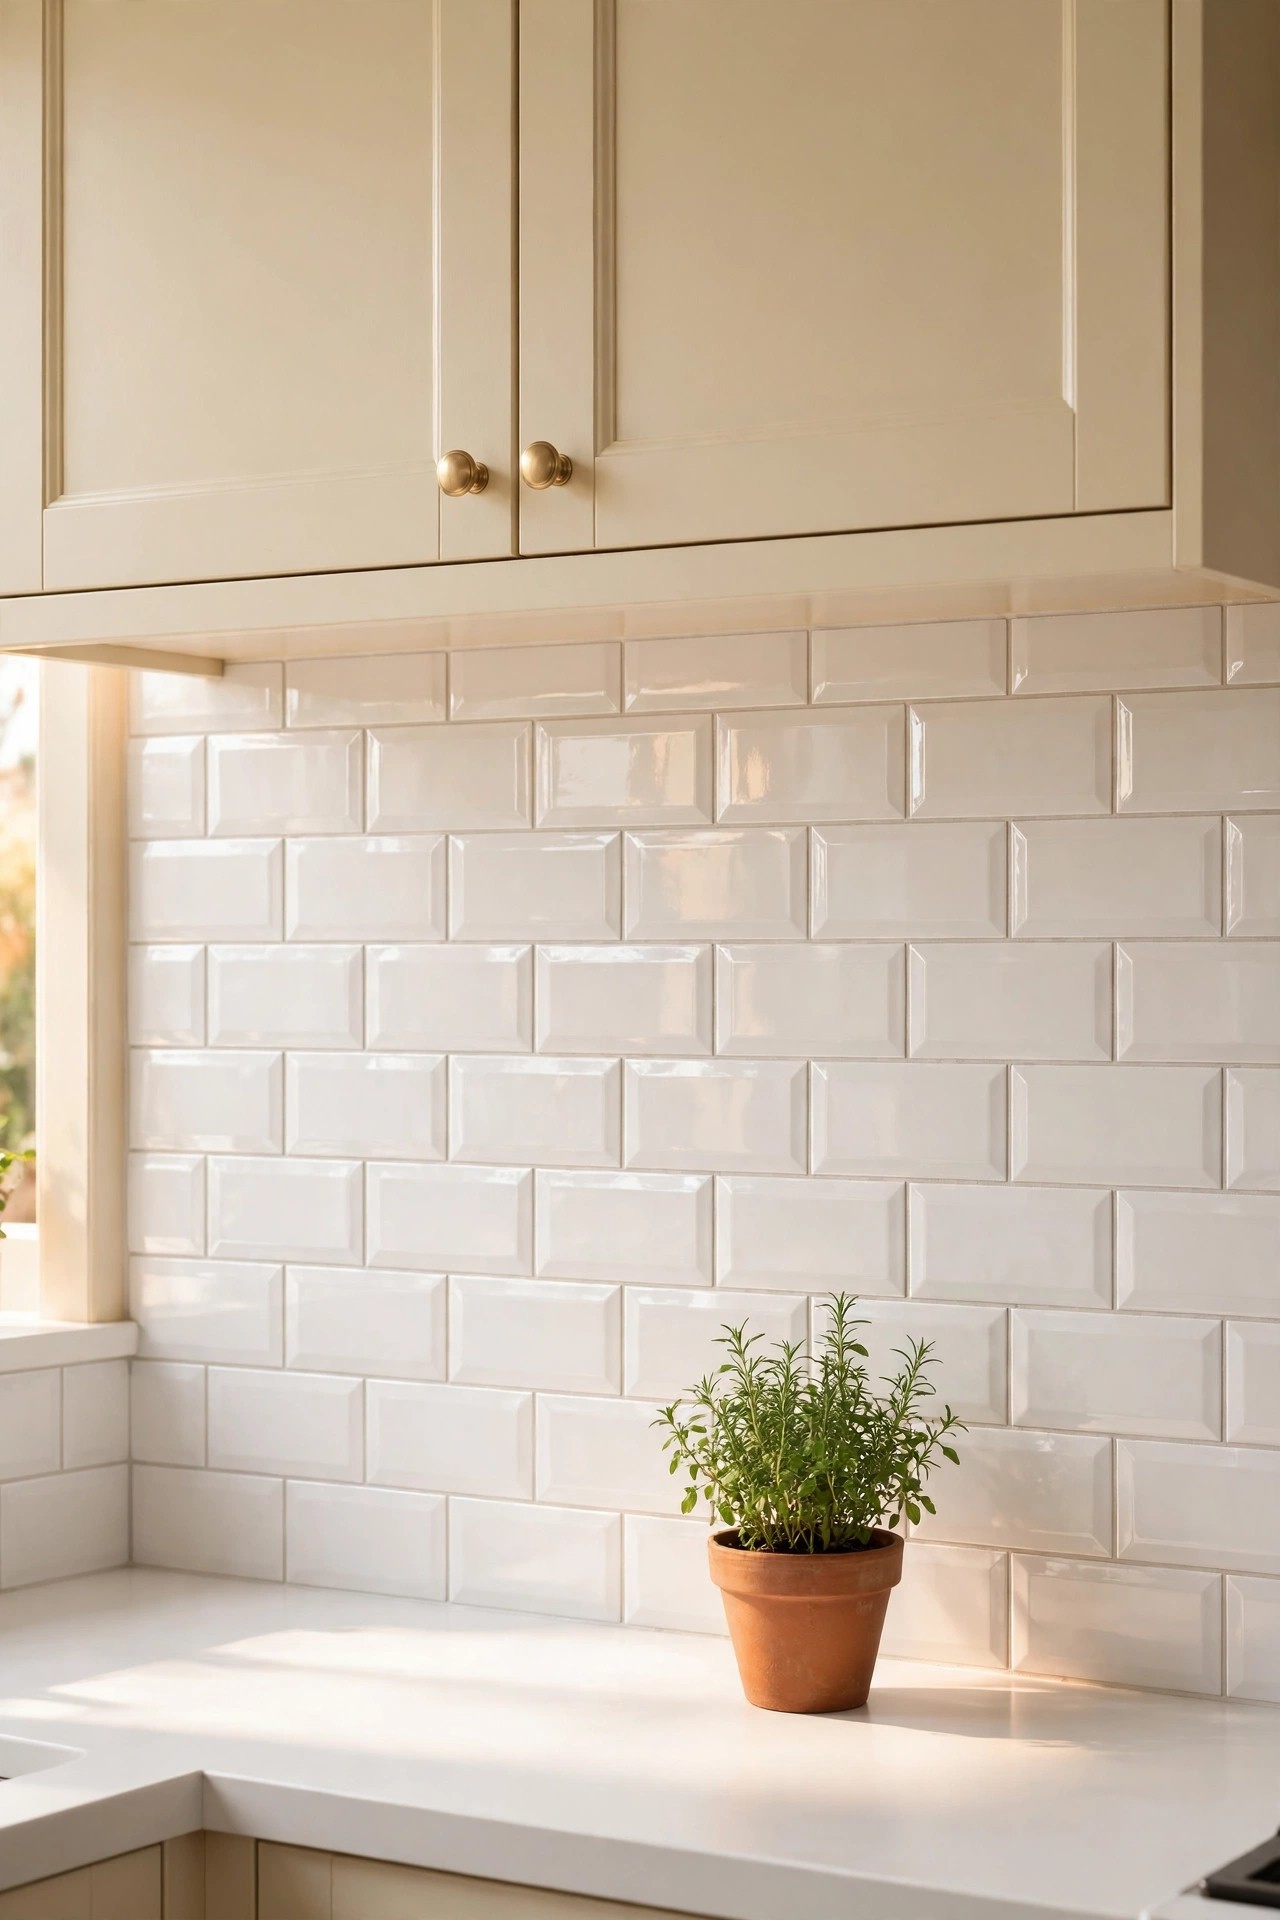
Description: Peel-and-stick subway sheets give the same brick pattern as ceramic tile with no thinset, no grout, and no wet saw. Each sheet carries a glossy gel surface that reads as glazed tile once it is on the wall, and the sheets overlap at the edges so the joints stay hidden. The honest trade-off is durability: a quality sheet lasts well on a smooth wall, but it will never feel as solid as real ceramic, and heat limits near burners are stricter.
Best For: Renters and anyone who wants a finished wall in one afternoon.
Not Ideal For: Heavily textured walls, or a spot directly behind a gas burner without the clearance the maker states.
Estimated Cost: $$ (estimate: about $180 to $360 in materials for a 30 square foot backsplash, roughly five packs)
Budget Note: There is no thinset, grout, or tool cost on top, so the pack price is close to the full project price.
Renter Friendly: Yes
Renter Note: The sheets are made to remove with gentle heat from a hair dryer in most cases; test one hidden corner first and keep spare sheets for repairs.
What You Need
Peel-and-stick subway tile sheets, enough packs for the measured area plus one spare pack
A degreasing cleaner and a lint-free cloth
A level, a pencil, and a utility knife with a straight edge
A hair dryer for removal later
Product recommendation (verified): Smart Tiles Peel and Stick Backsplash, Subway Pure White, pack of 10 sheets covering 6.21 square feet
Why it fits: The sheets use a gel surface that mimics glazed ceramic, each sheet measures 10.95 by 9.7 inches, and the brand is sold specifically for kitchen backsplash use with stated heat guidance.
Retailer/product page: https://www.amazon.com/dp/B09QQKKWBL/ref=sspa_mw_detail_0
How To Do It
Degrease the wall well, rinse, and let it dry fully; adhesive fails on greasy or damp paint.
Mark a level line above the counter and dry-fit the first row before peeling anything.
Peel the backing from the first sheet, align it to the line, and press from the center outward.
Overlap each next sheet on the marked edge so the grout-look joints line up.
Trim around outlets with a utility knife and straight edge, then press all seams once more.
Pro Tip
Order every pack in one order. Sheet whites can shift slightly between production runs, and a mixed batch shows in daylight.
3. Glossy Black Zellige-Look Tile
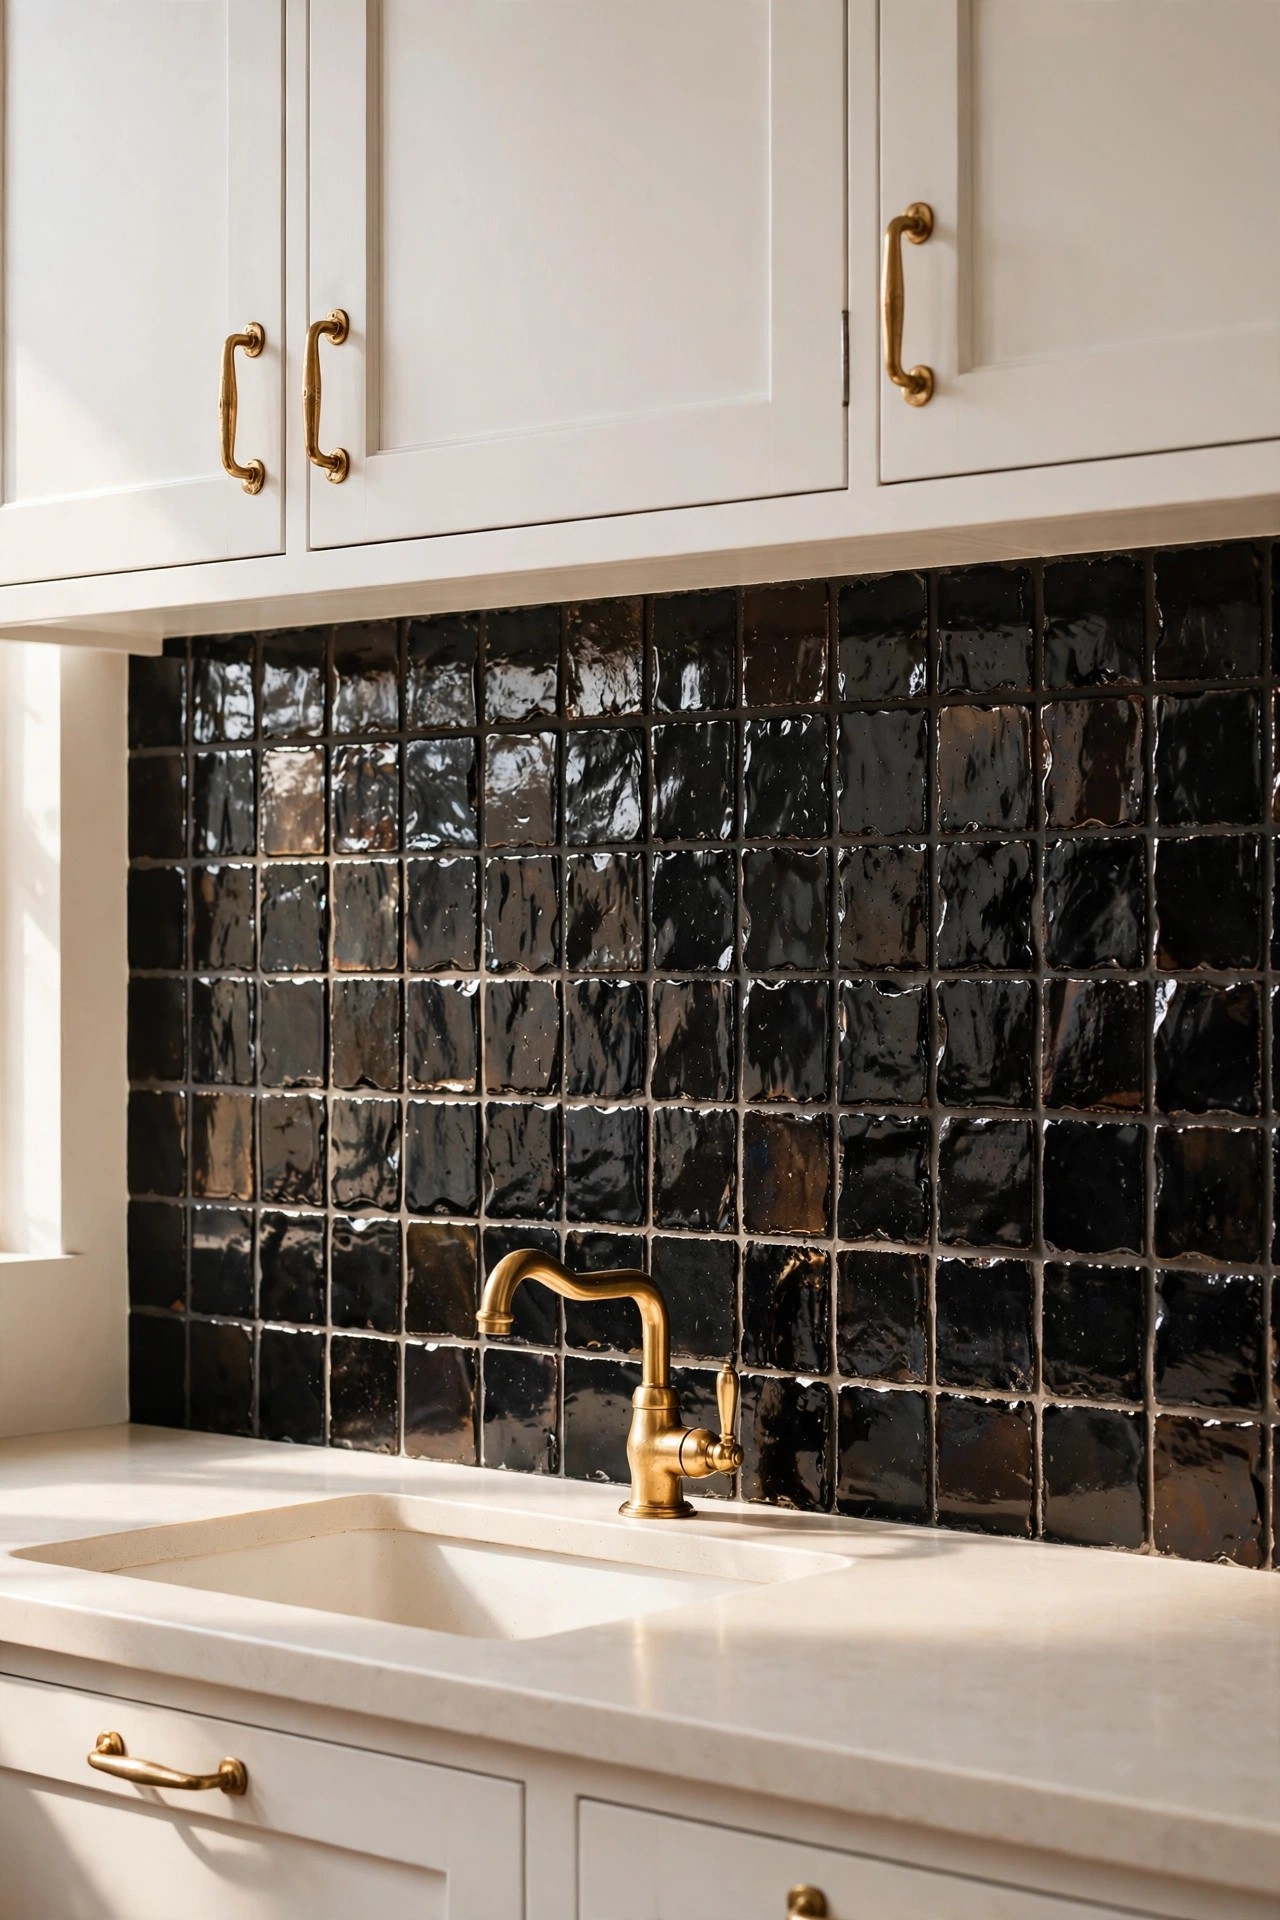
Description: A dark handmade-look tile is the fastest way to stop a white kitchen from feeling washed out. Zellige-style ceramic has uneven edges and a glaze that shifts from deep black to soft charcoal as light moves, so the wall reads rich rather than flat. It works best as one strong contrast against cream or white cabinets and warm metal hardware. The honest cost is upkeep: dark glossy tile shows water spots, dust, and cooking splashes sooner than pale tile does.
Best For: White or cream kitchens that need one strong contrast wall.
Not Ideal For: Small kitchens with little natural light, where a dark wall can close the room in.
Estimated Cost: $$ (estimate: about $250 to $500 in materials for a 30 square foot backsplash)
Budget Note: The tile itself is mid-priced; most of the budget goes on coverage, since each case holds only about 5.3 square feet.
Renter Friendly: No
Renter Note: This is a thinset and grout installation, so treat it as a permanent change for an owned home.
What You Need
Zellige-look ceramic subway tile with about 10 percent extra
Thinset mortar and a notched trowel
Mid gray grout and wider spacers for the uneven edges
A wet saw for cuts
A soft cloth for careful haze removal
Product recommendation (partially verified): TILECLUB Zellige Subway Ceramic Tile, Black, 2.5 by 8 inches, case of 38 tiles covering 5.32 square feet
Why it fits: The case is real ceramic with the wavy surface and glaze variation this look depends on, in a longer 2.5 by 8 format that suits a backsplash wall.
Retailer/product page: https://www.amazon.com/dp/B09159G4F4
How To Do It
Open several cases and mix tiles from all of them so the glaze variation spreads evenly.
Dry-lay one section on the counter to settle the pattern before any thinset is mixed.
Set the tiles with thinset, using wider joints that suit the uneven handmade edges.
Grout in a mid gray so the joints read as part of the surface, not as a grid.
Wipe the haze gently in stages; rough wiping leaves dull patches on glossy glaze.
Pro Tip
Sort the tiles by glaze depth first and place the darkest pieces away from the window, so the wall tone stays even across the day.
4. Marble Herringbone Mosaic
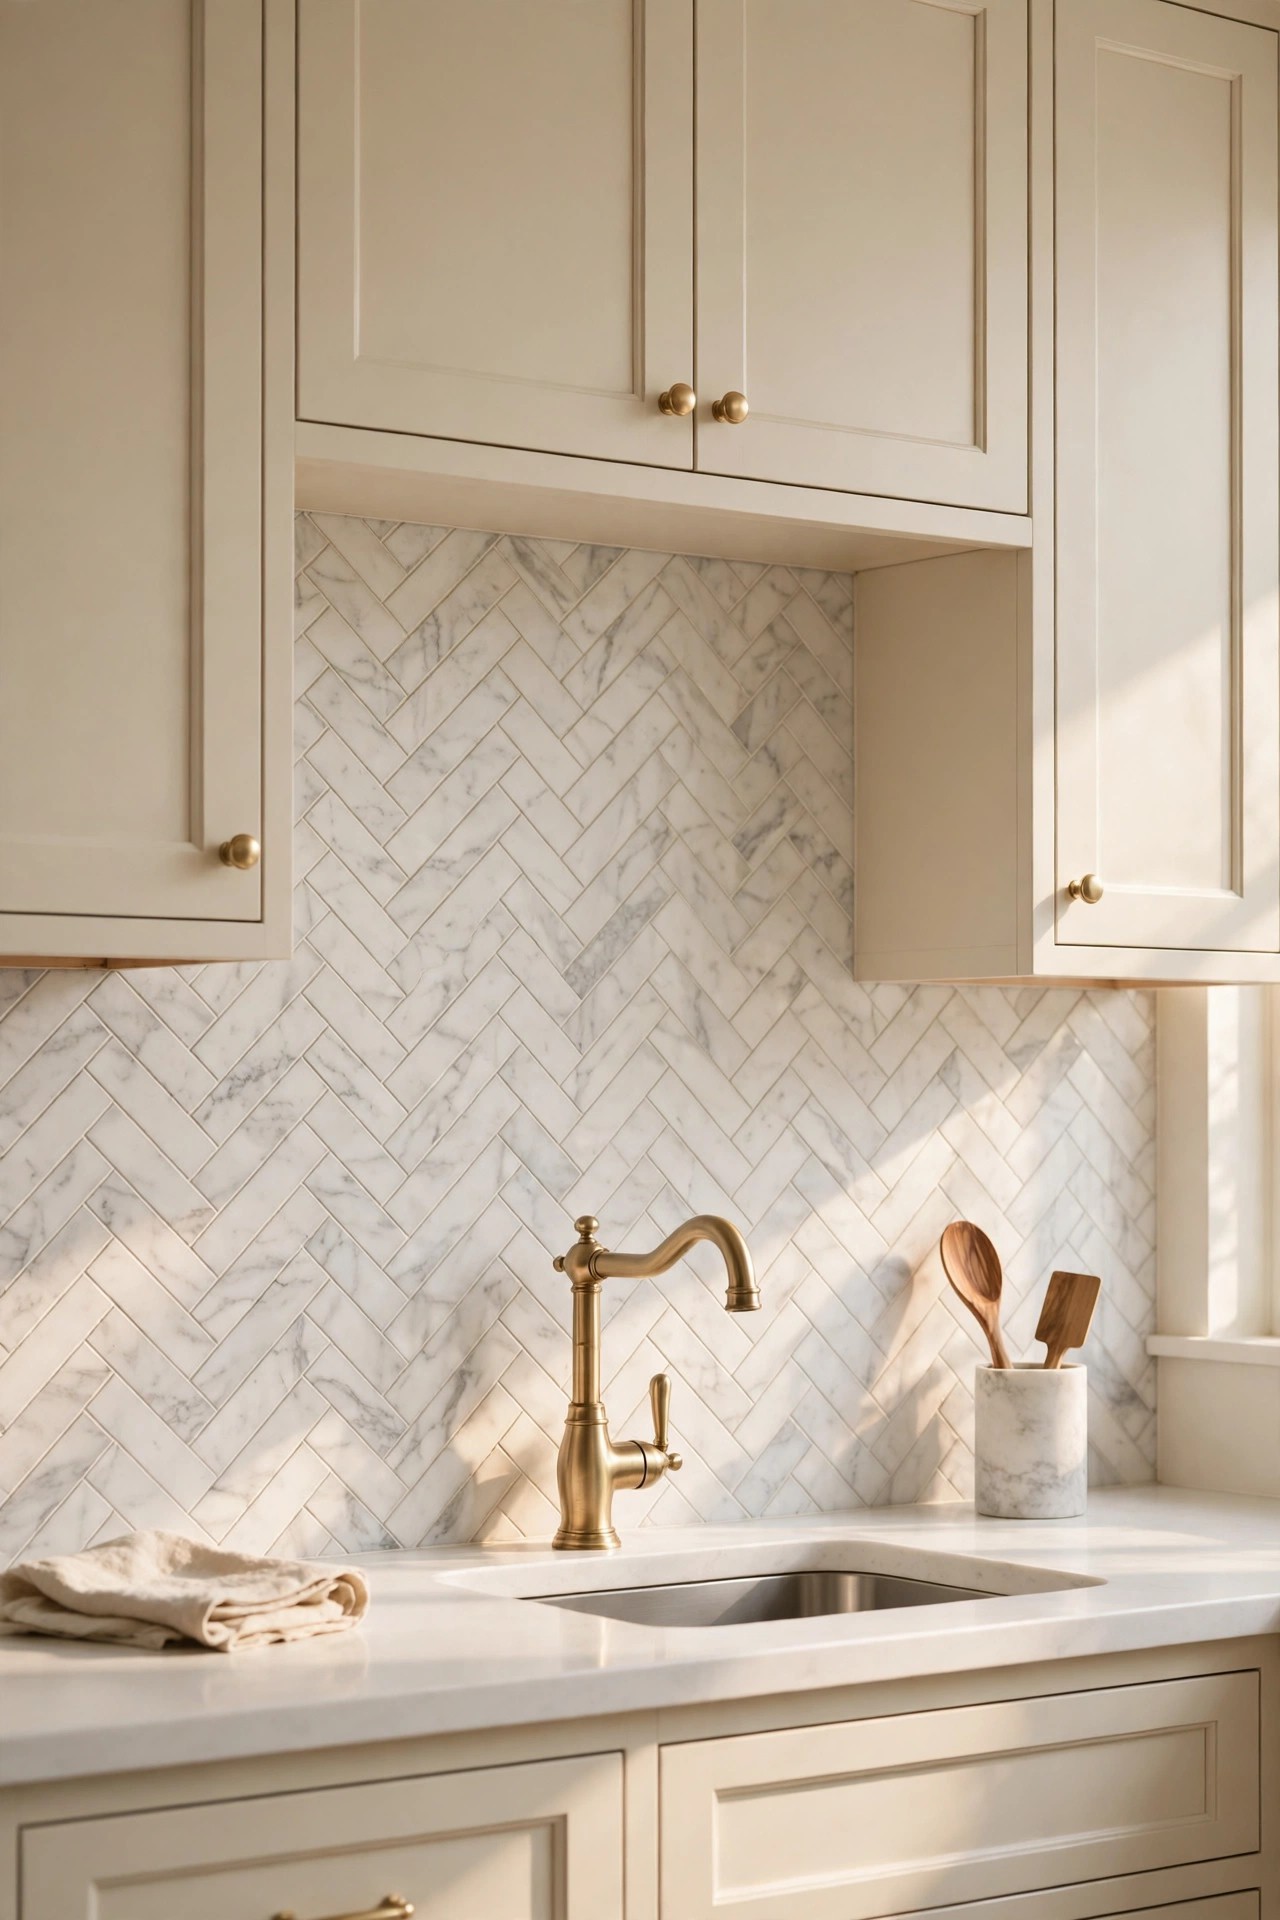
Description: Small marble rectangles set at angles give a kitchen wall movement without adding color. A herringbone mosaic in white Carrara marble, with its soft gray veining, suits the bright cream and warm white palette and makes the range wall feel like the planned center of the room. The pieces arrive mounted on mesh sheets, which keeps the pattern true. Marble is a real commitment, though: it needs sealing before and after grouting, and acids like lemon and tomato can etch the surface.
Best For: A focal wall behind the range in a white or cream kitchen in an owned home.
Not Ideal For: Anyone who wants a zero-maintenance surface, or a splash zone that sees heavy acidic cooking every day.
Estimated Cost: $ (estimate: about $450 to $900 in materials for a 30 square foot backsplash)
Budget Note: Mesh-mounted sheets cost more per square foot than field tile, and the sealing products add a small extra line to the budget.
Renter Friendly: No
Renter Note: Natural stone set in thinset is permanent, and the sealing and care routine belongs to a long-term owner, not a short lease.
What You Need
Marble herringbone mosaic sheets with about 15 percent extra, since angled patterns waste more
White thinset mortar, because gray thinset can darken pale marble
Unsanded or fine grout in a soft white or light gray
Penetrating stone sealer
A wet saw with a blade suited to marble
Product recommendation (partially verified): Soulscrafts Italian White Carrara Marble 1×3 Herringbone Mosaic Tile, polished, box of 5 mesh-mounted sheets covering 3.75 square feet
Why it fits: It is genuine Carrara marble in the 1 by 3 herringbone format, pre-mounted on mesh for a true pattern, and the polished finish suits a bright glam kitchen.
Retailer/product page: Not printed here; see the verification notes in the QA section at the end of this file.
How To Do It
Dry-lay the sheets on the counter and check how the herringbone turns at the wall ends.
Seal the marble faces lightly before setting, following the sealer label, to reduce grout staining.
Set the sheets in white thinset, keeping the mesh joints aligned so the pattern flows.
Grout with unsanded or fine grout and clean the haze with a soft cloth, not a scouring pad.
Seal the finished wall again once the grout has cured, and note the reseal date.
Pro Tip
Keep a small cutting board or tray under prep work near the range wall. Marble etches from lemon and vinegar splashes, and prevention is far easier than repair.
5. Peel-and-Stick Marble-Look Sheets
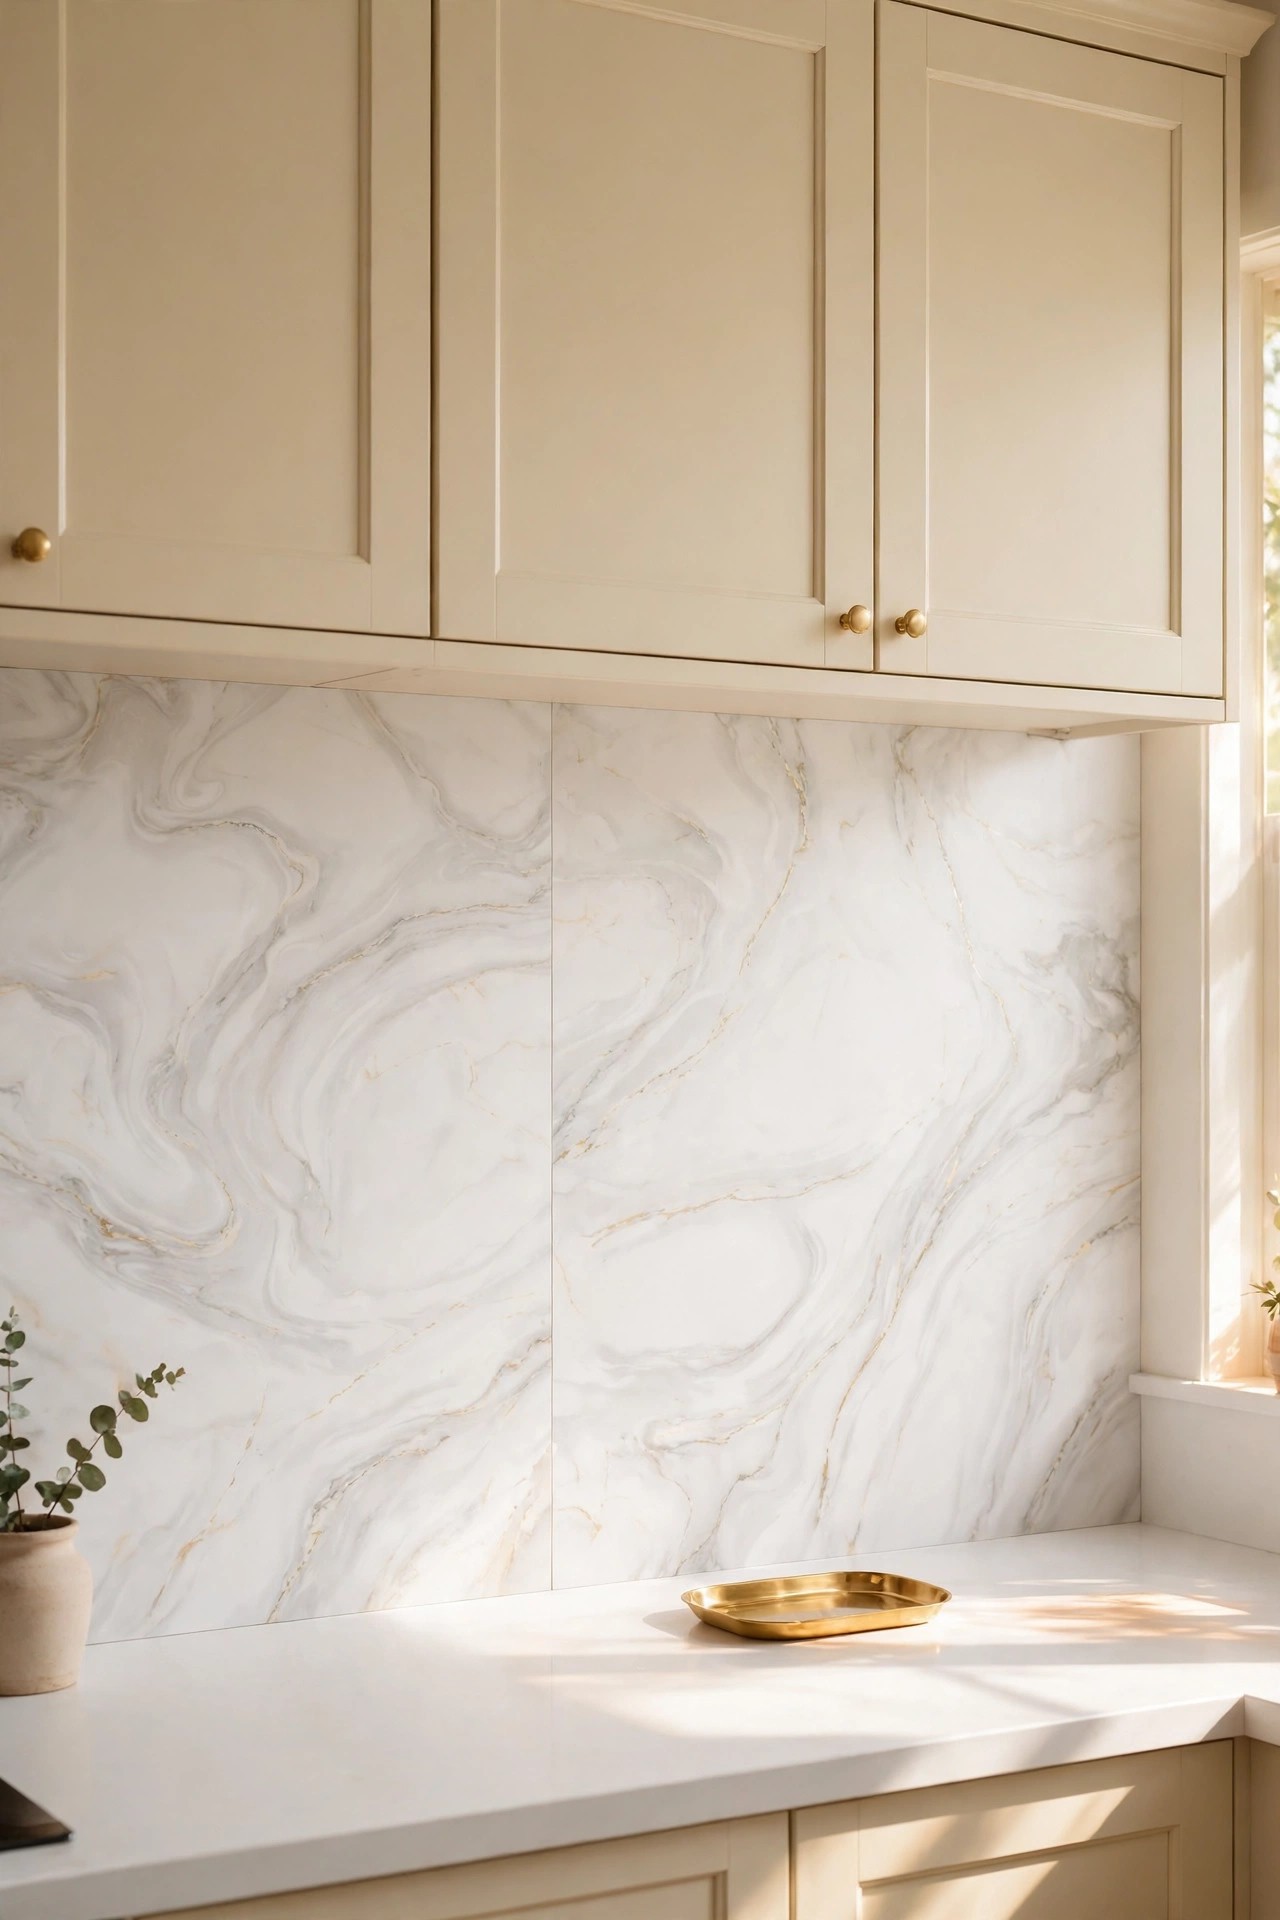
Description: Printed vinyl sheets copy the soft veining of marble at a fraction of the weight and cost, and each 12 by 12 inch sheet covers ground quickly. In a bright kitchen the look is convincing from normal standing distance, especially with cream cabinets and brass hardware carrying the real-material feel. Up close the surface is flat and printed, and the adhesive is strong, so this is a semi-permanent choice: plan on paint touch-ups when the sheets eventually come off.
Best For: A marble look on a small budget, over a smooth painted wall.
Not Ideal For: Rough, textured, or freshly painted walls, where the adhesive cannot grip evenly.
Estimated Cost: $ (estimate: about $120 to $300 in materials for a 30 square foot backsplash)
Budget Note: Sheets are sold in packs of ten, so measure carefully; one pack more or less swings the total noticeably.
Renter Friendly: With Conditions
Renter Note: The adhesive holds hard and can pull paint on removal; get the landlord’s agreement first and peel slowly with gentle heat when you move out.
What You Need
Marble-look self-adhesive backsplash sheets, enough packs for the area plus spares
A degreaser and a clean cloth
A level, a pencil, and a utility knife with a metal straight edge
A small roller or the edge of a card for pressing seams
Product recommendation (partially verified): Art3d 10-Sheet Premium Self-Adhesive Kitchen Backsplash Tiles in Marble, 12 by 12 inch sheets
Why it fits: The sheets are a thicker premium vinyl with a marble print made for kitchen walls, and the 12 by 12 format keeps seams fewer than small mosaic-style sheets.
Retailer/product page: https://www.amazon.com/dp/B07NJFGRWM/ref=cm_sw_r_apin_dp_MATZM02HDTYYMH2AVWDP
How To Do It
Confirm the paint underneath is fully cured and smooth; new paint needs the curing time the sheet maker states.
Degrease the wall, dry it fully, and mark a level starting line.
Start at the most visible stretch, usually behind the range, so the veining pattern begins cleanly.
Peel part of the backing, align, then smooth the sheet down in sections, pressing from the center out.
Trim at outlets and edges with a utility knife, and roll every seam firmly.
Pro Tip
Line up the veining direction across sheets before you peel anything. Random vein directions are the one detail that gives printed marble away.
6. Large-Format Marble-Look Porcelain
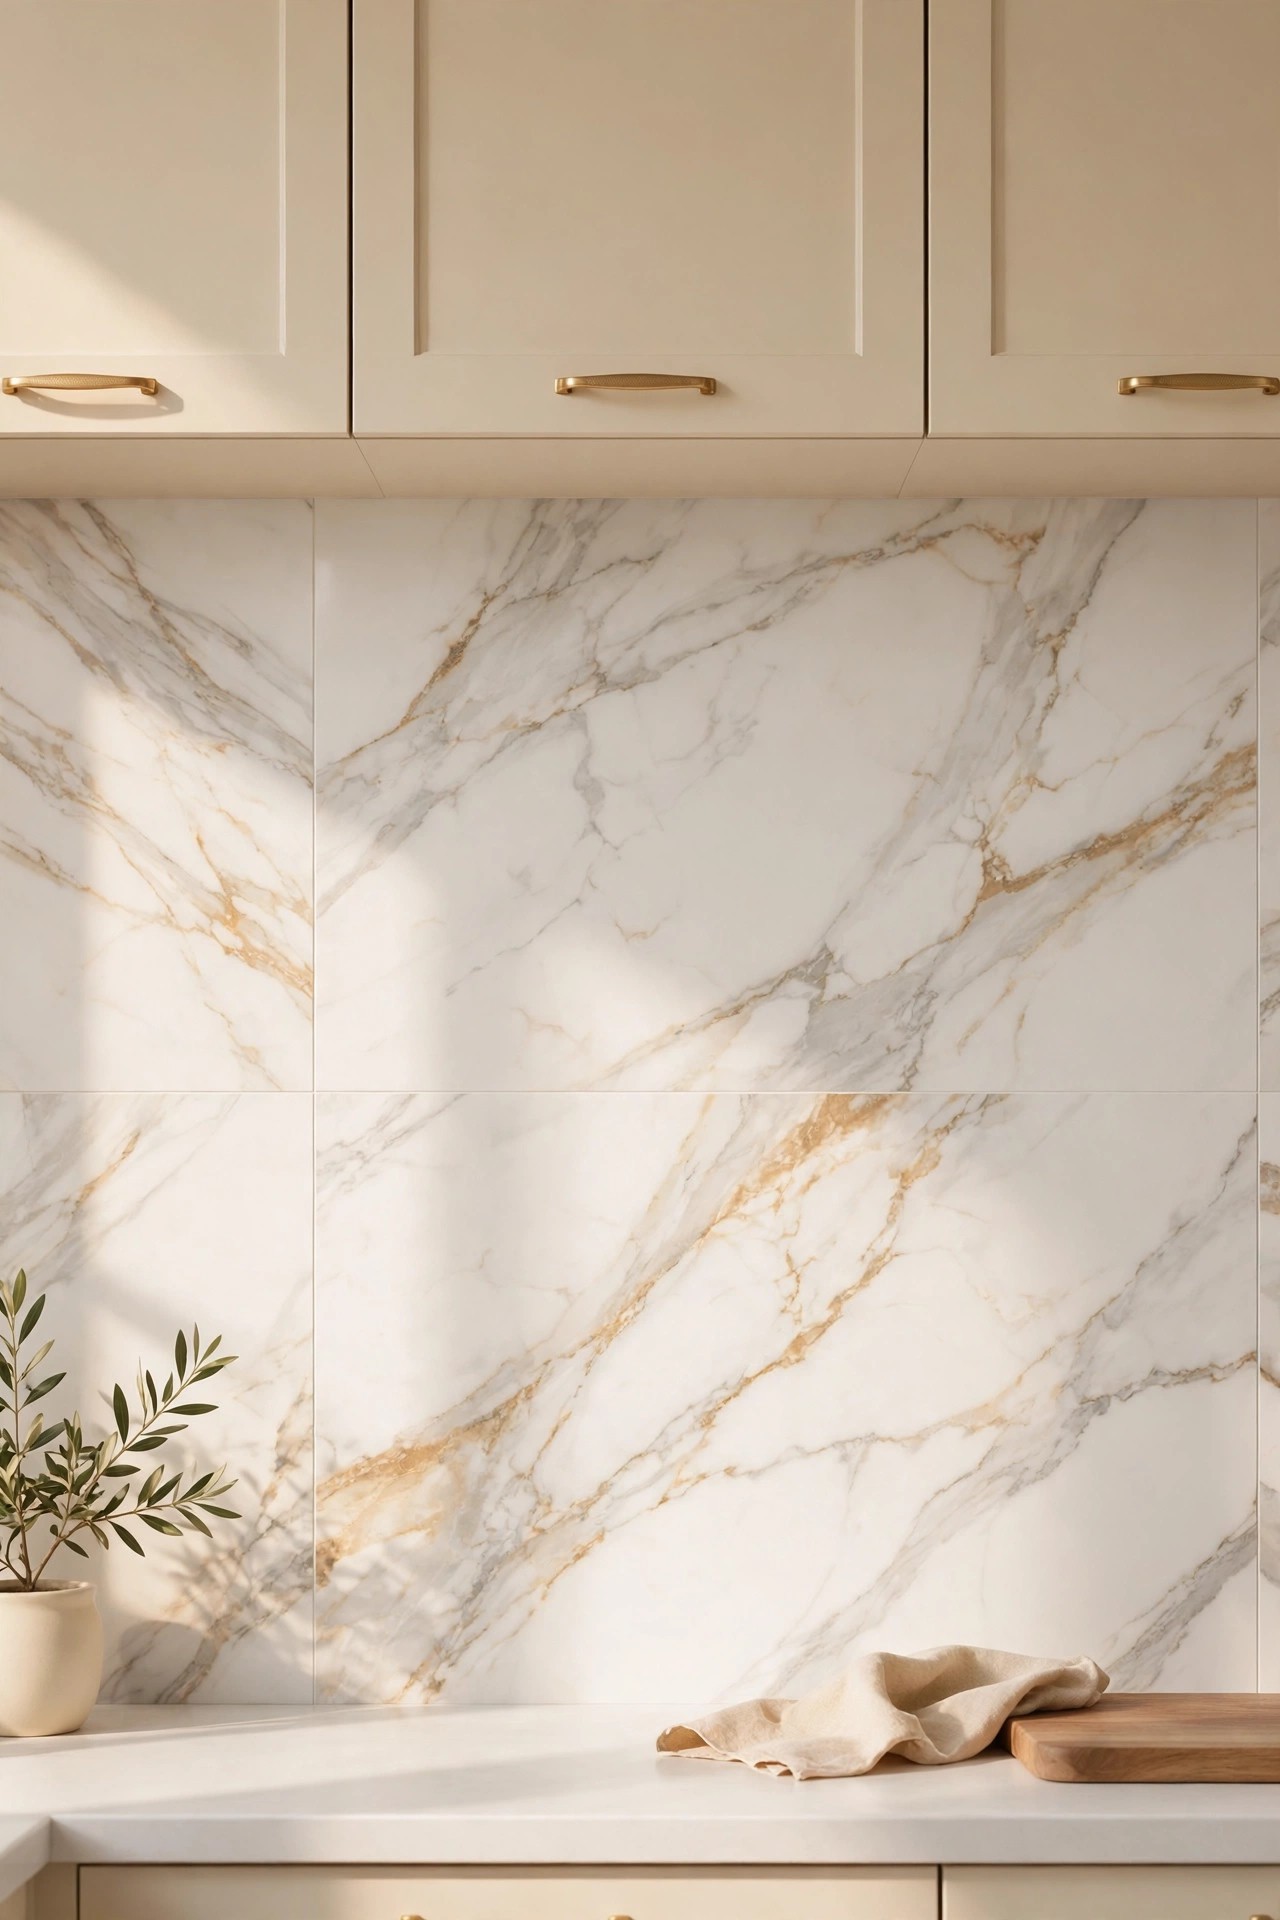
Description: Large porcelain tiles printed with marble veining give a quiet wall with very few grout lines to clean. A 12 by 24 inch tile covers the standard backsplash height in a course and a half, so the grid almost disappears and the veining does the decorative work. Porcelain needs no sealing and shrugs off splashes that would mark real marble. The catch is fitting: big tiles telegraph every bump in the wall, so the surface has to be flat and the cuts precise.
Best For: A calm, low-maintenance wall in a medium or large kitchen.
Not Ideal For: First-time tilers working on an uneven wall; large pieces are unforgiving and heavy to handle alone.
Estimated Cost: $ (estimate: about $400 to $850 in materials for a 30 square foot backsplash)
Budget Note: Fewer tiles cost less per wall than mosaics, but large-format mortar, leveling clips, and a suitable saw blade add real money.
Renter Friendly: No
Renter Note: This is a full thinset installation and counts as a permanent renovation.
What You Need
Large-format marble-look porcelain tile, 12 by 24 inches, with 10 percent extra
Large-format thinset mortar and a larger notch trowel
Tile leveling clips and wedges
A wet saw that can take a 24 inch tile
Grout matched closely to the tile background color
Product recommendation (verified): MMG Calacatta White Porcelain Tiles, 12 by 24 inches (also sold in 24 by 48 inches), polished or satin matte finish
Why it fits: It is true porcelain with a Calacatta marble look in the large formats this idea needs, and porcelain skips the sealing routine that natural marble demands.
Retailer/product page: https://mmgmarble.com/product/porcelain/calacatta-white-porcelain-tiles/
How To Do It
Check the wall with a long straight edge and skim-coat any dips; flatness decides the result.
Plan the layout so the top course is not a thin sliver under the cabinets.
Spread large-format thinset on the wall and back-butter each tile for full contact.
Set the tiles with leveling clips and check the faces stay flush as you go.
Grout in a color close to the tile background so the joints nearly vanish.
Pro Tip
Choose the satin matte finish if your kitchen gets strong side light. A polished face shows every slight lip between tiles when light rakes across it.
7. Full-Height Slab Backsplash
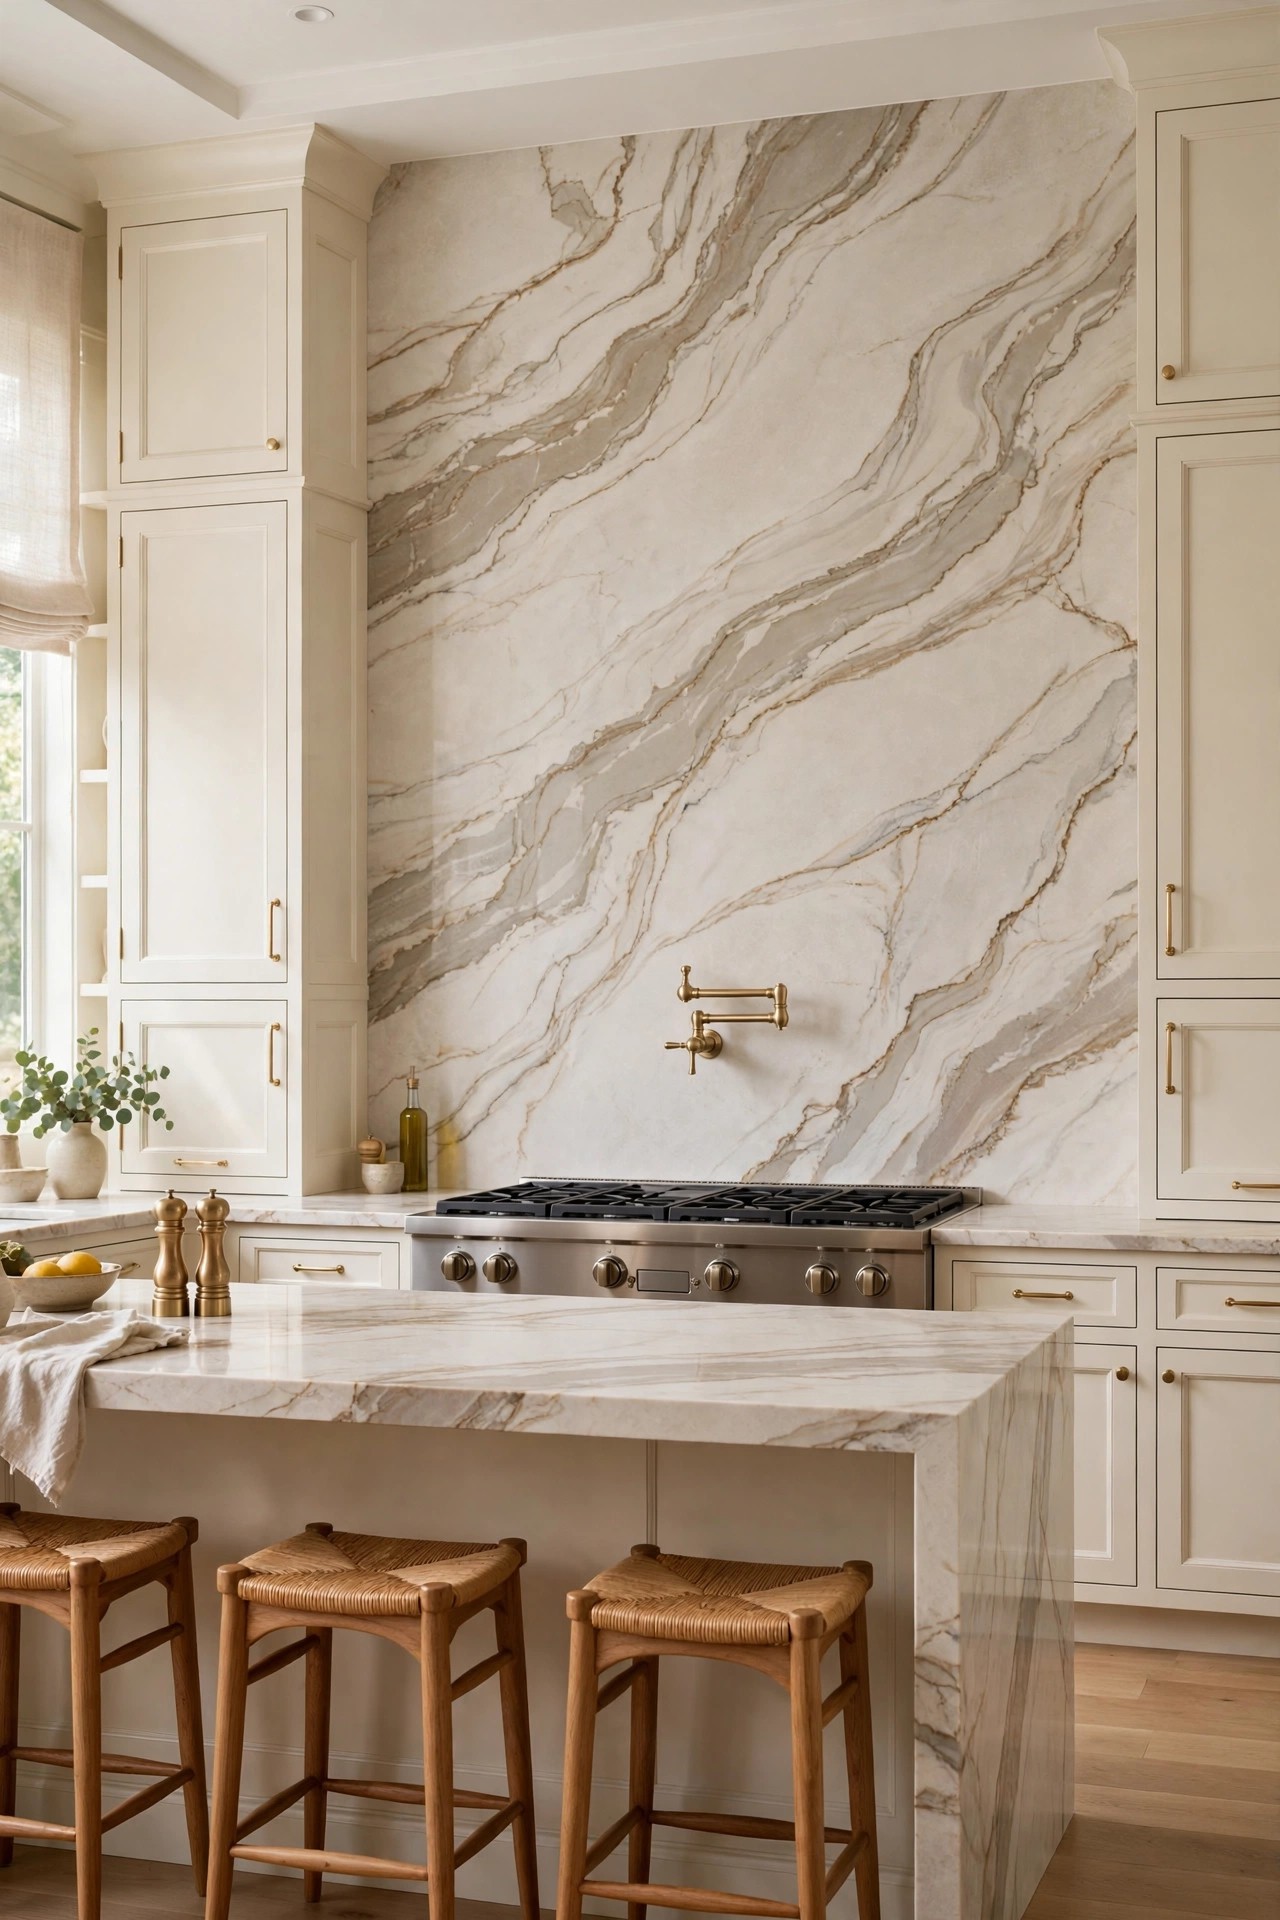
Description: Running one stone or porcelain slab from the counter to the ceiling removes grout lines completely and turns the range wall into a single calm surface. Book-matched veining, where two slabs mirror each other, is the version seen in high-end kitchens. This is the most expensive idea in the list and the least forgiving: the slab is templated, cut, and fitted by a fabricator, outlets are cut into stone, and a mistake is costly. In return, cleaning is one wipe and the wall will not date quickly.
Best For: A single focal wall behind the range in an owned home with a renovation budget.
Not Ideal For: Tight budgets, DIY installation, or walls that may need access to wiring or plumbing later.
Estimated Cost: $$ (estimate: about $1,500 to $4,000 or more installed for one range wall, including templating and cutting)
Budget Note: The slab itself is often less than half the bill; templating, cutouts, delivery, and fitting make up the rest.
Renter Friendly: No
Renter Note: A slab is a structural, permanent installation and is only realistic for the property owner.
What You Need
A fabricator who templates, cuts, and installs stone or porcelain slabs
Your countertop installed first, since the slab is measured from it
Outlet positions decided before templating
A cleaner approved for your slab material
Product type to look for: Book-matched porcelain slab panels, or a quartz or quartzite slab cut by a local fabricator to run from the countertop to the ceiling or the underside of the hood.
Key checks: Ask for one installed quote that includes templating, outlet cutouts, edge finishing, and sealing where the material needs it. View the actual slab before purchase, because veining varies, and confirm wall support for the slab weight with the fabricator.
How To Do It
Choose the slab in person and photograph the exact piece, including where the veining will fall.
Have the fabricator template the wall after the countertops are fitted.
Confirm every outlet and switch position before cutting begins.
Let the fabricator’s team set and level the slab, then check the counter joint line.
Seal the counter joint with color-matched caulk and follow the fabricator’s care guidance.
Pro Tip
If a full slab is out of reach, run large-format porcelain (Idea 6) to the ceiling on the range wall only. The effect is close, at a much lower installed cost.
8. Patterned Encaustic-Look Porcelain
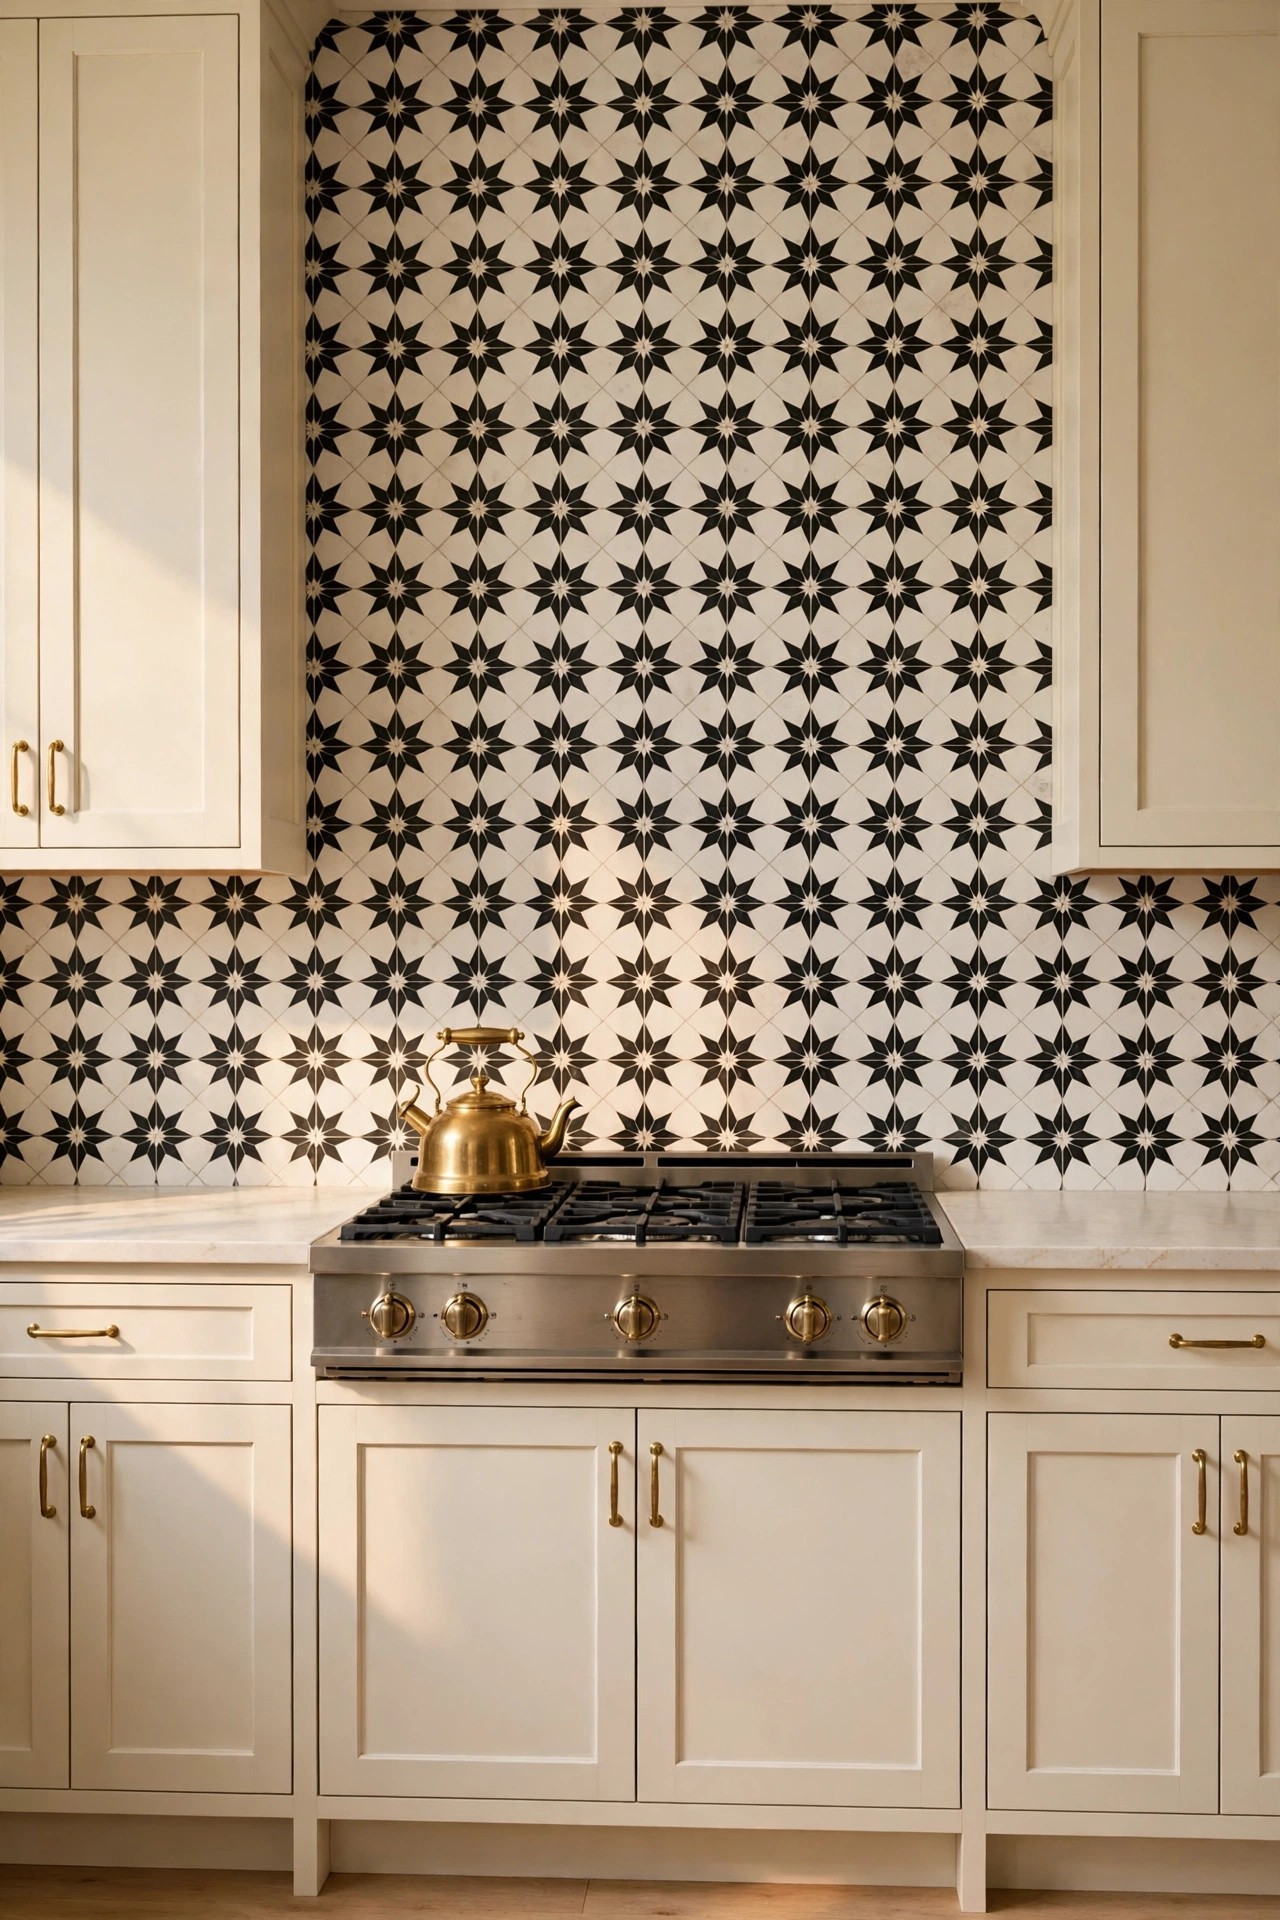
Description: A patterned porcelain tile in the encaustic style gives a plain kitchen a defined center without adding color. The black and soft white star pattern suits a defined zone, such as the wall behind the range or a coffee bar, framed by plain surfaces on both sides. Because the pattern is printed and glazed into porcelain, it wipes clean and never needs the sealing that true cement tiles demand. Used on every wall it can crowd a small room, so treat it as one strong accent.
Best For: One defined zone in an otherwise plain white or cream kitchen.
Not Ideal For: Whole-wall coverage in a compact kitchen, where the repeat can feel busy at close range.
Estimated Cost: $$ (estimate: about $250 to $520 in materials for a 30 square foot backsplash)
Budget Note: Limiting the pattern to the range wall cuts the tile bill roughly in half compared with covering every wall.
Renter Friendly: No
Renter Note: Patterned porcelain is a standard thinset job, so it belongs in an owned home.
What You Need
Encaustic-look porcelain tile with 10 to 15 percent extra, since pattern matching wastes more
Thinset mortar and a notched trowel
Mid gray grout
A wet saw for the border cuts
Grout sealer for the joints
Product recommendation (partially verified): SomerTile Stella Nero Encaustic Porcelain Floor and Wall Tile by Merola Tile, 9-3/4 by 9-3/4 inches, case of 16 tiles covering 10.88 square feet
Why it fits: The case is glazed porcelain with the classic black and white star pattern in a satin finish, rated for wall use, so it gives the cement-tile look with porcelain upkeep.
Retailer/product page: Not printed here; see the verification notes in the QA section at the end of this file.
How To Do It
Find the center of the wall and dry-lay the pattern outward so border cuts land evenly on both sides.
Mark the center lines on the wall and check them with a level.
Set the tiles in thinset, turning each piece so the star pattern continues across the joints.
Grout in a mid gray and wipe carefully; dark pattern tiles show dried grout film clearly.
Seal the grout lines once cured to slow down splash staining.
Pro Tip
Photograph your dry layout before setting a single tile. If a border piece looks wrong, it is far easier to fix on the counter than on the wall.
9. Iridescent White Glass Mosaic
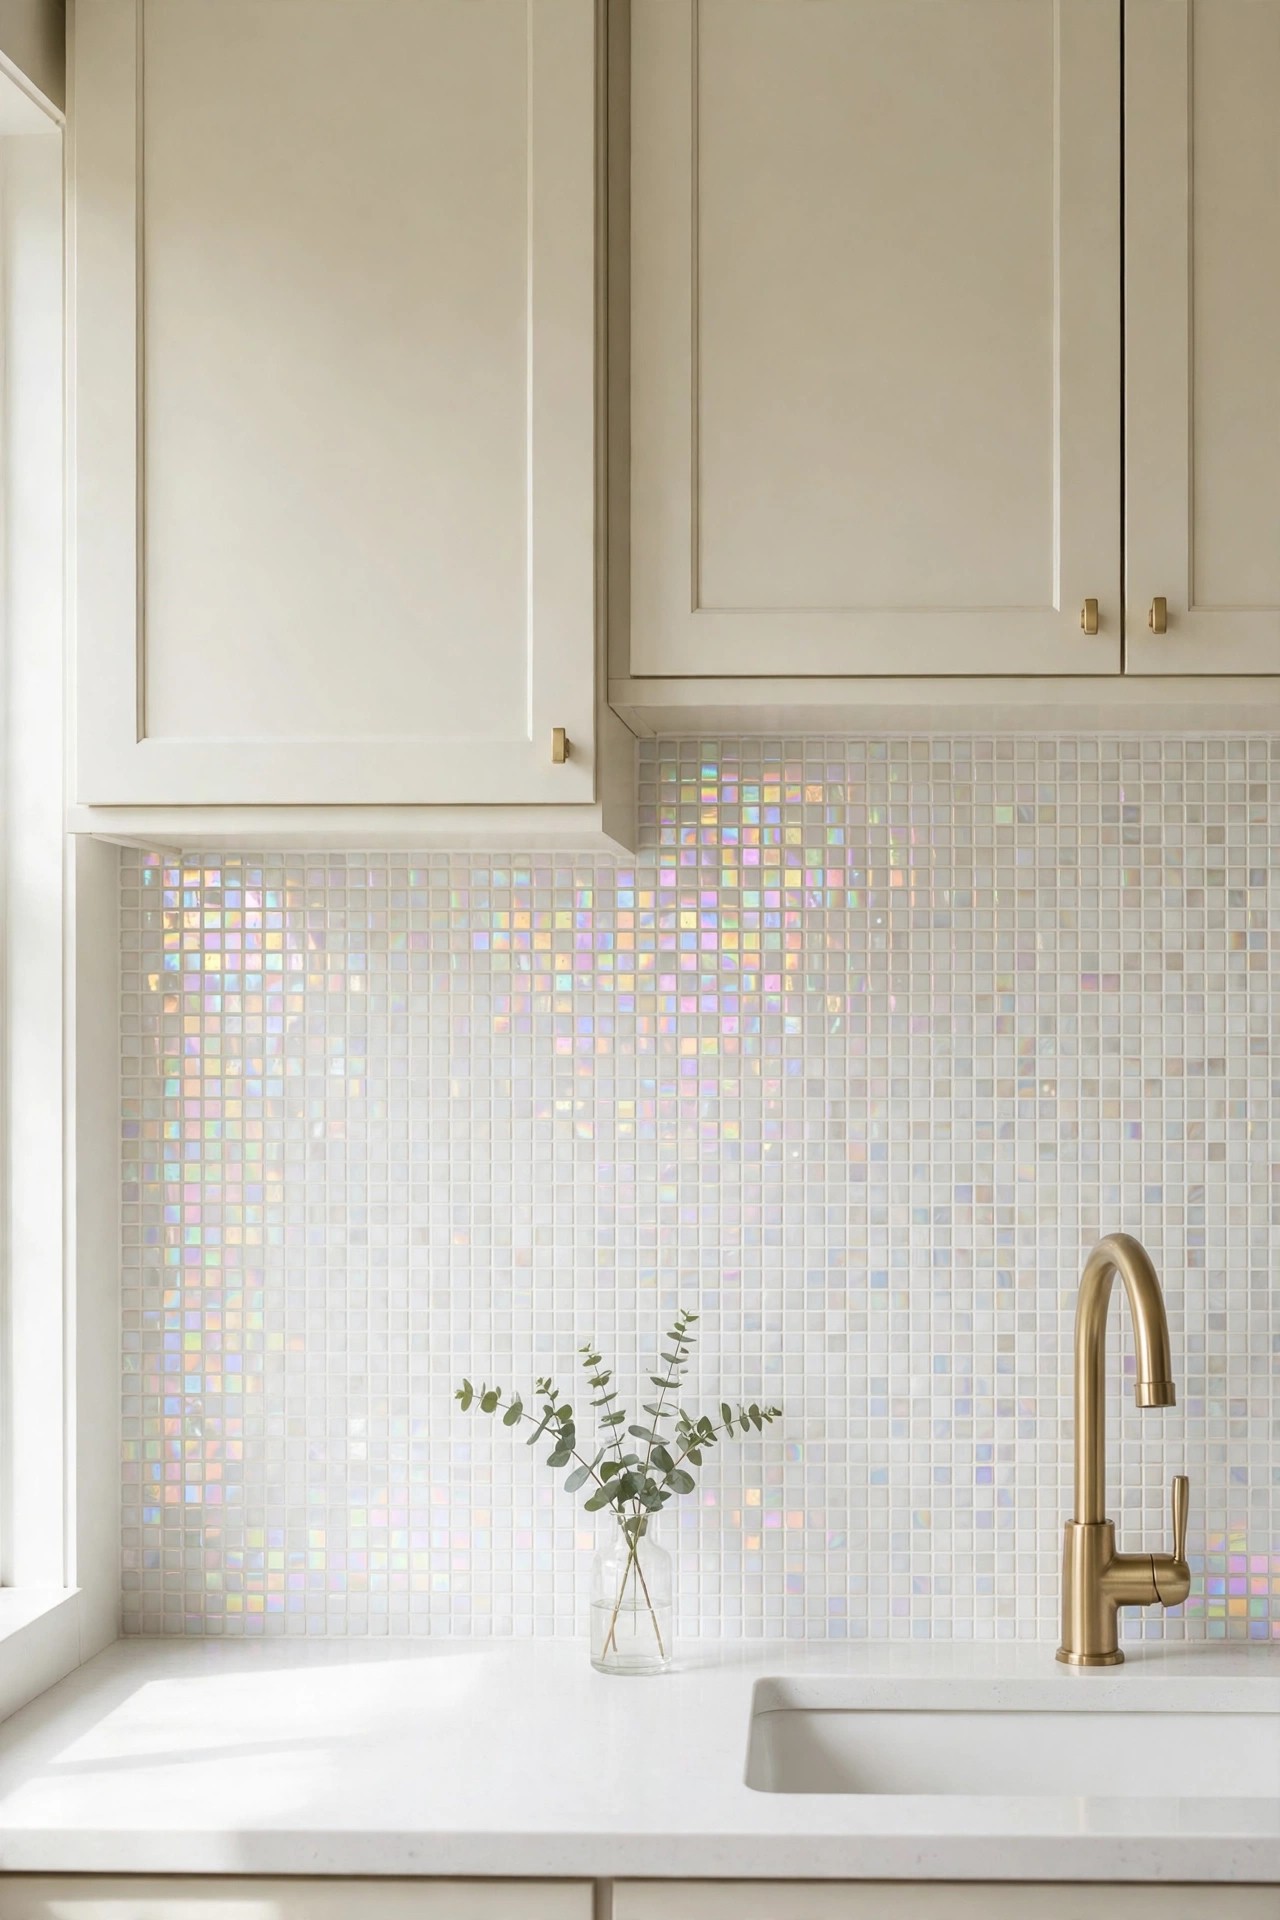
Description: Tiny glass squares with an iridescent finish shift between white, blush, and pale gold as the light changes, which gives a small or low-light kitchen a lift that flat tile cannot. The mosaic arrives on mesh sheets, so the small format is manageable to set. Glass is honest about its limits, though: it shows water spots and fingerprints clearly, the many grout joints need wiping, and glass-specific mortar matters, because standard gray thinset can dull the color from behind.
Best For: Low-light kitchens and small walls where a reflective surface earns its keep.
Not Ideal For: The wall directly behind a busy sink in a hard-water home, unless you enjoy wiping it down.
Estimated Cost: $$ (estimate: about $250 to $550 in materials for a 30 square foot backsplash)
Budget Note: The tile is mid-priced, but glass-rated white mortar and unsanded grout are specific purchases, not leftovers from a ceramic job.
Renter Friendly: No
Renter Note: Mesh mosaic is set and grouted like any real tile, so it is a permanent change.
What You Need
Glass mosaic sheets with about 10 percent extra
White thinset mortar rated for glass tile
Unsanded grout in white or pale gray
A grout float with a soft edge
A microfiber cloth for the final haze buff
Product recommendation (verified): Tenedos Square Iridescent Recycled Glass 1×1 Mosaic Floor Wall Tile, White, box of 10 sheets covering 10 square feet
Why it fits: The box is real recycled glass in a 1 by 1 mosaic with an iridescent white finish, sized in full sheets that cover 10 square feet per box.
Retailer/product page: https://www.amazon.com/dp/B0B75QLDY6/ref=cm_sw_r_cso_cp_apan_dp_W0MRHXEKE6EDGRP08V3X
How To Do It
Paint or skim the wall to an even pale tone; glass can show a patchy wall through lighter pieces.
Spread white glass-rated thinset with a small notch trowel and comb it flat enough not to squeeze through the joints.
Set the mesh sheets, aligning the grid across sheet edges so the mosaic reads as one surface.
Grout with unsanded grout to avoid scratching the glass faces.
Buff off the haze with a dry microfiber cloth once the grout firms up.
Pro Tip
Hold one sheet against the wall at night under your kitchen lights before ordering. Iridescent finishes change character under warm bulbs, and that is the light you will cook under.
10. Brushed Stainless Steel Subway Tile
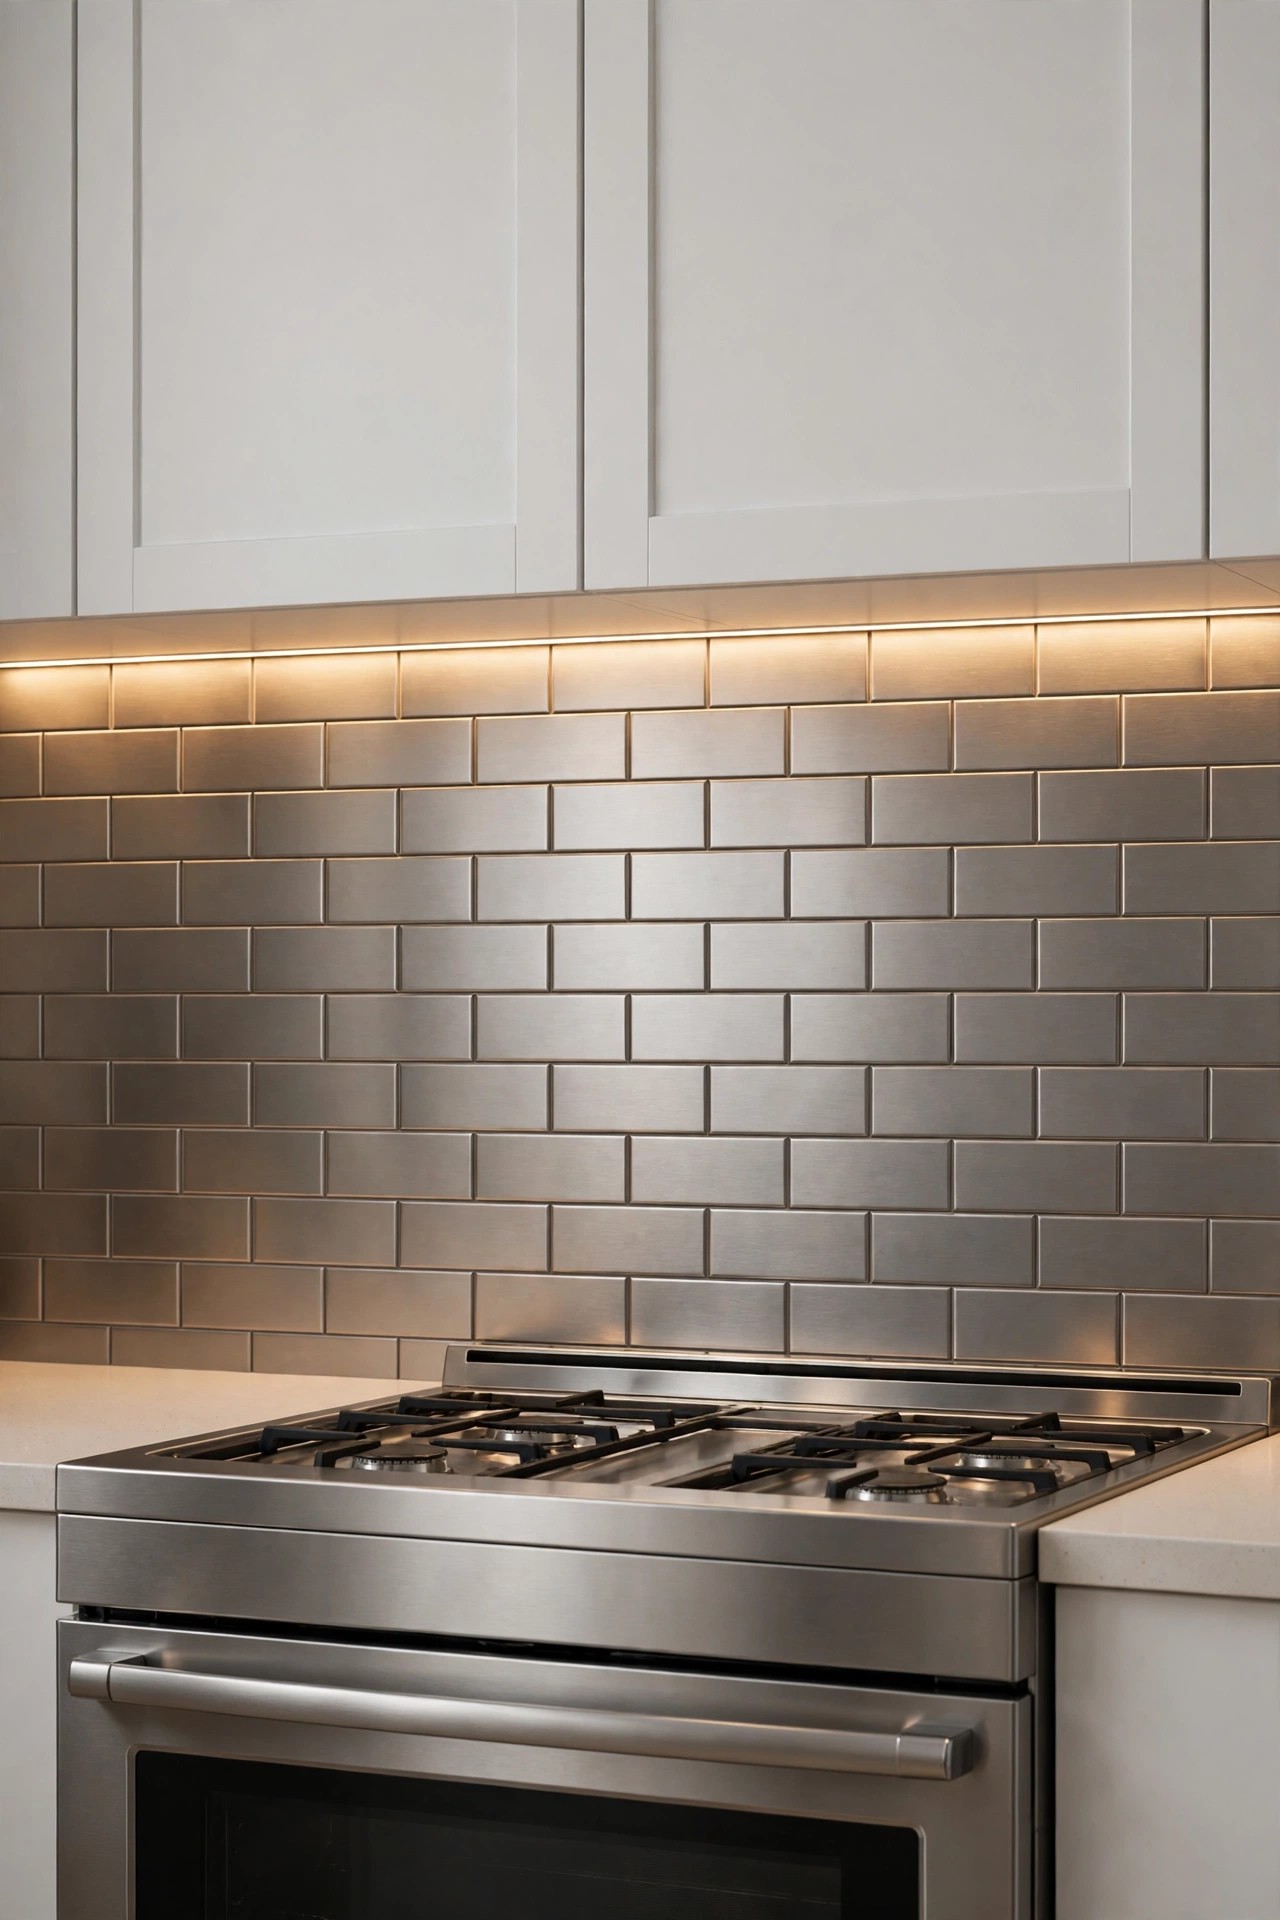
Description: Peel-and-stick metal tiles match stainless appliances exactly, so the backsplash stops being a separate decision and becomes part of the appliance run. The brushed finish softens reflections and suits modern white or gray kitchens. Each tile is a metal face over a backing board, cut with tin snips rather than a saw, which keeps the job quiet and dry. The trade-offs are cost per square foot, which is high because packs cover little, and fingerprints, which show on metal just as they do on a fridge door.
Best For: Modern kitchens with stainless appliances that want a matched, low-mess install.
Not Ideal For: Warm traditional kitchens, where brushed brass or cream tile usually sits better than cool steel.
Estimated Cost: $$ (estimate: about $450 to $750 in materials for a 30 square foot backsplash)
Budget Note: Packs cover about one square foot each, so measure precisely and price the full wall before falling for the per-pack price.
Renter Friendly: With Conditions
Renter Note: The adhesive is strong by design; warm each tile with a hair dryer and peel slowly at removal, and expect possible paint touch-ups afterward.
What You Need
Peel-and-stick stainless steel subway tiles, enough packs for the full measured area
A degreaser and a lint-free cloth
Tin snips for cuts around outlets
A level and a pencil
A J-roller or rolling pin for firm, even pressure
Product recommendation (verified): Aspect Peel and Stick Backsplash, 12.5 by 4 inch Subway Tile in Stainless Matted Metal, pack of 3 tiles covering about 1 square foot
Why it fits: It is a real metal-faced tile in a subway format made for backsplash walls, with a brushed stainless finish that matches standard appliance steel.
Retailer/product page: https://www.amazon.com/dp/B00NWZ6Q0I/ref=pfb_NUL_1_2_1434739231682Y7
How To Do It
Degrease the wall thoroughly; metal tiles show every bump and lose grip on greasy paint.
Mark a level line above the counter and plan the layout so cuts land at the least visible end.
Peel the backing, set each tile to the line, and press firmly across the whole face.
Cut around outlets with tin snips and deburr the cut edge with a file before setting the piece.
Roll every tile once more at the end, paying attention to corners and seams.
Pro Tip
Wipe metal tiles with the grain, never across it, and dry them after washing. Water dried against the grain leaves streaks that look like scratches.
11. Painted Beadboard Backsplash
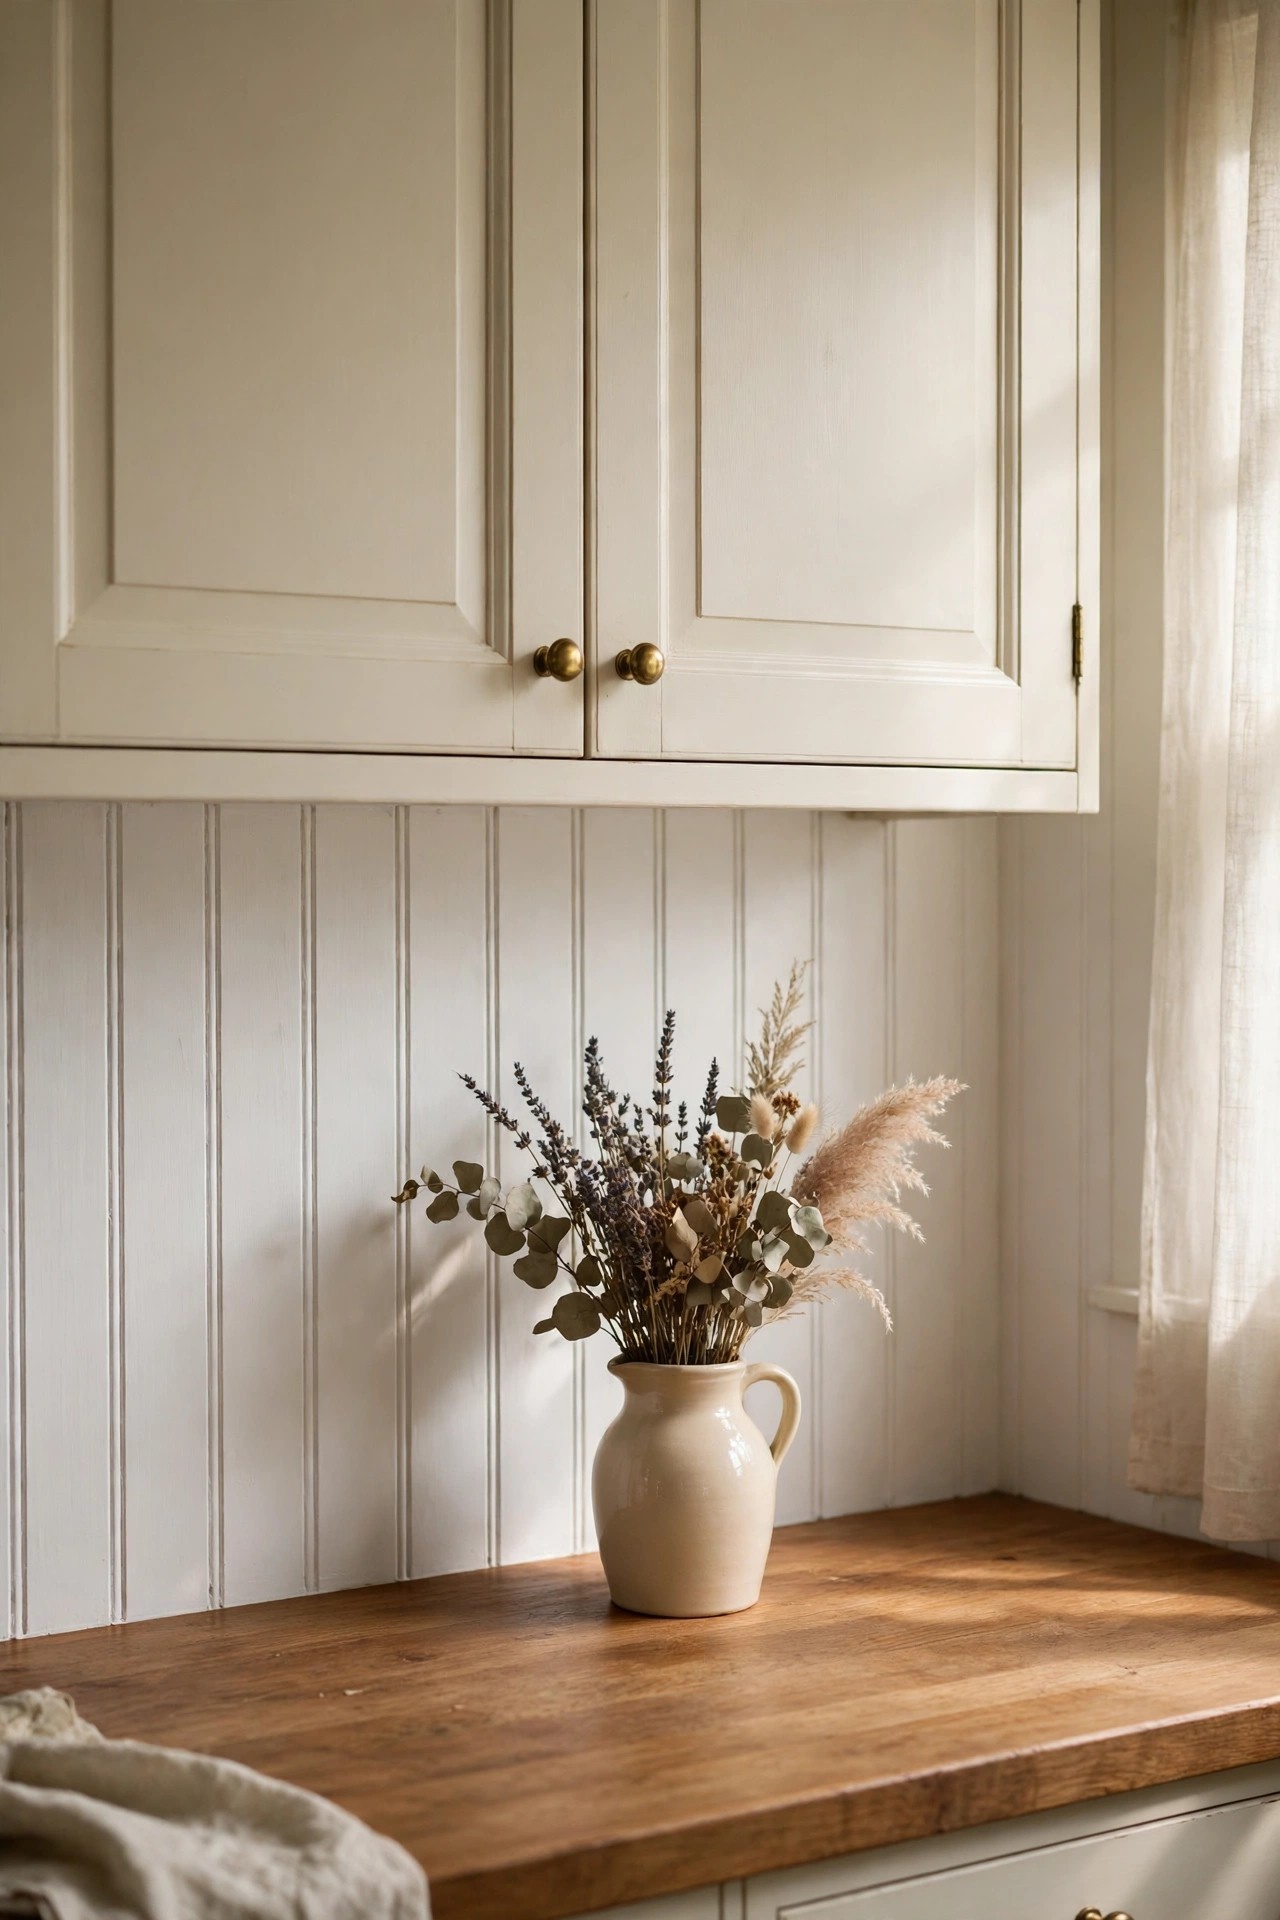
Description: Beadboard gives a kitchen fine vertical lines and a cottage softness that tile cannot copy, and the lowest-cost route to it is a paintable beadboard wallpaper rather than cut panels. The paper carries the pressed groove pattern, hangs like wallpaper, and takes paint once dry, so the wall reads as painted woodwork. It is not a surface for the spot behind an open flame or heavy steam, and the grooves need a semi-gloss paint to stay wipeable, but for the sink wall and side runs it is gentle and warm.
Best For: Cottage and farmhouse kitchens that want panel texture without cutting boards.
Not Ideal For: The stretch of wall directly behind a gas range, where paper products and open flame should not meet.
Estimated Cost: $ (estimate: about $60 to $180 in materials, covering the roll and two coats of paint)
Budget Note: One roll covers about 55 square feet, so most kitchens need a single roll plus paint you may already own.
Renter Friendly: With Conditions
Renter Note: Pre-pasted wallpaper usually strips with water at move-out, but painted grooves need patient removal; agree it with the landlord first.
What You Need
Paintable beadboard wallpaper, pre-pasted
A wallpaper tray, a smoothing brush, and a sharp knife
Semi-gloss paint in your cabinet color or a soft white
Caulk for the top and bottom edges
A plumb line or level
Product recommendation (verified): Graham & Brown Superfresco Easy Paintable Pre-Pasted Beadboard Wallpaper, one roll covering 55 square feet
Why it fits: The roll is made to copy beadboard paneling, it is pre-pasted for a simpler hang, and the surface is designed to be painted, which is what makes the grooves read as real woodwork.
Retailer/product page: https://www.amazon.com/dp/B0026SUA1S/ref=aip_sf_list_spv_ons_m_asin
How To Do It
Measure and cut lengths with a small allowance, matching the groove pattern across drops.
Activate the paste as the roll instructions direct and let each length rest for the stated booking time.
Hang the first length to a plumb line and smooth out bubbles toward the edges.
Trim top and bottom with a sharp knife and wipe paste off the face as you go.
When fully dry, paint two coats of semi-gloss and caulk the top and bottom edges.
Pro Tip
Paint a spare offcut first and hold it behind the faucet. The grooves catch shadow differently once painted, and the sheen choice is easy to change at this stage.
12. Thin Brick Veneer in a Warm Tan Blend
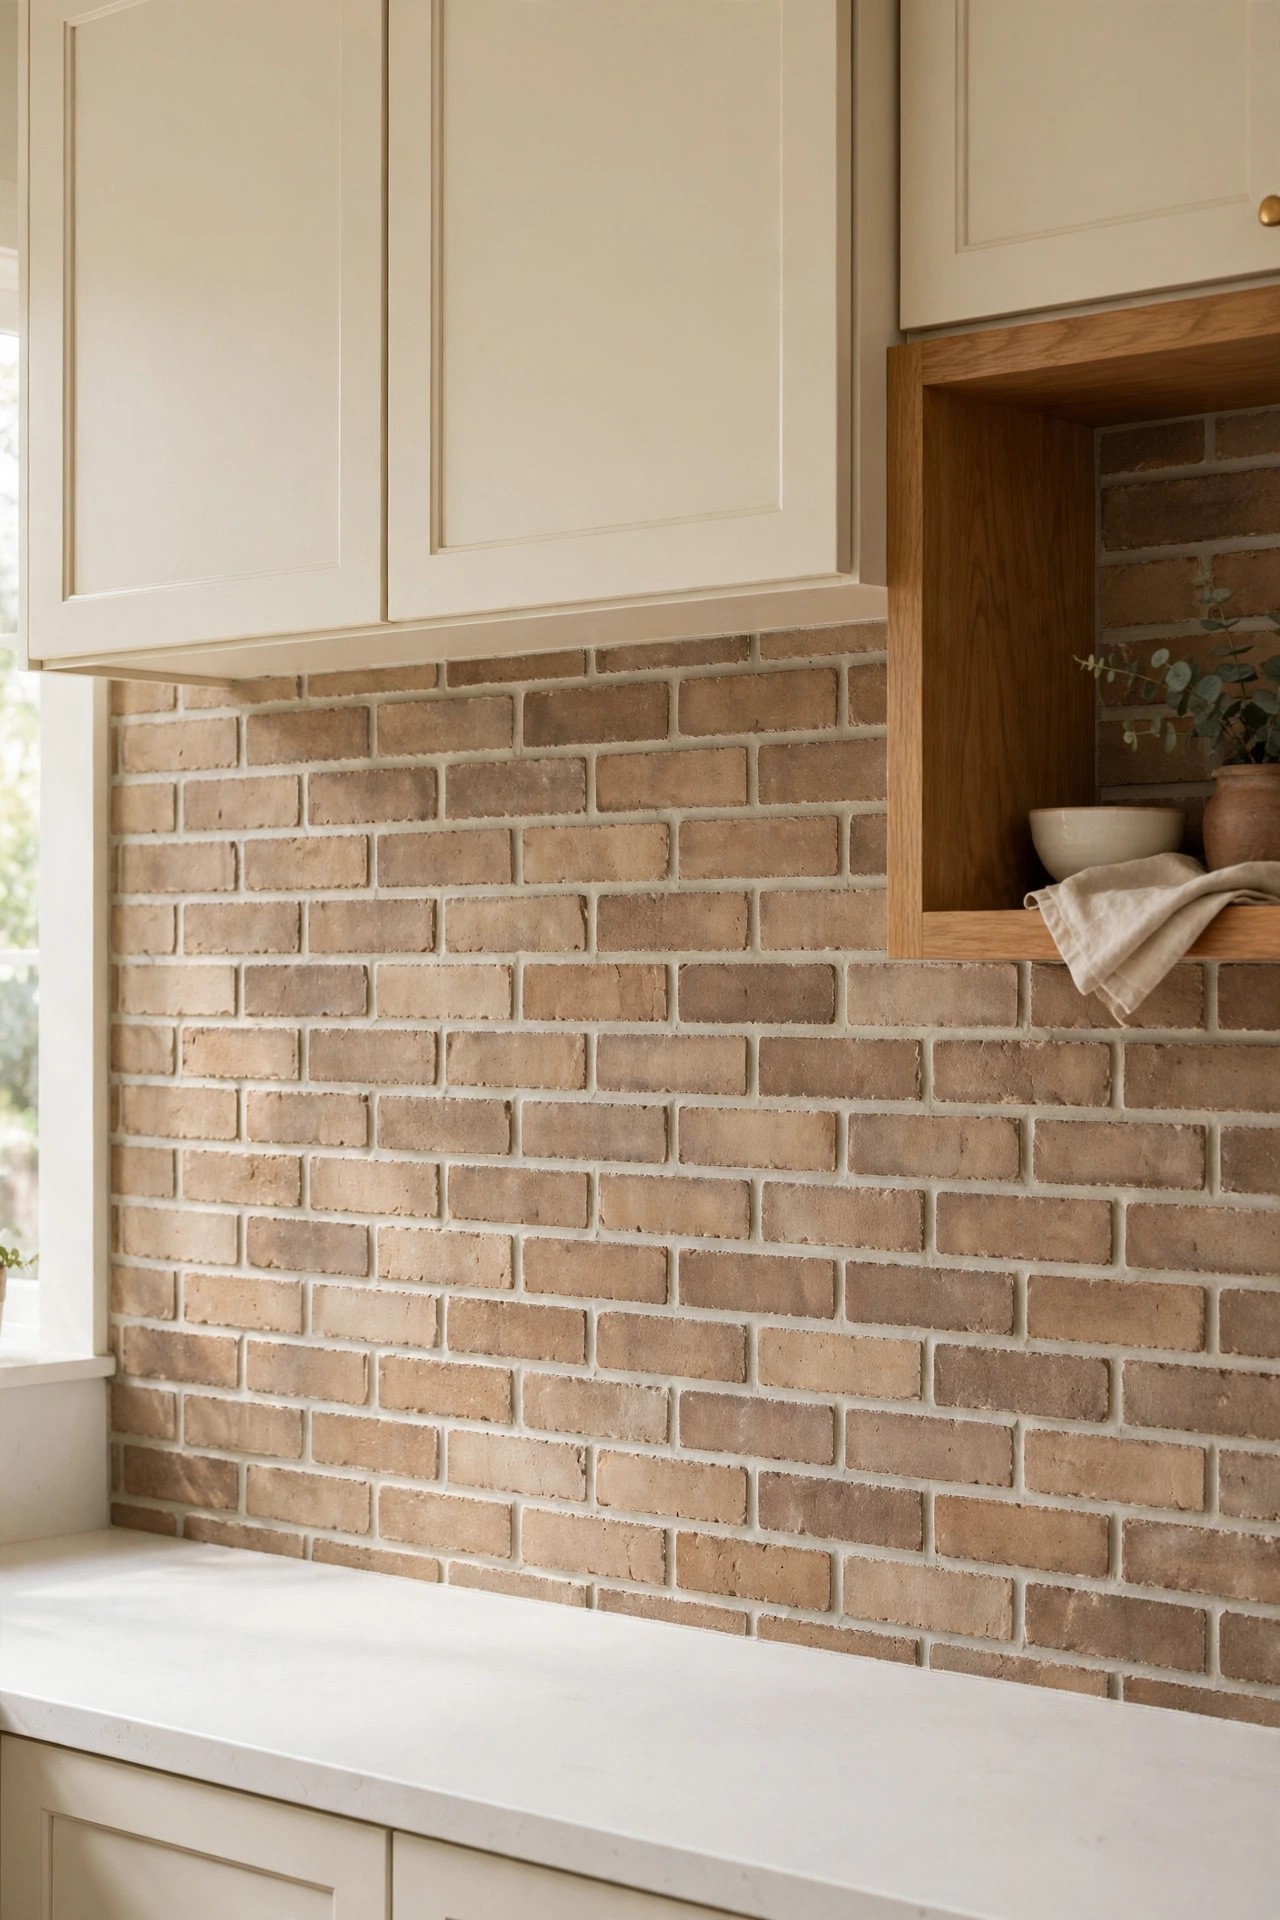
Description: Thin brick flats are real kiln-fired clay cut slim, so a kitchen gets genuine brick texture at tile thickness and weight. A tan and brown blend keeps the wall warm and pairs with cream cabinets, wood shelves, and brass hardware. Brick is a textured, thirsty surface: the faces are rough, the mortar joints sit slightly recessed, and both will hold grease near the stove unless the wall is sealed. In exchange, no printed product matches the depth and variation of real clay.
Best For: Warm, textured kitchens with wood and brass accents and a range hood that can carry a rustic surface.
Not Ideal For: Anyone who wants a smooth, wipe-clean wall right behind the burners.
Estimated Cost: $$ (estimate: about $300 to $620 in materials for a 30 square foot backsplash, including adhesive, grout, and sealer)
Budget Note: Each box covers about 7.3 square feet, so a standard wall takes four to five boxes before adhesive and grout.
Renter Friendly: No
Renter Note: Brick flats are bonded and grouted in place; removal will damage the wall surface underneath.
What You Need
Thin brick flats with about 10 percent extra
Tile adhesive or thinset mortar and a notched trowel
A grout bag and sanded grout for wide joints
Spacers or a simple gauge stick for even 3/8 inch joints
Matte penetrating sealer for stone and brick
Product recommendation (partially verified): Old Mill Brick Single Thin Brick Flats, Cafe Mocha, box of 50 flats covering 7.3 square feet
Why it fits: The flats are genuine kiln-fired clay brick in a tumbled tan and brown blend, each 7-5/8 by 2-1/4 inches and 1/2 inch thick, made for DIY wall installation.
Retailer/product page: Not printed here; see the verification notes in the QA section at the end of this file.
How To Do It
Lay out a section on the floor with 3/8 inch joints to settle the running bond and the color mix.
Butter the back of each flat with adhesive or thinset and press it to the wall with a slight twist.
Work in small areas and check the courses against a level line every few rows.
Fill the joints with a grout bag, then strike them smooth with a jointing tool once they firm up.
Seal the finished wall with a matte penetrating sealer, especially behind the range.
Pro Tip
Seal a sample flat and splash it with oil before you commit. Some sealers darken tan brick noticeably, and the sample tells you the true finished color.
13. Paint Over Existing Tile
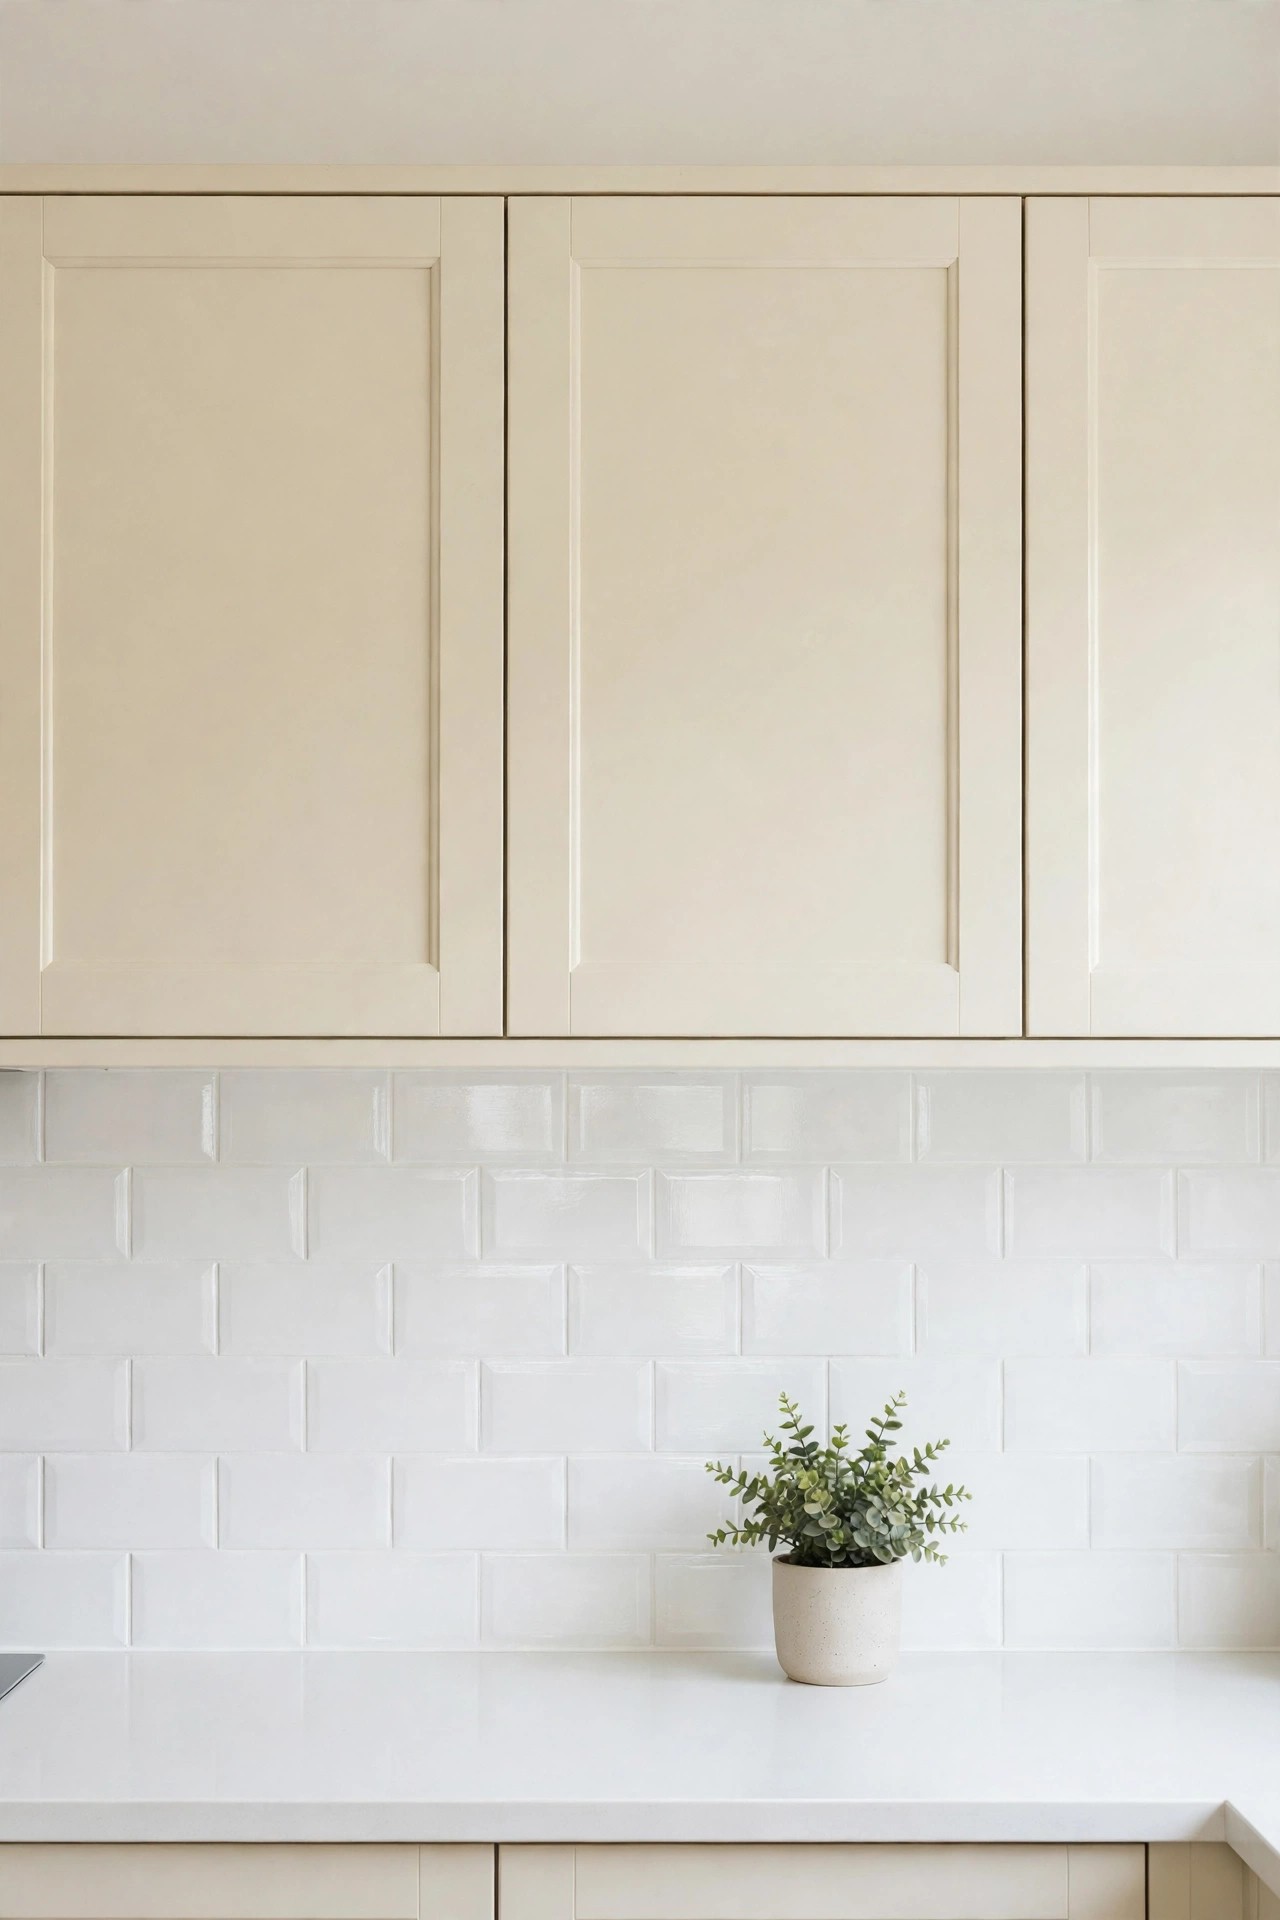
Description: If the old tile is sound, level, and only the color is wrong, a two-part epoxy tile coating can give the wall a clean white finish for the price of a single kit. The tile grid still shows faintly under the paint, which most people read as texture rather than a flaw. This is a coating, not a cure: it cannot fix loose, cracked, or bulging tile, the fumes during application are strong, and the surface needs three days before it can take water, so plan the kitchen downtime honestly.
Best For: Sound but dated tile in an owned home, where the layout is fine and only the color dates the room.
Not Ideal For: Damaged or loose tile, and any rental where the landlord has not agreed in writing.
Estimated Cost: $ (estimate: about $40 to $120, covering one or two kits plus rollers, tape, and sandpaper)
Budget Note: One kit covers up to 110 square feet, so most backsplashes need a single kit and the budget goes on prep supplies.
Renter Friendly: No
Renter Note: Paint permanently changes the landlord’s tile, so this one needs written permission, and even then it is hard to reverse.
What You Need
A two-part epoxy tile refinishing kit in white
A strong degreaser and scouring pads
Fine sandpaper for dulling the old glaze
Painter’s tape and drop cloths
A small foam roller, a brush for edges, and a respirator
Product recommendation (verified): Rust-Oleum Tub and Tile Refinishing 2-Part Kit, White, 32 fluid ounces, covering up to 110 square feet
Why it fits: The kit is a two-part epoxy acrylic made for ceramic and porcelain tile, it bonds in high-moisture areas, and the maker’s stated cure times let you plan the job honestly.
Retailer/product page: https://www.amazon.com/dp/B000PTSBKW
How To Do It
Remove every trace of grease with a strong degreaser, rinse, and let the wall dry completely.
Sand the old glaze lightly so the coating can grip, then wipe away all dust.
Tape the counter, cabinets, and faucet, and open windows; the mixed coating has strong fumes and about a six-hour working window.
Mix the two parts, then roll on a thin first coat and a second coat inside the stated window.
Keep water and cooking splashes off the wall for the full three-day cure before normal use.
Pro Tip
Do the work on a day when the kitchen can stay unused, and cook simple meals elsewhere. Steam and splashes during the cure are the main reason these coatings peel early.
14. Stacked Stone Ledger Panels
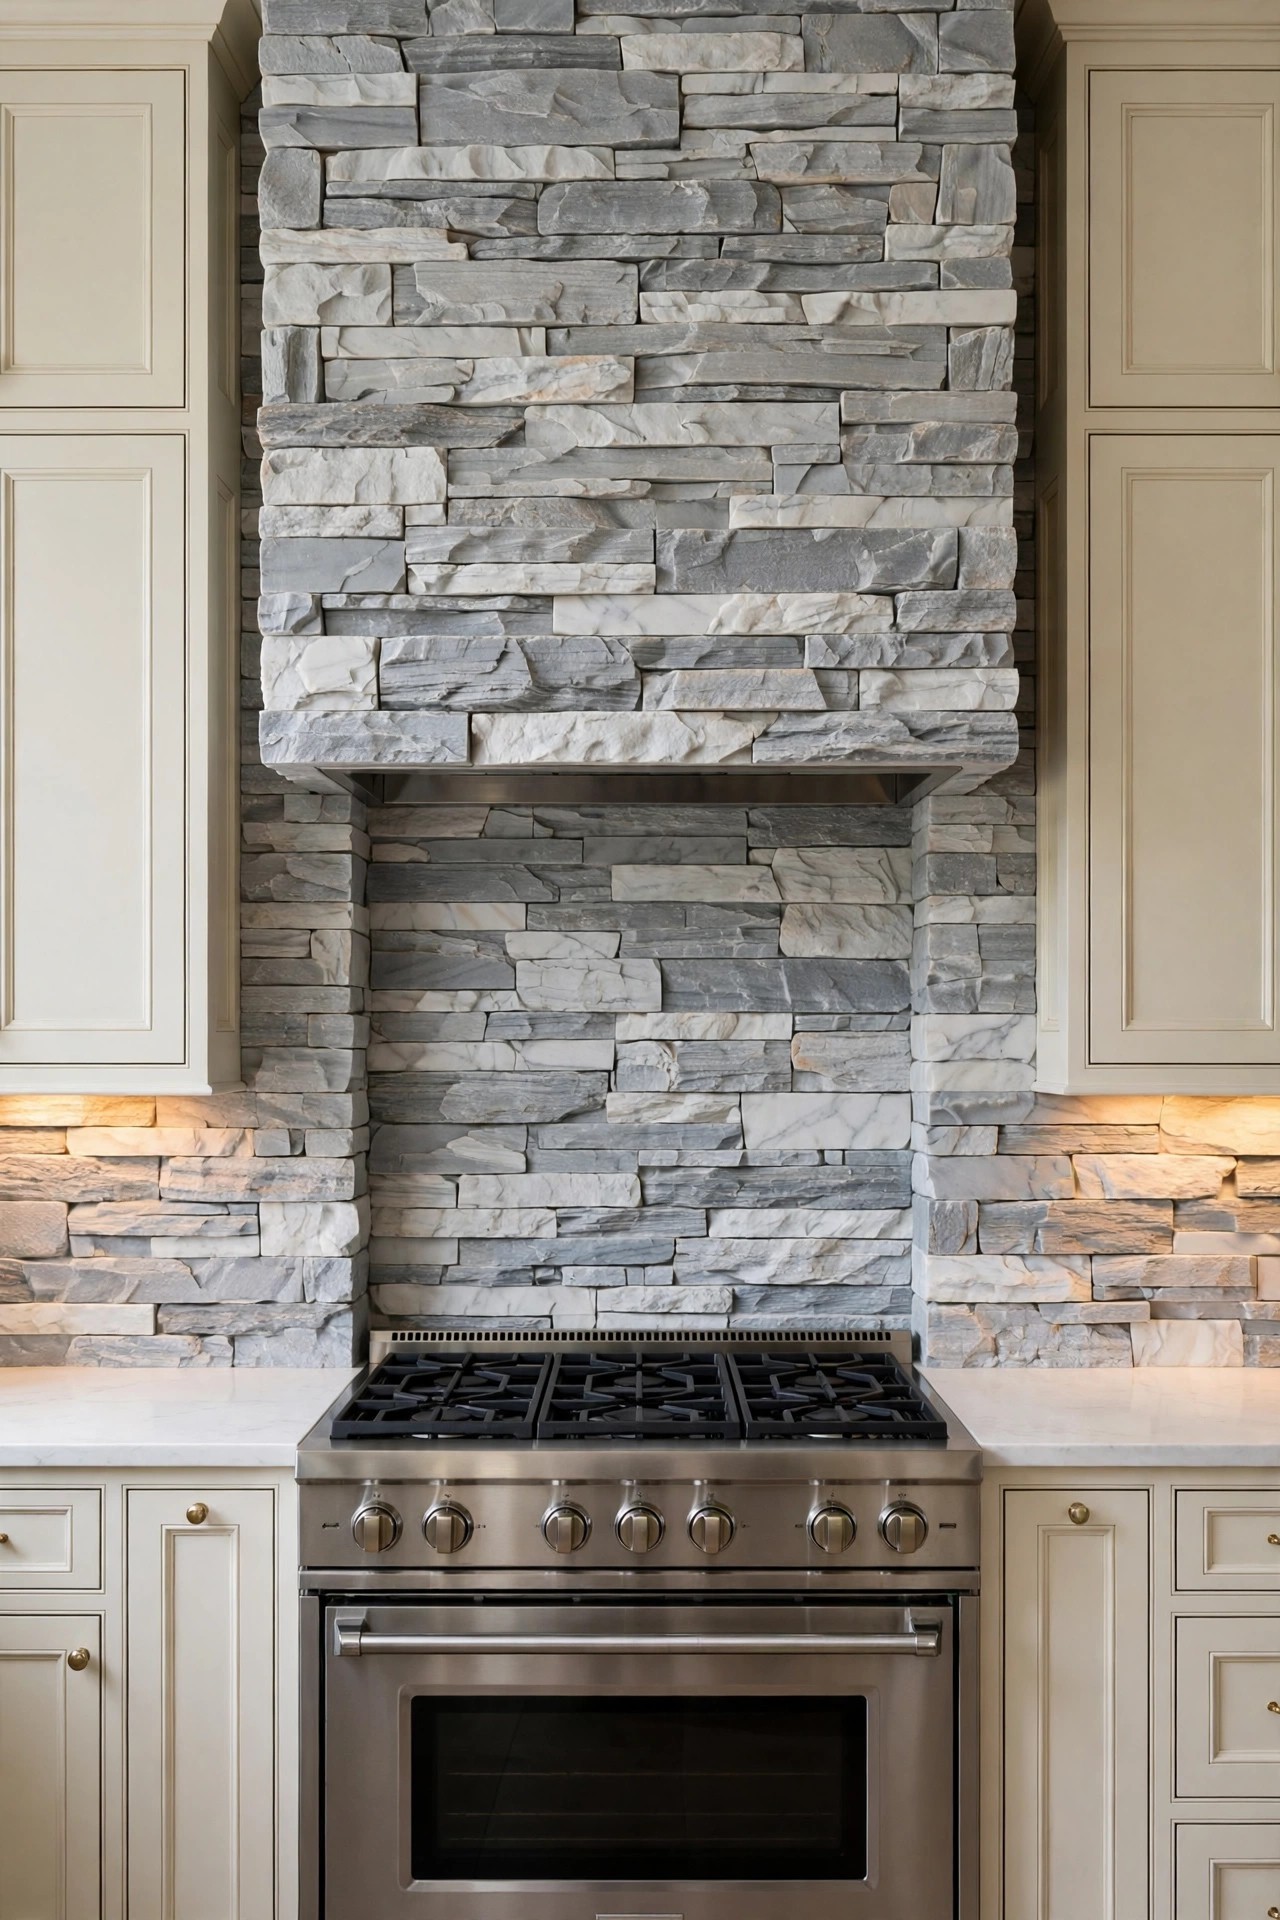
Description: Ledger panels are strips of natural stone fixed together into interlocking 6 by 24 inch pieces, so a wall gains texture and shadow without individual stone setting. The splitface marble in gray and white suits a larger kitchen or a single range wall framed by plain cabinets. No grout is needed, but the rough face is the hardest surface in this list to degrease, so it suits a range wall in a home that cooks gently, or a wall away from the burners, better than a heavy frying zone.
Best For: A range wall or full wall in a larger kitchen that needs texture and shadow.
Not Ideal For: The tight splash zone behind burners in a home that fries food daily.
Estimated Cost: $ (estimate: about $400 to $800 in materials for a 30 square foot backsplash)
Budget Note: Panels are sold by the case at about 6 square feet each, and a stone-rated wet saw blade is a real extra cost.
Renter Friendly: No
Renter Note: Stone panels are heavy, thinset in place, and count as a permanent renovation.
What You Need
Stacked stone ledger panels with about 10 percent extra
Polymer-modified thinset mortar rated for natural stone
A wet saw with a diamond blade for stone
A notched trowel and a level
Penetrating stone sealer
Product recommendation (verified): MSI Alaska Gray Ledger Panel, 6 by 24 inch Splitface Marble Wall Tile, case covering 6 square feet, model LPNLMALAGRY624
Why it fits: The panel is natural marble in a gray and white blend with interlocking ends, sized for backsplash and wall use, and the case format makes coverage easy to calculate.
Retailer/product page: https://www.homedepot.com/p/MSI-Alaska-Gray-Ledger-Panel-6-in-x-24-in-Splitface-Marble-Wall-Tile-6-sq-ft-case-LPNLMALAGRY624/207041865
How To Do It
Dry-fit the first two courses on the floor to see how the interlocking ends meet.
Spread polymer-modified thinset and set the panels from the counter line upward, checking level often.
Cut end panels and outlet openings with a wet saw and a diamond blade.
Offset each course so the joints stagger and the wall reads as one stone surface.
Seal the finished wall with a penetrating stone sealer and note the reseal date.
Pro Tip
Stand back and view the wall from the doorway after the first two courses. Stone color varies panel to panel, and swapping one strong panel early is easy; later it is not.
15. Whitewashed Reclaimed Wood Planks
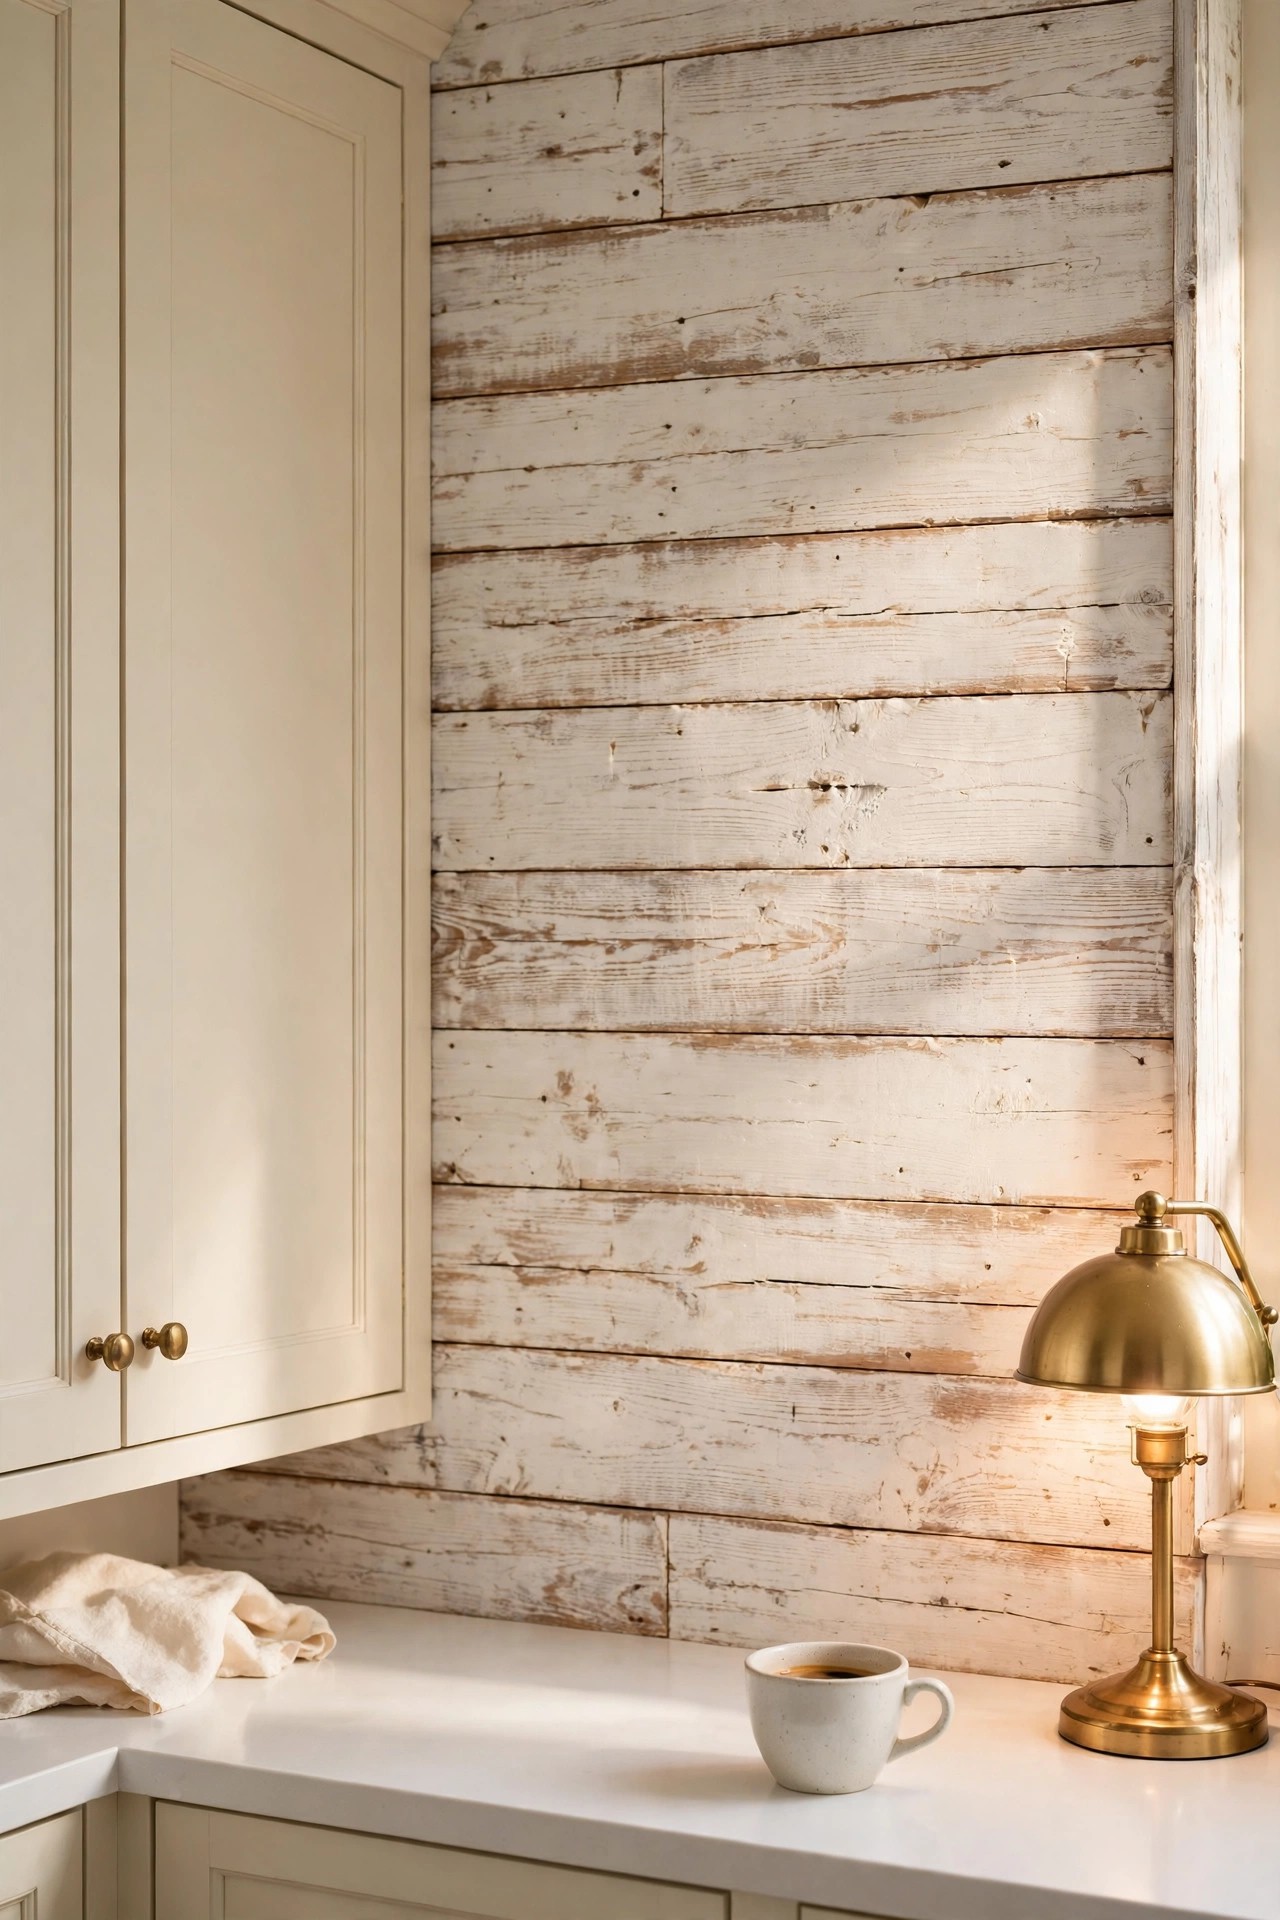
Description: Real reclaimed wood planks in a whitewashed finish bring grain and warmth that no tile copies, and peel-and-stick backing makes the fitting simple. The honest place for wood in a kitchen is a coffee bar, a breakfast nook wall, or a short run away from water and flame, not the splash zone behind a gas range or a sink. The maker is clear that these planks are a permanent wall finish, and removal can damage the surface underneath, so treat this as an owner’s project with a long view.
Best For: A coffee bar or nook wall in an owned home that needs warmth and grain.
Not Ideal For: Behind a gas range or a sink, where open flame and constant water meet real wood.
Estimated Cost: $ (estimate: about $450 to $850 in materials for a 30 square foot wall)
Budget Note: Planks are sold in 10 square foot packs at a premium per foot, so a small feature wall is the sensible scope.
Renter Friendly: No
Renter Note: The brand describes the planks as a permanent solution and warns that removal may damage the wall underneath, so this is not a deposit-safe choice.
What You Need
Reclaimed wood peel-and-stick planks, enough packs for the wall plus spares
A level and a pencil for layout lines
A fine-tooth saw for cuts
A J-roller for firm pressure
A sample pack first, to test color and adhesion on your wall
Product recommendation (partially verified): Timberchic 100% Reclaimed Wood Wall Planks, Coastal White, 3 inch wide planks, pack covering 10 square feet
Why it fits: The planks are genuine reclaimed wood with a whitewashed coastal finish and a strong adhesive backing, in varied lengths that suit a staggered plank layout.
Retailer/product page: Not printed here; see the verification notes in the QA section at the end of this file.
How To Do It
Leave the planks in the room for a day so the wood settles to room conditions.
Mark a level starting line and plan staggered joints so no two rows end at the same point.
Peel and stick each plank, pressing firmly along its full length.
Cut end pieces and outlet openings with a fine-tooth saw and test-fit before sticking.
Roll the whole wall once at the end and keep the required distance from heat sources.
Pro Tip
Order the sample pack before the full order. Reclaimed wood varies plank to plank, and the sample tells you whether the whitewash tone matches your cabinets in your light.
Practical Tips for Kitchen Backsplash Ideas
- Measure twice, order once. Measure the wall in square feet, then add 10 percent for cuts. Add 15 percent for herringbone and other angled patterns, because the edge cuts waste more.
- Decide the stove zone first. Heat and grease decide which materials are safe on the range wall. Keep paper, wood, and peel-and-stick products at the clearance the maker states behind burners, and choose tile, stone, or metal for the hardest-working stretch.
- Sample on the real wall. Tape one tile, sheet, or plank offcut in place and live with it through morning and evening light. Whites and glazes shift more than any other choice in the kitchen.
- Plan outlet cuts before you start. Backsplash material adds depth, so outlets may need extension rings to sit flush. Decide this before the first tile goes up, not after.
- Caulk the counter joint, never grout it. The joint between counter and wall moves slightly, and grout cracks there. A flexible caulk line stays closed and can be renewed in minutes.
- Seal stone and grout on a schedule. Marble, brick, and grout all drink up splashes over time. Note the sealing date on a card inside a cabinet door and repeat as the product label directs.
Frequently Asked Questions
What is the cheapest kitchen backsplash idea that still looks finished?
Painting sound existing tile (Idea 13) is the cheapest route, at roughly the cost of one refinishing kit, followed by paintable beadboard wallpaper (Idea 11). Peel-and-stick sheets (Ideas 2 and 5) cost more but give a true tile pattern. All three depend on honest prep: degreased, dry, smooth surfaces decide whether the cheap option looks finished or temporary.
Can a peel-and-stick backsplash go behind a stove?
It depends on the heat source and the clearance the maker states. Electric and induction stovetops are usually fine at the stated distance, while gas burners need more clearance because of open flame and higher wall heat. Check the sheet maker’s own heat guidance for your exact product, and if the gap behind your range is tight, use real tile or metal on that stretch and peel-and-stick on the rest.
How much extra tile should I order?
Order about 10 percent more than the measured area for straight layouts, and about 15 percent more for herringbone, diagonal, or patterned layouts. The extra covers cuts, breakage, and one repair years later. Keep the spare box; tile lines are discontinued often, and a stored box is the only sure color match.
Which backsplash is easiest to clean?
Glossy ceramic subway tile (Idea 1) and large-format porcelain (Idea 6) are the easiest, because the faces are smooth and the grout lines are few. Glass mosaic wipes clean but has many joints. Rough stone ledger panels (Idea 14) and thin brick (Idea 12) are the hardest to degrease, which is why the article places them thoughtfully rather than everywhere.
Can I install a new backsplash over an old one?
Peel-and-stick sheets can go over smooth, sound, fully degreased tile in many cases. Real tile over old tile is rarely a good idea: the added depth causes problems at outlets, edges, and cabinet lines, and weak old tile can fail under the new layer. The same reflective glass in Idea 9 is also a strong bathroom surface; see bathroom decor for where it works there.
Conclusion
The right backsplash is the one that matches how you actually cook and how long you plan to stay. Real tile and stone reward an owned home with decades of service, peel-and-stick sheets give renters a clean wall they can undo, and paint buys a sound old backsplash a few more good years. Start with the wall behind your range, be honest about heat, water, and budget, and the rest of the kitchen gets easier to plan.
2 Comments
Comments are closed.