
15 Tiny Bathroom Ideas for Rooms as Small as 3 x 5 Feet
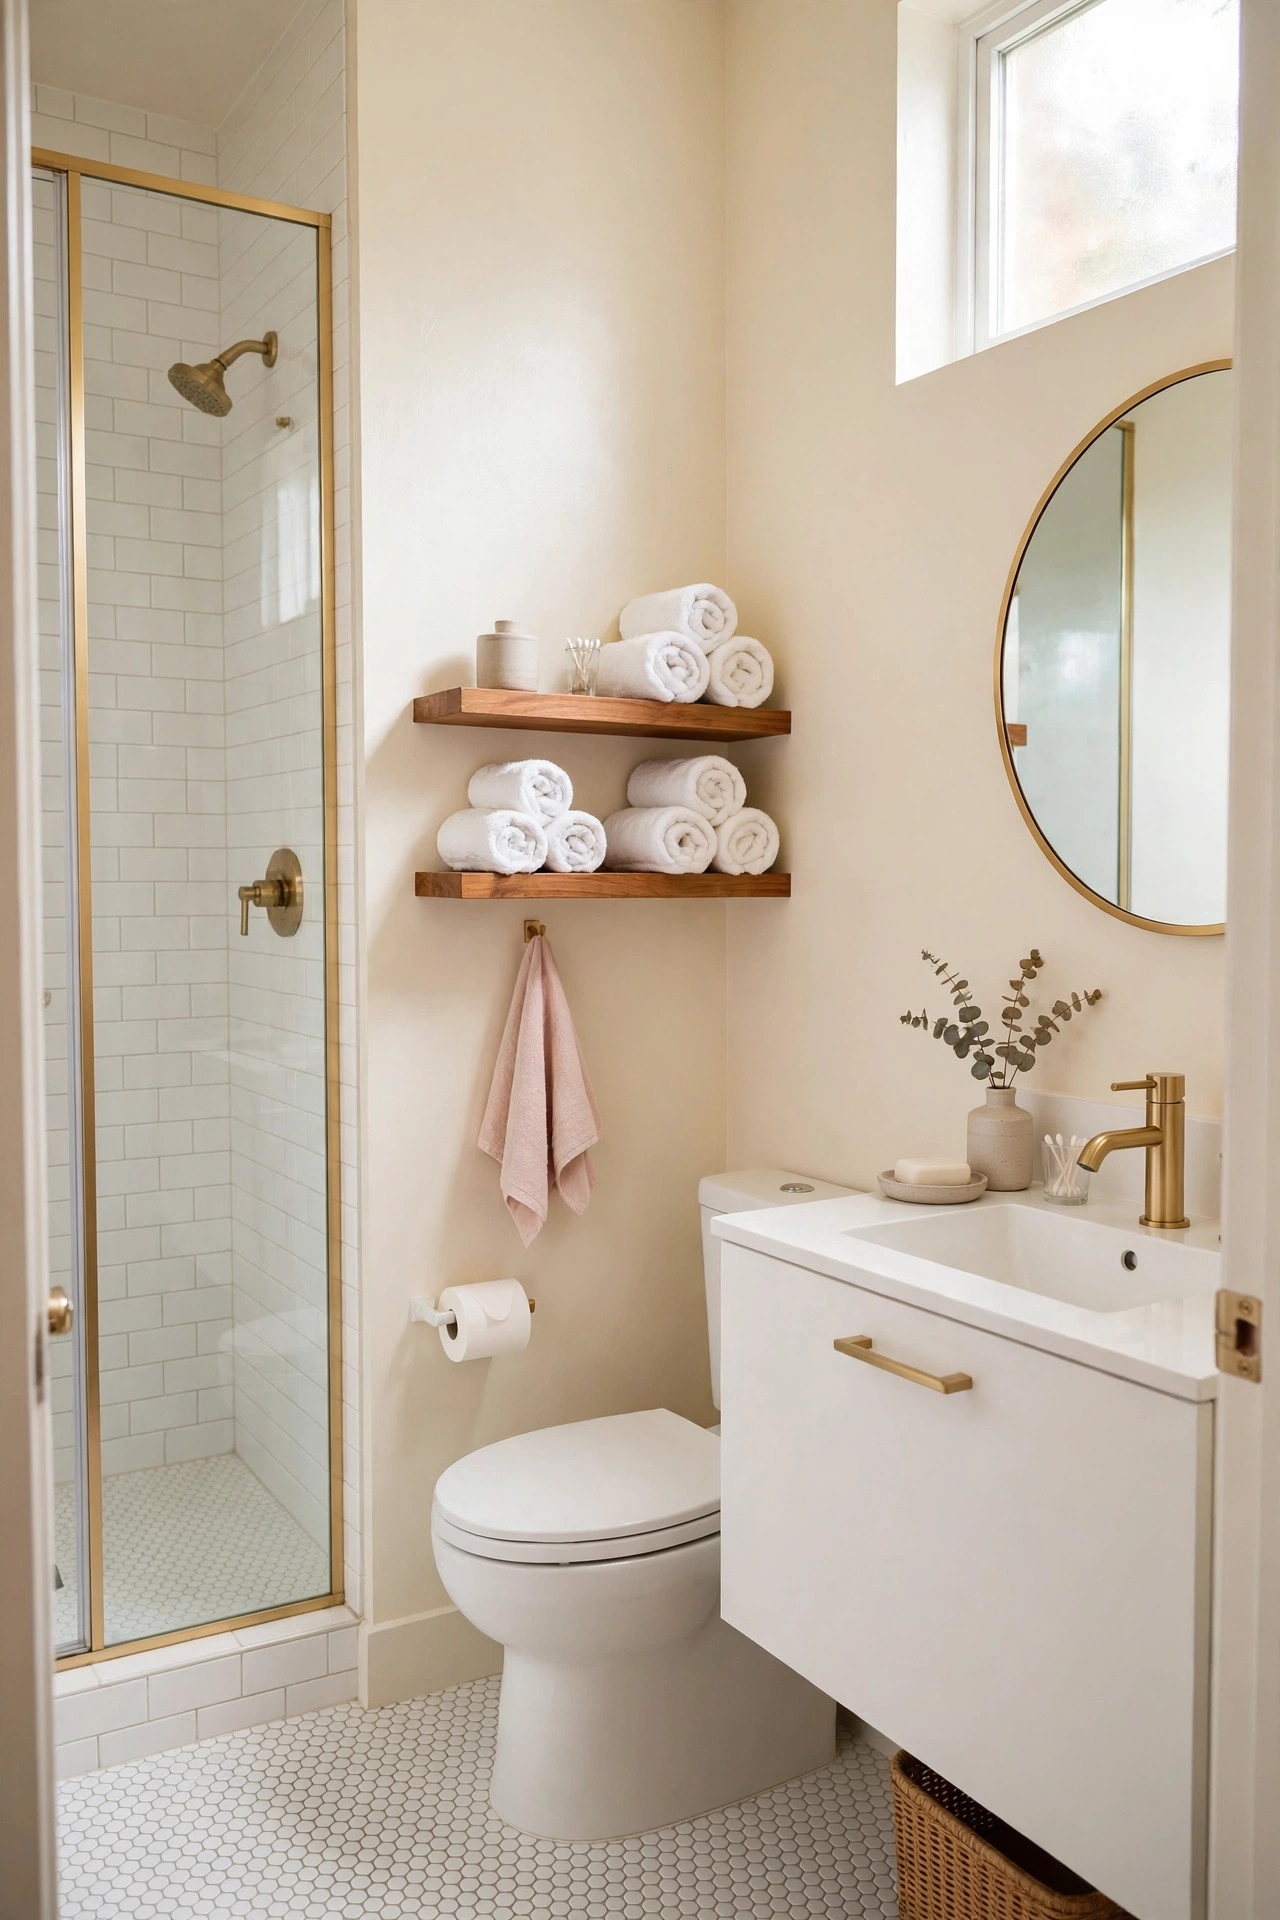
A tiny bathroom fails on inches, not on style. In a 3 x 5 to 5 x 7 foot room, a standard toilet leaves too little knee room, a swinging door eats floor you cannot spare, and bottles end up balanced on the tub edge. These tiny bathroom ideas fix the math first: shorter fixtures, storage inside the walls, and doors and glass that do not fight for the same square feet. Every idea states the size it needs, an honest cost estimate and a renter note. If your bathroom is small but the look also needs work, the calmer styling pairs well with the space fixes here.
1. Choose a Short-Projection Compact Toilet
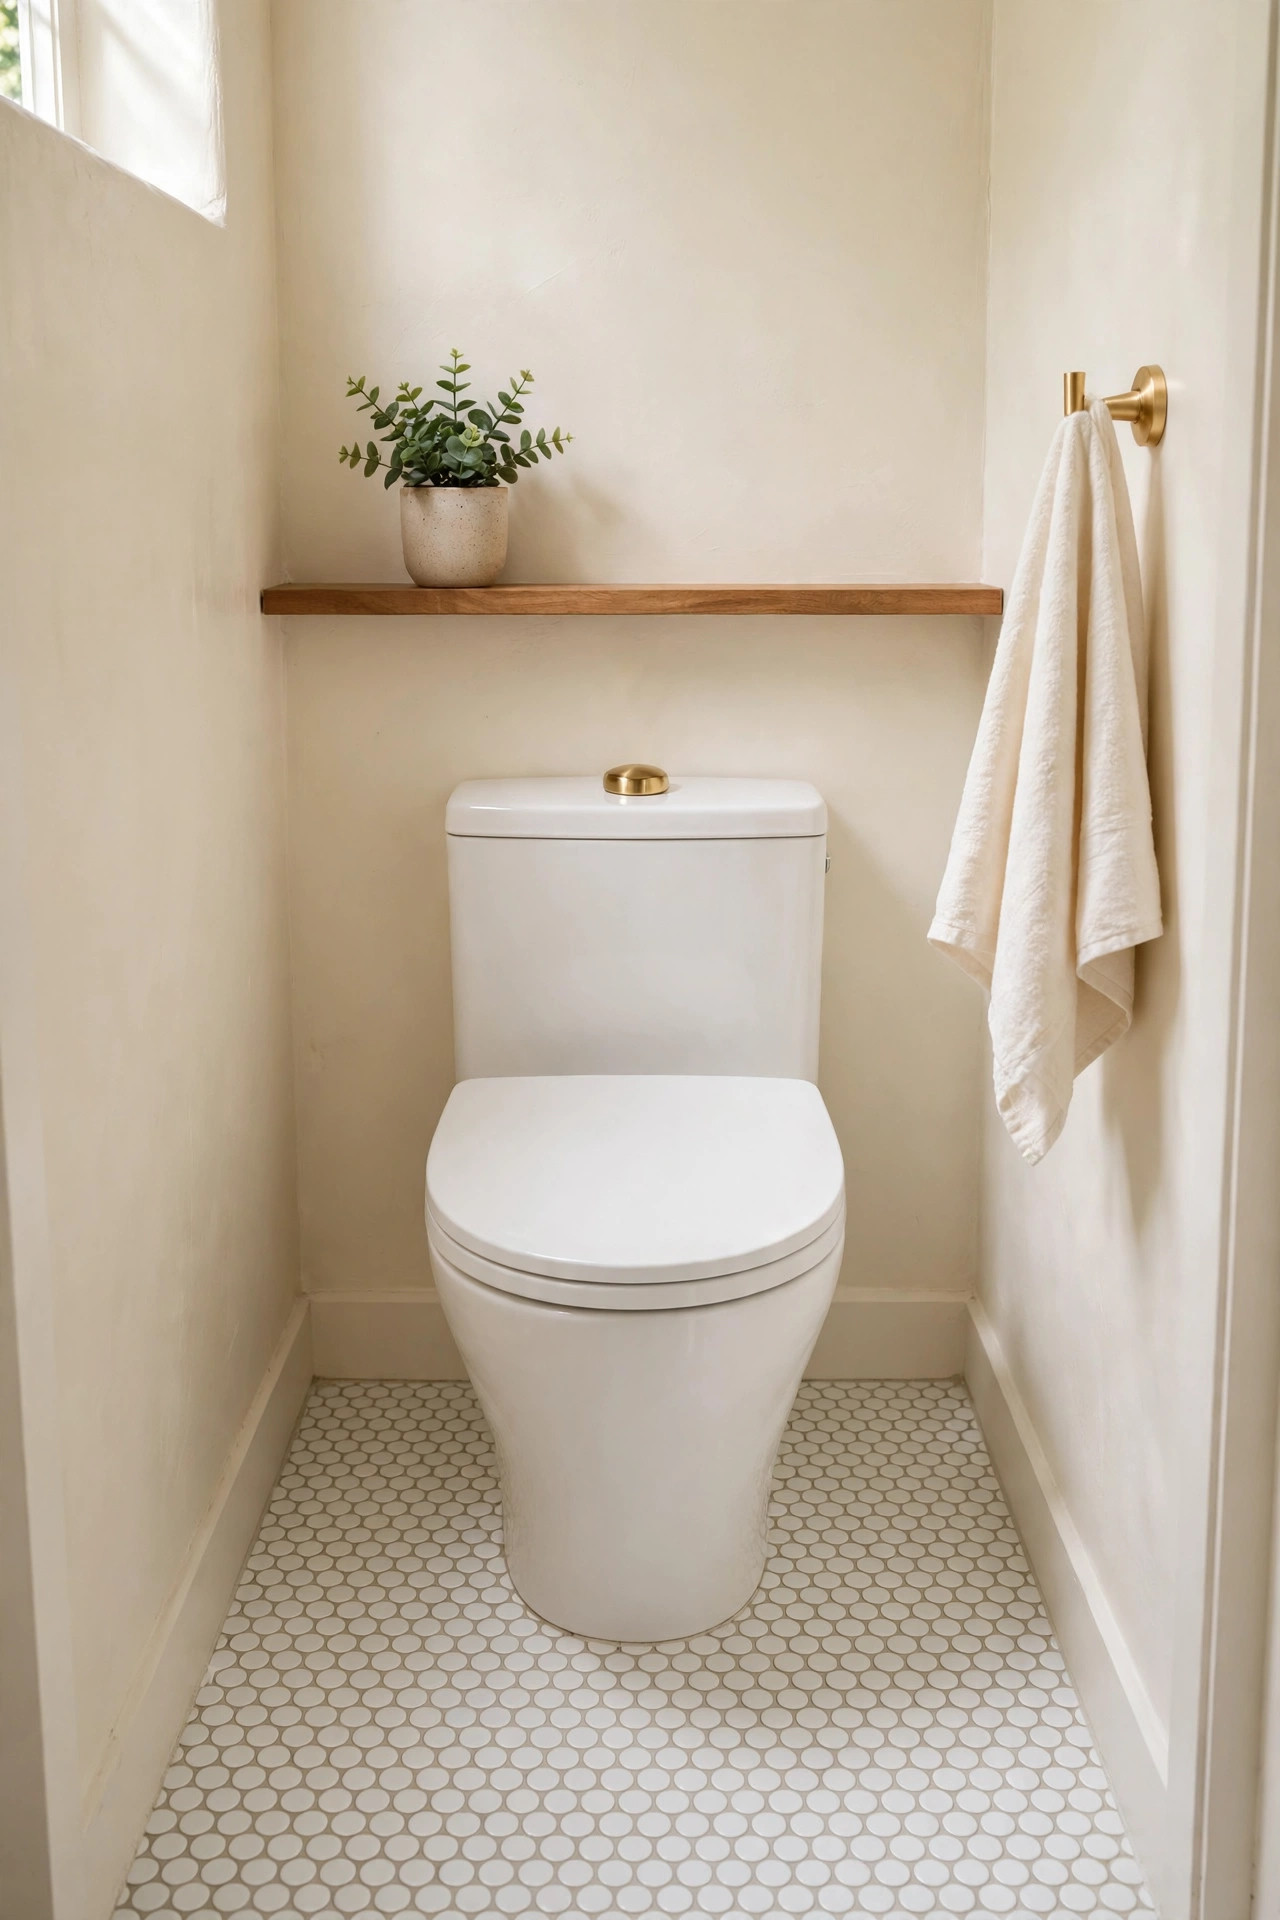
Description: A standard toilet projects 28 to 30 inches from the wall, and in a 5 x 7 bathroom that depth steals the clearance your knees and the door swing both need. A compact one-piece toilet at about 25 inches deep gives back 3 to 5 inches in front of the bowl without moving the drain. The skirted sides also wipe clean faster than a two-piece base, which matters when the mop has almost no room to move.
Best For: 5 x 7 and 3 x 5 bathrooms where the toilet faces the vanity or the door swing passes in front of it.
Not Ideal For: Homes with a 10 inch rough-in unless you order the matching version, and anyone who needs a taller comfort-height seat.
Estimated Cost: $230-$330 (estimate) for the toilet, plus $150-$300 if a plumber fits it.
Budget Note: The saving is in keeping the same rough-in, because moving a drain flange costs far more than the toilet itself.
Renter Friendly: No
Renter Note: A toilet swap is plumbing work and changes a fixture, so it is an owner project; renters should start with ideas 7, 11, 12 and 15.
What You Need
Compact toilet with seat, wax ring, new supply line, adjustable wrench, level, old towels for the water left in the trap.
Product recommendation (verified): HOROW 8733S-G Compact One-Piece Toilet with Gold Dual Flush Button, 12 inch rough-in
Why it fits: It measures 25 inches deep by 13 3/8 inches wide, roughly 4 inches shorter than a standard toilet, and the gold flush button suits the brushed gold fittings used through this list.
Retailer/product page: https://horow.com/products/horow-12-inch-toilet-bowl-one-piece-floor-mounted-toilet-model-8733s-g
How To Do It
- Measure from the finished wall to the centre of the floor bolts to confirm your rough-in is 12 inches before ordering.
- Turn off the water, flush to empty the tank, and sponge out the water left in the bowl.
- Unbolt and lift off the old toilet, scrape the old wax from the flange, and check the flange sits level with the floor.
- Set a new wax ring, lower the toilet straight onto the bolts, and tighten evenly without cracking the base.
- Connect the supply line, refill, and flush twice while checking around the base for leaks.
Pro Tip
Measure the rough-in from the wall surface, not from the top of the baseboard, because the baseboard thickness is the most common reason a compact toilet ends up ordered in the wrong size.
2. Float a 24 Inch Vanity to Show the Floor
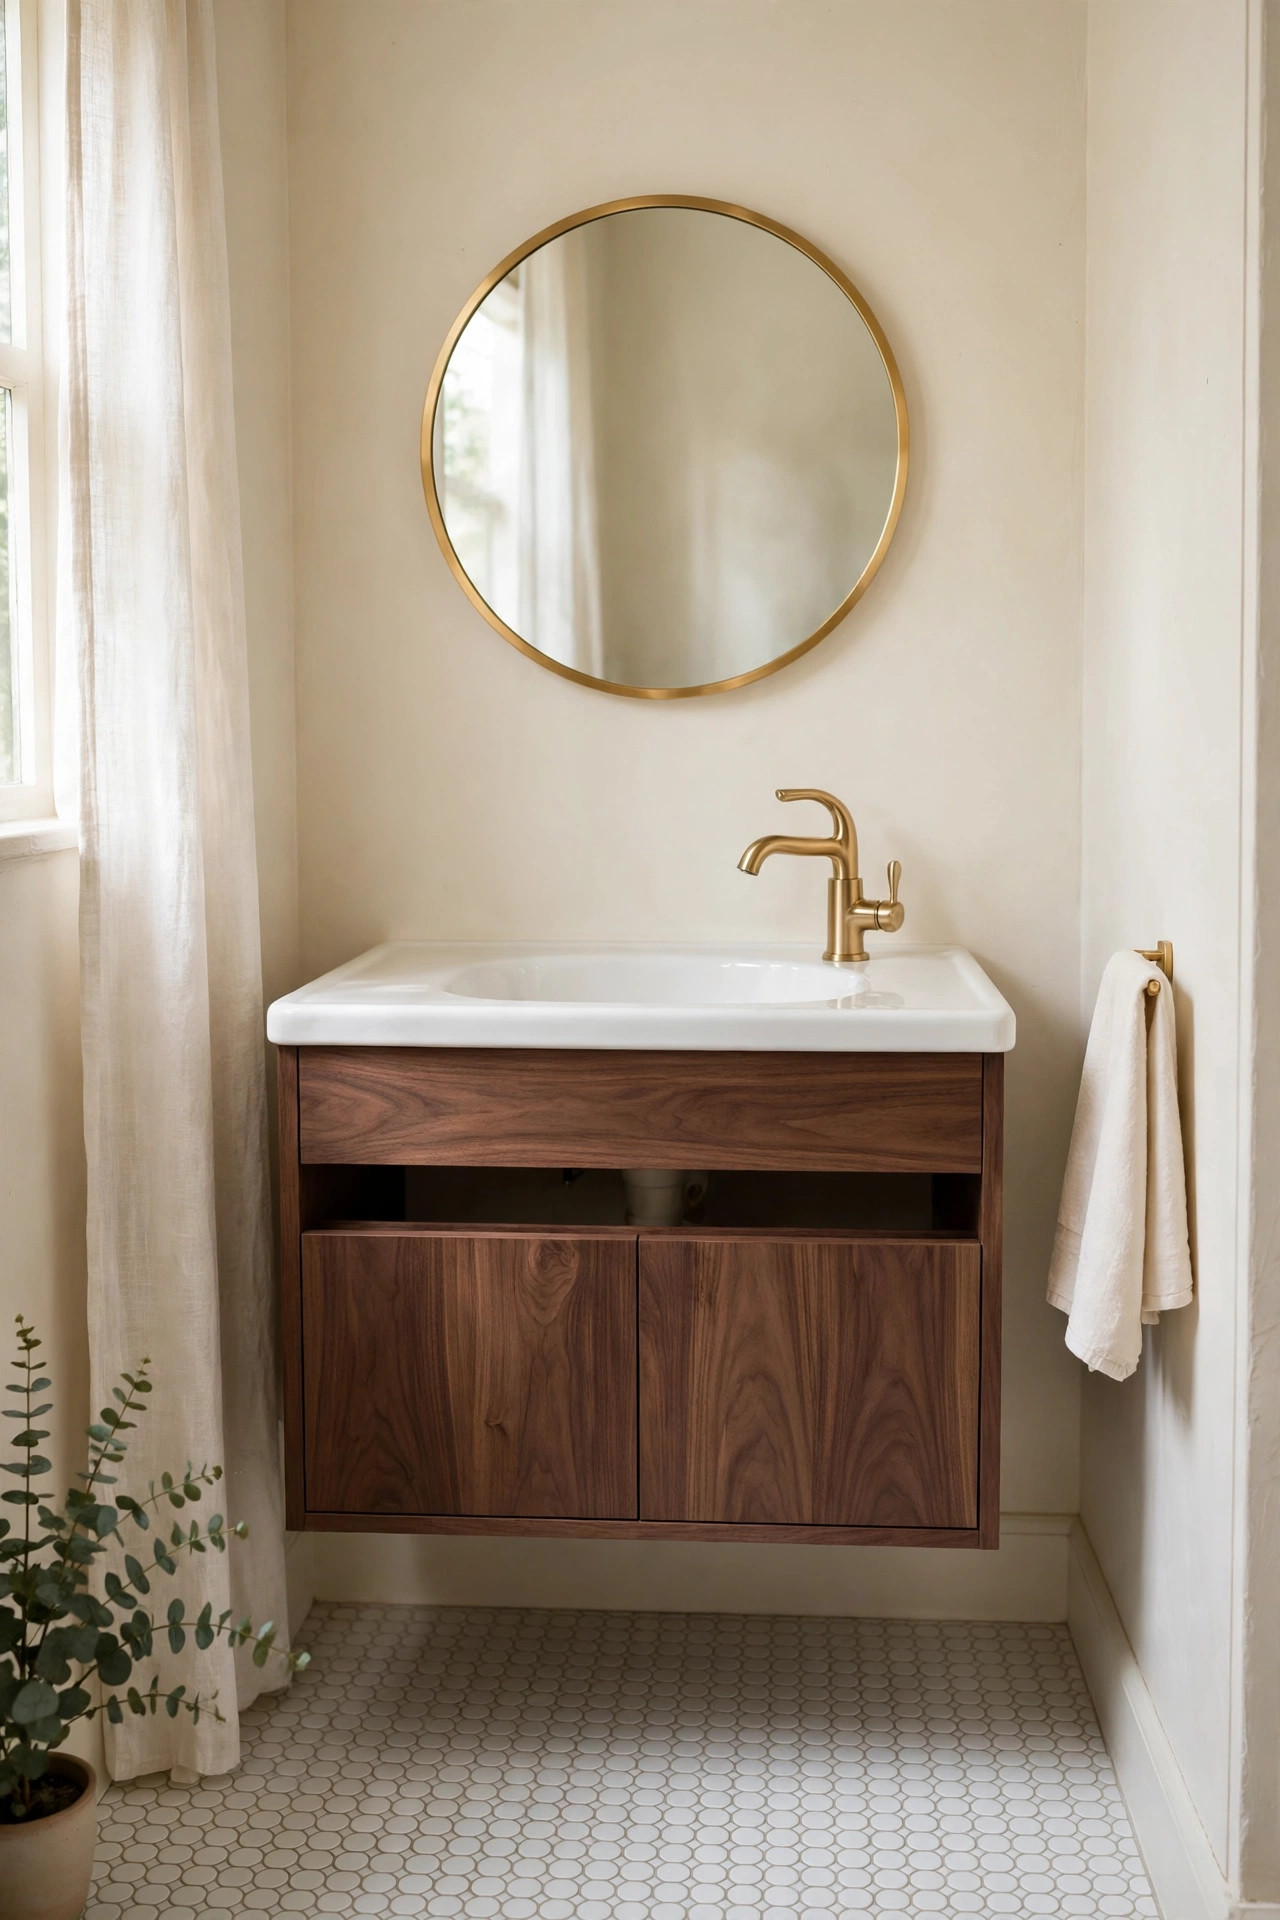
Description: A vanity that stops short of the floor lets your eye and the light travel underneath it, so the room reads wider than it measures. At 24 inches wide and about 18 inches deep, a floating vanity still gives you two drawers of storage and a full-size basin, while the open floor below takes a scale, a step stool or a basket. It also ends the dark, damp gap where a floor cabinet traps water and dust.
Best For: 5 x 7 bathrooms and narrow 3 x 6 layouts where the vanity wall is the first thing seen from the door.
Not Ideal For: Walls with no stud or blocking where the cabinet must hang, and households that store heavy bulk items under the sink.
Estimated Cost: $280-$450 (estimate) for a 24 inch vanity with the sink included.
Budget Note: A model that arrives fully assembled costs a little more but removes a full afternoon of flat-pack work in a room with no spare floor to build on.
Renter Friendly: No
Renter Note: The cabinet must fix into studs and the plumbing is opened up, so this is an owner project.
What You Need
Floating vanity with sink, stud finder, level, drill, silicone sealant, plumber’s tape, a bucket for the trap water.
Product recommendation (verified): Little Tulip Iris Collection 24 Inch Floating Bathroom Vanity, Walnut, with ceramic sink
Why it fits: It is 24 inches wide by 18.3 inches deep, arrives fully assembled, and has two soft-close drawers with a cut-out in the top drawer that works around the plumbing.
Retailer/product page: https://www.amazon.com/dp/B0D2P7YWWF/ref=cm_sw_r_cso_fm_apin_dp_CMAB3JKW61HG1954Q9JP
How To Do It
- Find and mark the studs, then set the mounting height so the sink rim lands near 34 to 36 inches.
- Fix the hanging bracket level into the studs; a floating vanity should never hang on drywall anchors alone.
- Lift the cabinet onto the bracket with a second pair of hands and check it is level both ways.
- Connect the faucet, supply lines and trap, then run the water and check every joint with a dry hand.
- Run a thin bead of silicone where the sink meets the wall so splash water cannot sit behind the cabinet.
Pro Tip
Choose drawers over doors at this size: a drawer brings the contents to you, while a door cabinet in a tiny room hides everything behind the trap where you cannot reach it.
3. Put the Sink in the Corner
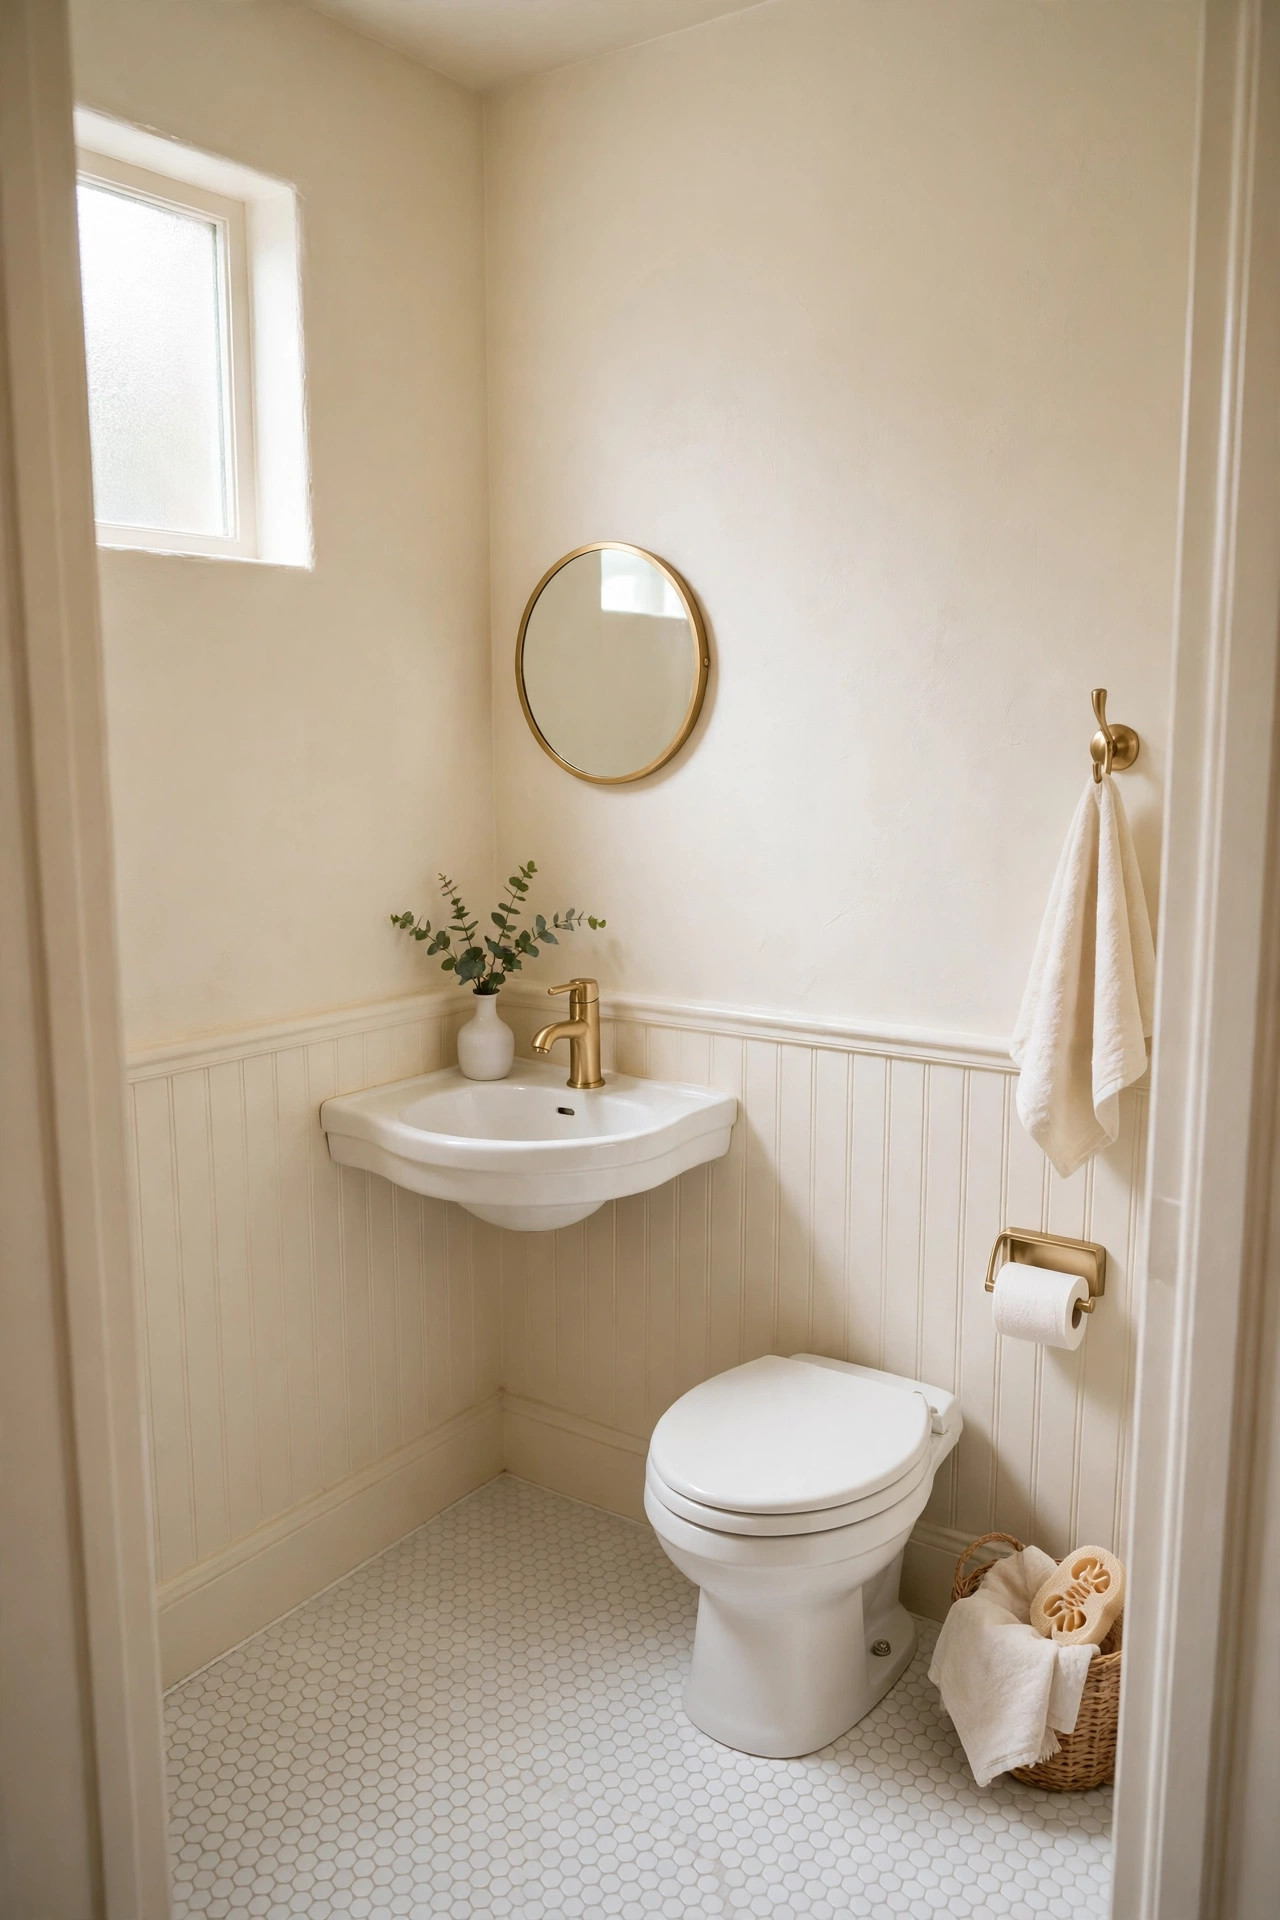
Description: Corners are the one part of a tiny bathroom that nothing else can use, which makes them the right home for a small basin. A corner sink keeps its plumbing on the two walls that meet there and frees the straight wall runs for the toilet and the shower door. The trade-off is basin size: a compact corner sink suits hand washing, teeth and a quick face wash, not soaking anything large.
Best For: 3 x 5 and 4 x 6 bathrooms where a 24 inch vanity will not fit beside the toilet with legal clearance.
Not Ideal For: Anyone who washes hair in the basin or needs counter space for cosmetics and a hair dryer.
Estimated Cost: $60-$120 (estimate) for the sink; faucet and drain are usually sold separately.
Budget Note: Budget for the faucet, pop-up drain and mounting bolts on top of the sink price, since most corner sinks ship as the basin only.
Renter Friendly: With Conditions
Renter Note: The sink bolts into both walls, so you need permission and a wall strong enough to carry it; the holes are small and patchable when you leave.
What You Need
Corner wall-mount sink, single-hole faucet, pop-up drain, lag or toggle bolts suited to your wall, level, silicone sealant.
Product recommendation (verified): QISHKA Corner Wall Mount Bathroom Sink, 12 x 12 inch ceramic, single faucet hole with overflow
Why it fits: The 12 x 12 inch square body sits across the corner with about 17 inches of projection at its deepest point, the smallest footprint in this list, and the listing offers larger sizes if your corner allows more.
Retailer/product page: https://www.amazon.com/dp/B0F8TH3V3S/ref=mp_s_a_1_4
How To Do It
- Hold the sink in the corner at about 33 to 35 inches high and mark the bolt points on both walls.
- Check both marks for pipes and wires, then drill and fit bolts rated for a ceramic basin plus the weight of leaning hands.
- Hang the sink, level it across the front edge, and tighten evenly so the ceramic is not stressed.
- Fit the faucet and drain, connect the trap to the corner waste, and test for leaks with the bowl full.
- Seal the two wall joints with silicone so water cannot run behind the basin.
Pro Tip
Mount a small round mirror in the corner above the sink rather than on one flat wall; standing at 45 degrees to both walls gives you more elbow room than facing a wall square-on.
4. Move the Faucet to the Wall and Slim the Sink
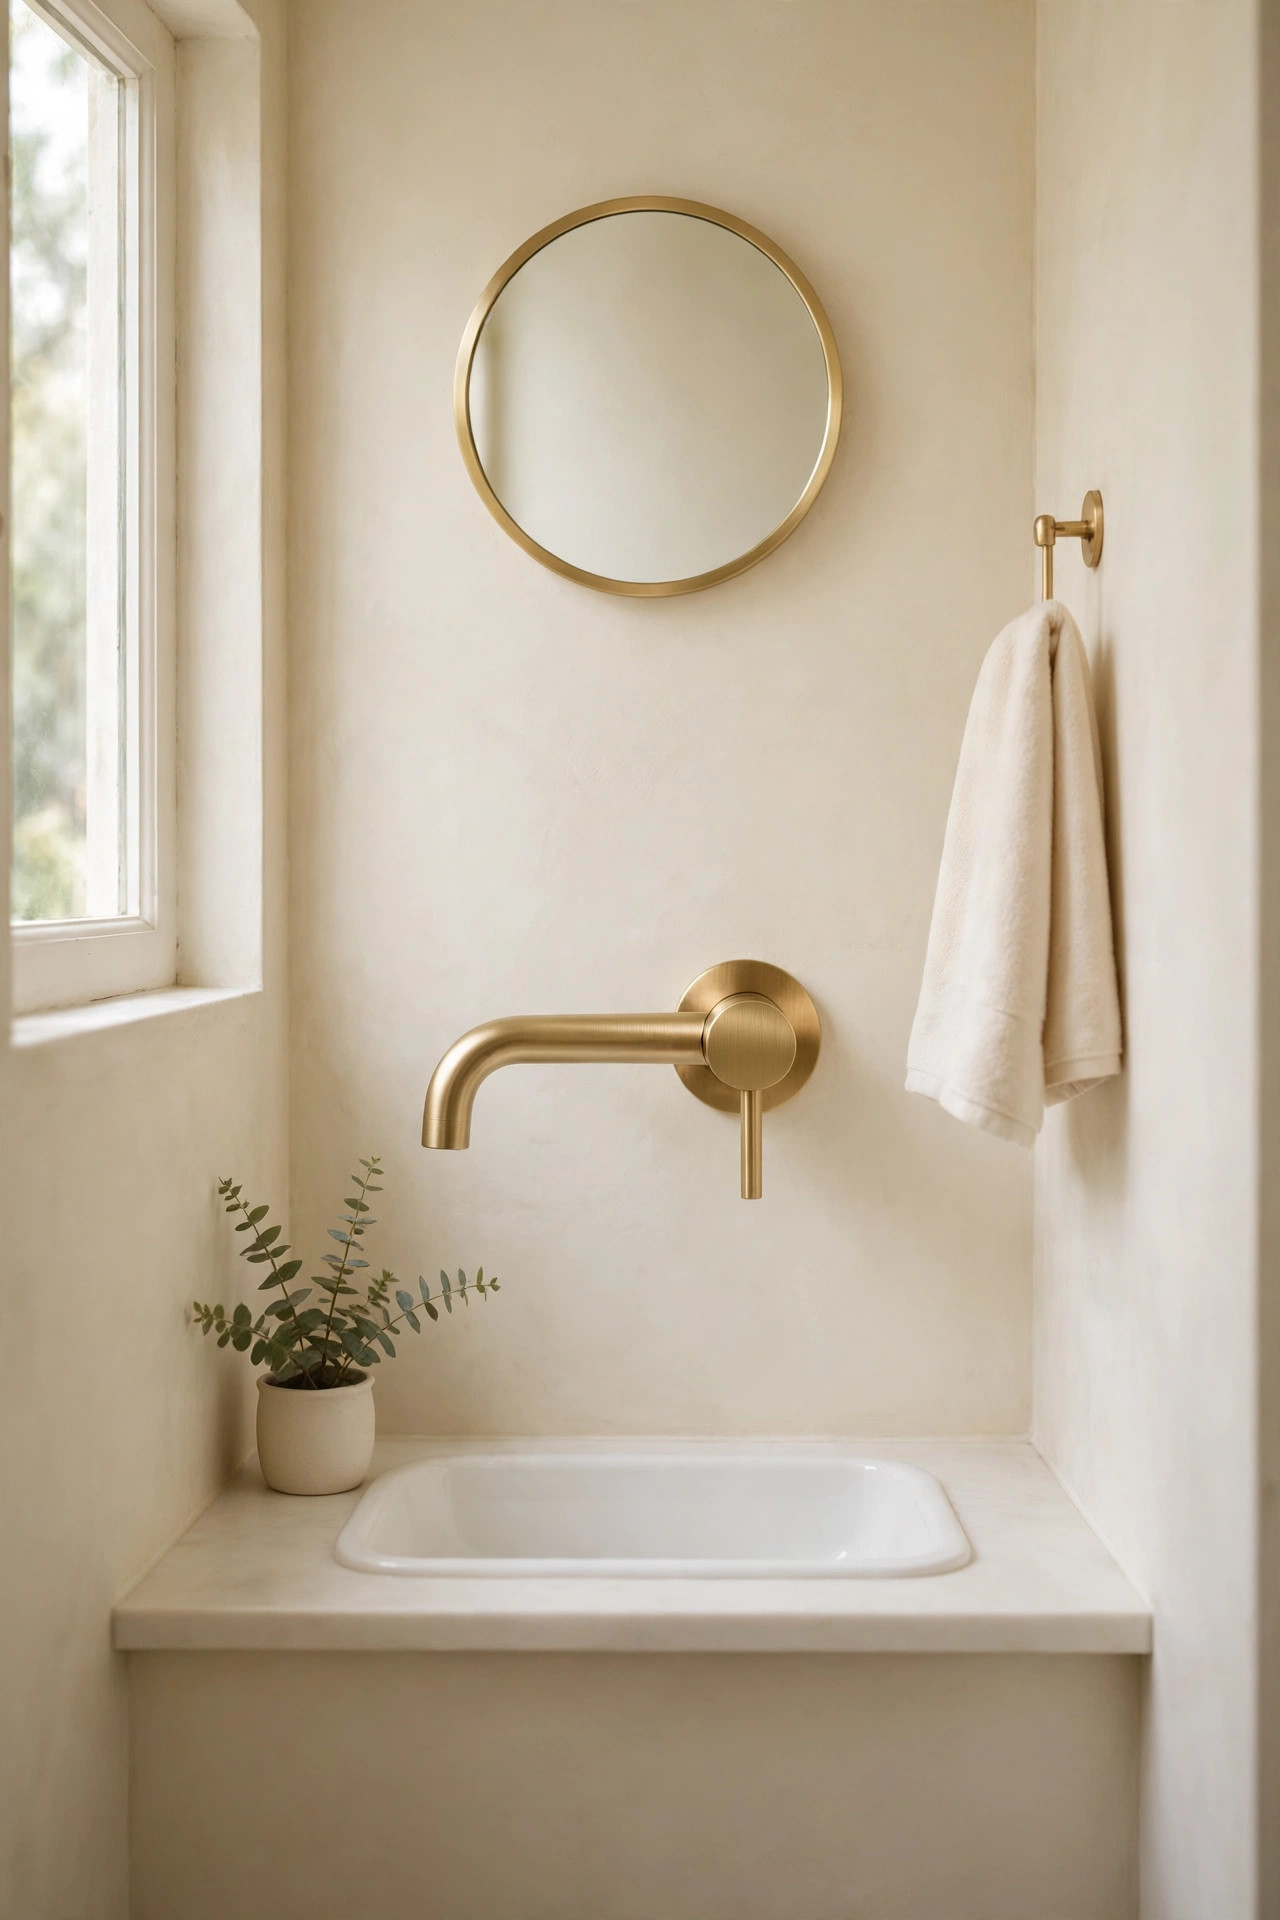
Description: A deck-mounted faucet needs counter depth behind the bowl, which is why standard vanities run 21 to 22 inches deep. Moving the faucet onto the wall lets the sink and counter shrink to 16 to 18 inches deep, returning 3 to 4 inches to the walkway in front. In a 5 foot wide room, that is the difference between squeezing past the vanity and walking past it.
Best For: Remodels in 5 x 7 bathrooms where the vanity wall is being opened anyway, and narrow galley layouts.
Not Ideal For: Quick cosmetic updates, because the valves and spout piping must be roughed into the wall at the right height before tiling.
Estimated Cost: $180-$350 (estimate) for the faucet, plus plumbing labour if the wall is not already open.
Budget Note: This only saves money during a remodel; opening a finished wall just to move a faucet rarely pays for itself in space.
Renter Friendly: No
Renter Note: The plumbing lives inside the wall, so this is strictly an owner project.
What You Need
Wall-mount faucet with rough-in valve, plumber for the in-wall piping if you are not experienced, tile or wall repair materials, level, thread seal tape.
Product recommendation (verified): Kingston Brass KS3247AX Vintage 8 Inch Center Wall Mount Bathroom Faucet, Brushed Brass
Why it fits: The 8 inch centre wall-mount body carries an 8.5 inch spout reach, long enough to clear a shallow 16 to 18 inch sink, and the brushed brass finish matches the gold fittings in this list.
Retailer/product page: https://www.amazon.com/dp/B07DB6Y9VT/ref=cm_sw_r_cso_cp_apan_dp_6VAFHYDYD7883YHNGXSP
How To Do It
- Decide the sink first, because its depth and bowl centre set the spout height and reach you need.
- Have the valve roughed in so the spout lands about 4 to 6 inches above the sink rim, centred on the bowl.
- Pressure-test the in-wall piping before the wall is closed and tiled.
- Fit the trim, handles and spout once the wall finish is complete.
- Run the water at full flow and check the stream lands in the bowl, not on the back edge, before signing off the plumbing.
Pro Tip
If a full wall-mount is too much work, a tall single-hole faucet mounted at the back corner of the sink buys back part of the same counter depth with no wall opening at all.
5. Swap the Swing Door for a Pocket or Sliding Door
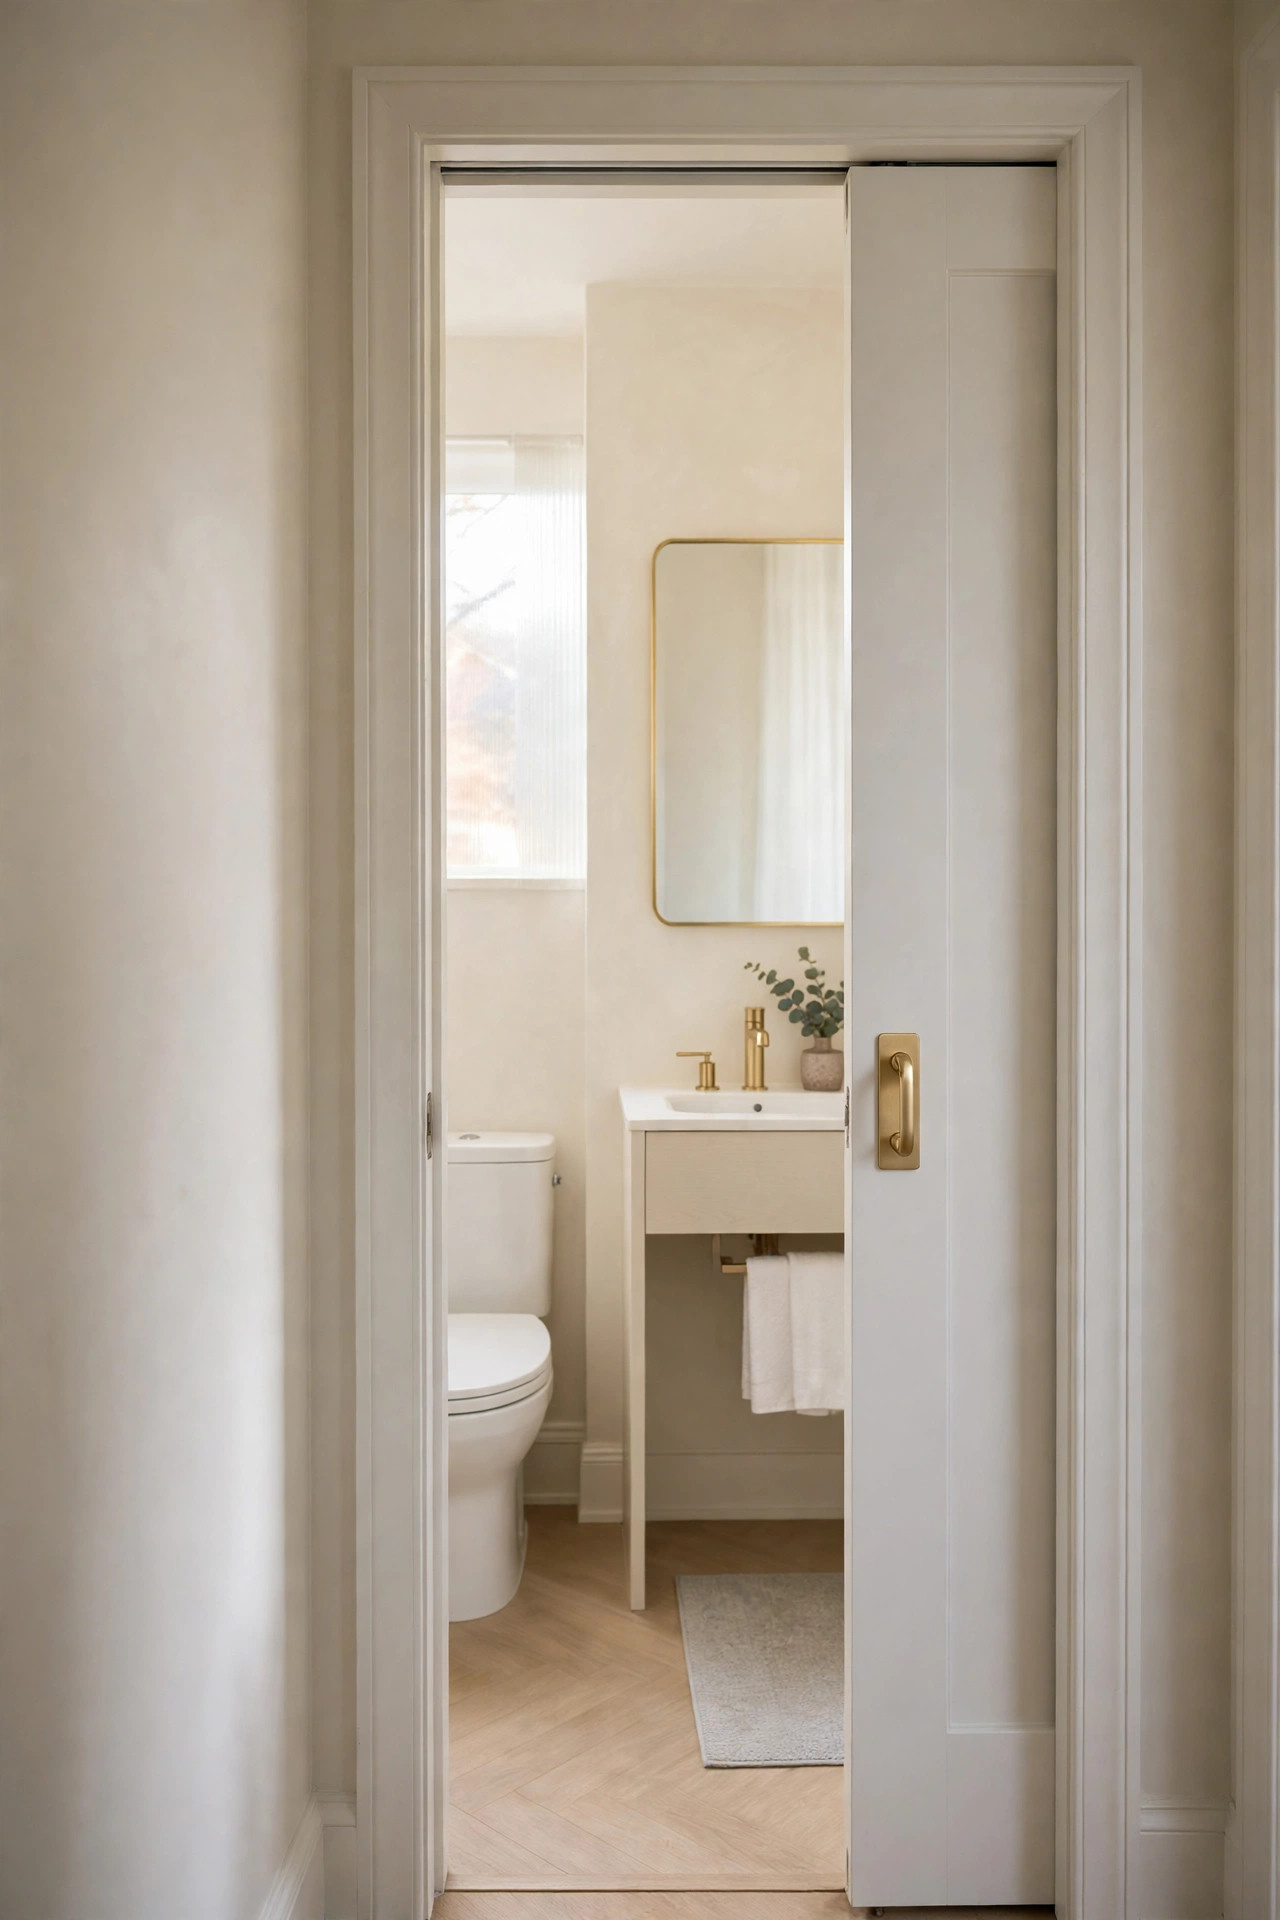
Description: A hinged 28 inch door sweeps a quarter circle of about 4 square feet, and in a 25 to 35 square foot bathroom nothing can sit in that arc: not the vanity, not a stool, not a person drying off. A pocket door slides into the wall and hands the whole arc back to the room. A surface-mounted sliding door on a rail does the same job where the wall cavity is not available.
Best For: 3 x 5 and 5 x 5 bathrooms where the door currently hits the vanity or the toilet, and remodels with one plumbing-free wall.
Not Ideal For: Walls carrying pipes, wiring or the shower valve, which usually cannot take a pocket frame without moving services.
Estimated Cost: $250-$450 (estimate) for the frame kit, plus the door slab, trim and labour.
Budget Note: The kit is the smaller cost; wall opening, drywall repair and repainting are where most of the budget goes.
Renter Friendly: No
Renter Note: This is structural work inside the wall and needs the owner’s permission and, in many areas, a permit.
What You Need
Pocket door frame kit for a 2×4 stud wall, door slab, edge pull and privacy latch, drywall and paint for making good, stud finder and pipe detector.
Product recommendation (verified): Johnson Hardware 1500 Series Soft Close Pocket Door Frame, 32 x 80 inch, for 2×4 stud walls
Why it fits: The kit is made for standard 2×4 stud walls, can be cut down for smaller doors, soft-closes doors up to 200 lb, and comes from a maker that publishes full rough-opening dimensions.
Retailer/product page: https://www.amazon.com/dp/B07D2J3Q16/ref=cm_sw_r_cso_fm_apin_dp_BAN5SYMNAWE1G703WSQ3
How To Do It
- Scan the chosen wall for pipes, cables and the shower valve; if any are present, switch to a surface sliding rail instead.
- Open the wall and frame the rough opening at the size the kit specifies, roughly twice the door width plus 1 inch.
- Fit the frame and track dead level, because a pocket door cannot be adjusted later without reopening the wall.
- Hang the slab, fit the guides, and check the door travels fully into the pocket without rubbing.
- Close the wall, trim the opening, and fit an edge pull and privacy latch rated for bathroom use.
Pro Tip
Fit the privacy latch before the wall is closed up and test it from both sides; pocket door latches are the one part that is miserable to change afterwards.
6. Trade the Tub for a 32 Inch Corner Glass Shower
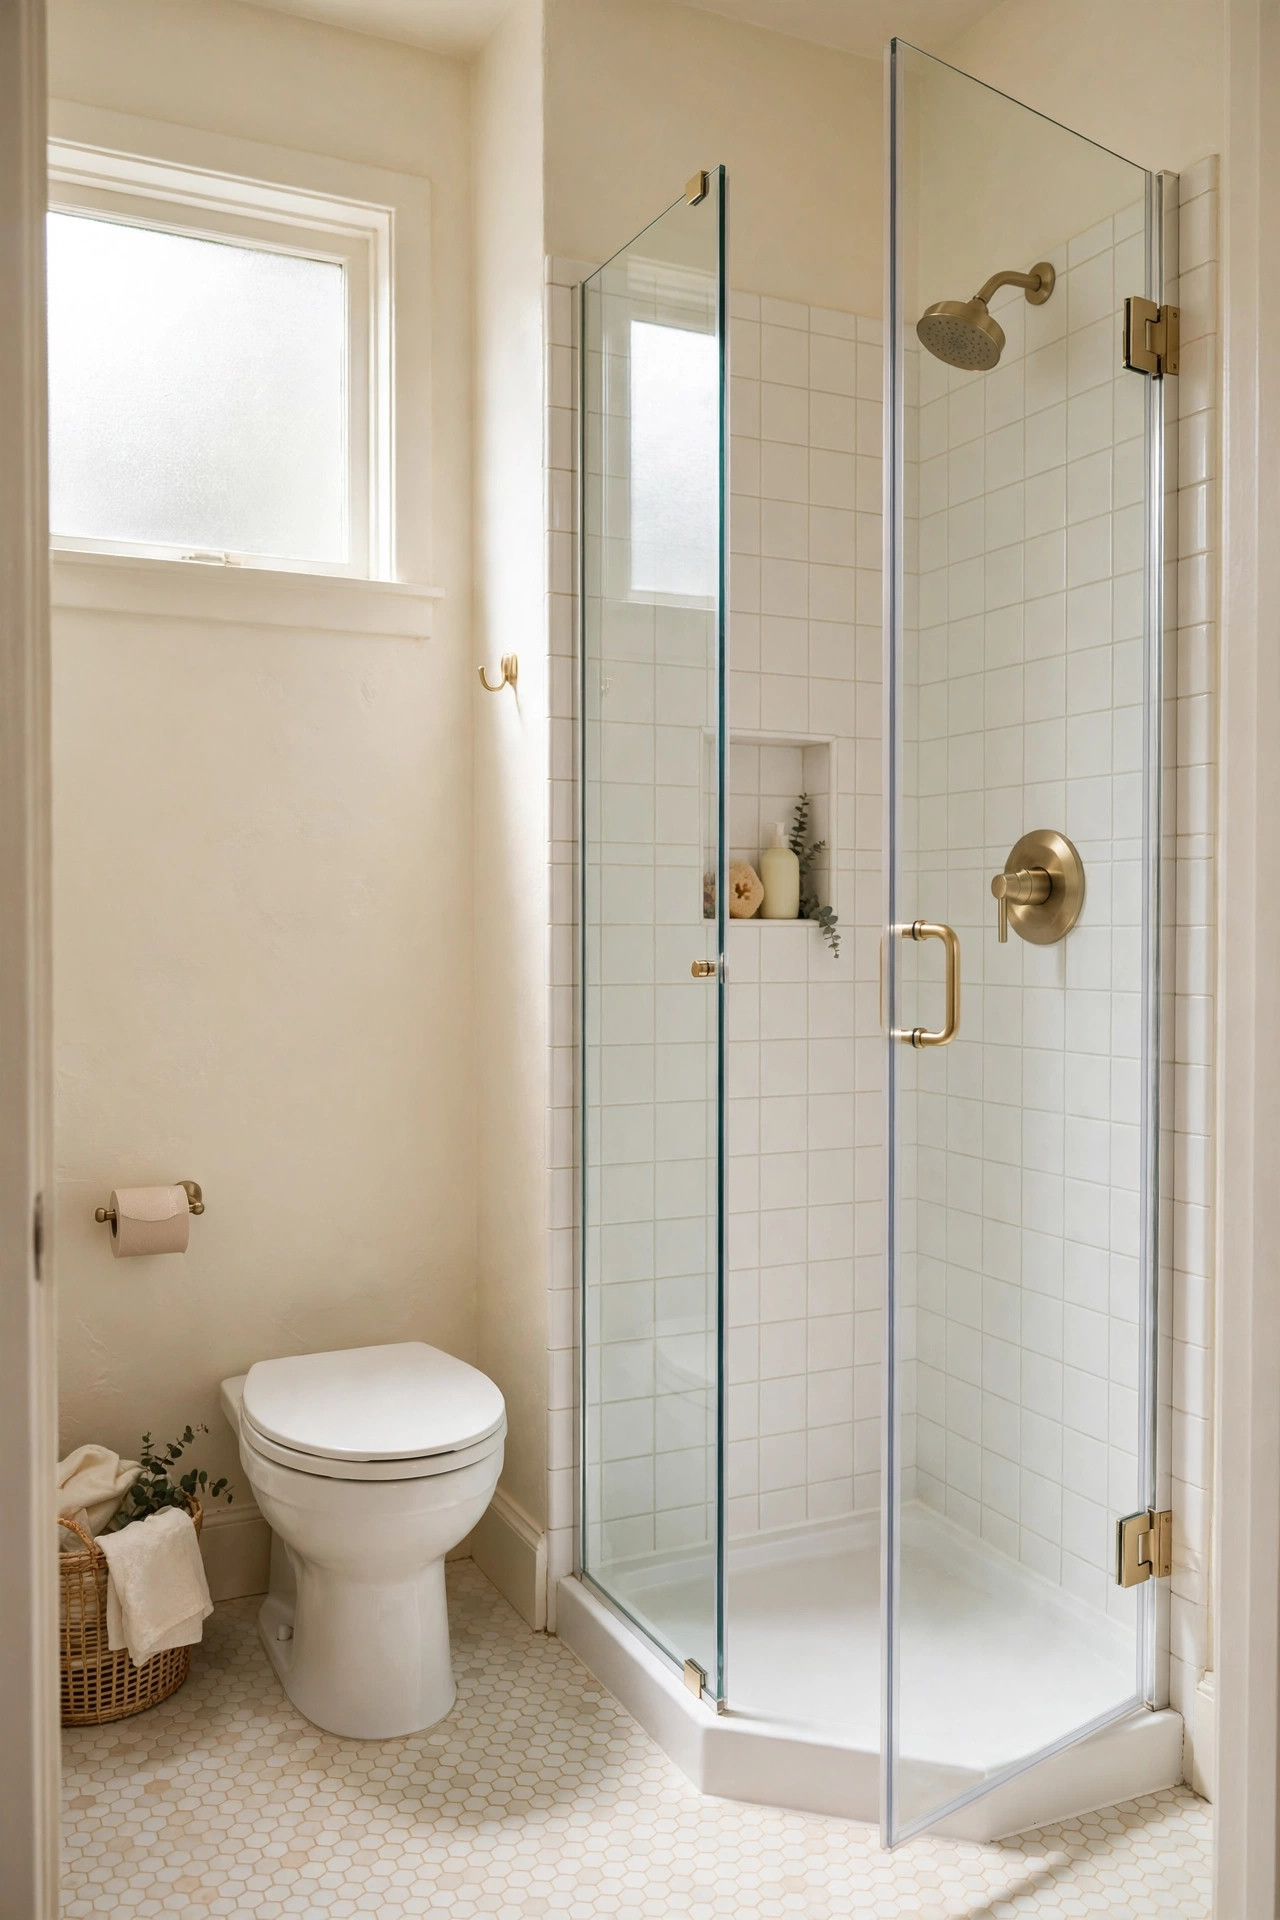
Description: A 60 inch tub fills the whole end of a 5 x 7 bathroom whether anyone bathes or not. A 32 x 32 inch corner shower does the daily job in about 7 square feet and returns roughly 28 inches of length to the room, which is where a linen tower or a wider vanity then fits. Clear glass keeps the sightline open to the back wall, so the room still reads as one space instead of a box inside a box.
Best For: Households that shower only, second bathrooms, and 5 x 7 or 5 x 5 rooms where the tub end wall is wasted.
Not Ideal For: The only bathroom in a home with small children, where losing the tub makes bath time and later resale harder.
Estimated Cost: $900-$1,600 (estimate) for a corner kit with base and walls, plus fitting.
Budget Note: A complete kit with base, back walls and enclosure in one delivery is usually cheaper than buying glass, base and wall panels separately.
Renter Friendly: No
Renter Note: Removing a tub is a full plumbing change and is never a renter project.
What You Need
Corner shower kit (base, back walls, glass enclosure), drain assembly matched to the existing drain position, waterproofing membrane, silicone, level.
Product recommendation (verified): DreamLine Flex 32 x 32 Inch Corner Shower Enclosure Kit, model DL-6716-01CL, chrome, with base and backwalls
Why it fits: The kit is a true 32 x 32 inch corner footprint with a pivot door that needs no sliding track space, tempered glass, and the base and acrylic back walls are included, so the parts are made to fit each other.
Retailer/product page: https://www.amazon.com/dp/B00K5BWKZW/ref=asc_df_B00K5BWKZW
How To Do It
- Confirm the drain position in the floor matches the kit’s corner drain base before ordering.
- Remove the tub, repair the subfloor, and waterproof the corner to the height the kit specifies.
- Set the base dead level in mortar so it does not flex or creak underfoot.
- Fit the back walls, then the glass panels and pivot door, checking the door clears the toilet before final fixing.
- Seal every joint, wait the full cure time, then run the shower and check below and behind for leaks.
Pro Tip
Measure the pivot door’s swing against the toilet position on paper first; in the tightest layouts a bi-fold glass door folds into itself and needs no swing room at all.
7. Keep the Tub but Curve the Shower Rod
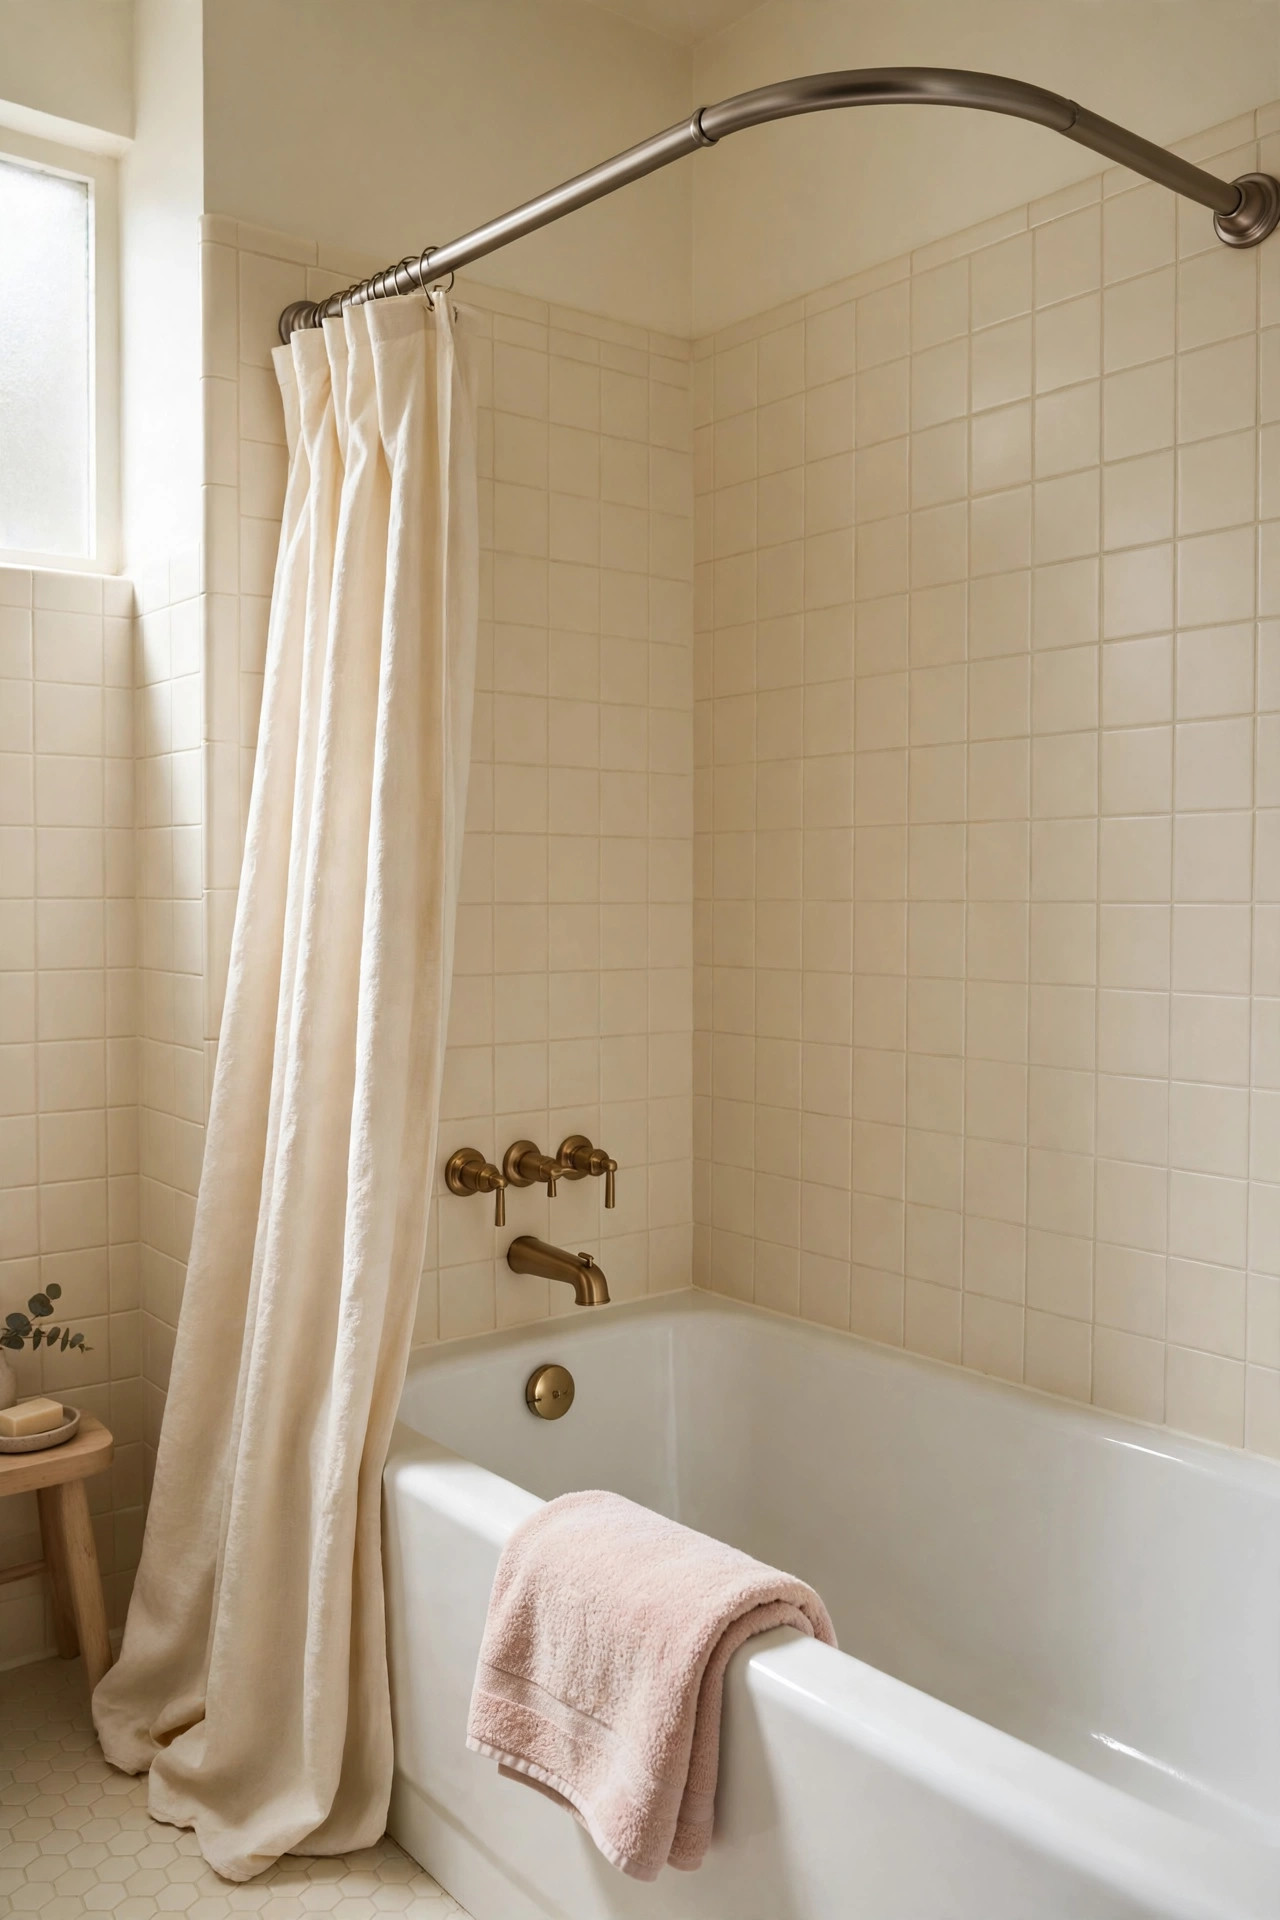
Description: If the tub stays, the cheapest extra space in the room is at shoulder height. A curved rod bows the curtain outward so it stops clinging to wet skin, and the maker of the rod below rates the gain at up to 6.5 inches of extra elbow room across the middle of the tub. Nothing on the floor changes, the curtain still parks inside the tub, and the whole job takes minutes.
Best For: Renters and owners keeping a 60 inch tub in a 5 x 7 bathroom who want the shower to feel less cramped today.
Not Ideal For: Showers over 72 inches wide or alcoves with sloped ceilings that a tension rod cannot grip.
Estimated Cost: $25-$45 (estimate) for a tension curved rod.
Budget Note: The tension version costs about the same as the screw-fixed one and leaves no holes, so it is the default choice unless the walls are tiled and slippery.
Renter Friendly: Yes
Renter Note: A tension rod needs no drilling and comes down in seconds when you move out.
What You Need
Curved tension shower rod sized for a 50 to 72 inch opening, shower curtain and liner, hooks or rings, a step stool.
Product recommendation (verified): Zenna Home Curved Shower Curtain Rod, tension mount, 50 to 72 inch adjustable, Satin Nickel
Why it fits: It adjusts from 50 to 72 inches so it fits a standard 60 inch tub alcove, mounts by tension with no drilling, and the aluminium body is sold as rustproof for wet rooms.
Retailer/product page: https://www.amazon.com/dp/B00JVG5NUG/ref=cm_sw_r_fa_ud_dp_42C4A8WAW0VDH2MW5M73
How To Do It
- Measure the alcove width at the height you plan to hang the rod, usually just above shoulder height.
- Twist the rod to length so it is slightly longer than the opening, then compress it into place.
- Centre the curve so the bow points into the room, not into the tub.
- Thread the curtain and liner on together, liner inside the tub, and check the liner still reaches the tub floor.
- Pull the curtain closed while showering for a week of tests before deciding whether the fixed version is worth drilling for.
Pro Tip
Because the curtain now hangs further out at the top, check that the liner’s bottom hem still falls inside the tub; a longer 78 inch liner solves the drip problem on shorter tubs.
8. Run the Mirror Wall to Wall
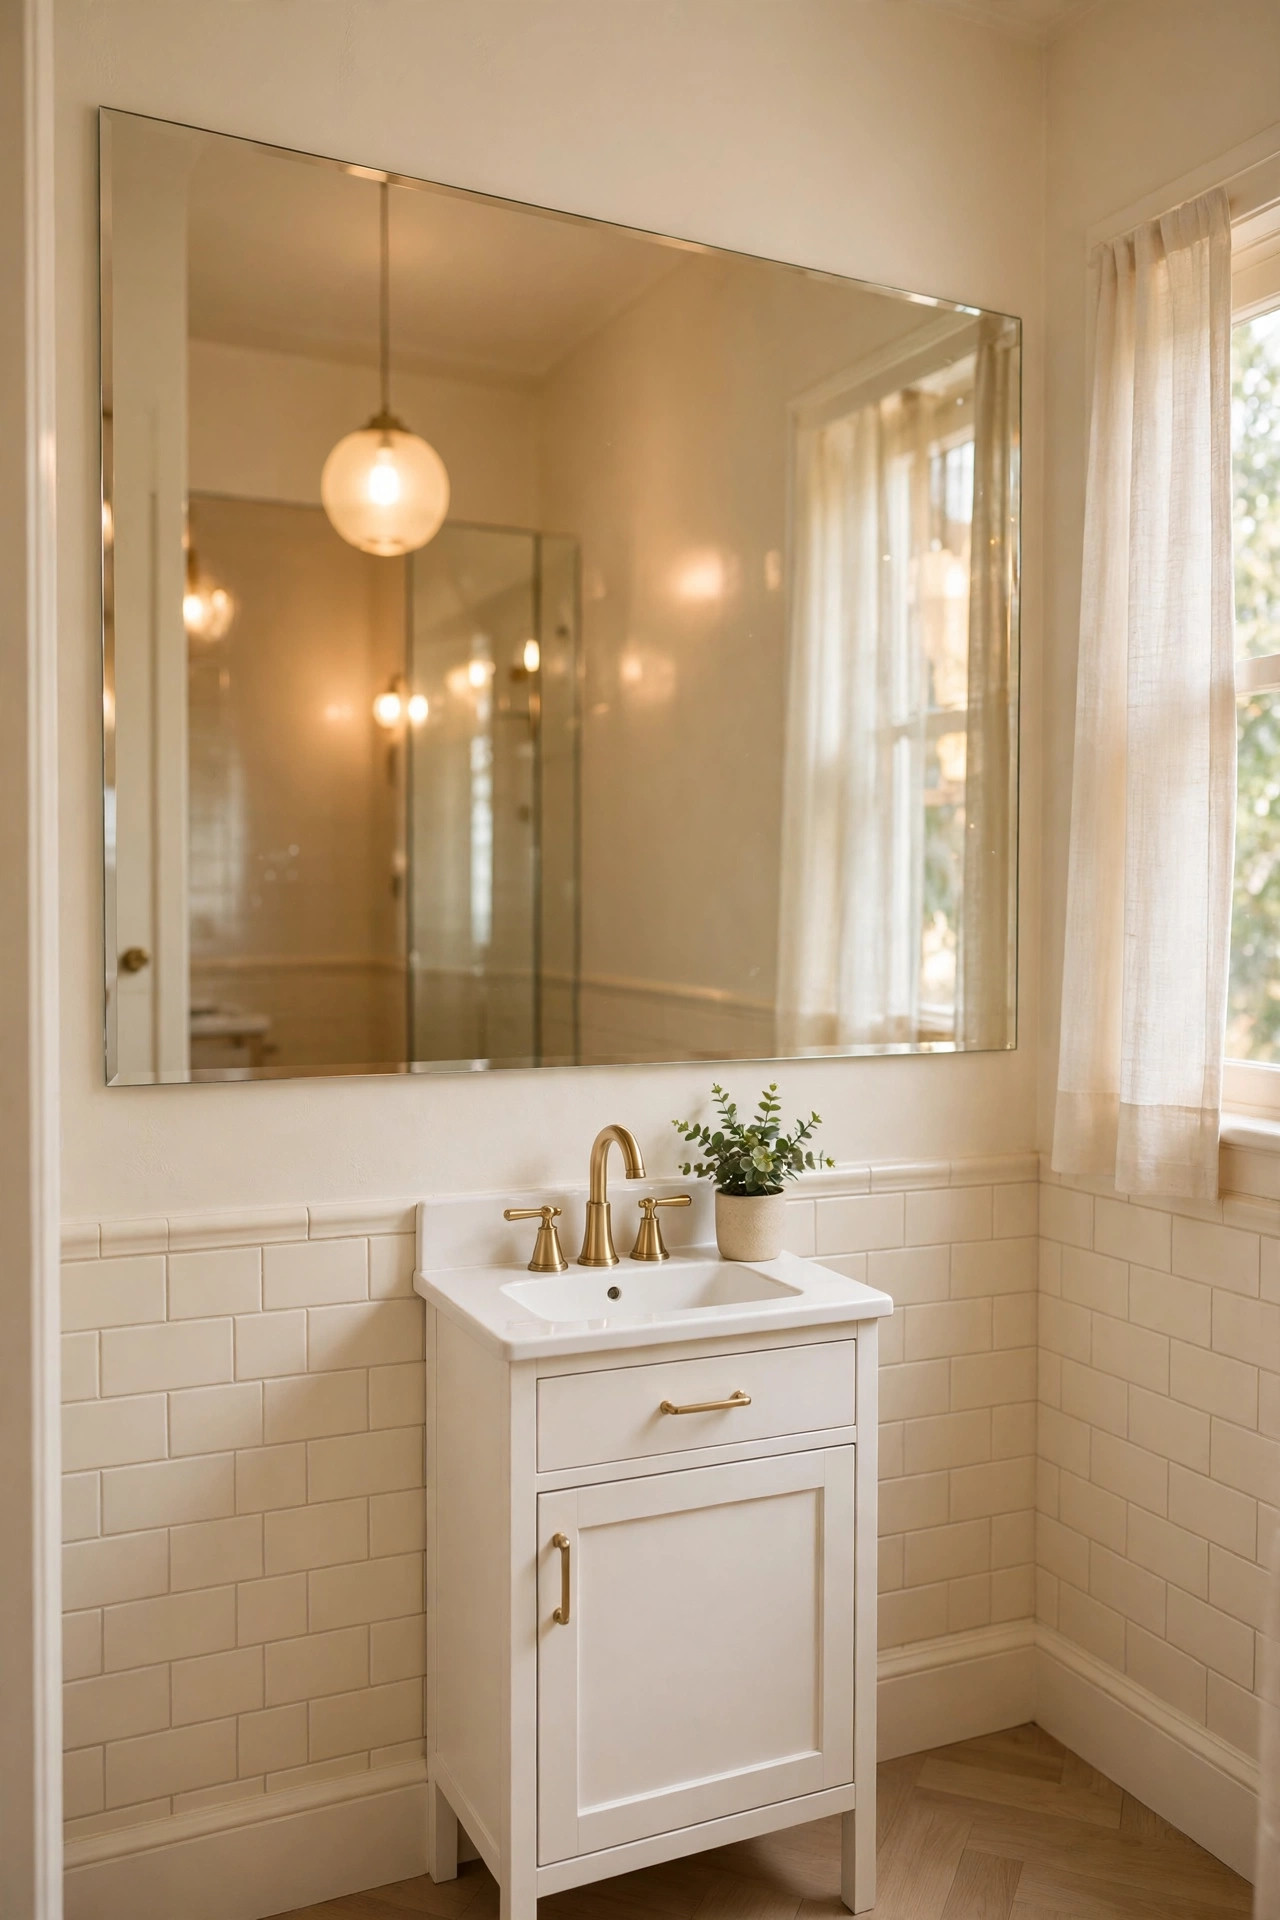
Description: A small mirror in a frame gives you a face-sized reflection and leaves the rest of the wall doing nothing. A frameless mirror sized to the vanity wall, edge to edge, bounces light from the window or the vanity light across the whole room and doubles every fixture it reflects. On a 30 to 36 inch wall section it also removes the painted gaps at each side that make a small vanity wall look chopped up.
Best For: Windowless tiny bathrooms and any vanity wall between 30 and 48 inches wide.
Not Ideal For: Walls that are noticeably out of square, where a full-width slab of glass shows every gap at the corners.
Estimated Cost: $70-$130 (estimate) for a 24 x 36 inch frameless beveled mirror.
Budget Note: One large frameless mirror costs less than a smaller framed mirror plus the sconces people add to fill the empty wall beside it.
Renter Friendly: With Conditions
Renter Note: Use clips or brackets into studs where you can; heavy-duty removable mirror strips exist for lighter mirrors, but a 24 x 36 inch glass sheet should be mechanically fixed, so ask first.
What You Need
Frameless beveled mirror, mirror clips or pivot brackets, wall anchors rated for the weight, level, painter’s tape, a second pair of hands.
Product recommendation (verified): Hamilton Hills Frameless Beveled Rectangle Mirror, 24 x 36 inch, with pivot brackets
Why it fits: Hung with the 36 inch side horizontal it covers most of a small vanity wall, the beveled edge finishes it without a frame eating width, and the safety-backed glass is made for bathroom walls.
Retailer/product page: https://www.amazon.com/dp/B081S9C26N/ref=btn_assoc_p-instagram_o-1_srctok-4b245b26d4d7f5dd_ht-t_lf_lspvrd_qv_asin
How To Do It
- Measure the wall between the side wall and any door trim, and order a mirror 1 to 2 inches narrower than that gap.
- Mark a level line so the mirror’s bottom edge sits 4 to 6 inches above the backsplash.
- Fix the lower brackets or clips into studs or rated anchors, checking for pipes behind the wall first.
- Lift the mirror in with help, settle it onto the lower fixings, then close the top brackets.
- Check the reflection from the doorway: it should bounce light or a window, not stare straight at the toilet.
Pro Tip
If the wall is too wide for one stock mirror, hang two identical frameless mirrors side by side with a hairline gap; the reflection still reads as one sheet of glass.
9. Recess the Medicine Cabinet Between the Studs
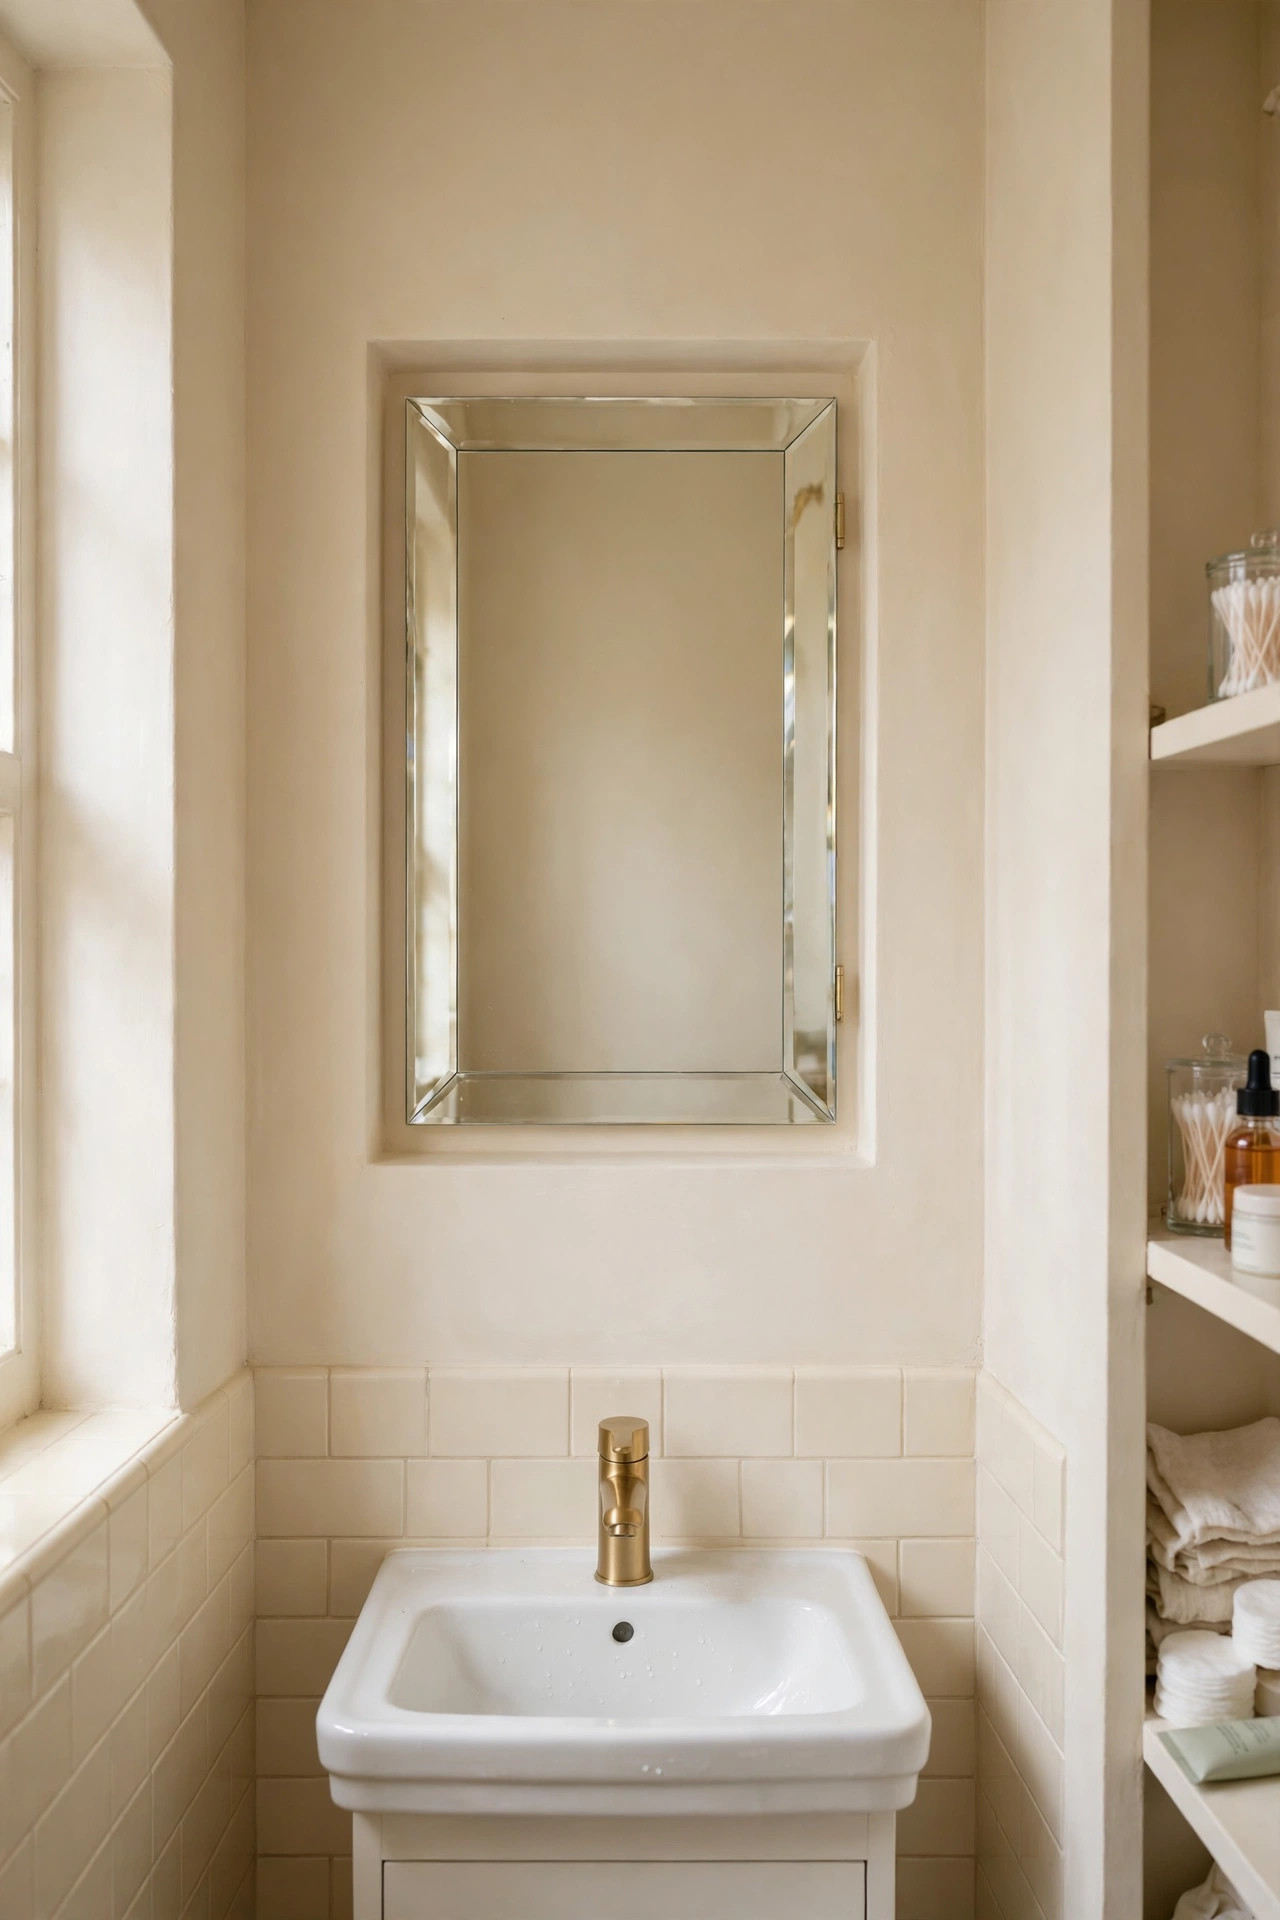
Description: A surface cabinet sticks 5 inches out over the sink, exactly where your head goes when you lean in to wash. A recessed cabinet hides its depth inside the wall cavity, so the mirror sits nearly flush and the storage is free: three shelves of bottles that no longer live on the counter. A standard 16 x 26 inch cabinet is sized to fit the bay between studs on a typical interior wall.
Best For: Owner-remodels of 5 x 7 and 5 x 5 bathrooms where the counter is the only storage and it is always crowded.
Not Ideal For: Exterior walls with insulation and vapour barriers, and walls hiding the shower valve or main waste stack.
Estimated Cost: $90-$160 (estimate) for the cabinet; cutting and patching are DIY or a small handyman job.
Budget Note: The cabinet itself is modest; the cost to avoid is hitting a pipe, so a stud finder with pipe detection is part of the real budget.
Renter Friendly: No
Renter Note: It requires cutting drywall, so renters should pick a surface-mount mirrored cabinet instead and accept the small projection.
What You Need
Recessed medicine cabinet, stud and pipe finder, drywall saw, level, shims, screws, paintable caulk.
Product recommendation (verified): Hamilton Hills 16 x 26 Inch Recessed Medicine Cabinet with Beveled Mirror
Why it fits: The 16 x 26 inch size is built around a standard stud bay, the beveled mirror door matches the frameless look in idea 8, and three adjustable glass shelves let tall bottles and short jars share the depth.
Retailer/product page: https://www.amazon.com/dp/B081S9RBN6/ref=cm_sw_r_apin_dp_GE9P059CP2J89S4VG6QT
How To Do It
- Scan the wall above the sink for studs, pipes and cables, and mark a rough opening that fits between two studs.
- Cut the opening to the size in the cabinet instructions, usually about 14 inches wide by 24 inches high for this size.
- Test-fit the box, shim it level and plumb, and screw through the cabinet sides into the studs.
- Seal the edges with paintable caulk so steam cannot creep into the wall cavity.
- Hang the door, adjust the glass shelves, and load the heaviest bottles on the lowest shelf.
Pro Tip
Before cutting, open a small inspection hole low in the marked area and look inside with a phone light; it is the cheapest way to find the pipe that the scanner missed.
10. Build the Shower Storage Into the Wall
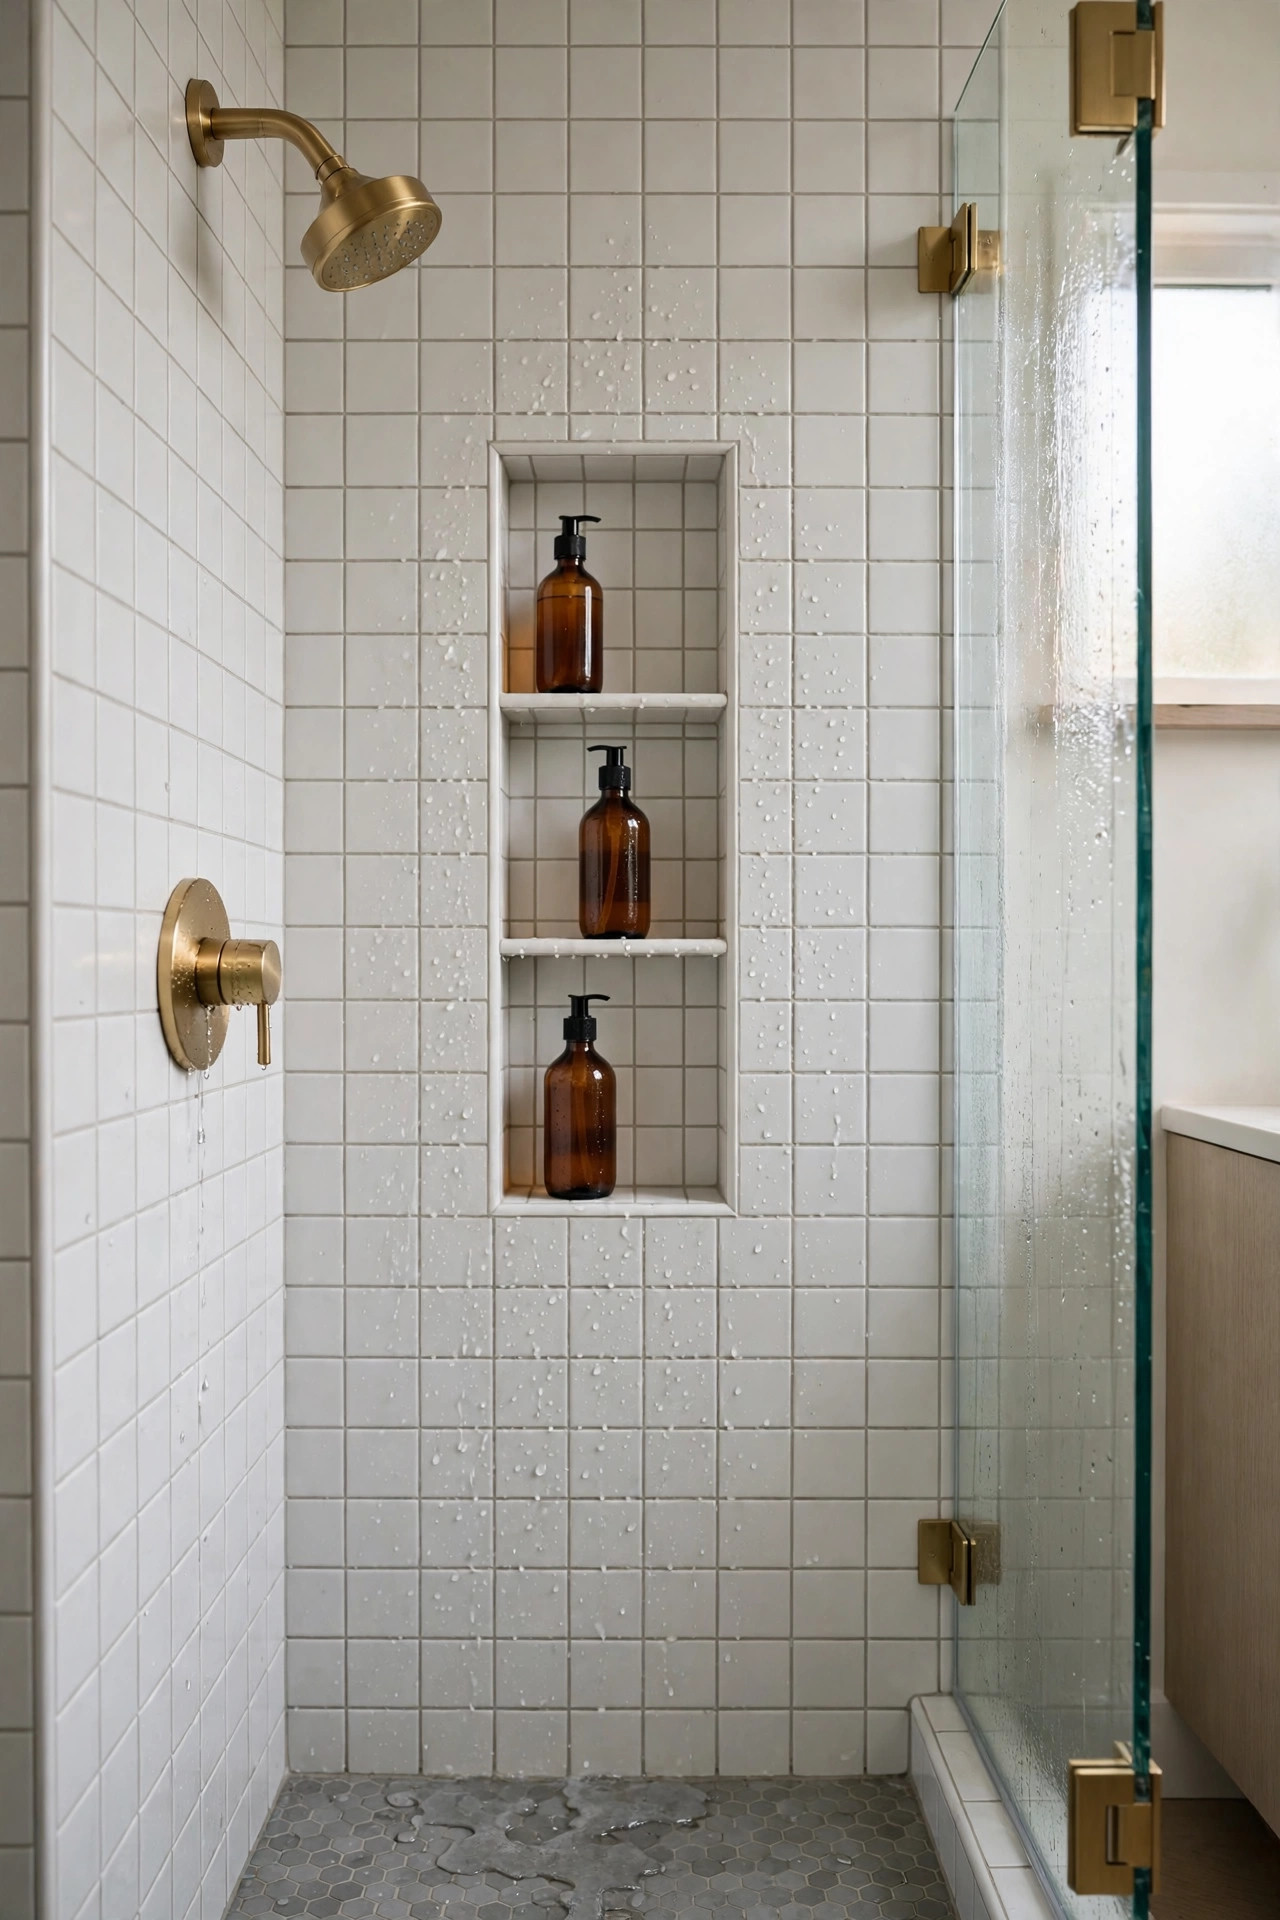
Description: In a 32 inch shower, a wire rack or a row of bottles on the floor takes space your feet and elbows genuinely need. A recessed niche moves shampoo storage into the wall itself, between the studs, so the shower keeps its full width. A 12 x 24 inch niche holds the daily bottles for two people with a shelf spare, and it never rusts, tips or falls at 2 a.m.
Best For: Tiled showers in owner remodels, especially 32 to 36 inch showers where floor and ledge space are gone.
Not Ideal For: Shower walls on exterior walls in cold climates, where a niche can become a cold spot and a condensation risk.
Estimated Cost: $90-$170 (estimate) for a stainless niche insert, plus tile and waterproofing already in the shower budget.
Budget Note: The insert replaces the fiddliest part of a hand-built niche, the waterproof box, so most of its cost returns as saved tiler time.
Renter Friendly: No
Renter Note: The niche is cut into the shower wall during tiling, so it belongs to a remodel, not a rental refresh.
What You Need
Stainless steel niche insert, waterproofing membrane and sealant, tile and grout, level, screws for the flange.
Product recommendation (verified): Neodrain Stainless Steel Shower Niche, inner size 24 x 12 x 4 inch, white, tile-ready, 304 stainless steel
Why it fits: Turned upright it fits a single stud bay at 12 inches wide, the 4 inch depth matches standard framing, and the tile-ready body is rated for up to 25 lb of bottles.
Retailer/product page: https://www.amazon.com/dp/B088F91FJ8/ref=cm_sw_r_cso_fm_apin_dp_RHFRRMQCRJXQF9MN421R
How To Do It
- Choose the niche wall first: the wall opposite the shower head keeps bottles out of the direct spray and is easiest to reach.
- Frame or confirm the opening between studs at a height between 36 and 48 inches, comfortable for a standing reach.
- Fix the insert level with a very slight fall toward the room so water runs off its floor, never into the wall.
- Seal every edge into the waterproofing layer before any tile goes on; a niche fails at its corners, not its centre.
- Tile, grout, and silicone the inside corners where the niche meets the shower walls.
Pro Tip
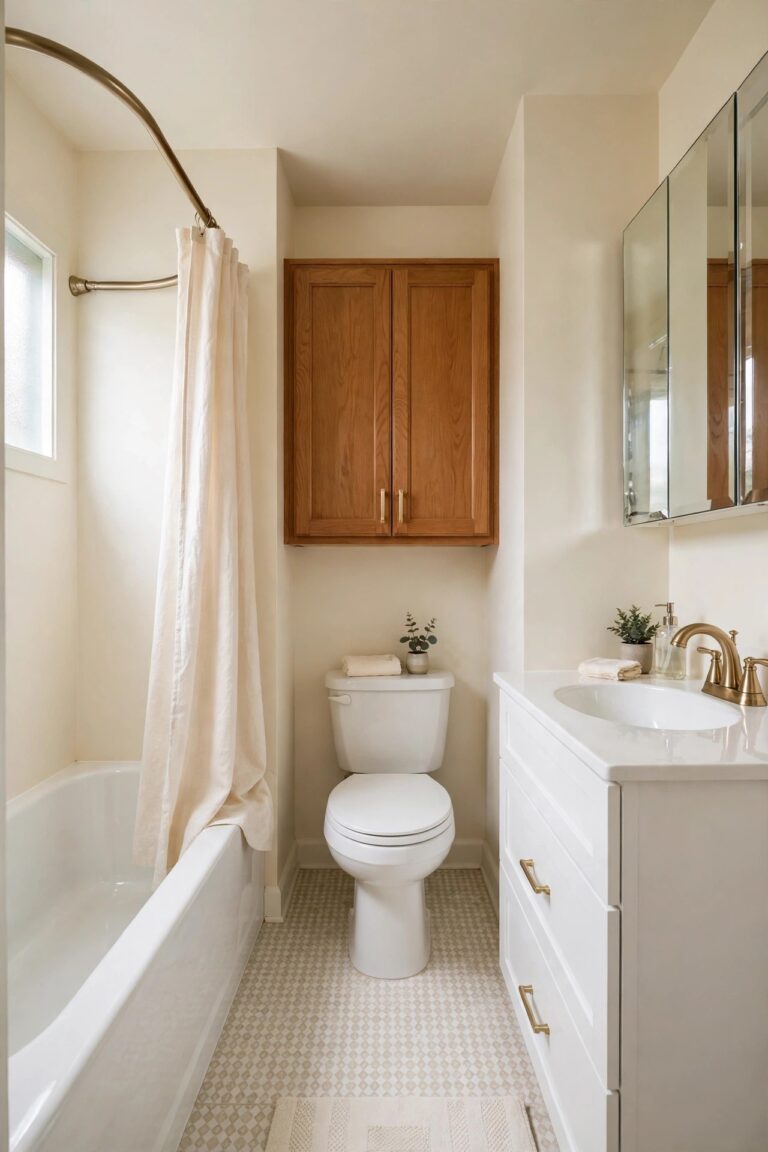
Stand in the dry shower and mime washing your hair before fixing the height; a niche set for the drawings instead of your elbows ends up too low for tall bottles or too high to reach safely.
11. Claim the Wall Above the Toilet
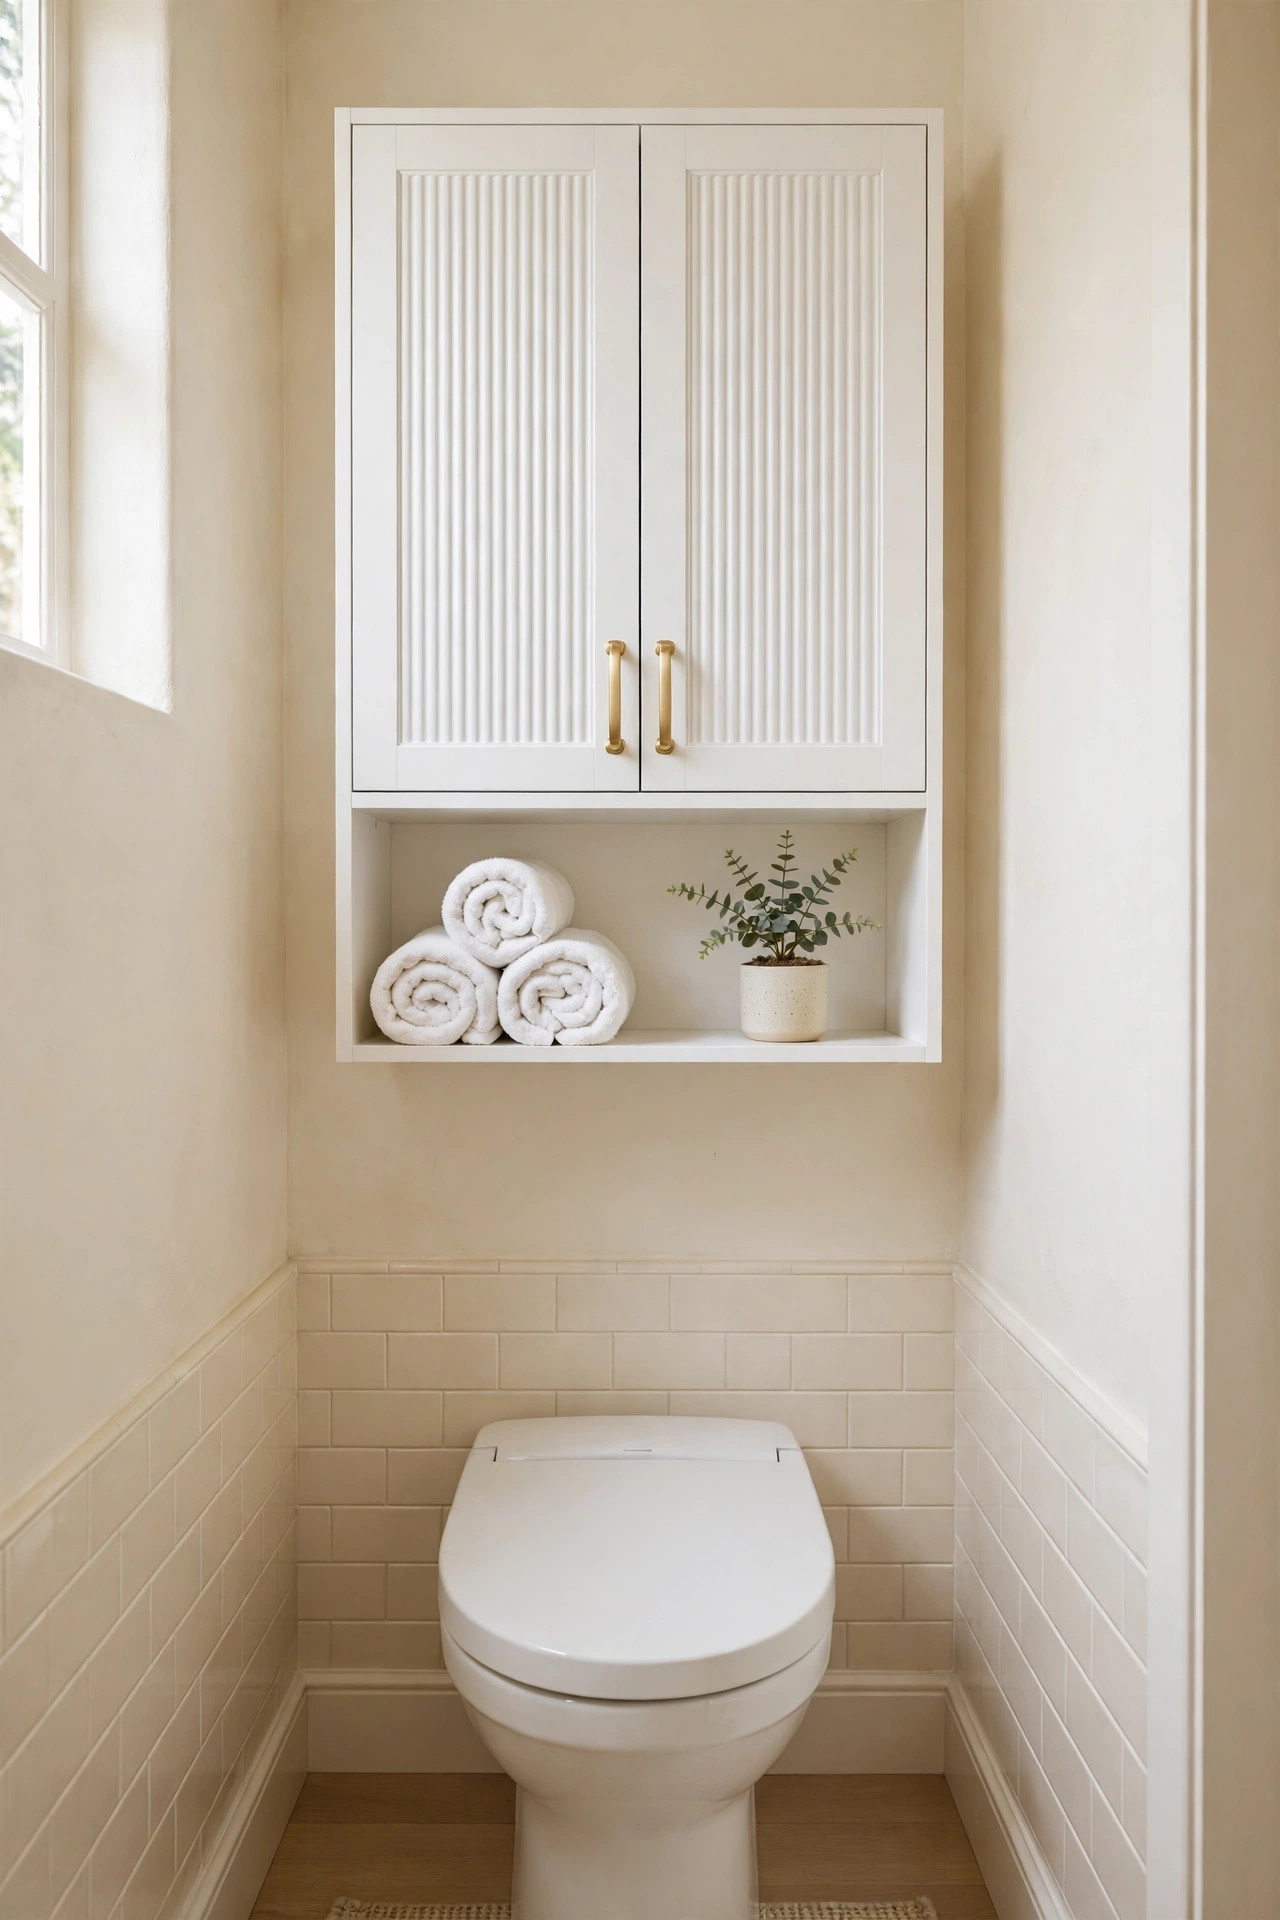
Description: The two feet of wall above the toilet tank are the largest unused storage zone in most tiny bathrooms. A freestanding over-toilet cabinet legs around the tank and turns that zone into closed storage for spare rolls, cleaning bottles and the medicines that should not sit in shower steam. At under 10 inches deep it stores plenty without looming over anyone seated below.
Best For: Any tiny bathroom with a standard toilet and no linen closet, renters included.
Not Ideal For: Toilets tucked under a sloped ceiling or a window, and tanks with a top-flush button the cabinet frame would block.
Estimated Cost: $110-$170 (estimate) for a cabinet with doors and an adjustable shelf.
Budget Note: Closed doors cost a little more than open shelves and are worth it above a toilet, where dust and steam settle on everything left out.
Renter Friendly: Yes
Renter Note: It stands on its own legs with no wall fixing; use the included anti-tip kit, and if your lease bans screws, swap it for furniture anti-tip straps that hook over the top.
What You Need
Over-toilet cabinet, tape measure, level, screwdriver for assembly, anti-tip kit, felt pads for the feet.
Product recommendation (verified): VASAGLE MAXE Collection Over The Toilet Storage Cabinet, 23.6 inch wide, Cloud White, model UBTS028W01
Why it fits: At 23.6 inches wide by 9.8 inches deep it clears a standard tank, the bottom bar adjusts in height to work around different plumbing, the fluted doors hide clutter, and an anti-tip kit is included.
Retailer/product page: https://www.amazon.com/dp/B0F31YHS1K/ref=sspa_mw_detail_6
How To Do It
- Measure the tank width, the height from floor to the top of the tank, and check the flush handle or button clears the frame.
- Assemble the cabinet flat in the largest room you have, then carry it in; there is no room to build it in place.
- Slide it over the toilet, level the feet, and fit the anti-tip kit before loading anything.
- Check the tank lid still lifts off for maintenance and the flush works with the cabinet loaded.
- Load heavy bottles low and spare towels up top, keeping the open shelf for the light, good-looking pieces.
Pro Tip
Leave the middle shelf for a small basket of spare rolls; above a toilet, a basket stops rolls falling into the bowl when you reach one-handed.
12. Slide a Slim Linen Tower Into the Gap
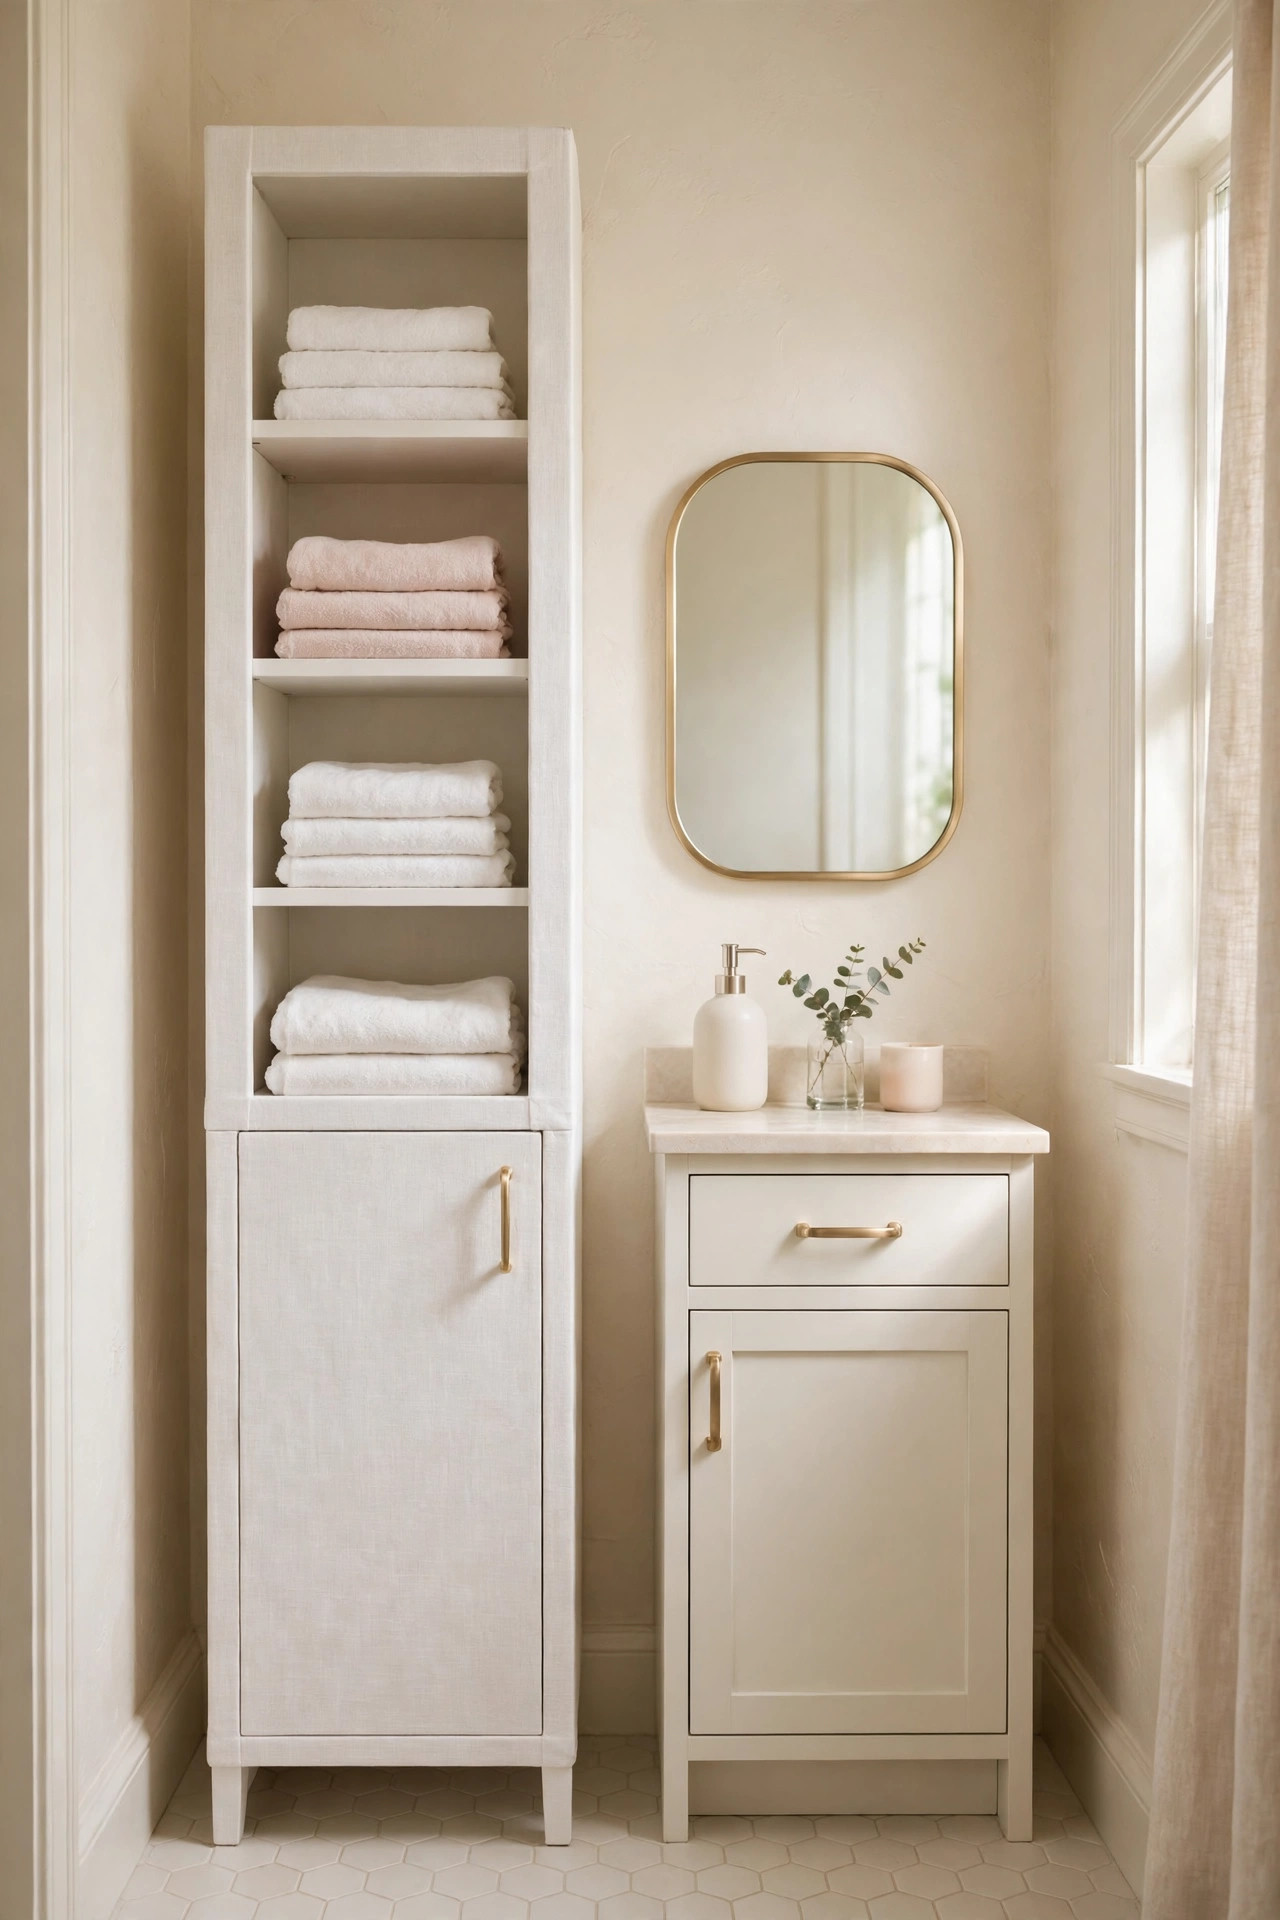
Description: Most tiny bathrooms have one useless gap: 12 to 18 inches beside the vanity or between the toilet and the wall. A slim tower built for that width turns the gap into a linen press, with open shelves for folded towels, a drawer for small things and a closed cupboard for cleaners. Because it is tall instead of wide, it stores like a closet while standing on about 1.4 square feet of floor.
Best For: 5 x 7 bathrooms with a measured gap of at least 16 inches beside the vanity or toilet.
Not Ideal For: Gaps under 14 inches, and spots where the tower would block a heating vent or the door’s full opening.
Estimated Cost: $90-$150 (estimate) for a slim tower with drawer and cupboard.
Budget Note: One tower that mixes open shelves, a drawer and a closed section replaces the shelf unit, basket and caddy you would otherwise buy separately.
Renter Friendly: Yes
Renter Note: It is freestanding; fix the anti-tip strap as in idea 11, since a tall narrow cabinet in a small room should never stand unsecured.
What You Need
Slim linen tower, tape measure, level, screwdriver, anti-tip kit, folded towels and a small basket for the open shelves.
Product recommendation (verified): VASAGLE Storage Cabinet, Slim Linen Tower with Drawer and Door, 15.7 x 12.6 x 63 inch, White, model UBBC63WT
Why it fits: The 15.7 inch width and 12.6 inch depth are made for the gap beside a vanity, and the mix of open shelving, drawer and closed cabinet matches how bathroom storage is actually used.
Retailer/product page: https://www.amazon.com/dp/B07BDLD1LV/ref=as_li_ss_tl
How To Do It
- Measure the gap at floor level and at counter height; baseboards steal about half an inch, so measure above them too.
- Assemble the tower in another room and check the door and drawer open toward the usable side before moving it in.
- Slide it into the gap, level it on its adjustable feet, and fit the anti-tip kit.
- Load by frequency: daily towels at hand height, spare bottles low, rarely used items at the top.
- Leave the top open shelf for folded towels only, so the tower reads calm rather than cluttered.
Pro Tip
If your gap is 13 inches or less, skip the tower and hang two shallow wall shelves there instead; a cabinet that has to be forced in will chip both itself and the vanity.
13. Pair Large Wall Tile With a Small Mosaic Floor
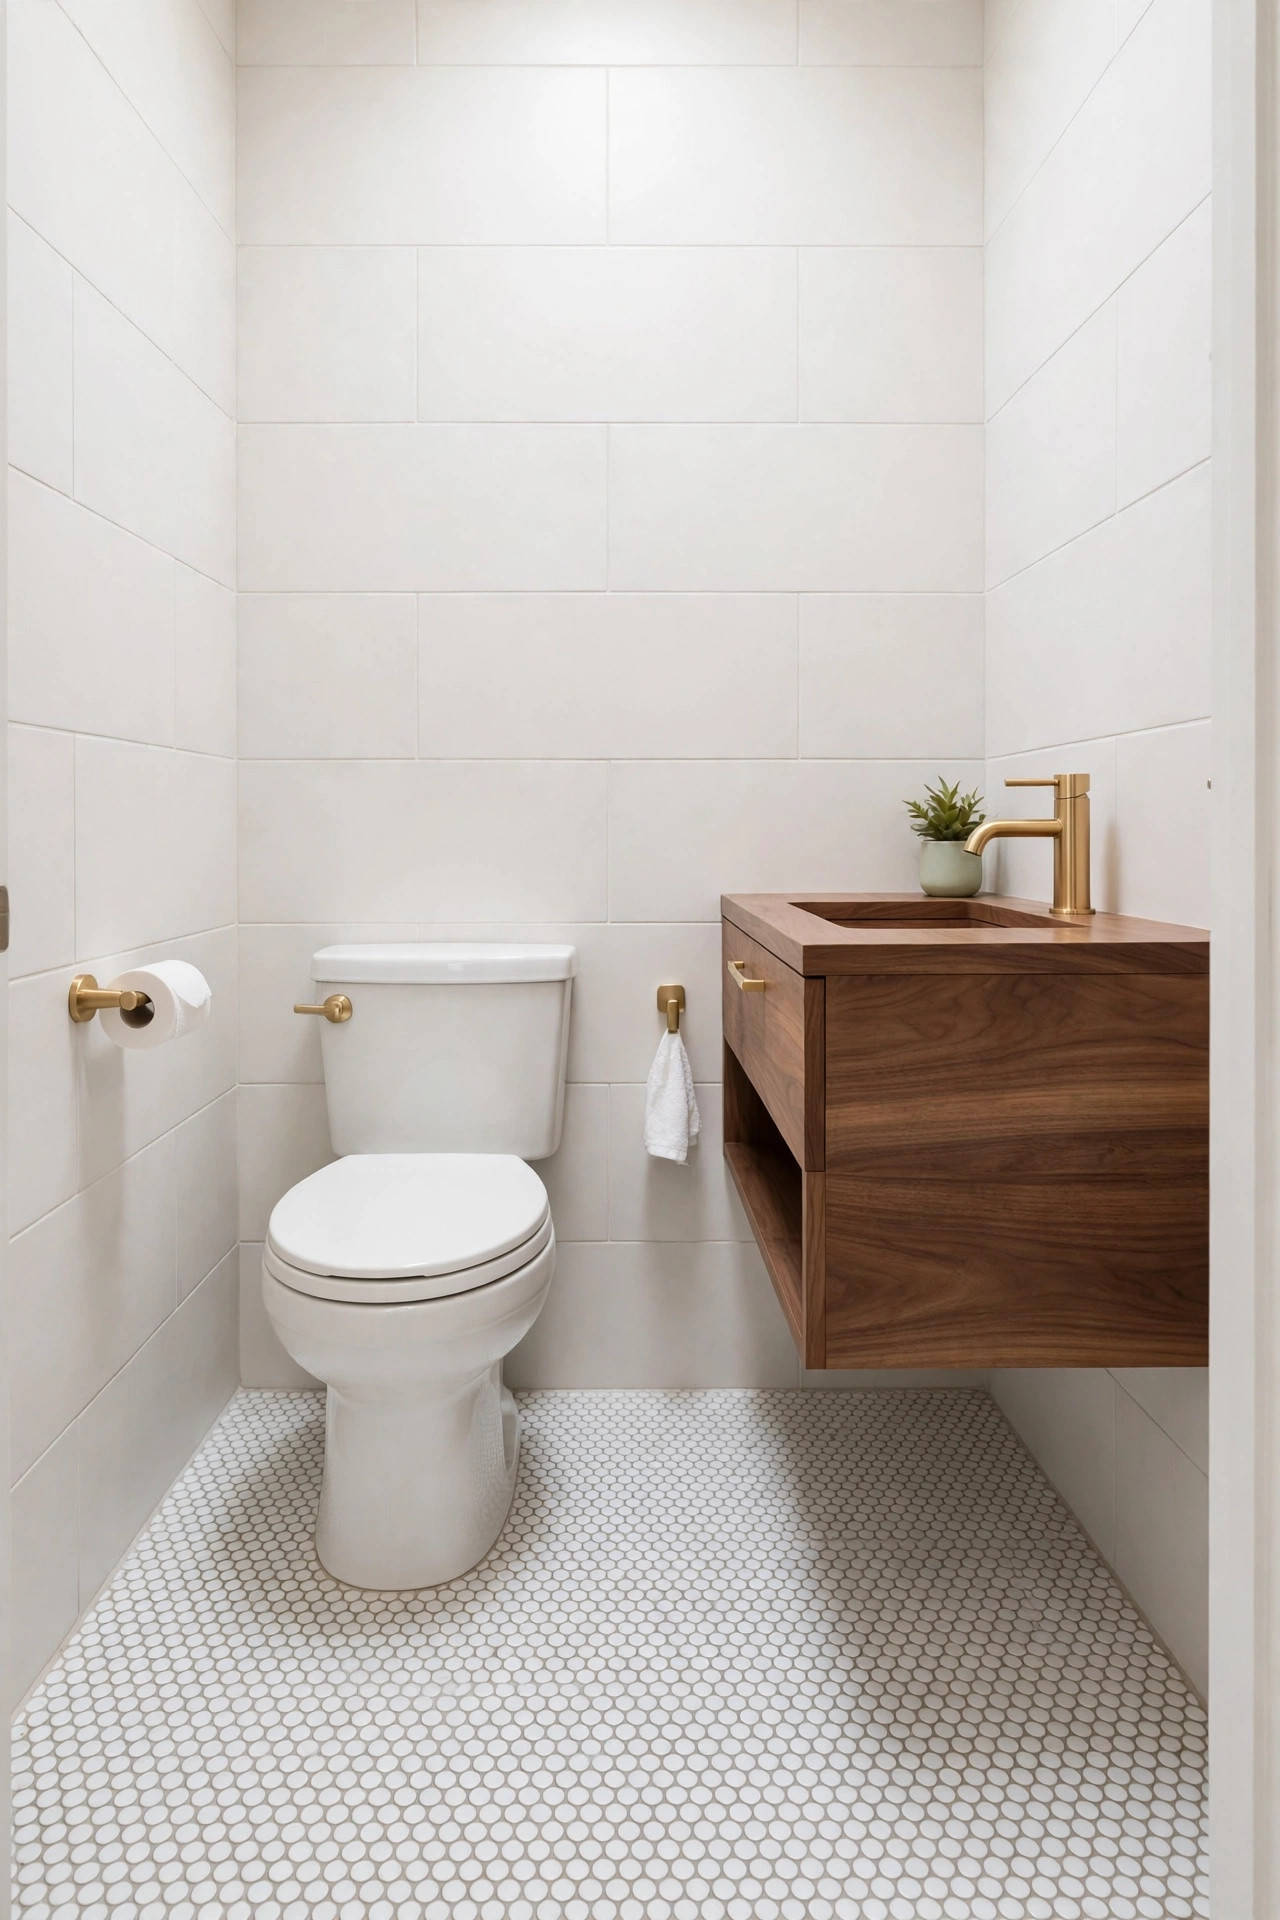
Description: Tile scale steers how big a tiny floor feels. Large, pale wall tiles with few grout lines keep the walls calm and unbroken, while a small penny or hex mosaic on the floor does the practical work: hundreds of grout joints give wet feet grip that a big polished tile cannot. Matching the grout closely to the tile colour on the walls keeps the pattern quiet, and one repeated pale palette ties floor, walls and fixtures together.
Best For: Owner remodels retiling a 5 x 7 or smaller bathroom, especially windowless rooms that need all the reflected light they can get.
Not Ideal For: Floors with movement or a weak subfloor, where small mosaics telegraph every crack; fix the base first.
Estimated Cost: $5-$9 per square foot (estimate) for porcelain mosaic, plus setting materials and labour.
Budget Note: A tiny bathroom floor is only 25 to 35 square feet, so the upgrade from basic tile to a good mosaic costs less here than in any other room.
Renter Friendly: No
Renter Note: Retiling is permanent work; renters can borrow the look with a washable pale runner over the existing floor instead.
What You Need
Porcelain penny or hex mosaic sheets for the floor, large format pale tile for the walls, thinset, grout in a colour matched to the wall tile, tile spacers, a notched trowel, grout float.
Product recommendation (verified): Merola Tile Hudson Penny Round Porcelain Mosaic Tile, Glossy White, 12 x 13 inch sheets (Home Depot, model FKOMPR11)
Why it fits: The penny rounds come on mesh sheets that are easy to lay in a small, cut-heavy floor, the porcelain body is rated for bathroom floors and walls, and the white glaze keeps a windowless room bright. Choose the matte version of the same line for the floor if your store stocks it, since matte grips better when wet.
Retailer/product page: https://www.homedepot.com/p/Merola-Tile-Hudson-Penny-Round-Glossy-White-12-in-x-13-in-Porcelain-Floor-and-Wall-Mosaic-Tile-10-5-sq-ft-Case-FKOMPR11/100541361
How To Do It
- Work out the layout dry, centring the pattern so the cut edges at both walls are balanced.
- Spread thinset in small sections; mosaic sheets slump and drift if the bed is too large or too wet.
- Lay the floor mosaic first, then the large wall tiles down to meet it, so the wall grout line hides the floor edge.
- Grout the floor in a mid grey rather than white; white floor grout in a tiny, busy bathroom greys unevenly within a year.
- Seal the grout once cured, and keep the bath mat off the floor for the first two days.
Pro Tip
Lay the floor pattern on the diagonal in a long, narrow bathroom; the angled lines push the side walls apart visually where straight rows would underline the narrowness.
14. Layer the Light: Ceiling Plus Face Level
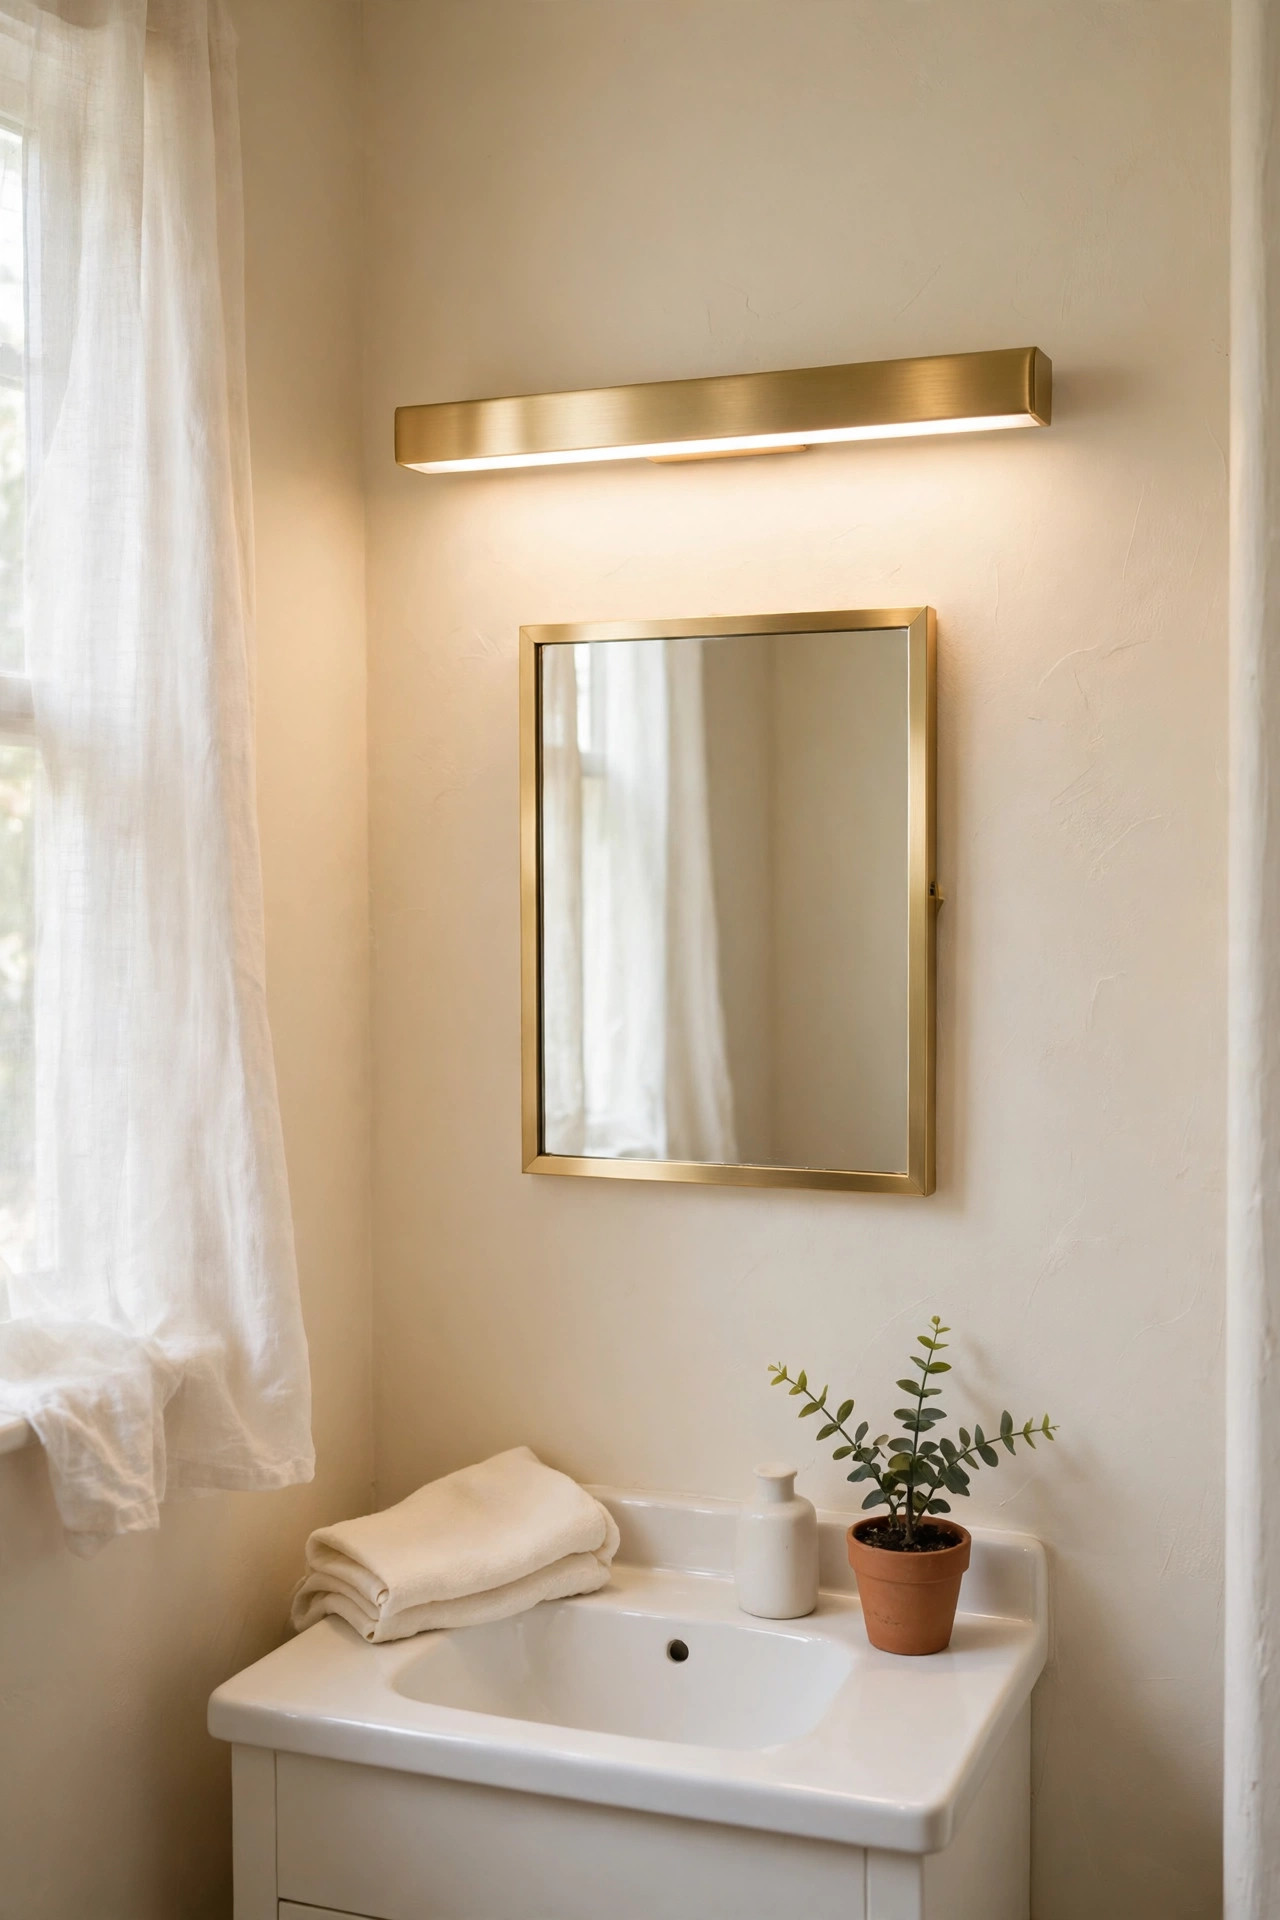
Description: One ceiling light behind you throws your face into shadow at the mirror and makes a small room feel smaller and dingier than it is. Two layers fix it: a ceiling fitting for general light and a bar or pair of lights at face level over the mirror, so faces are lit evenly and the walls read bright to their edges. Warm white light near 3000K keeps skin tones honest and suits the cream and gold palette used here.
Best For: Windowless tiny bathrooms and anyone who shaves or applies makeup at the mirror.
Not Ideal For: Rooms with no ceiling fitting at all, where adding both layers means new wiring runs and a bigger electrician bill.
Estimated Cost: $45-$90 (estimate) for a 24 inch LED vanity bar, plus fitting if you are not swapping an existing light.
Budget Note: An LED bar with the light built in costs less than a fitting plus separate bulbs, and it is sealed better against steam.
Renter Friendly: No
Renter Note: Hardwired lights are an owner job; renters can add battery sconces beside the mirror with adhesive mounts for a similar face-level effect.
What You Need
LED vanity light bar, screwdriver, wire connectors, voltage tester, and a licensed electrician if any new wiring is needed.
Product recommendation (verified): AIJIASI Gold Vanity Light, 24 inch LED bar, 18W, 3000K warm white, dimmable
Why it fits: The 24 inch bar matches a small vanity width, its 3000K warm output and roughly 1530 lumens are sized for a single-sink room, and the brushed gold finish continues the fittings palette.
Retailer/product page: https://www.amazon.com/dp/B0DK1QKYPL
How To Do It
- Turn the power off at the breaker and prove the circuit is dead with a tester before touching any wire.
- Remove the old fitting and check the junction box is secure; light bars must fix to the box or a stud, not to plaster alone.
- Connect the new bar, earth first, and mount it centred on the mirror about 75 to 78 inches above the floor.
- Restore power and check the light is even across the mirror with no dark band at chin height.
- If the bar dims, confirm your dimmer switch is LED-rated to avoid flicker and buzzing.
Pro Tip
Keep every bulb in a tiny bathroom the same colour temperature; a warm bar over the mirror fighting a cold ceiling light makes the room look patched together, however good each light is alone.
15. Use the Back of the Door and the Space Above It
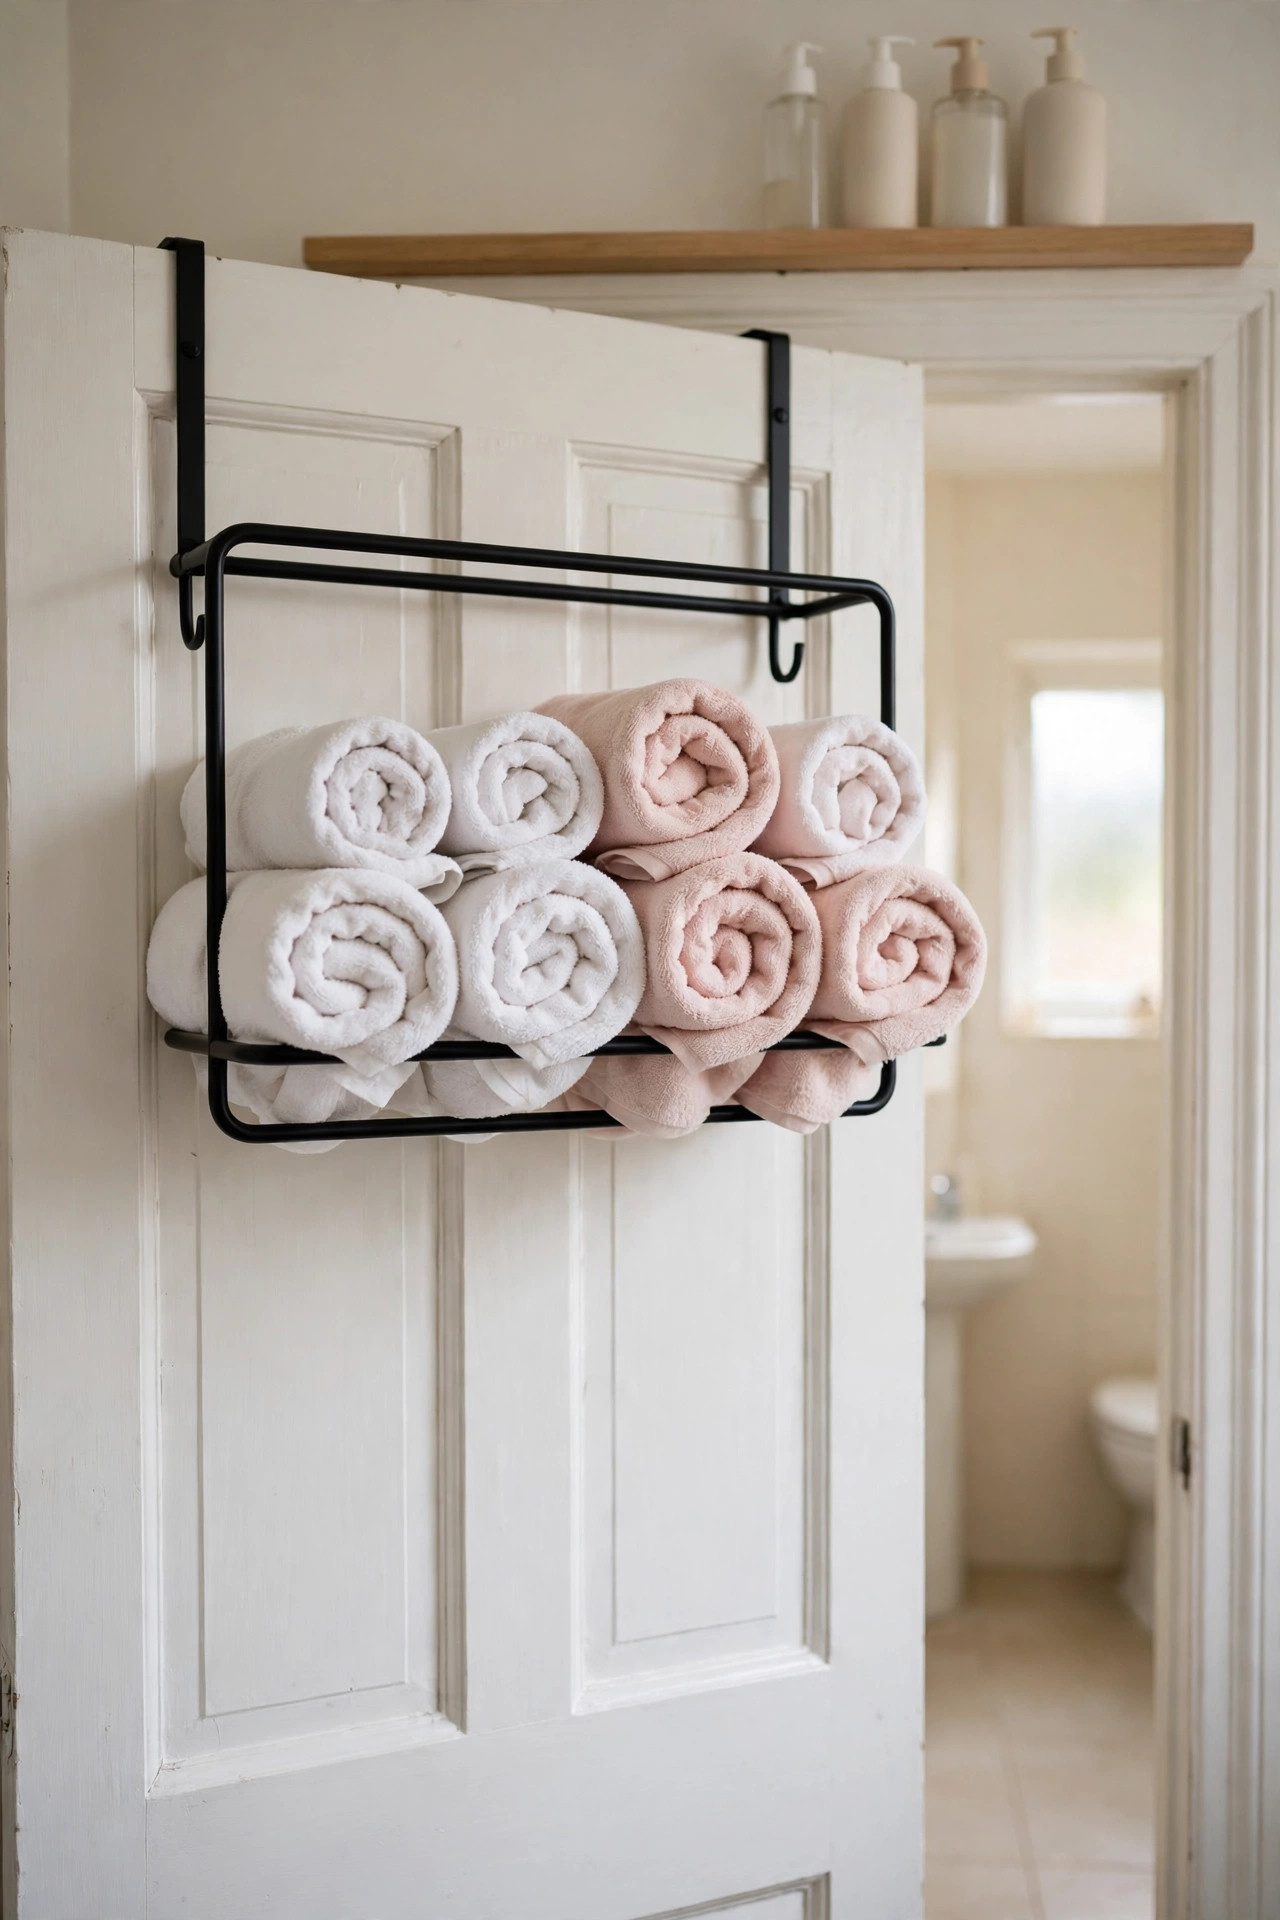
Description: The back of the door is a full-height storage wall that most tiny bathrooms waste, and the strip of wall above the door frame is a second one. An over-door rack holds rolled towels and hooks robes where the door swing already travels, so it costs no new floor or wall space. The high shelf above the door takes the spare shampoo and cleaning bottles you need monthly, not daily, at a height where clutter stops catching the eye.
Best For: Renters and any tiny bathroom where every wall is already spoken for.
Not Ideal For: Doors thinner or thicker than the rack’s hook range, and doors that open against a glass shower panel the rack could strike.
Estimated Cost: $30-$60 (estimate) for a three tier over-door rack and one small shelf.
Budget Note: This is the cheapest storage in the list per item stored, and both pieces can move to your next home.
Renter Friendly: Yes
Renter Note: The rack hangs on hooks with no drilling; the shelf above the door does need two screws, so renters can skip the shelf and keep the rack only.
What You Need
Over-door towel rack sized to your door thickness, a slim floating shelf and brackets for above the door, level, step stool, spare bottles for the high shelf.
Product recommendation (verified): HapiRm 3 Tier Over The Door Towel Rack with metal shelf and 6 hooks, Black
Why it fits: It hangs over doors up to 1.77 inches thick or wall-mounts if you prefer, the three tiers hold rolled bath towels vertically, and the top shelf and hooks take the small items that usually crowd the sink.
Retailer/product page: https://www.amazon.com/dp/B0DB7BG68Z/ref=cm_sw_r_cso_fm_apin_dp_CJHJ3BBN3E1RPFKD8EX5
How To Do It
- Measure your door thickness first; over-door hooks only sit flat and silent inside their rated range.
- Hang the rack, then open and close the door slowly to confirm it clears the frame and any glass panel.
- Add the felt or adhesive pads supplied so the rack does not rattle or mark the door paint.
- Fit the shelf above the door at least a hand’s width below the ceiling, into studs or rated anchors.
- Load the rack with daily towels and the high shelf with spares only, so nothing heavy lives above head height.
Pro Tip
Roll towels for door racks rather than folding them over rails; rolls stay put when the door moves, and five rolled towels fit the width that holds two hanging ones.
Practical Tips for Tiny Bathrooms
- Measure clearances before you buy anything. Building codes generally ask for at least 21 inches of clear floor in front of a toilet and 15 inches from the toilet centreline to a side wall. In a tiny room, check those two numbers first; they decide which ideas in this list are even possible.
- Repeat one metal finish. Brushed gold or brushed nickel, pick one and use it on the faucet, mirror fixings, hooks and handles. In 30 square feet, two competing finishes make the room look pieced together.
- Take wall tile to the ceiling. Stopping tile at shower height leaves a painted band that lowers the ceiling visually. Running it full height stretches the walls and removes a ledge where steam and dust collect.
- Keep the big surfaces pale and the colour small. White and cream on walls, floor and fixtures, then blush or wood in towels, a tray and one shelf. Small rooms carry contrast best in things you can change in five minutes. The same rule shapes the calmer rooms in these bathroom decor ideas.
- Run the fan longer than feels necessary. Tiny bathrooms hold steam in a small volume of air, so grout and paint suffer fast. Run the extractor during every shower and for 20 to 30 minutes after, and leave the door ajar between uses.
Frequently Asked Questions
What is the smallest a full bathroom can be?
About 25 to 35 square feet is the realistic floor. A 5 x 5 room fits a 32 inch corner shower, a compact toilet and a 24 inch vanity with legal clearances, while a 5 x 7 can also take a 60 inch tub along one wall. A 3 x 5 room works only with a corner shower or a very short tub, a corner or wall-hung sink and a compact toilet.
Can a 5 x 7 bathroom fit a tub and a separate shower?
Not sensibly. A 60 inch tub needs the full 5 foot wall, leaving no compliant space for a separate shower stall. The usual answer is a shower over the tub with a curved rod (idea 7) or glass panel, or dropping the tub for a 32 to 36 inch shower (idea 6) if nobody in the home bathes.
How much does a tiny bathroom remodel cost?
Broadly, a cosmetic refresh with paint, a mirror, lighting and storage runs about $800 to $2,500 in materials, while swapping fixtures and retiling usually lands between $6,000 and $15,000 depending on labour rates and how much plumbing moves. Small rooms are cheaper on materials and dearer per square foot on labour, so get the layout settled before ordering anything.
Will removing the only tub hurt resale?
It can. Many buyers with young children filter for a tub, so if this is the home’s only bathroom, keep the tub and use the curved rod and glass panel ideas instead. In a second bathroom or an apartment aimed at adults, a good shower in place of a tired tub is rarely a problem. These small full bathroom ideas cover the keep-the-tub layouts in more depth.
Do I need a permit to change a toilet or vanity?
Swapping a toilet or vanity for a similar one in the same position usually needs no permit in most US areas. Moving drains, adding a pocket door inside a wall, or new electrical circuits often do. Rules vary by city, so check your local building department before opening any wall.
Conclusion
Start with the measurement that is failing you. If knees and doors collide, the compact toilet and the pocket door change daily life most; if the room works but holds nothing, the recessed cabinet, the niche and the over-toilet cabinet add storage without touching the floor plan. Pick one fix, live with it for a month, and let the room tell you which inch matters next.
One Comment
Comments are closed.