15 Small Full Bathroom Ideas That Handle Daily Family Use
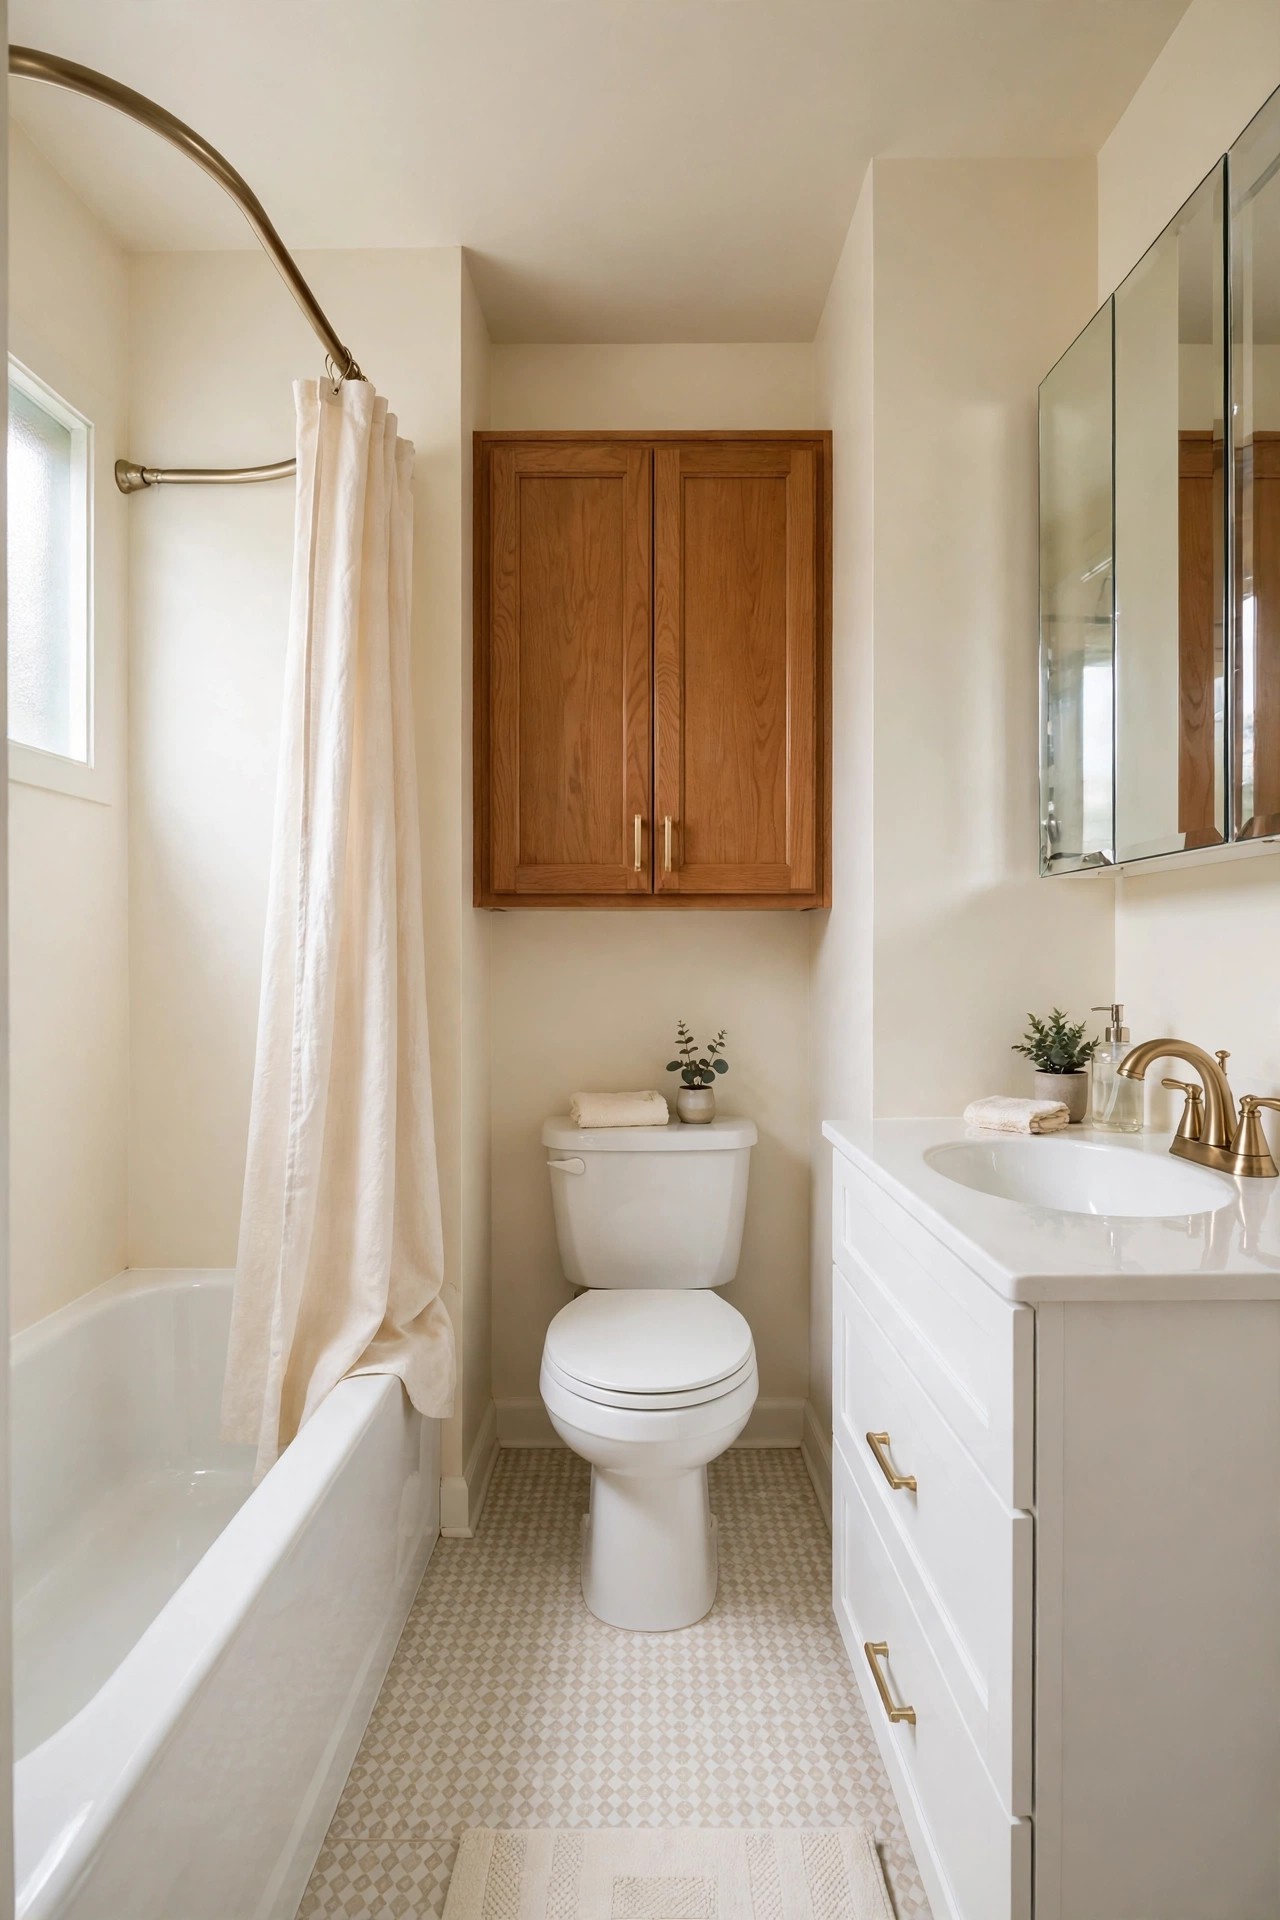
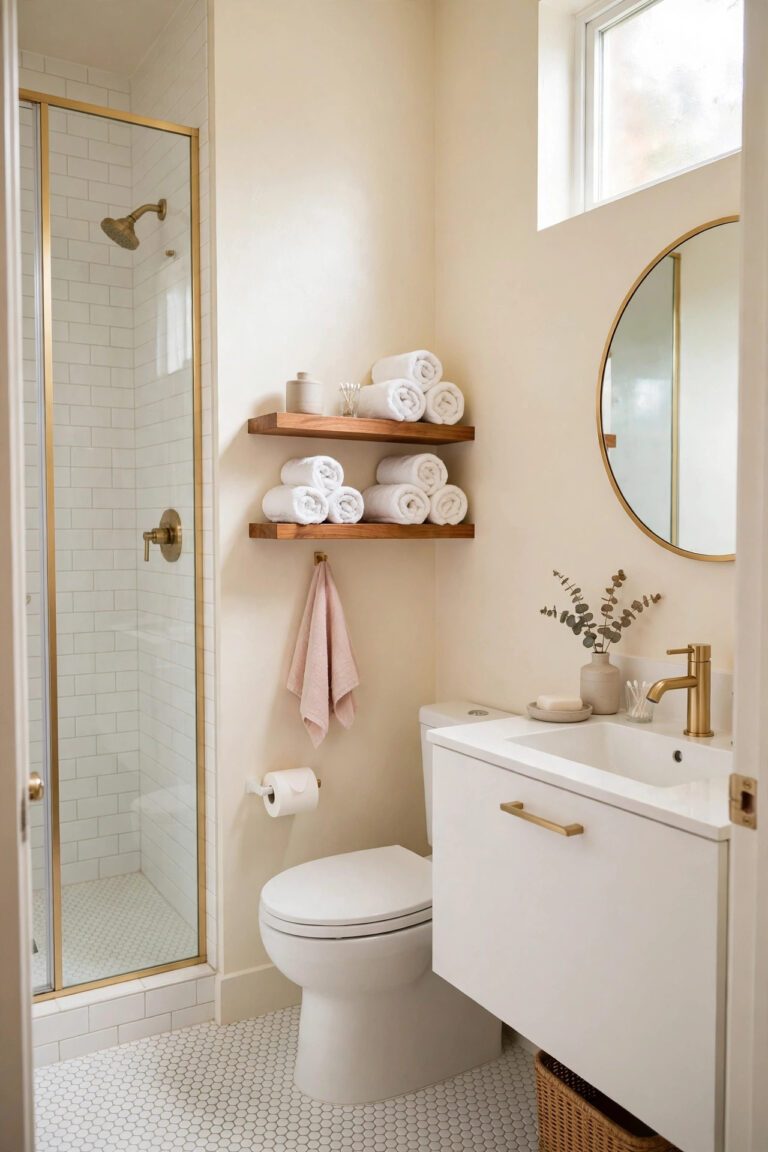
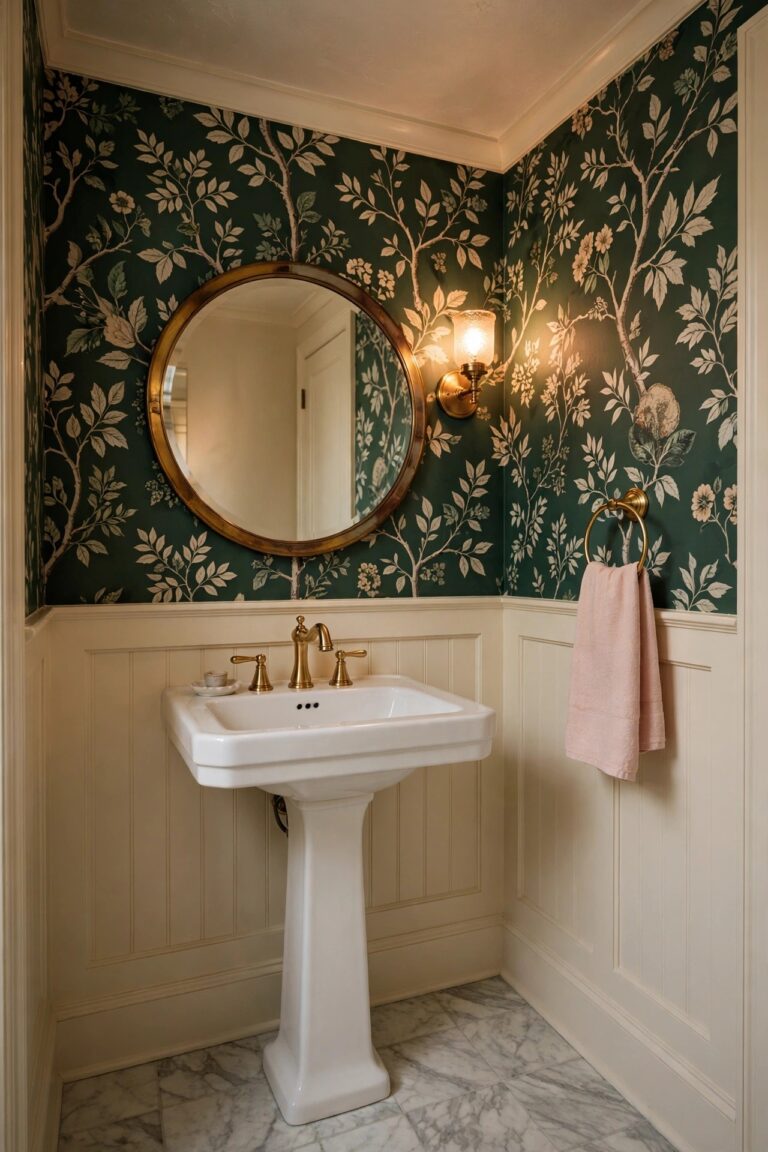
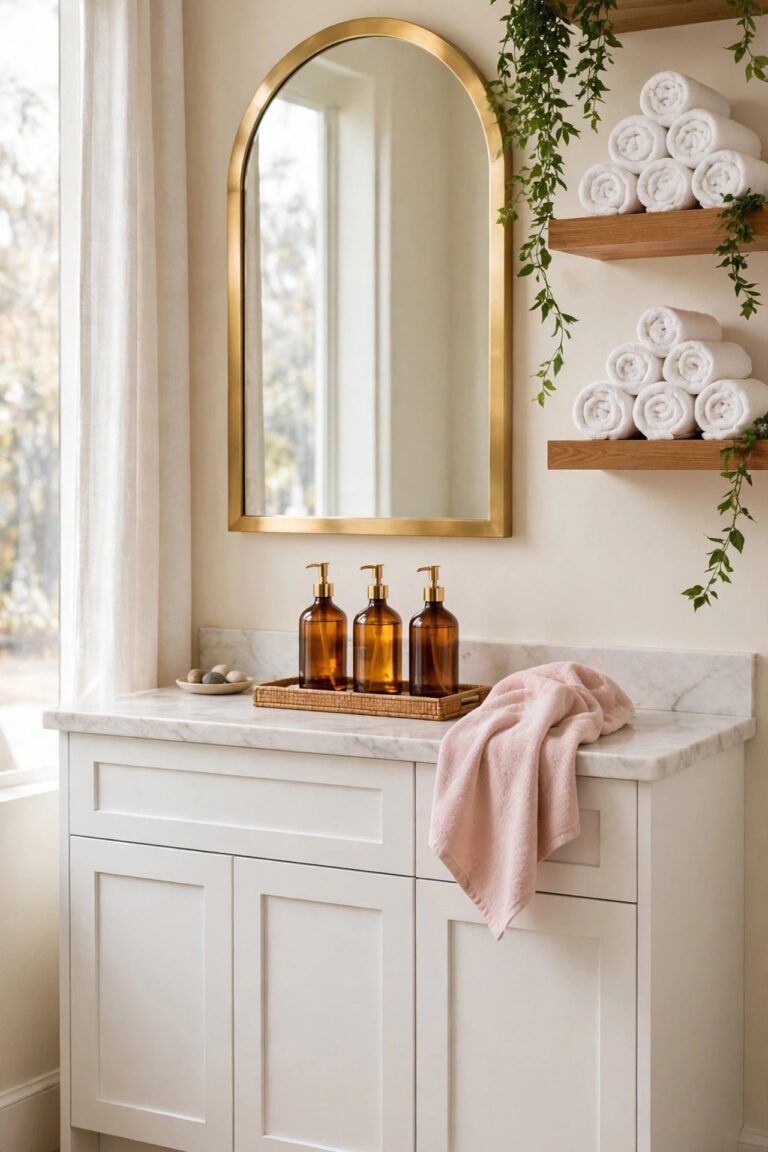
A small full bathroom has a harder job than any other room its size: a tub or shower, a toilet and a sink in roughly 5×7 to 5×9 feet, used by the whole household every day. That is a different problem from a powder room, which only needs a toilet and a basin, and from a styling update, which can put looks first. These small full bathroom ideas put daily function first: storage that survives wet hands and rushed mornings, fixtures that give back inches, and finishes that wipe clean. The calm look comes from repeating white, warm wood and brushed gold, the same palette used in these bathroom decor ideas. Measure your room before ordering anything, because in a room this size two inches decide whether a door swings clear.
1. Bow the Shower Curtain Out With a Curved Rod
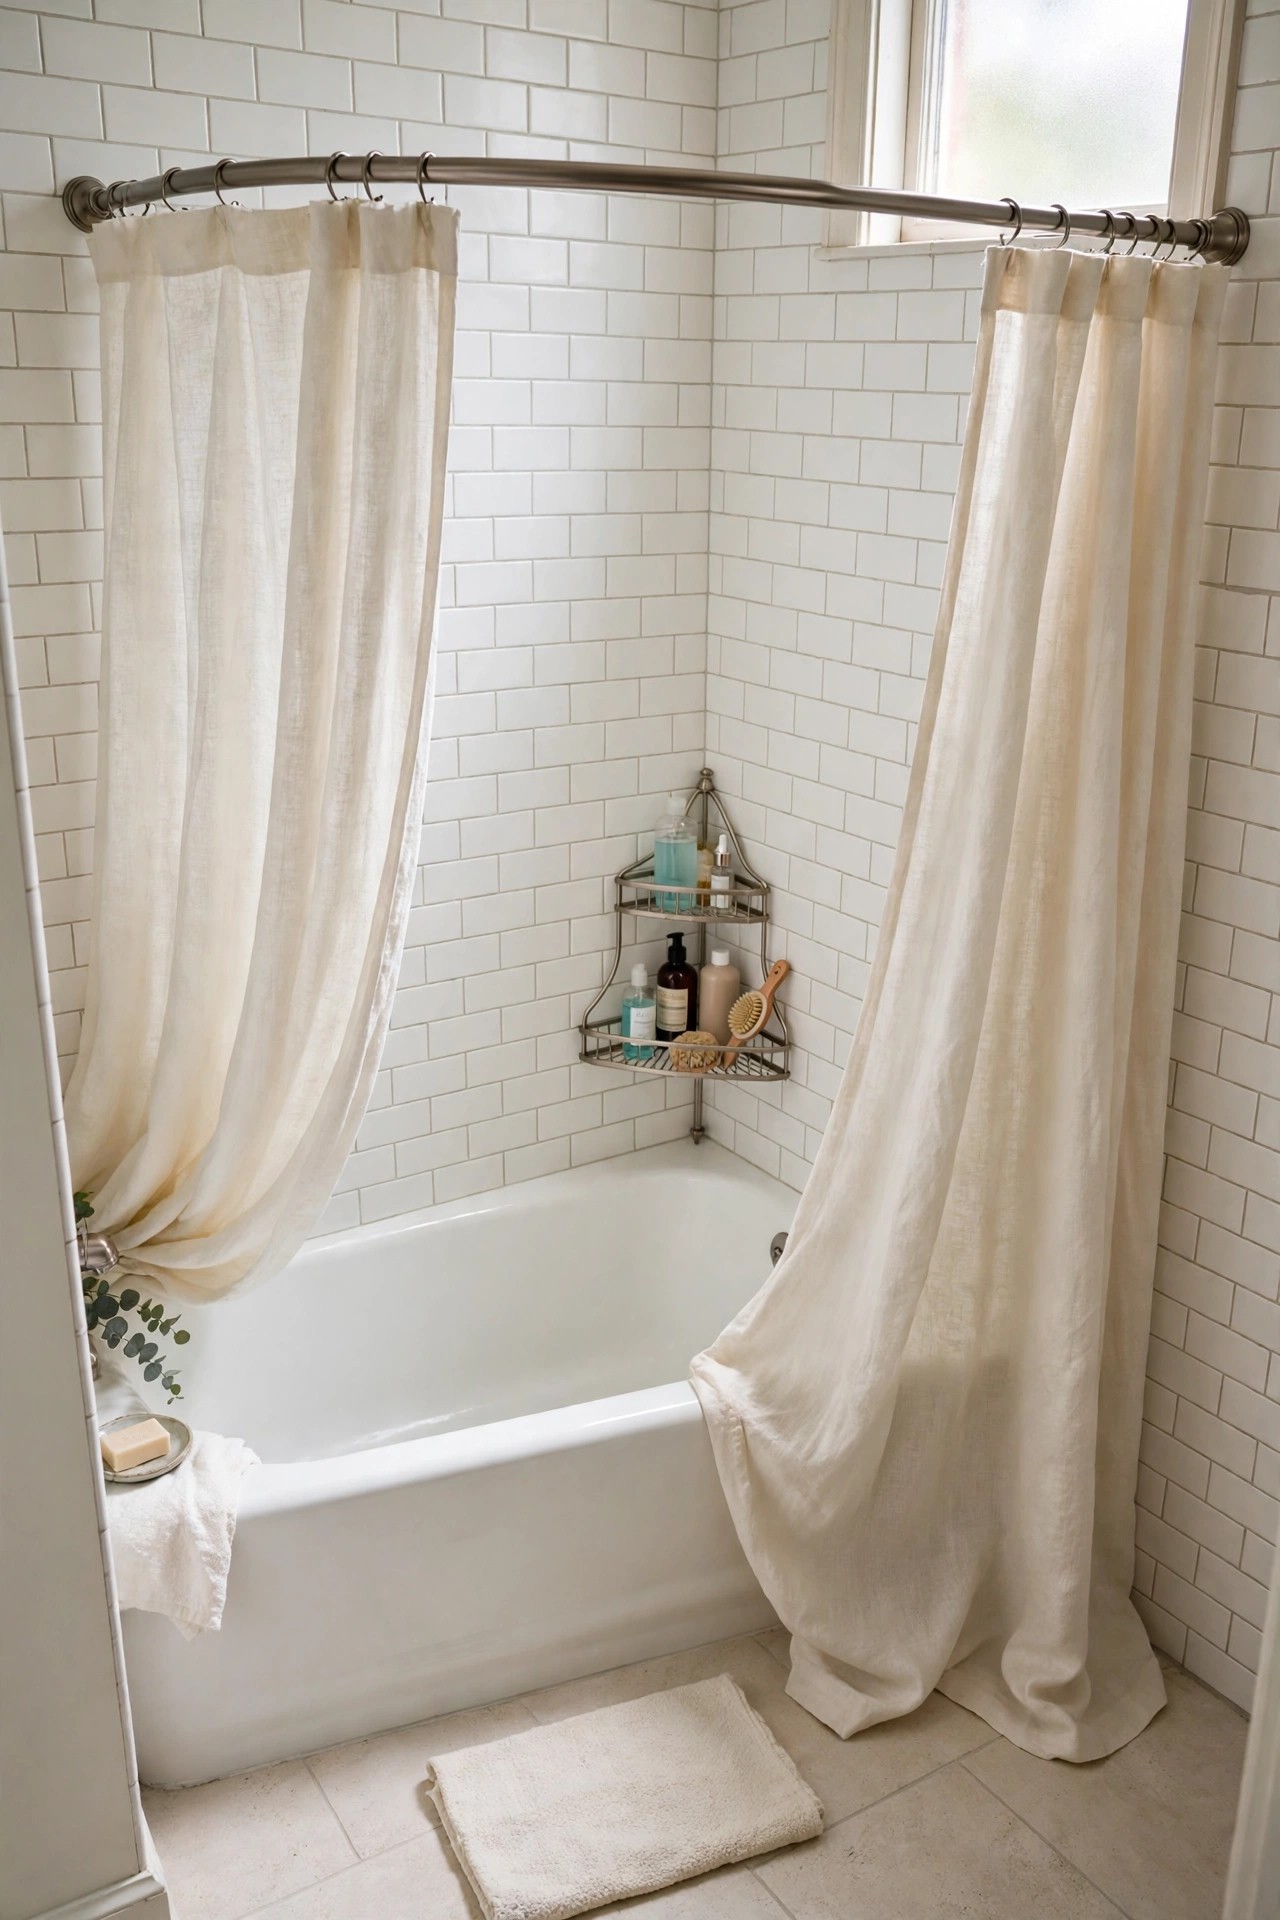
Description: In a standard 60 inch tub, a straight rod puts the wet curtain against your arms every time you shower. A curved rod bows the curtain outward and adds up to about 6 inches of elbow room at shoulder height, without moving a single wall or fitting. Tension versions twist into place between the walls, so the swap takes minutes. Choose rustproof aluminum or stainless steel, because a rod that rusts in a steamy full bathroom is a short-lived fix.
Best For: Standard 5 foot tubs in rooms where the curtain clings and the shower feels narrower than the tub.
Not Ideal For: Glass-door tubs, or ceilings so low that a bowed curtain would brush the shower head.
Estimated Cost: $30-$50 (estimate) for a tension curved rod.
Budget Note: Tension mount costs about the same as screw mount here, so pay for the rustproof metal rather than the mounting style.
Renter Friendly: Yes
Renter Note: The tension version needs no holes at all; keep the old straight rod to swap back at move-out.
What You Need
Curved shower rod sized to your tub length, your existing curtain and liner, a step stool, a second pair of hands for tension fitting.
Product recommendation (partially verified): Zenna Home Curved Shower Curtain Rod, Tension Mount, 50 to 72 Inch, Satin Nickel
Why it fits: The listed 50 to 72 inch adjustment covers a standard 60 inch tub, the aluminum body is rustproof for a steamy full bathroom, and the maker lists up to 6.5 inches of added elbow room.
Retailer/product page: https://www.amazon.com/dp/B00JVG5NUG/ref=cm_sw_r_fa_ud_dp_42C4A8WAW0VDH2MW5M73
How To Do It
- Measure the wall-to-wall distance above the tub and set the rod length to match.
- Take the old rod down and wipe the wall ends so the tension pads grip clean tile.
- Extend the curved rod with the bow facing out, twist to lock, and check it holds a firm pull.
- Hang the liner inside the tub edge and the curtain outside it, then run the shower to check for leaks at the ends.
Pro Tip
Hang the rod so the curtain hem sits just inside the tub rim at both ends; a bowed curtain that clears the rim in the middle can still drip at the corners.
2. Swap a Pedestal or Door Cabinet for a 24 Inch Drawer Vanity
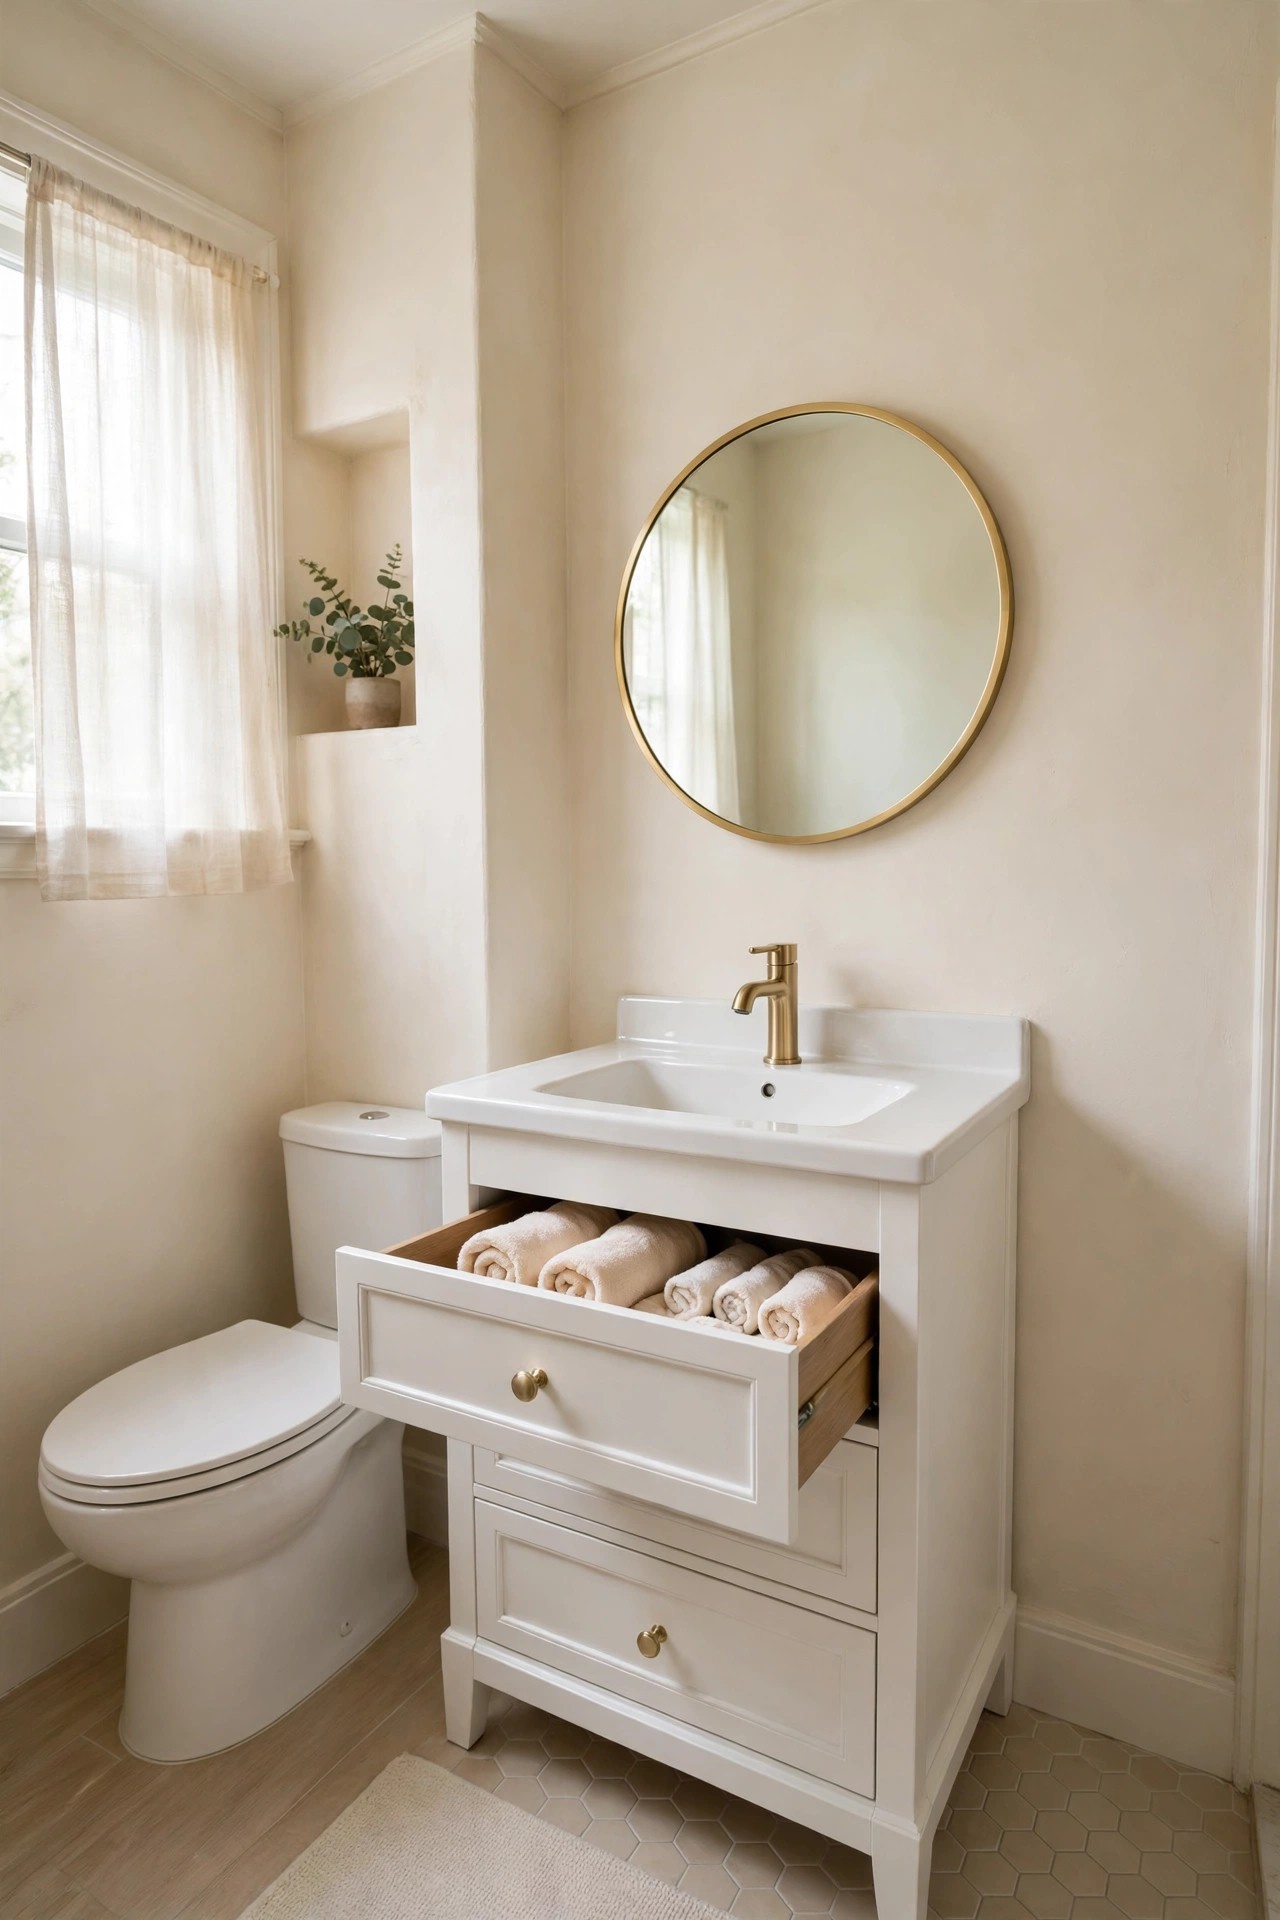
Description: A pedestal sink stores nothing, and a door cabinet hides a deep, dark box where bottles fall over. A 24 inch vanity with drawers fixes both: toothbrushes and daily items sit in a shallow top drawer you can see at a glance, and cleaning supplies stand upright below. At about 18 to 19 inches deep, it also leaves more floor in front than a standard 21 inch vanity. The swap uses the same water lines in most cases, so it is a weekend job rather than a remodel.
Best For: Bathrooms where the counter and floor have become the storage system.
Not Ideal For: Rooms where the plumbing comes through the floor in a spot a drawer box would block; check the drawer cut-outs against your pipes first.
Estimated Cost: $250-$450 (estimate) for the vanity and sink, faucet often sold separately.
Budget Note: The vanity itself is the cost; reusing your current faucet and supply lines keeps the rest of the bill small.
Renter Friendly: No
Renter Note: This is a fixed plumbing change, so it is an owner project or one that needs written landlord permission.
What You Need
24 inch vanity with sink, faucet, flexible supply lines, plumber’s putty or silicone, level, adjustable wrench, bucket and towels for the shut-off test.
Product recommendation (partially verified): Harper & Bright Designs 24 inch Bathroom Vanity with Sink, White
Why it fits: The listed size is 24.2 inches wide by 18.5 inches deep, shallower than a standard vanity, and it pairs soft-close doors with a drawer and a ceramic basin with an overflow.
Retailer/product page: https://www.amazon.com/dp/B0CZNZ43YJ/ref=pd_aw_subss_hxwPER_sspa_mw_detail_m_sccl_2_1
How To Do It
- Shut off the water, disconnect the old sink, and photograph the pipe layout before removing anything.
- Set the new vanity in place, level it, and mark any drawer or shelf cut-outs the pipes need.
- Connect the faucet, supply lines and drain, then turn the water on and check every joint with a dry hand.
- Run a bead of silicone where the backsplash meets the wall and let it cure before the first shower steam.
Pro Tip
Before ordering, tape the vanity outline on the floor and open the bathroom door fully; in a 5×7 room the door swing, not the wall width, is usually what rules a vanity out.
3. Hide Daily Clutter Behind a Mirrored Medicine Cabinet
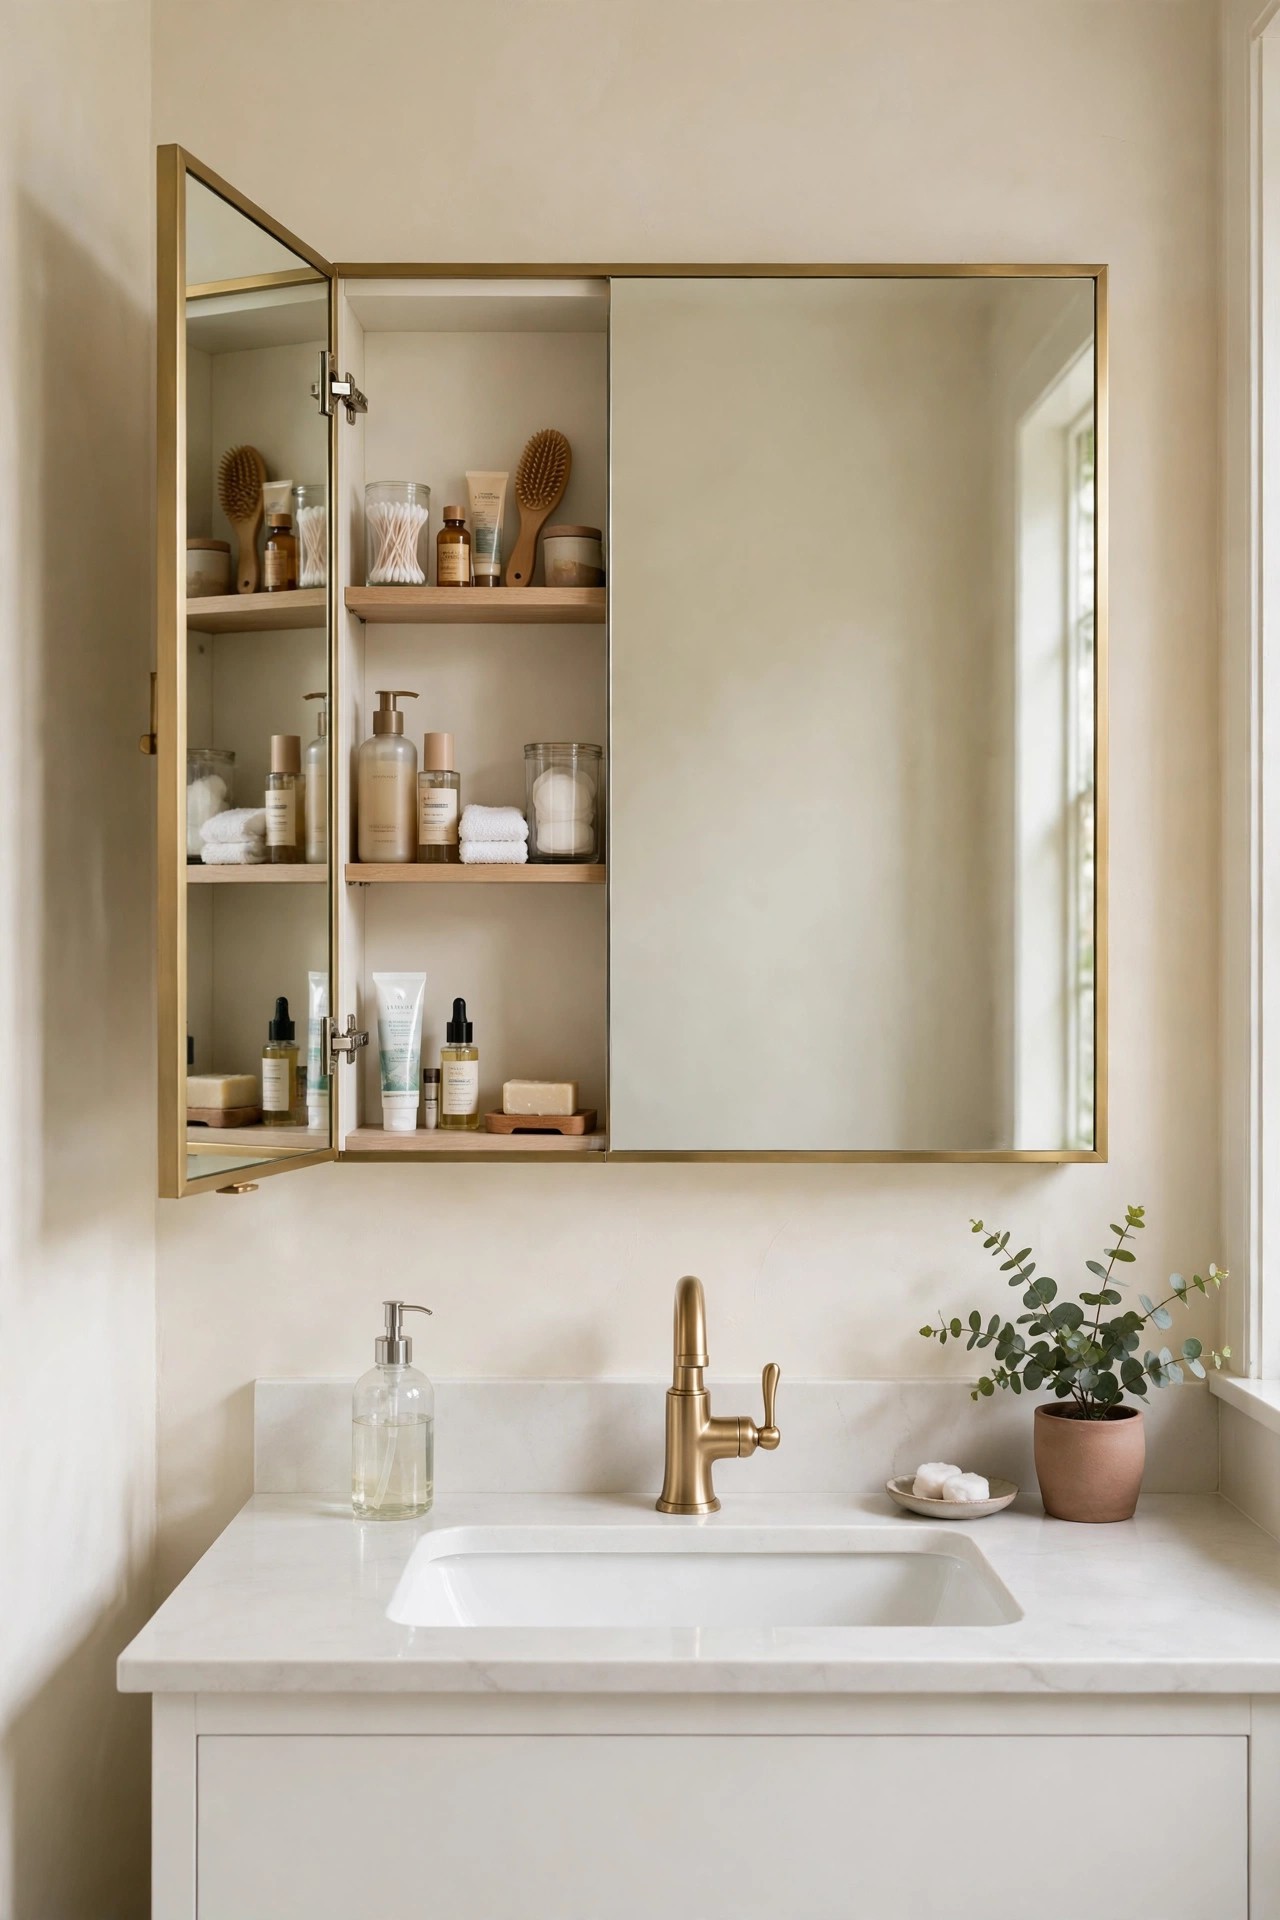
Description: A flat mirror uses the best storage wall in the room for reflection only. A medicine cabinet about 5 inches deep puts medicines, contact supplies and skincare behind that same mirror, which clears the narrow counter of everything except the soap. Models with built-in LED light and a defogger earn their keep in a full bathroom, where the mirror fogs at every shower. Surface mounting avoids opening the wall; recessed mounting saves the most depth but needs a stud check first.
Best For: Counters crowded with small bottles that get used twice a day.
Not Ideal For: Walls with plumbing vents or wiring in the stud bay if you plan to recess; surface mount instead.
Estimated Cost: $150-$260 (estimate) for a 24 x 30 inch lighted cabinet.
Budget Note: The lighted, anti-fog versions cost more than a plain cabinet, but they replace a separate vanity light on the same wall.
Renter Friendly: With Conditions
Renter Note: Surface mounting leaves screw holes; use it only with landlord permission, and keep medicines out of children’s reach since the cabinet sits low over a small vanity.
What You Need
Mirrored medicine cabinet sized to the vanity, stud finder, level, drill, wall anchors rated for the cabinet weight, screwdriver.
Product recommendation (verified): Keazile 24×30 Inch Medicine Cabinet with Mirror and LED Lights, Recessed or Surface Mount
Why it fits: At 24 inches wide and 4.8 inches deep it matches a 24 inch vanity, mounts on the surface or recessed, and the listed features include dimmable light, anti-fog and an adjustable shelf.
Retailer/product page: https://www.amazon.com/dp/B0F66K397G
How To Do It
- Find the studs above the vanity and mark the cabinet outline, centred on the faucet.
- Hold the cabinet so its bottom edge sits about 4 to 6 inches above the backsplash.
- Fix it to studs where possible and use rated anchors elsewhere; check the door swing clears the faucet.
- If the model has a light or defogger, have the wiring connected to the bathroom circuit by a qualified electrician.
Pro Tip
Put a small magnetic strip inside the door for tweezers and nail clippers; they are the items that otherwise migrate to the counter edge and fall behind the vanity.
4. Use the Wall Over the Toilet for a Closed Cabinet
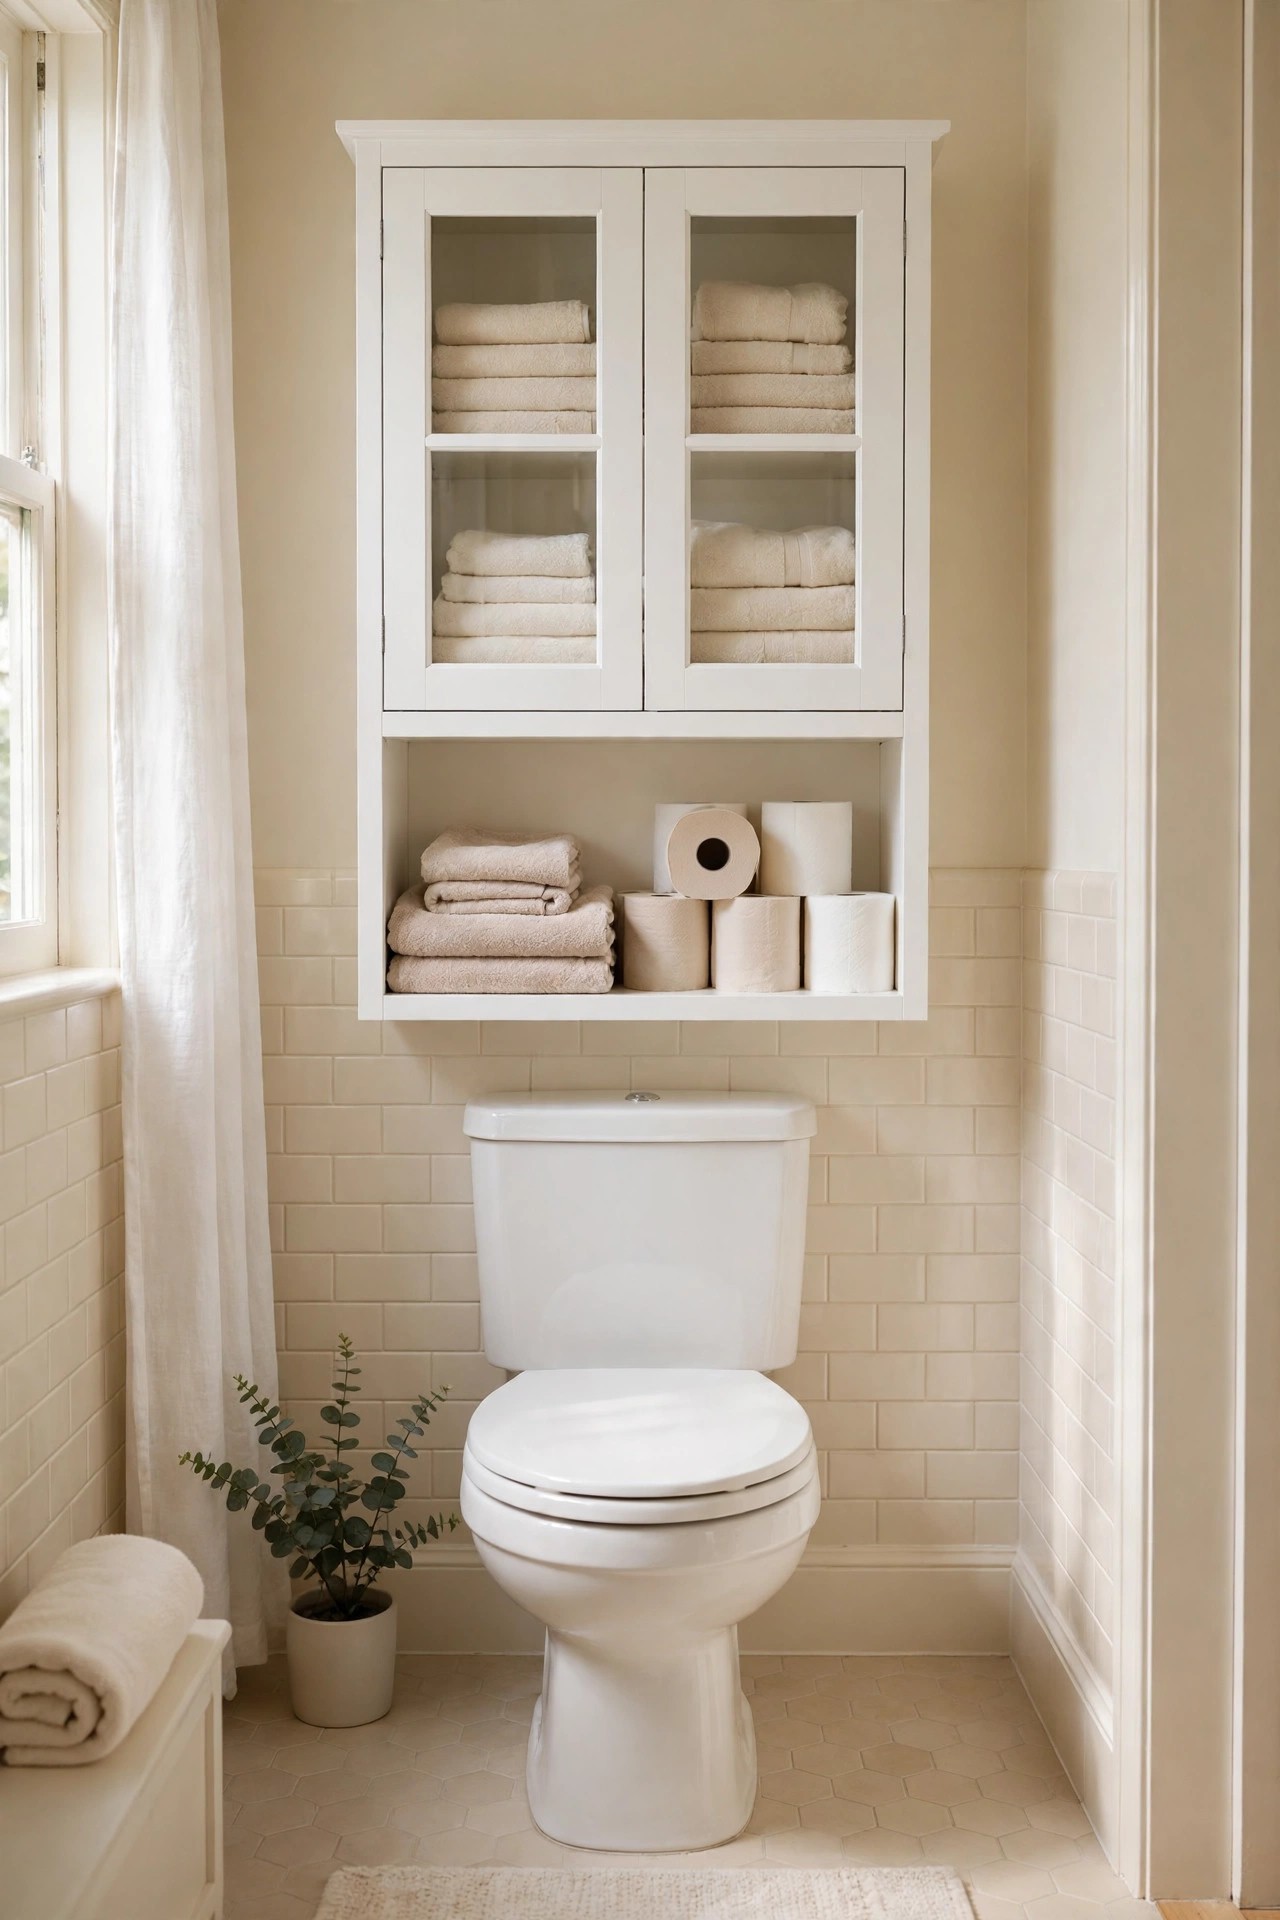
Description: The space over the toilet tank is the largest unused wall area in most small bathrooms. A freestanding cabinet about 24 inches wide and 8 to 9 inches deep turns it into closed storage for spare towels, paper rolls and backup toiletries, which keeps the room looking calm instead of stacked. Doors matter here: open shelves in a family bathroom collect dust and look busy, while closed doors hide the spare-bottle jumble. Check the clearance between the cabinet’s lower bar and your tank lid before you buy.
Best For: Bathrooms with no linen closet and a clear wall over a standard toilet.
Not Ideal For: Toilets with a top-flush button the cabinet frame would block, or very low ceilings under about 78 inches.
Estimated Cost: $110-$170 (estimate) for a freestanding over-toilet cabinet.
Budget Note: Freestanding cabinets cost less than wall-hung ones and skip the anchoring hardware, though the anti-tip strap is not optional.
Renter Friendly: Yes
Renter Note: It stands on the floor rather than the wall; still fit the supplied anti-tip device, using a removable wall strap if your lease bans screws.
What You Need
Over-toilet cabinet, anti-tip strap, level, screwdriver, baskets or bins measured to the shelves.
Product recommendation (partially verified): Shintenchi Over the Toilet Storage Cabinet, Glass Door, White
Why it fits: The listed size is 23.6 inches wide, 8.5 inches deep and 65.4 inches tall, slim enough for a 5 foot wide room, with an adjustable shelf, an open shelf and an included anti-tip device.
Retailer/product page: https://www.amazon.com/dp/B0CCT5DH7N/ref=cm_sw_r_as_gl_apa_gl_i_QFH6FTV21RS8WDSM3HTY
How To Do It
- Measure from the floor to the tank lid and confirm the cabinet’s cross bar clears it.
- Assemble the frame flat, then lift it over the toilet with a second person guiding the legs.
- Level it, fit the anti-tip strap, and load the heaviest items on the lowest shelf.
- Leave the open shelf for daily items and put backups behind the doors so the room reads tidy.
Pro Tip
Measure your tallest spare bottle before choosing shelf height; shampoo and cleaner bottles, not towels, are what usually force the adjustable shelf to its top setting.
5. Give Every Bottle a Shelf on a Tension Pole Caddy
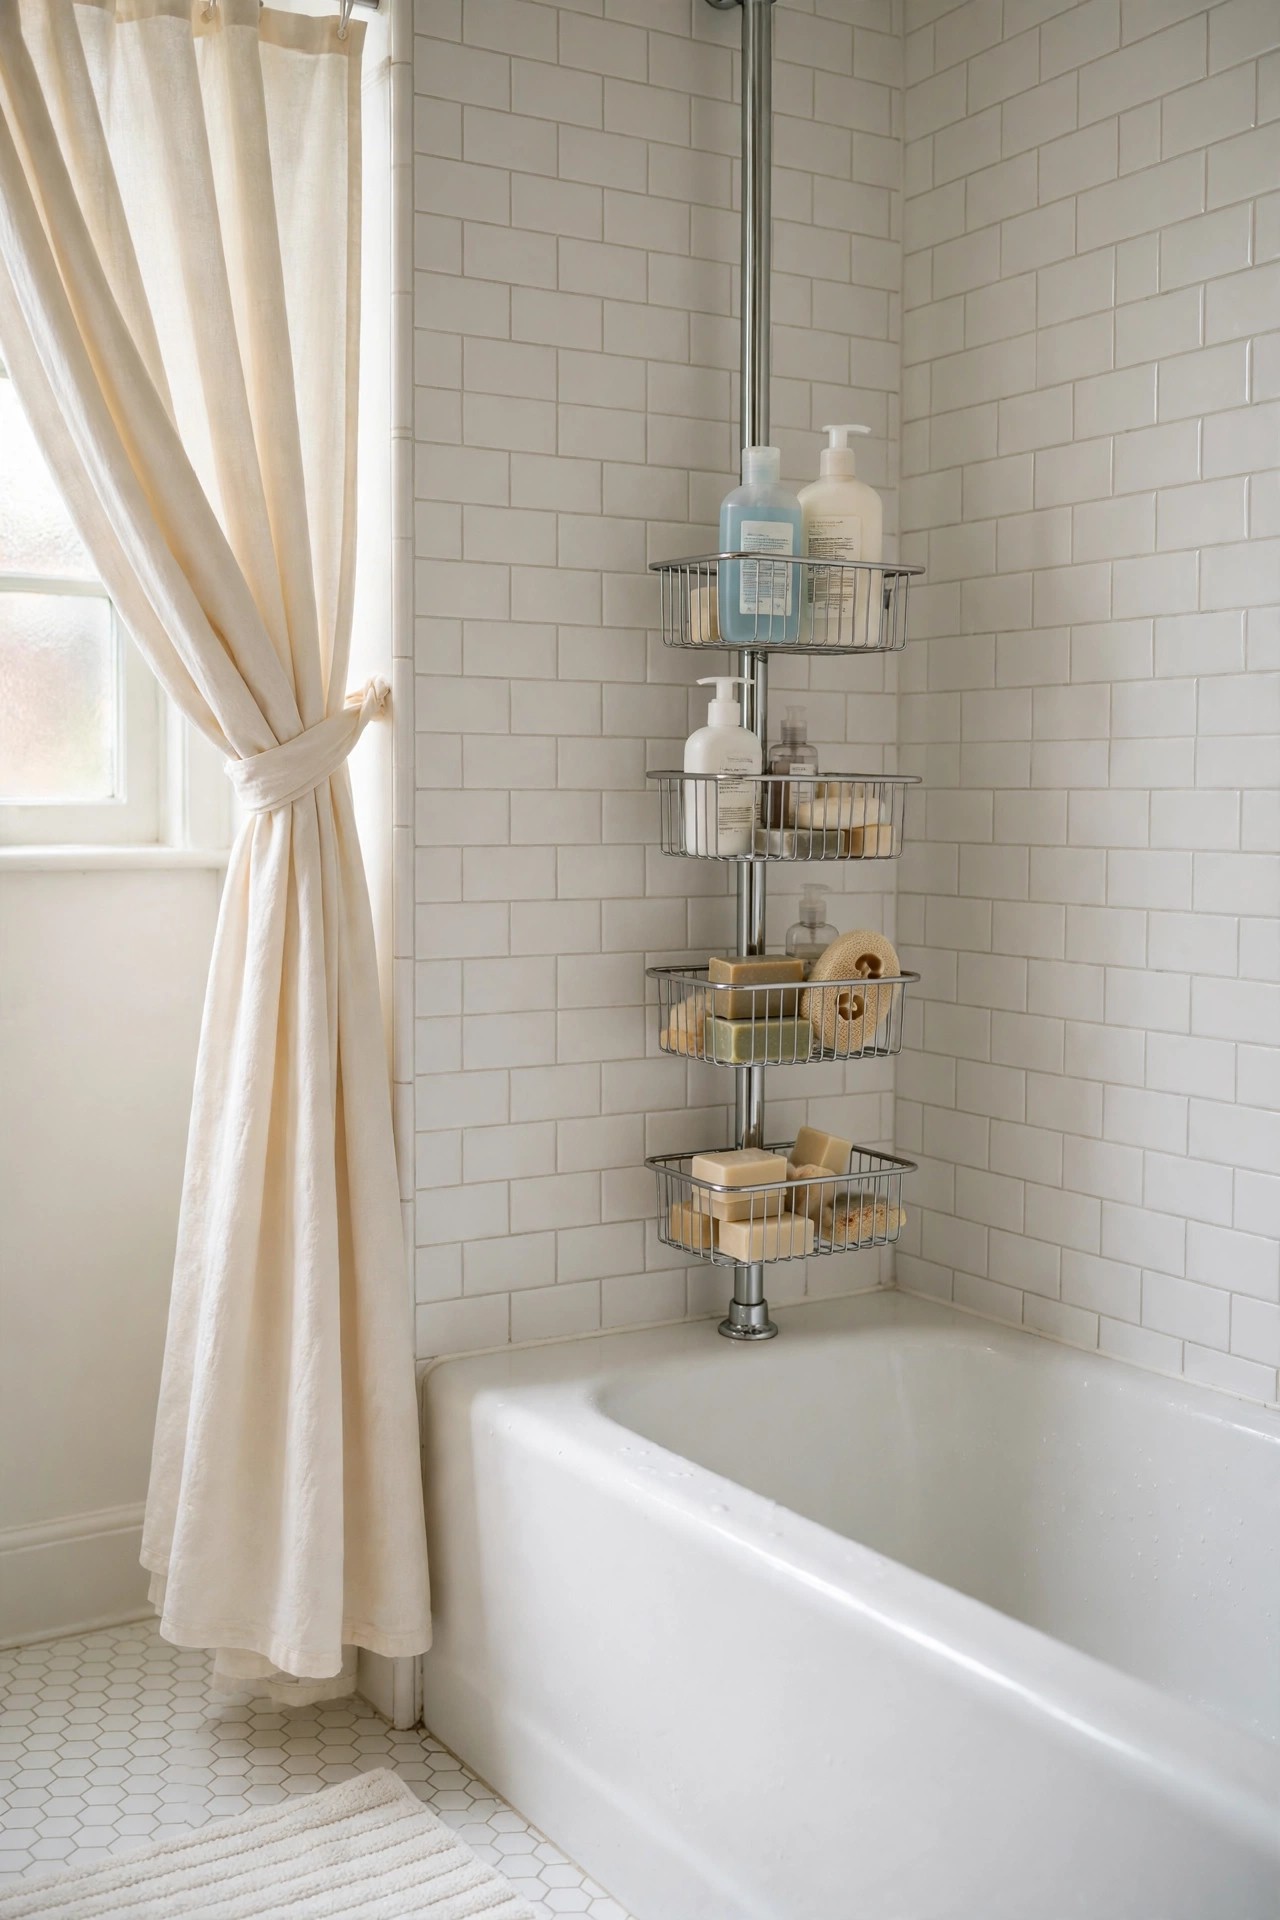
Description: The rim of a family tub becomes a bottle shelf by default, and everything on it gets knocked into the water. A tension pole caddy stands in the dead corner of the tub, floor to ceiling, with baskets at different heights: tall shampoo bottles low, children’s items where small hands reach, razors up high. Because it wedges in with spring tension, it survives daily use better than suction shelves, which let go under heavy bottles. Keep to the listed weight limit per basket.
Best For: Tubs with no built-in niche and four or more bottles in daily rotation.
Not Ideal For: Sloped or vaulted ceilings the pole cannot press against, and tubs with a wide curved rim that leaves no flat corner footing.
Estimated Cost: $45-$70 (estimate) for a four-basket tension pole caddy.
Budget Note: Steel with a rust-resistant finish costs a little more than plastic and is the version that lasts in a wet corner.
Renter Friendly: Yes
Renter Note: No drilling and no adhesive; the pole lifts out for cleaning and leaves the tile untouched.
What You Need
Tension pole caddy, tape measure for your floor-to-ceiling height, a cloth to dry the corner before fitting.
Product recommendation (partially verified): Zenna Home Tension Pole Shower Caddy, 4 Baskets with Built-In Towel Bar, Chrome, 60 to 97 Inch
Why it fits: The listed 60 to 97 inch height range covers both tub-rim-to-ceiling and standard ceiling fits, the four baskets are adjustable, and the steel build is rust resistant with a 7.5 pound capacity figure listed.
Retailer/product page: https://www.amazon.com/dp/B07QS5D94K/ref=cm_sw_r_apin_dp_6VHAQE2G8QWA5T6P09Z5_1
How To Do It
- Measure the corner height and assemble the pole sections to sit about 2 inches longer than the gap.
- Dry the tub corner and ceiling patch so the end caps grip.
- Compress the pole, set the base in the corner, and let the spring push it firm against the ceiling.
- Slide the baskets to your heights, lock them, and load heavy bottles on the lowest basket.
Pro Tip
Set one basket at a child’s reach and the adult products above it; sharing one shower gets much calmer when nobody has to pass bottles mid-shower.
6. Slide a Slim Rolling Cart Into the Vanity Gap
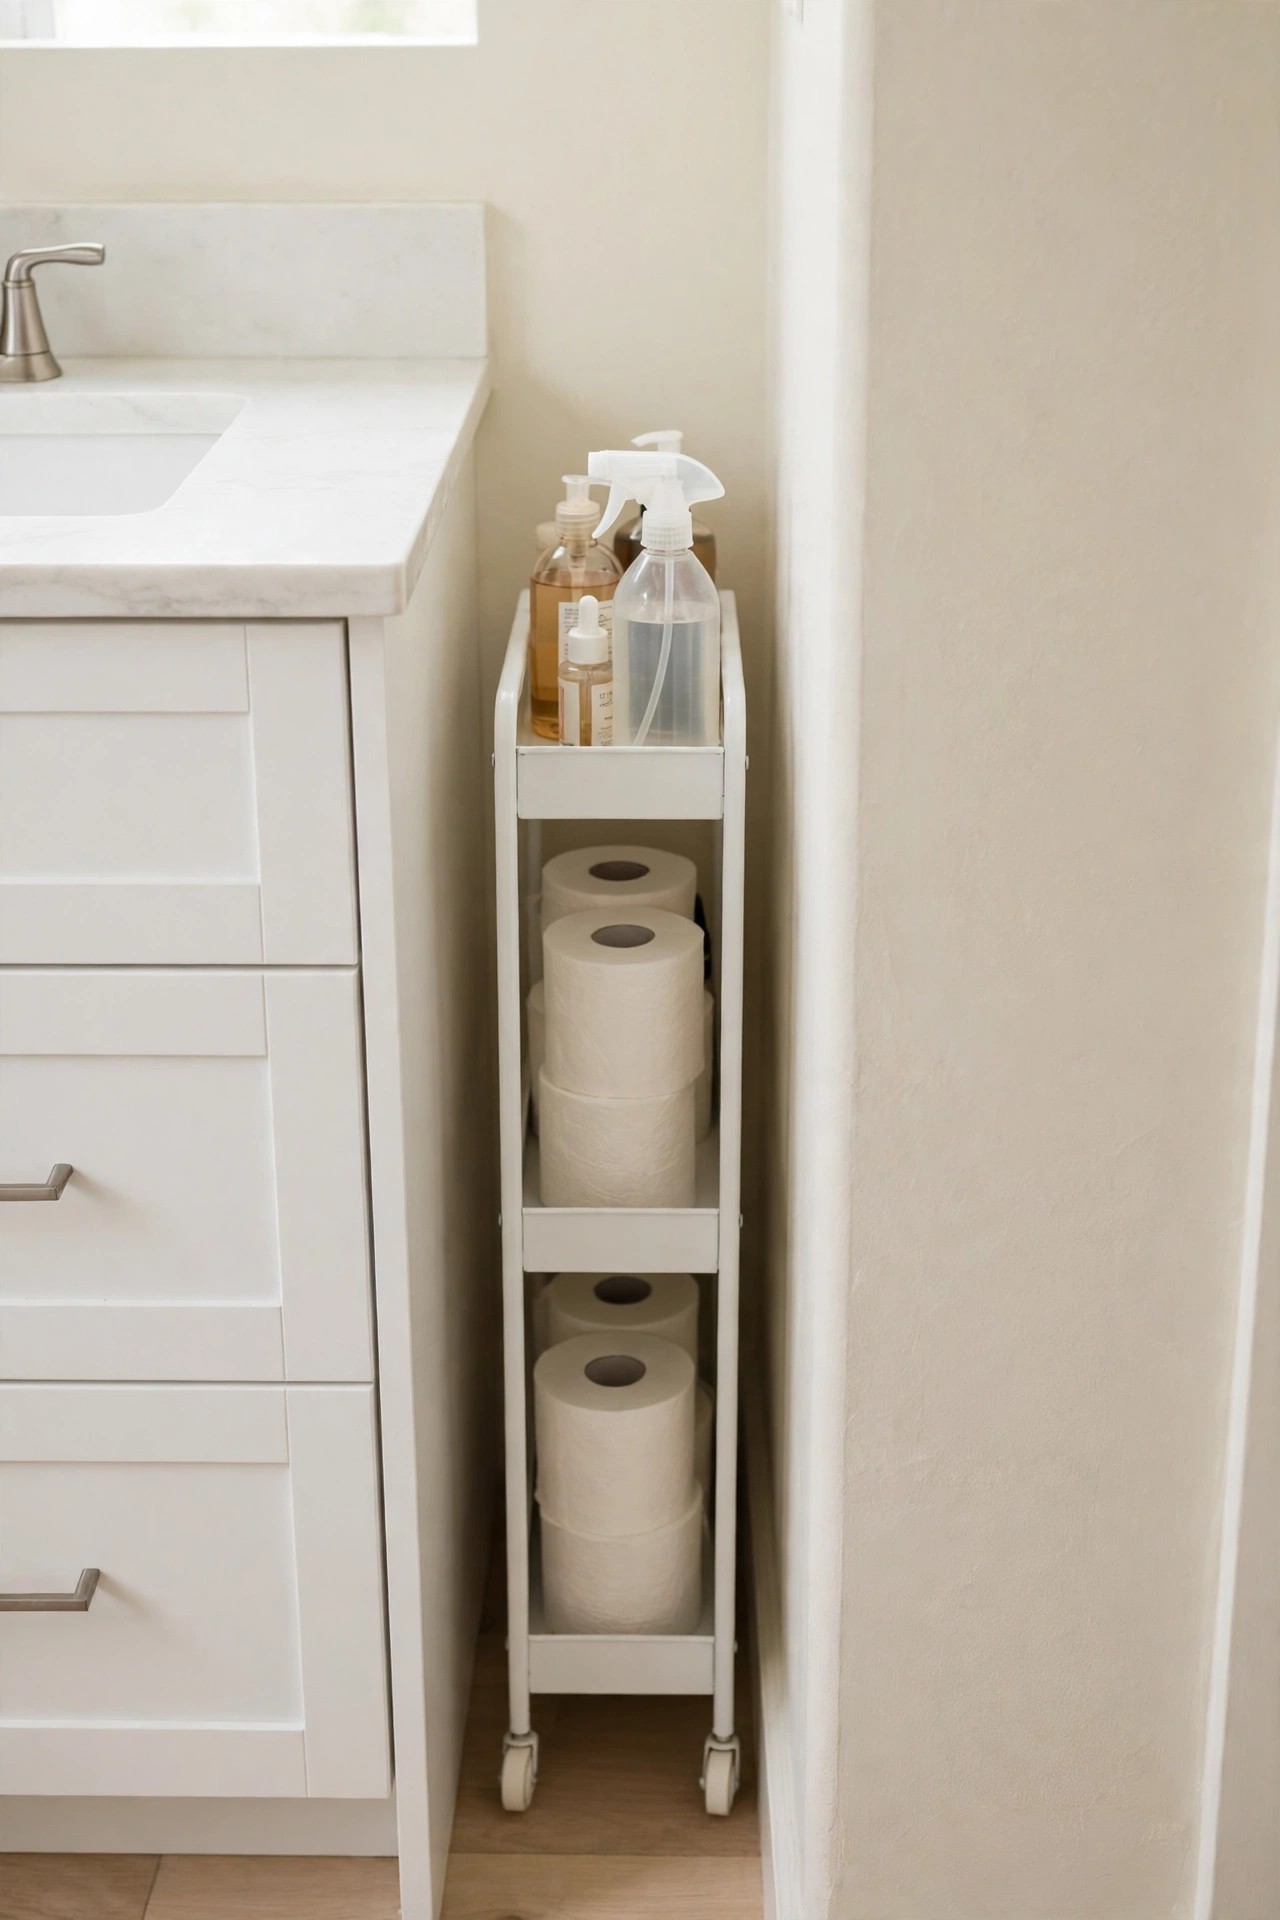
Description: Most small bathrooms have a dead slot about 5 inches wide beside the vanity, too narrow for a cabinet and too useful to waste. A slim rolling cart turns that slot into three tiers of storage for spare rolls, cotton supplies and cleaning cloths, and rolls out when you need something. The same trick works in a tight kitchen, which is why the cart is also a staple of these kitchen ideas. Measure first; cart widths run about 4.9 to 5.5 inches.
Best For: Vanities with a 5 to 6 inch side gap that currently collects dust and dropped items.
Not Ideal For: Gaps under 4.5 inches, and uneven floors where a loaded cart would roll on its own.
Estimated Cost: $20-$35 (estimate) for a three tier slim cart.
Budget Note: Plastic carts are the budget pick and wipe clean; metal versions cost more and rattle less on tile.
Renter Friendly: Yes
Renter Note: It is freestanding furniture with no fixing of any kind.
What You Need
Slim rolling cart, tape measure, small bins or jars sized to the tiers if you want subdivided storage.
Product recommendation (verified): SPACEKEEPER Slim Rolling Storage Cart, 3 Tier, White
Why it fits: The listed size is 4.9 inches deep by 15.3 inches wide by 26.1 inches tall, narrow enough for the standard vanity gap, with three tiers and caster wheels for pull-out access.
Retailer/product page: https://www.amazon.com/dp/B07QRH2PZS/ref=aip_sf_list_spv_ons_m_asin
How To Do It
- Measure the gap width and height so the cart clears the vanity top edge and any baseboard.
- Snap the tiers and wheels together; most slim carts need no tools.
- Load daily spares on the top tier and cleaning items at the bottom.
- Roll it in with the handle or top edge facing out so it pulls free with one finger.
Pro Tip
Keep one tier empty-ish for guest supplies; a small bathroom feels planned when a visitor is not handed a roll from a hallway closet.
7. Organize Under the Sink With Two-Tier Pull-Outs
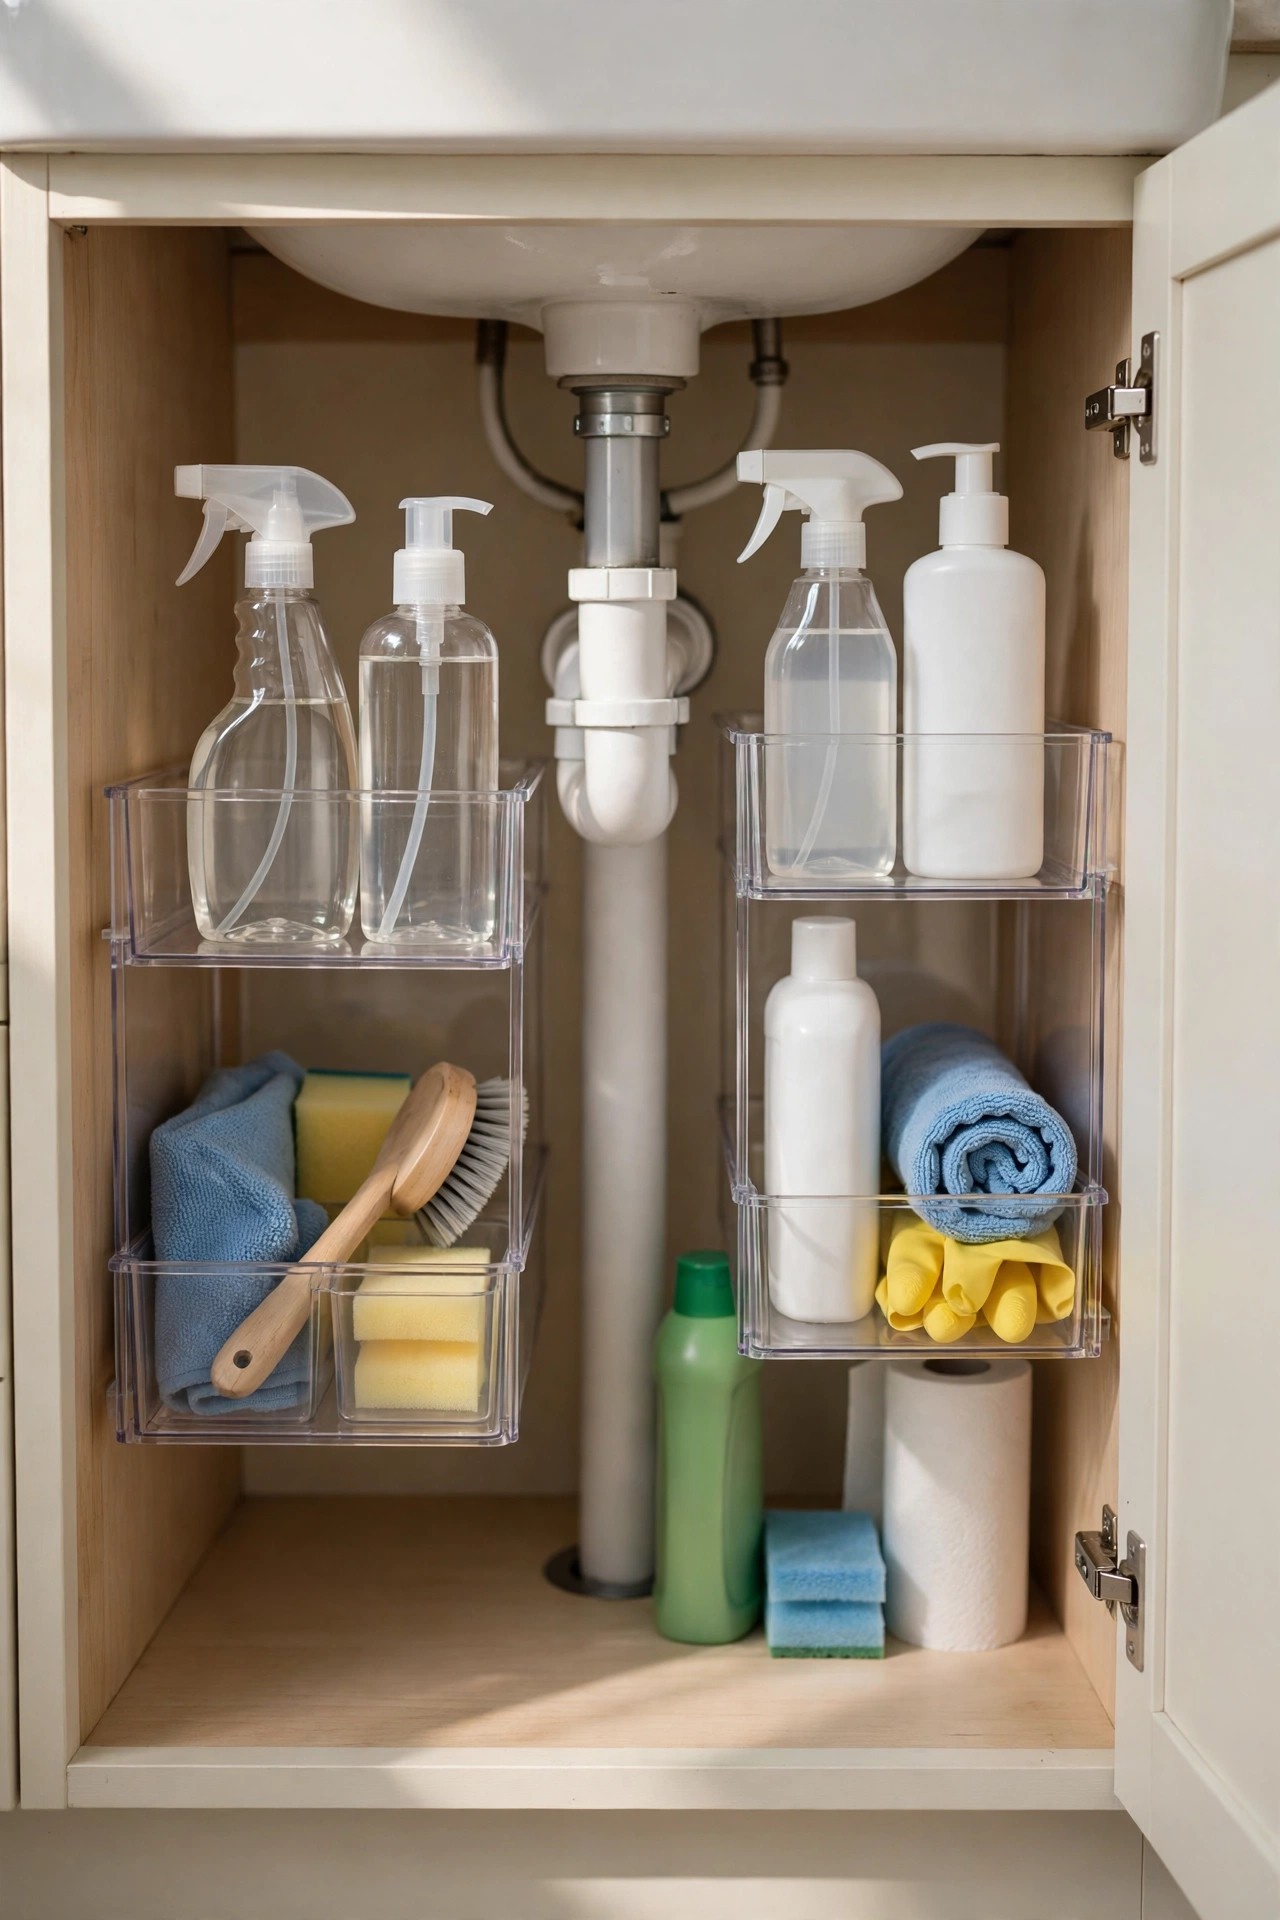
Description: Under a 24 inch sink there is real storage volume, but the drain pipe splits it and everything at the back is forgotten. A two-tier pull-out organizer works around the pipe: the sliding lower drawer brings the back row forward, and the fixed top tier doubles the shelf count. Clear sides matter in a dark cabinet, because you can see the level in a bottle before you grab it. Buy the height after measuring from the cabinet floor to the underside of the sink bowl.
Best For: Vanity cabinets where items get lost behind the pipes.
Not Ideal For: Cabinets with a drawer box at the top that leaves under 10 inches of clear height; measure before ordering.
Estimated Cost: $25-$40 (estimate) for a two-pack of two-tier organizers.
Budget Note: A two-pack usually costs little more than a single unit and covers both sides of the drain.
Renter Friendly: Yes
Renter Note: The units sit loose on the cabinet floor; nothing is fixed or glued.
What You Need
Two-tier pull-out organizers, tape measure, a torch or phone light for the cabinet check.
Product recommendation (verified): Vtopmart 2 Tier Bathroom Under Sink Organizers, Clear, 4 Pack
Why it fits: Each unit is listed at 11.8 inches deep, 7.5 to 7.9 inches wide and about 10 to 10.6 inches tall, a size made to share space with drain pipes, with pull-out drawers on tracks and a 15 pound capacity.
Retailer/product page: https://www.amazon.com/dp/B0CN3CPSHG/ref=cm_sw_r_as_gl_api_gl_i_dl_Z0VCTGKDQYD8QJMCZ2H1
How To Do It
- Empty the cabinet, wipe it dry, and measure the clear height and the width each side of the drain.
- Assemble the two tiers and check the top drawer clears the sink bowl underside.
- Set one unit each side of the pipe, heaviest bottles in the lower drawers.
- Label nothing and stock by task instead: daily items one side, cleaning the other.
Pro Tip
Put a folded microfiber cloth under any pump bottles; the first slow leak under a sink is usually spotted weeks late in a small cabinet.
8. Hang the Family’s Towels on the Back of the Door
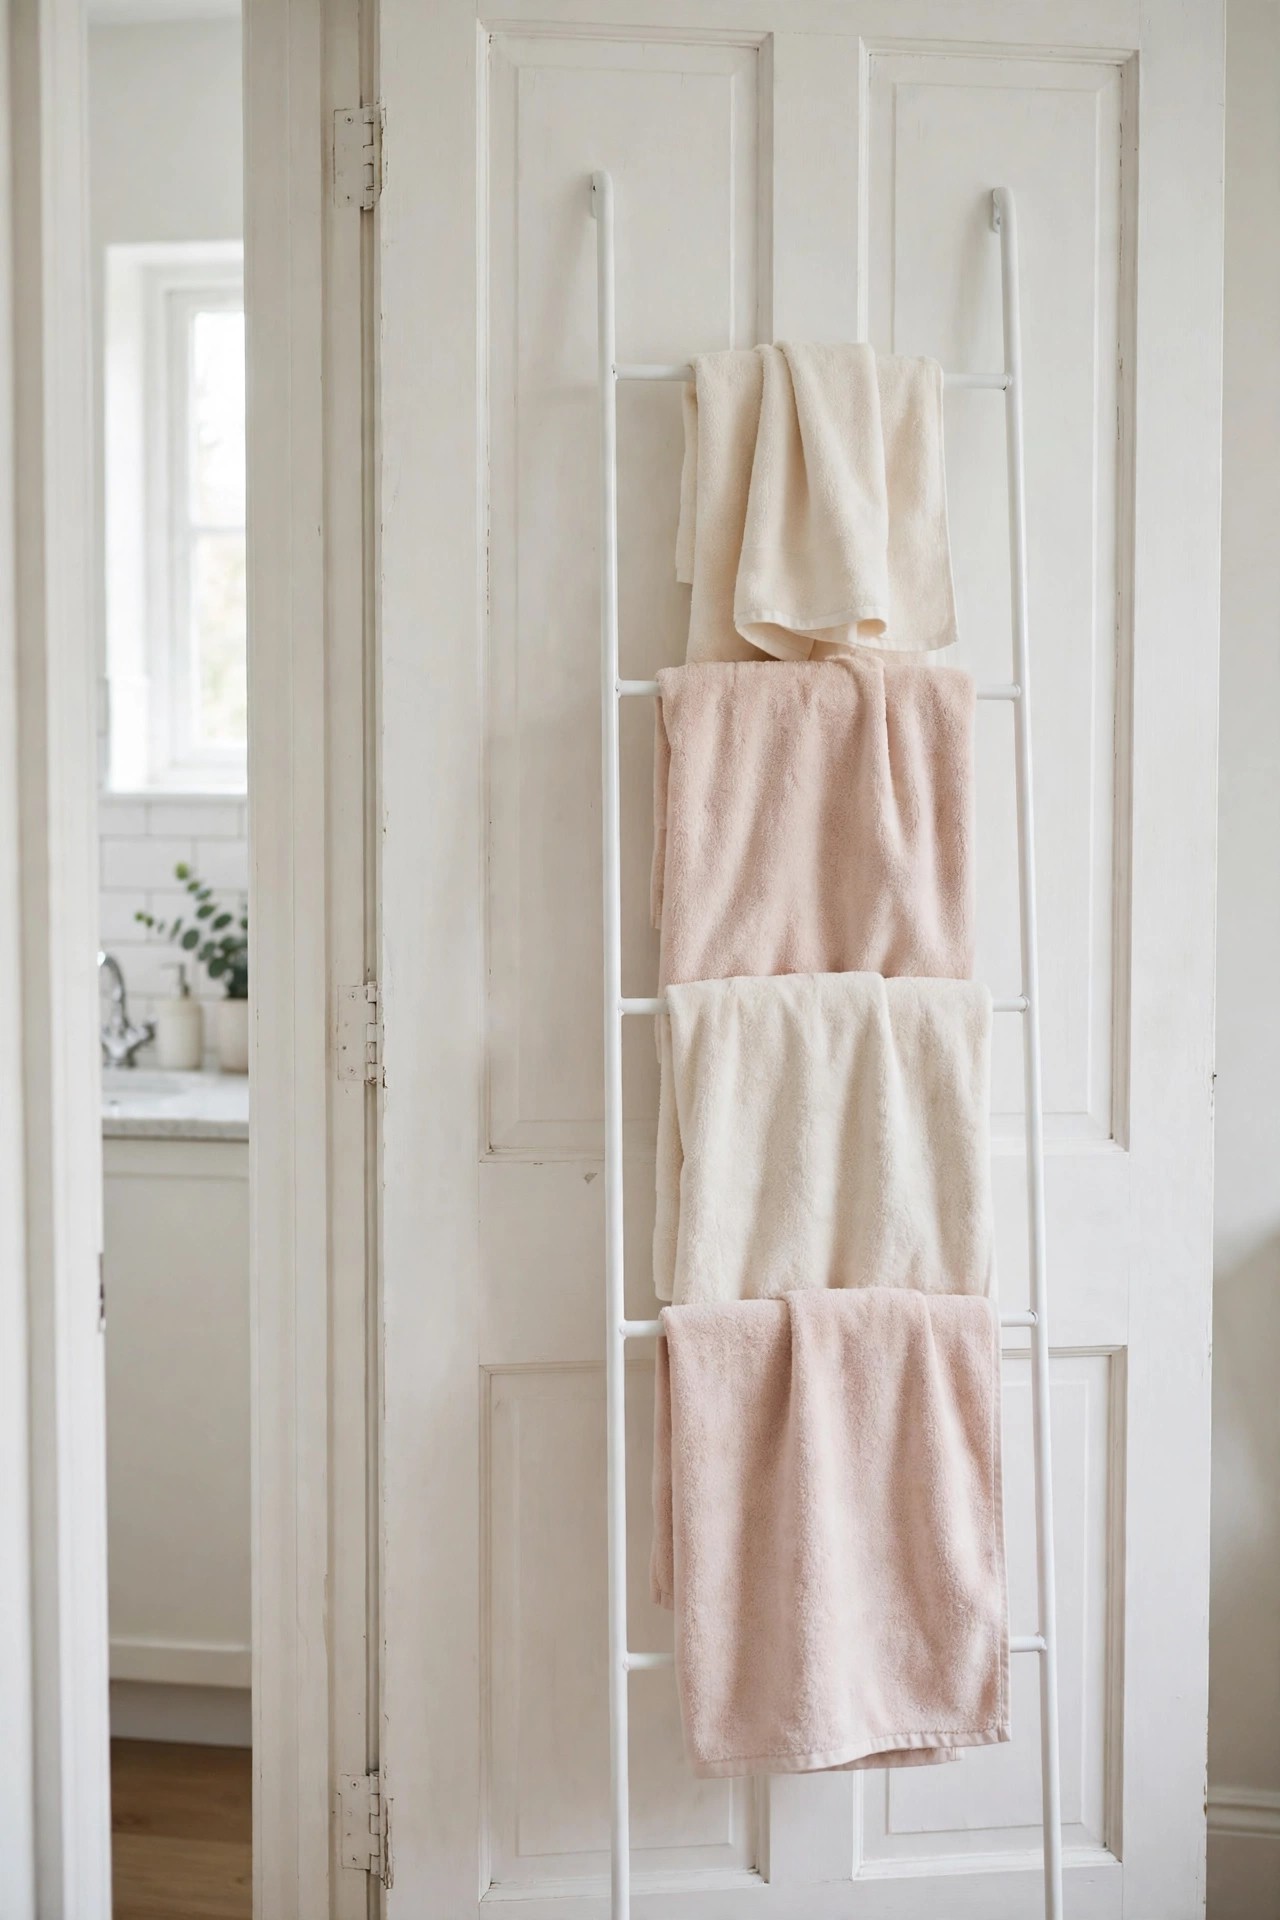
Description: One towel bar serves one person, and in a family bathroom the other three towels end up on the floor or the tub edge. A ladder rack that hooks over the door gives four rungs of hanging space on a surface that was doing nothing, and air moves around towels better on rungs than on single hooks, so they dry between uses. Check your door thickness and the gap above the door before ordering, and add felt pads so the rack does not tap against the door.
Best For: Bathrooms with one towel bar and three or more towel users.
Not Ideal For: Doors with less than a small coin’s clearance at the top frame, and pocket doors with no top edge to hook.
Estimated Cost: $35-$55 (estimate) for a four-rung over-door rack.
Budget Note: One ladder rack costs less than fitting a second and third wall bar, and needs no drilling at all.
Renter Friendly: Yes
Renter Note: It hooks on and lifts off; use the rubber feet and pads so the door paint stays unmarked.
What You Need
Over-door ladder towel rack, felt pads, tape measure for door thickness and top clearance.
Product recommendation (partially verified): MyGift Over The Door Towel Rack with 4 Rungs, White Metal Ladder
Why it fits: The four rungs hold a full set of family towels, the rack is listed to fit doors up to 1.75 inches thick, and its approximate size is 15.5 inches wide by 41.5 inches tall, inside a standard door’s width.
Retailer/product page: https://www.amazon.com/dp/B00KD1P1T6/ref=cm_sw_r_cso_cp_apin_dp_FSX60QX31D1JTTBKKC1C?previewDoh=1
How To Do It
- Measure the door thickness and the gap between the door top and the frame.
- Hook the brackets over the door and hang the ladder so it sits flat against the door face.
- Add felt pads where metal meets door, then test the door closes without a rattle.
- Give each person a rung, bath towels above and hand towels on the lowest rung.
Pro Tip
Fold bath towels in thirds lengthwise before hanging; on narrow rungs they hang flatter, dry faster and stop sliding off when the door moves.
9. Choose a Short-Projection Toilet When You Replace One
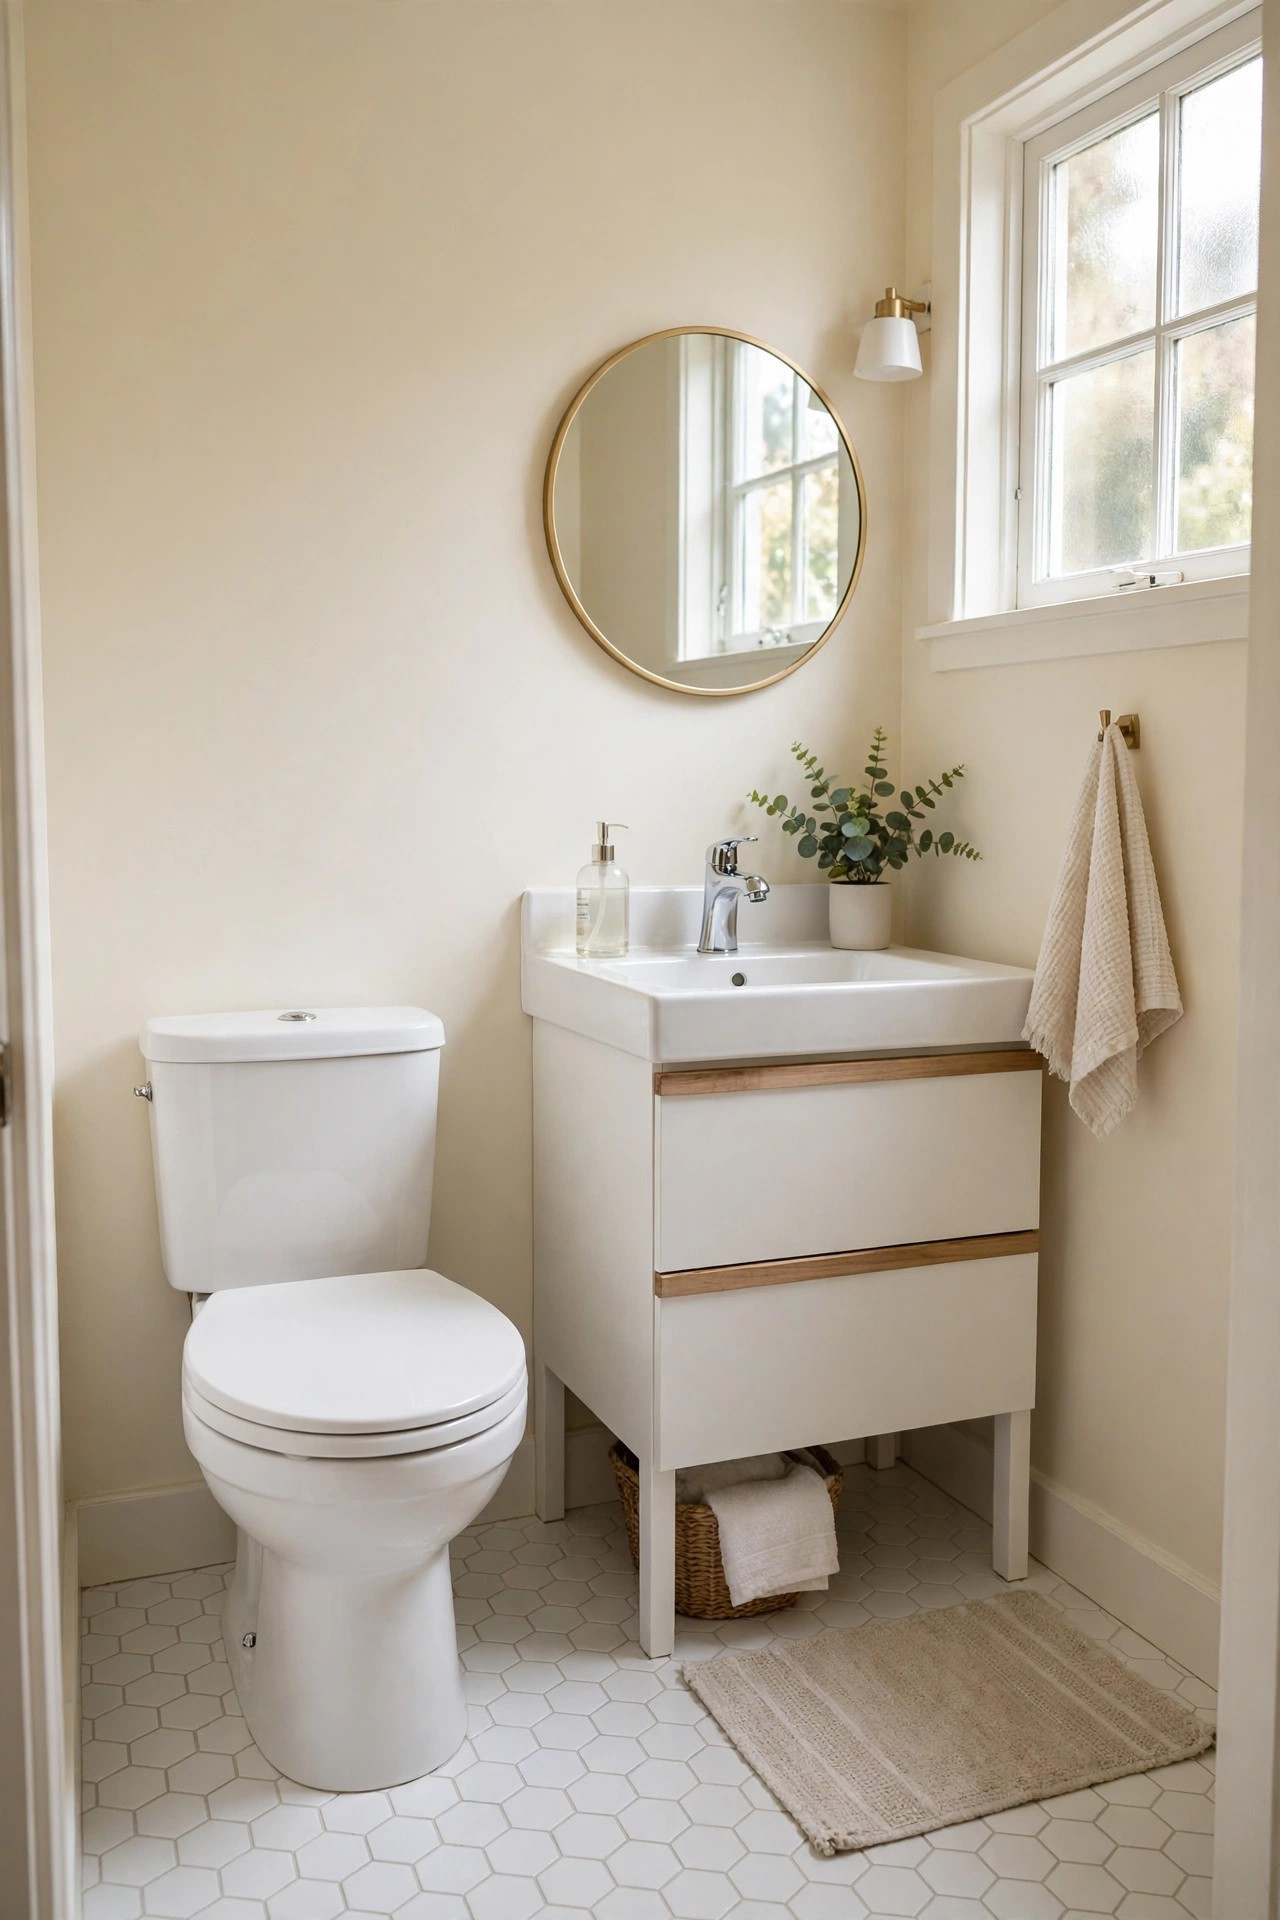
Description: A standard toilet projects about 28 to 30 inches from the wall. Compact one-piece models project about 24 to 25 inches, which returns 4 to 5 inches of knee and standing room in a room where the vanity door, the tub and your legs all compete for the same floor. The trade is bowl shape: most compact models use a round bowl, which some adults find less roomy than elongated. If your rough-in is 12 inches, which is standard, a compact toilet usually keeps the same flange position.
Best For: Owner remodels where the toilet faces the vanity or a wall at close range.
Not Ideal For: Renters, and homes with a 10 inch rough-in unless the model is made for it; measure from the wall to the floor bolts first.
Estimated Cost: $230-$330 (estimate) for the toilet, plus a wax ring and possibly a plumber’s visit.
Budget Note: The toilet is not the place to save twice; a dual flush model trims the water bill every day it is installed.
Renter Friendly: No
Renter Note: This is permanent plumbing for owners; renters should skip to the storage ideas, which return the same calm without touching fittings.
What You Need
Compact toilet with seat, wax ring, closet bolts, adjustable wrench, level, towels and a bucket for the tank water.
Product recommendation (partially verified): SOTOMO Compact One Piece Toilet, Round, Dual Flush, 12 Inch Rough-In (MY-2133)
Why it fits: The listed depth is 25 inches from the wall, about 4 inches shorter than a standard toilet, with a skirted one-piece body that wipes clean and a dual flush averaging under 1.28 gallons.
Retailer/product page: https://www.amazon.com/dp/B0CXHYBRPN/ref=sr_1_7
How To Do It
- Measure your rough-in from the finished wall to the centre of the floor bolts; order only a model that matches.
- Shut off the supply, drain and remove the old toilet, and scrape the old wax ring fully off the flange.
- Set the new wax ring, lower the toilet straight onto the bolts, and level it before tightening evenly.
- Connect the supply, fill the tank, and flush three times while checking the base and valve for leaks.
Pro Tip
Sit on the new toilet before the silicone bead goes around the base; a compact bowl changes the feel, and it is easier to judge with the seat at its real height. Leave the back of the base unsealed so a slow leak shows instead of hiding under the toilet.
10. Trade the Curtain for a Frameless Glass Tub Panel
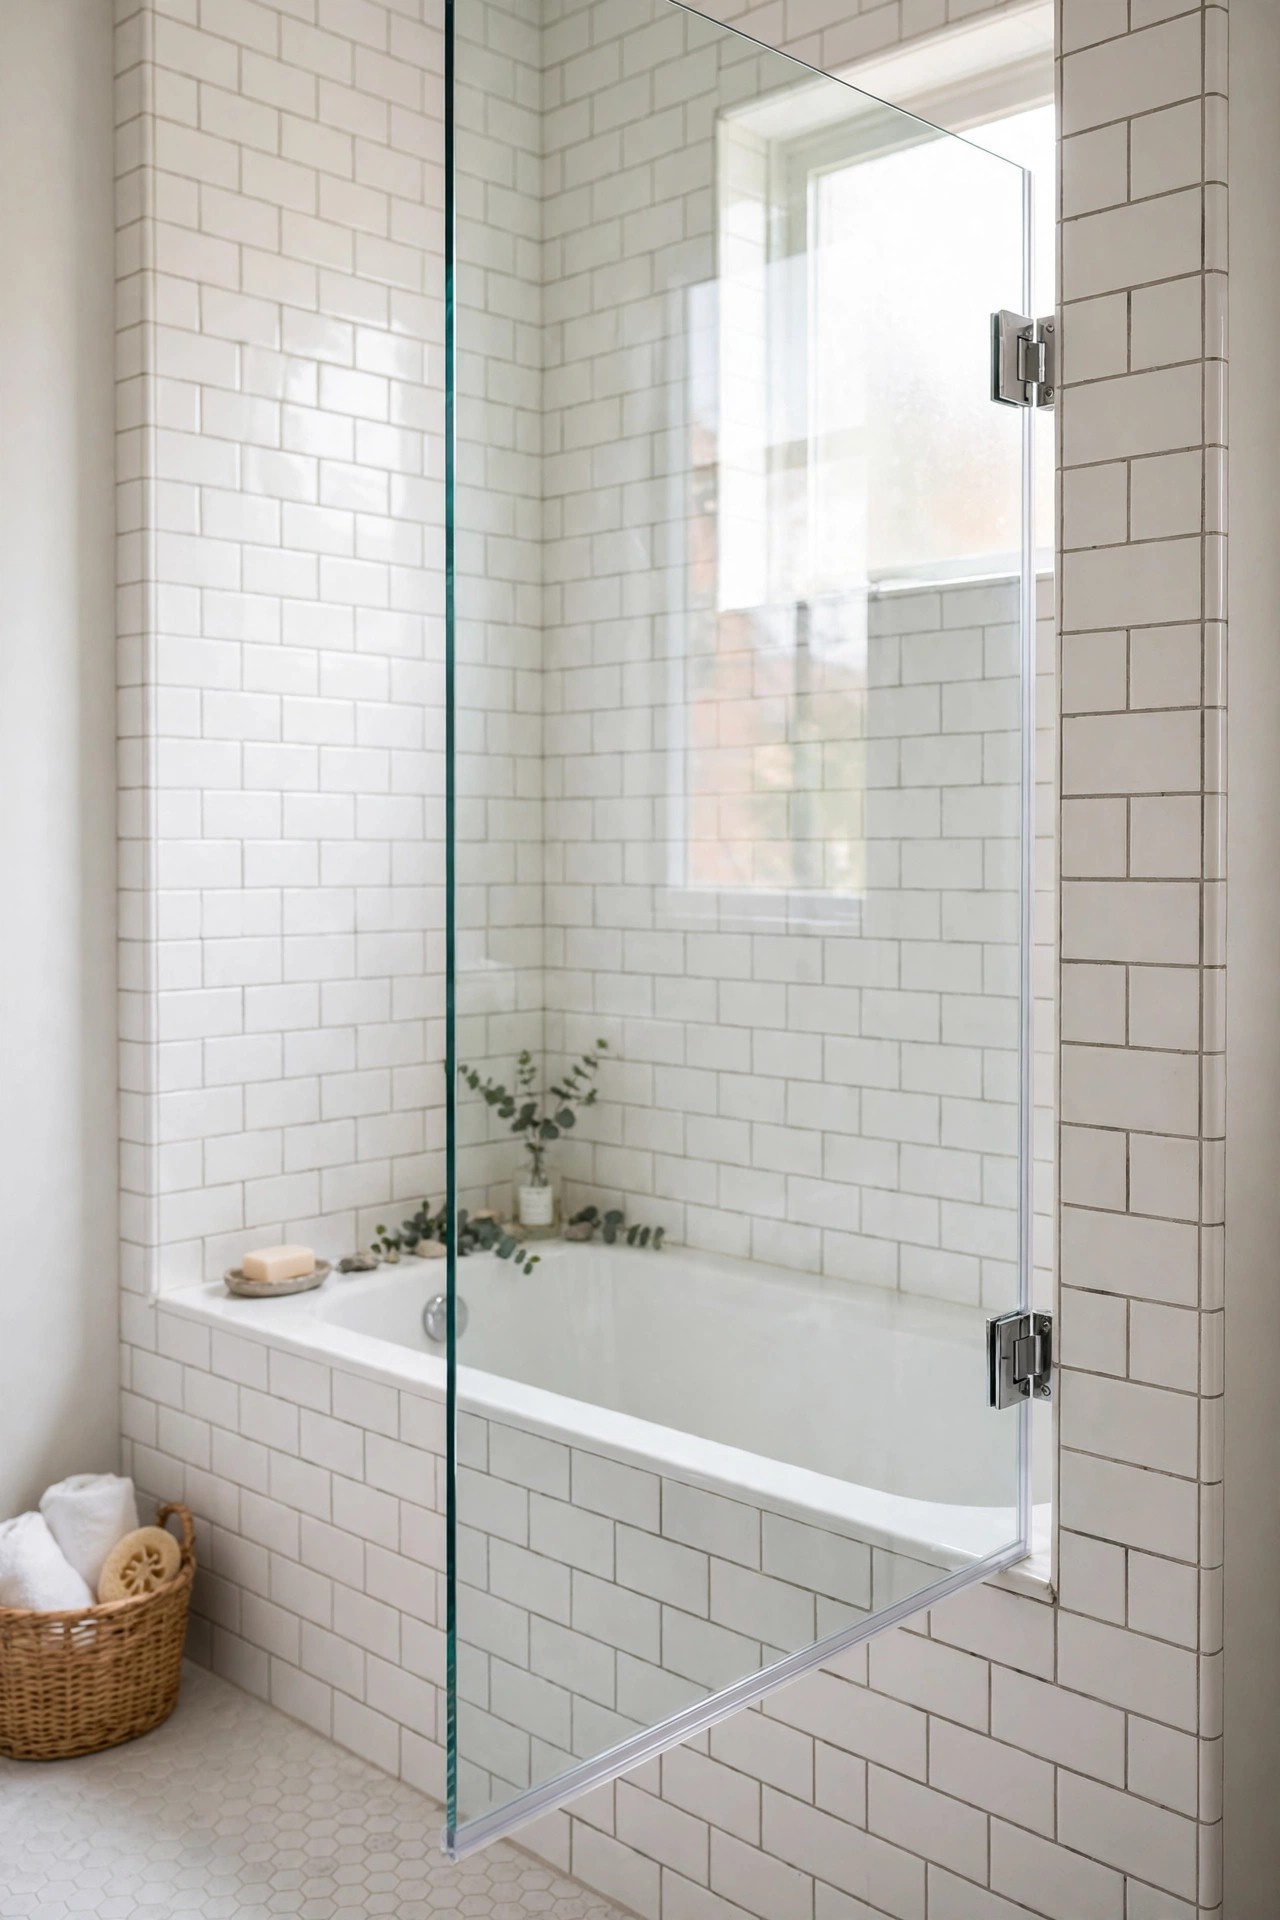
Description: A curtain blocks light and clings; a fixed or hinged glass panel over the front half of the tub keeps the spray in while the room stays bright, and it wipes down in seconds. Panels about 34 inches wide cover the shower zone and leave the rest of the tub open, which matters when children still take baths in the same tub. It is the most construction-heavy idea here: hinges fix to the wall, so tiling and stud positions decide if it is a DIY job or a fitter’s.
Best For: Owners whose curtain is the one thing that still makes the room feel closed in.
Not Ideal For: Renters, and tubs with a curved or sloped front edge that a panel seal cannot sit on.
Estimated Cost: $250-$450 (estimate) for the panel, more if a fitter installs it.
Budget Note: A hinged panel costs less than a full sliding tub door and leaves bath access open, which suits a family tub.
Renter Friendly: No
Renter Note: The hinges and wall channel are screwed fixings, so this is an owner upgrade only.
What You Need
Frameless tub panel with hinges, drill with tile bit, wall plugs rated for the panel weight, level, silicone sealant, a second person to hold the glass.
Product recommendation (partially verified): DreamLine Aqua Uno Frameless Hinged Tub Door, 34 Inch W x 58 Inch H, Chrome (SHDR-3534586-01)
Why it fits: The 34 inch width covers the shower end of a 60 inch tub while leaving the rest open for baths, and the Aqua line uses clear tempered glass with solid brass hinges and a reversible fit.
Retailer/product page: https://www.amazon.com/dp/B004WSKGJQ
How To Do It
- Check the wall beside the tub is plumb and find the studs or sound tile the hinges will fix to.
- Mark the hinge positions with the panel held in place and the tub edge wiped clean.
- Fix the hinges, hang the panel, and adjust until it swings without touching the tub rim.
- Seal the wall joint with silicone and let it cure a full day before the first shower.
Pro Tip
Keep a small squeegee on a hook inside the tub and make the last shower of the day end with ten seconds of wiping; glass in a hard-water family bathroom stays clear with habit, not products.
11. Put the Shower Head on a Slide Bar for Every Height
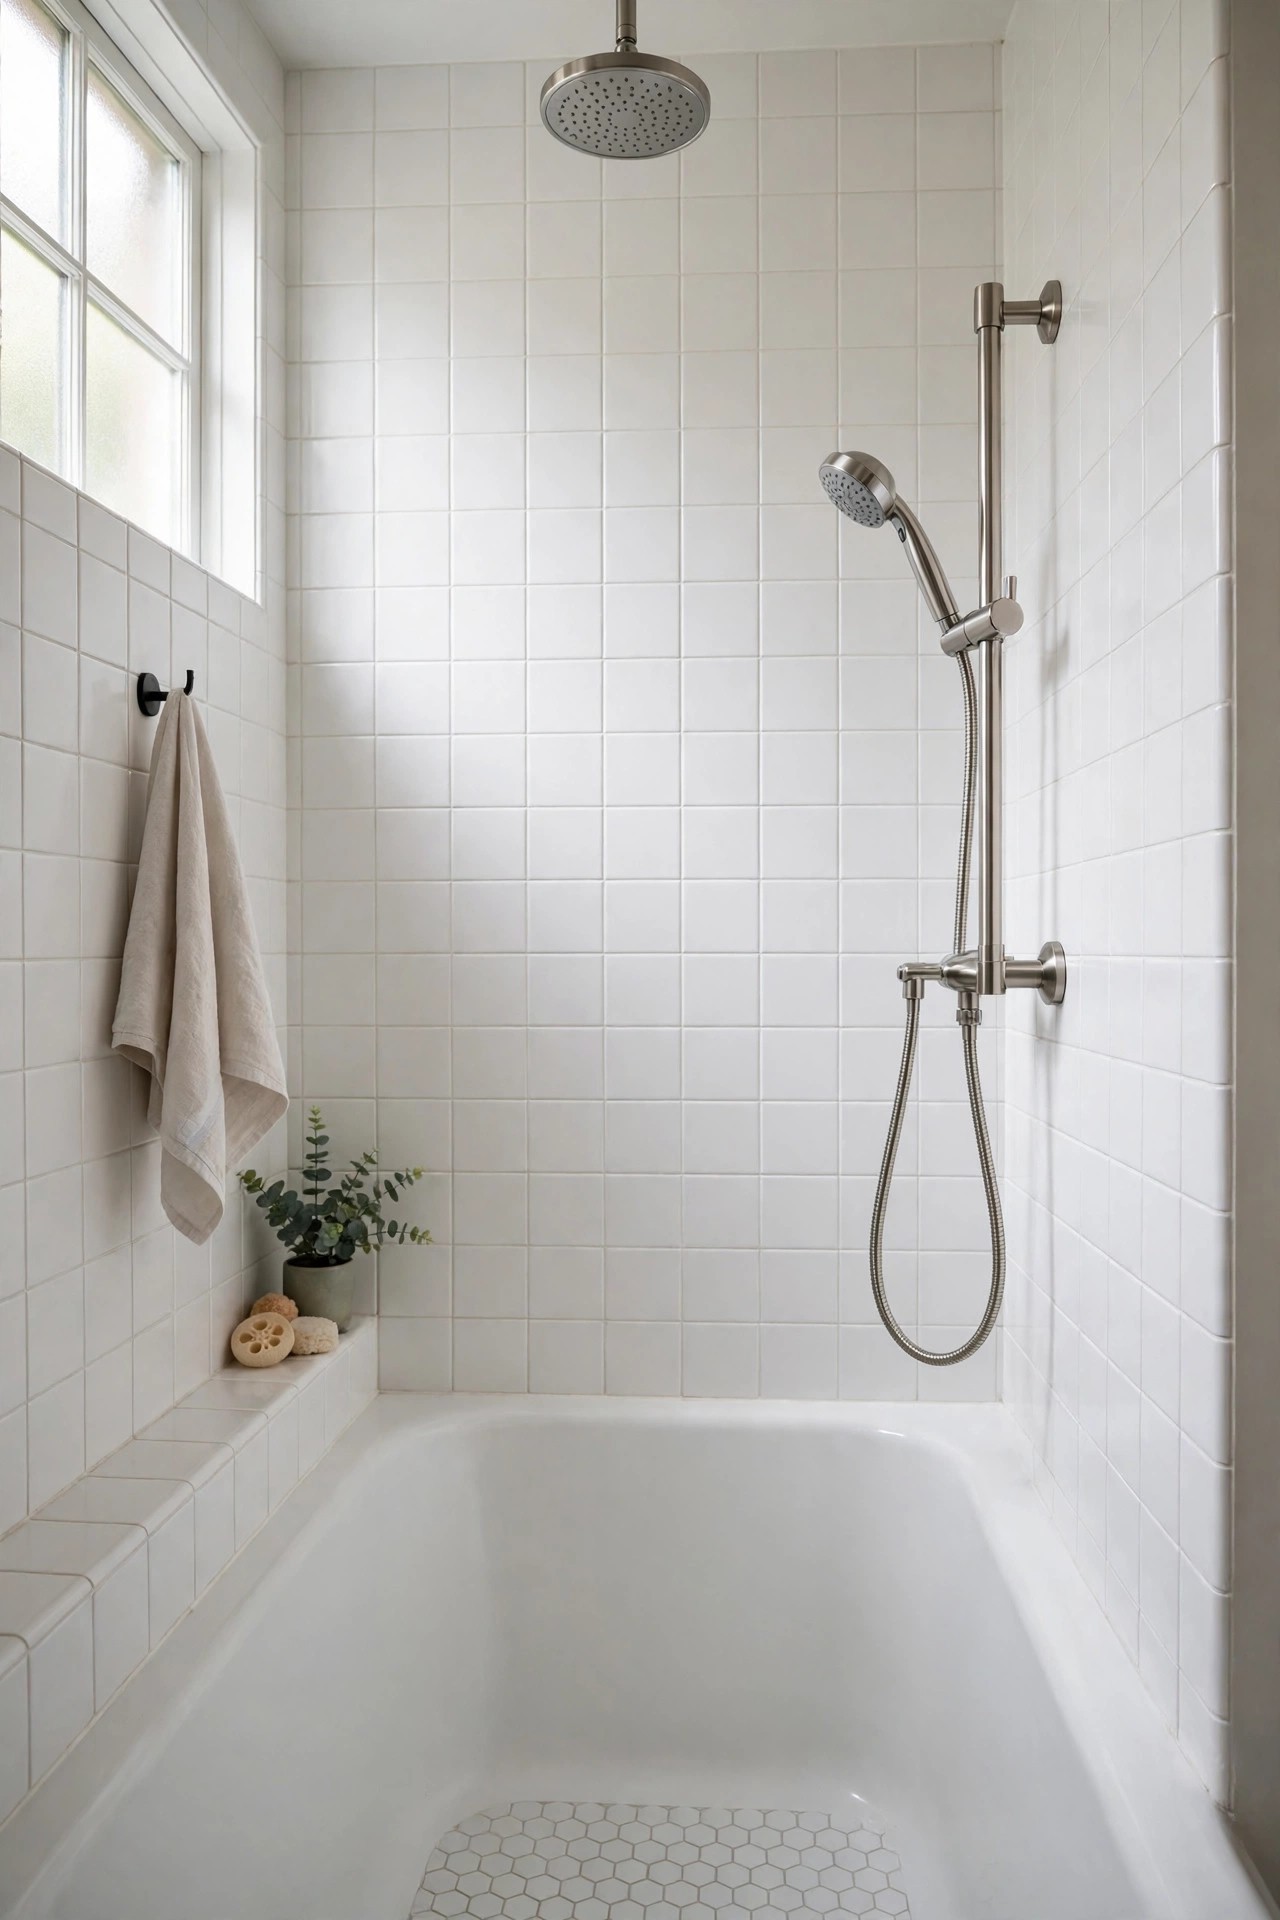
Description: A fixed head at one height serves exactly one person well. A slide bar lets the handheld sit high for adults, drop low for children and come off the wall entirely for rinsing the tub, the dog or a head of long hair. Drill-free versions mount on the existing shower arm and an adhesive or suction lower bracket, which makes this the most renter-realistic fixture change in the list. A 5 foot hose is the minimum worth buying; shorter hoses strain at the tub’s far end.
Best For: Households sharing one tub between tall adults, small children and bath-time cleaning.
Not Ideal For: Showers with very low water pressure, where splitting flow between two heads weakens both.
Estimated Cost: $60-$110 (estimate) for a slide bar combo with hose and diverter.
Budget Note: A combo that reuses your shower arm skips the plumber entirely, which is where the real saving sits.
Renter Friendly: Yes
Renter Note: Choose a drill-free mount and keep the original shower head in a labelled bag so the bathroom can be returned as found.
What You Need
Slide bar handheld combo with hose and diverter, thread seal tape, adjustable pliers with a cloth to protect the finish.
Product recommendation (partially verified): HotelSpa Instant-Mount Drill-Free Slide Bar Combo, 30 Setting, Model 1187
Why it fits: The listed set includes a 22 inch stainless steel slide bar, a 5 foot hose and a 3-way diverter, and it mounts without drilling, so the head height adjusts for each user in the same tub.
Retailer/product page: https://www.amazon.com/dp/B01HQAH2NO
How To Do It
- Unscrew the old shower head and clean the thread on the shower arm.
- Wrap the thread with seal tape, fit the diverter, and attach the fixed head and the hose.
- Set the slide bar bracket at the height of the shortest adult user and fix the lower mount.
- Test every setting, then check each joint for drips with the water at full pressure.
Pro Tip
Mount the bar so the handheld, at its lowest setting, still reaches the tub floor; that is the position you will use for rinsing shampoo off children and cleaner off tile.
12. Lay a Light Peel and Stick Vinyl Floor Over the Old One
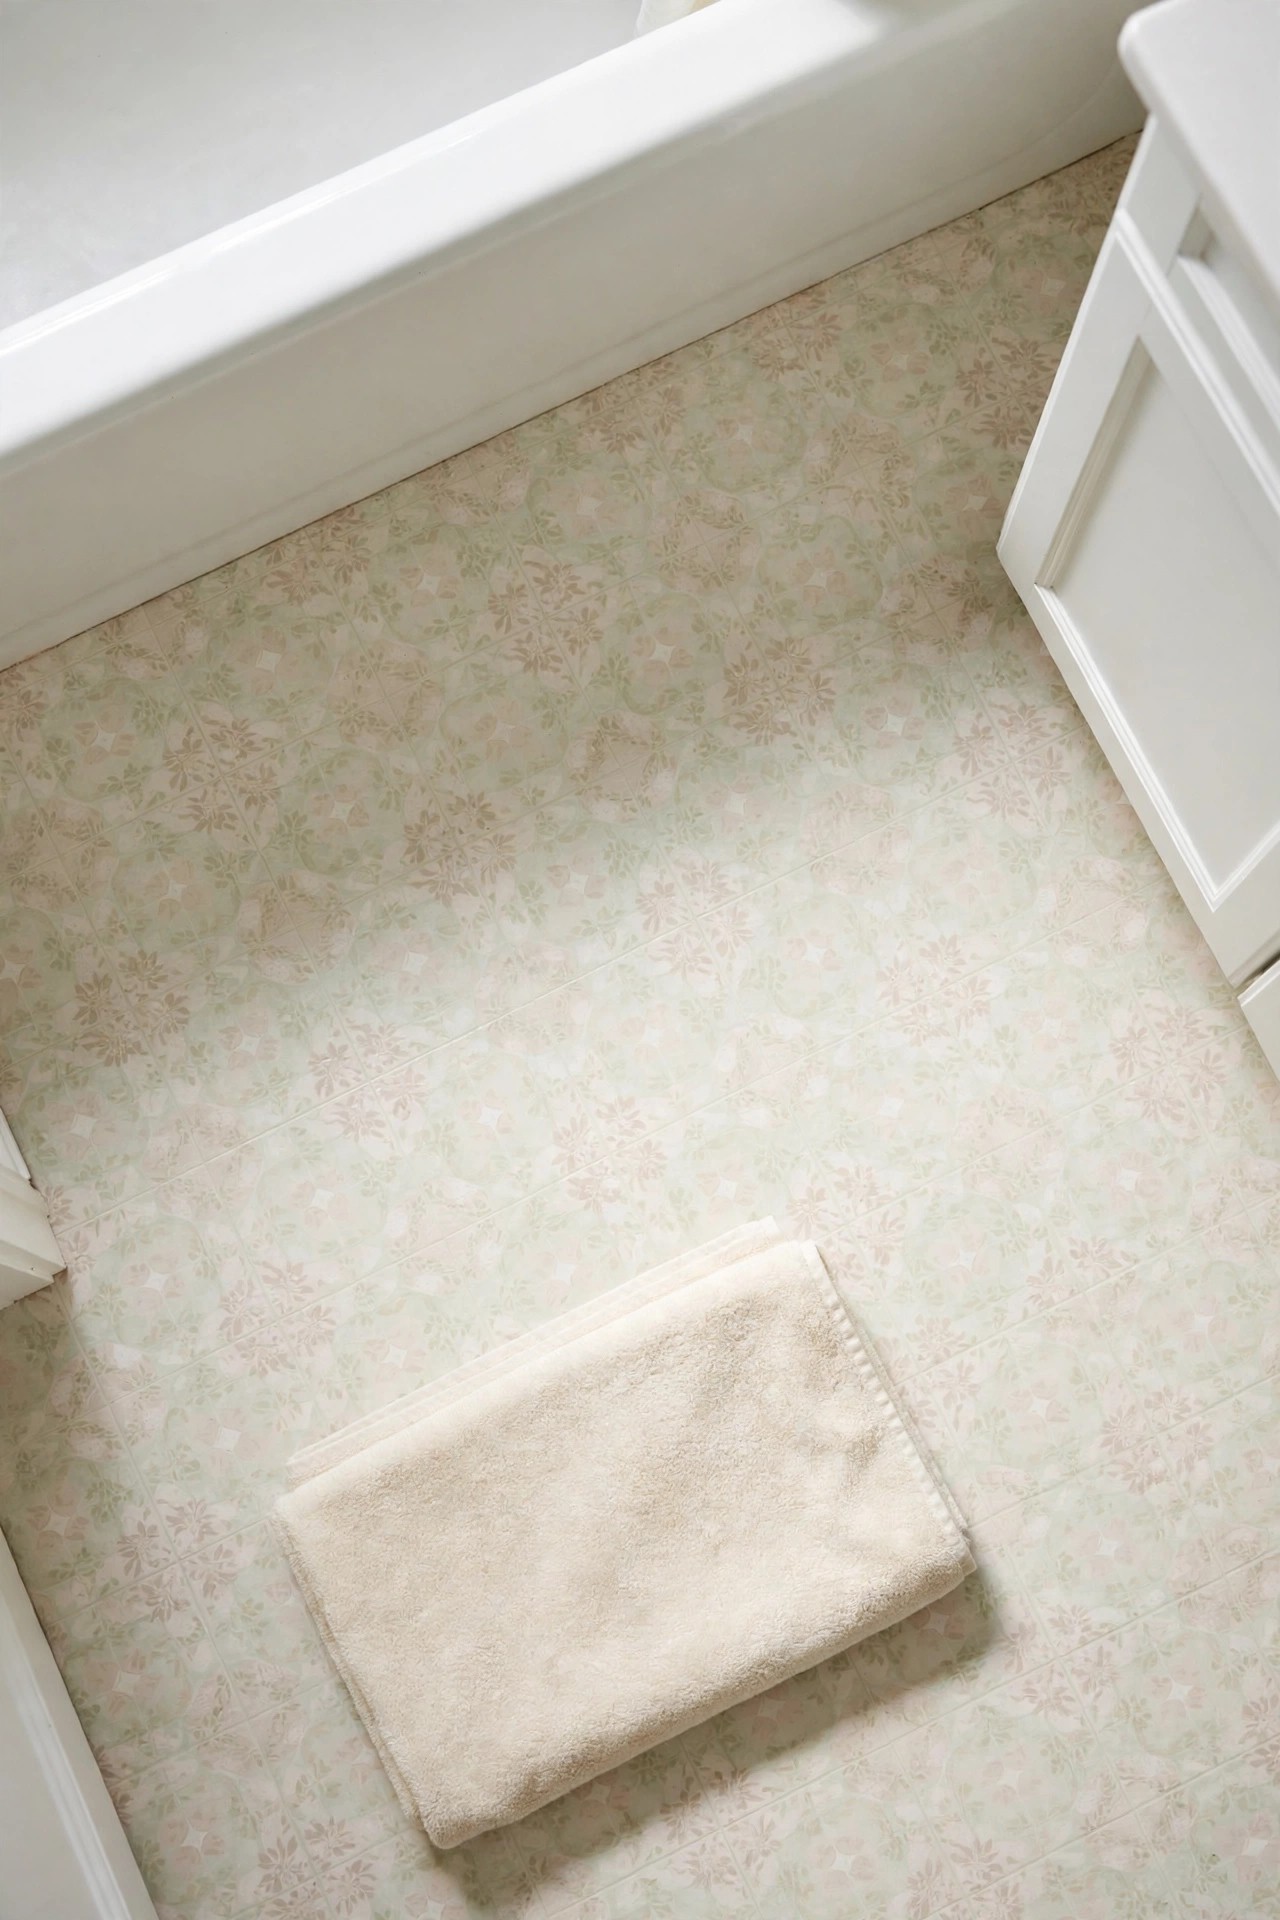
Description: In 35 to 45 square feet, the floor is the biggest single surface, and a dark one makes the whole room feel smaller and less clean. Peel and stick vinyl tiles in a pale pattern go over a sound existing floor in an afternoon, are water resistant at the surface, and cut with a utility knife around the toilet and vanity. They are not a lifetime floor: pooled water at the tub edge will find the seams, so seal the tub line and lift any tile that starts to curl.
Best For: Sound but dated vinyl or tile floors in rooms that need light more than they need luxury.
Not Ideal For: Floors with loose tiles, soft spots or regular standing water; fix the base problem first.
Estimated Cost: $60-$110 (estimate) for four packs covering a typical small full bathroom.
Budget Note: One pack covers about 10 square feet, so measure and add one spare pack for cuts; the pattern repeat decides the waste, not the room.
Renter Friendly: With Conditions
Renter Note: The tiles remove with heat, but adhesive residue and a lifted old floor are real risks; get the landlord’s written okay first.
What You Need
Peel and stick vinyl floor tiles, utility knife and straight edge, tape measure, roller or a smooth bottle for pressing seams, silicone for the tub edge.
Product recommendation (verified): FloorPops Fontaine Peel & Stick Floor Tiles, Blue Encaustic Pattern (FP2477)
Why it fits: Each tile is listed at 12 by 12 inches with 10 square feet per pack, the vinyl is water resistant for bathroom floors, and the pale encaustic pattern reads light while hiding daily dust and hair.
Retailer/product page: https://www.amazon.com/dp/B079DCJMMB
How To Do It
- Clean the old floor, let it dry fully, and remove any loose sections or high spots.
- Dry-lay from the centre of the room so the cut tiles land at the tub and walls, not at the door.
- Peel, set and roll each tile firmly, working out from the centre and cutting edges with the knife.
- Seal the line where the floor meets the tub with silicone and wait the maker’s stated time before mopping.
Pro Tip
Buy tiles from one batch in a single order; pattern colour shifts slightly between print runs, and a patch bought later can show even in the same design.
13. Let a Humidity-Sensing Fan Run the Room Dry
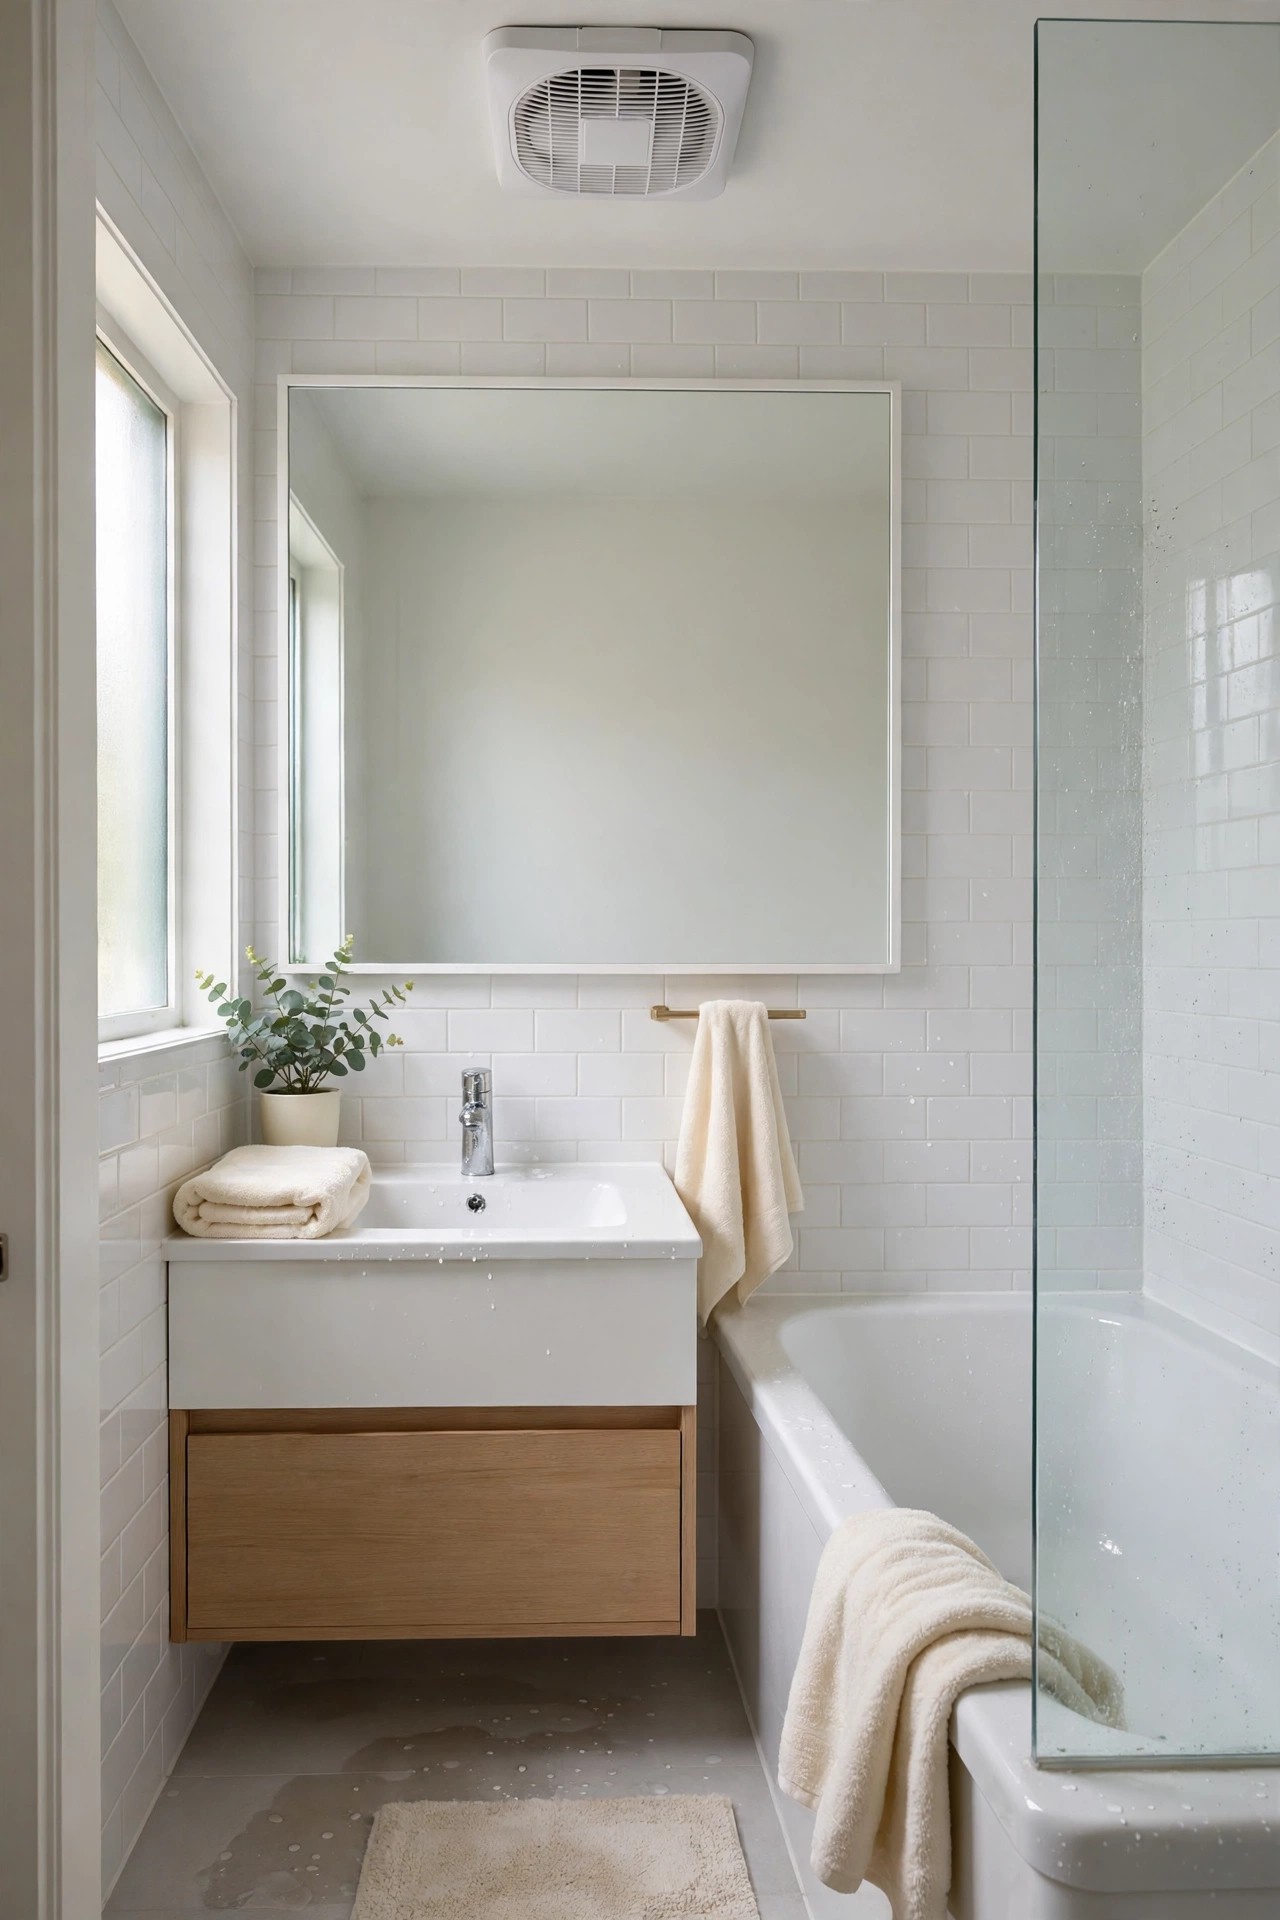
Description: A full bathroom makes steam several times a day, and in a small room it sits on paint, grout and ceilings. A fan with a humidity sensor switches on when the shower runs and keeps going until the air clears, which matters in a family bathroom because nobody remembers the fan switch during the school run. For a room of 35 to 45 square feet, a fan rated around 80 to 110 CFM is the usual working range; quiet models near 1 sone can run without waking anyone.
Best For: Bathrooms with fogged mirrors, peeling paint or a musty smell that returns by evening.
Not Ideal For: Rooms with no existing fan duct; adding a duct run is a bigger job than swapping the fan itself.
Estimated Cost: $110-$180 (estimate) for the fan, plus fitting if the wiring or duct size changes.
Budget Note: If a fan already exists, a humidity-sensing wall control can add the automatic behaviour for less than a full fan swap.
Renter Friendly: No
Renter Note: Fans are wired and ducted fittings, so this is owner work; renters can start with the habit of a 20 minute fan run after showers if a fan is fitted.
What You Need
Humidity-sensing exhaust fan matched to your duct size, screwdriver, wire connectors, foil duct tape, and the breaker switched off before any wiring is touched.
Product recommendation (partially verified): Broan AE110 Flex Series Bath Fan with Humidity Sensor, 110 CFM
Why it fits: The listed rating is 110 CFM at a quiet 1.0 sone, sized for rooms up to 100 square feet, with room-side installation and a sensor that runs the fan when humidity rises.
Retailer/product page: https://www.costco.com/p/-/broan-high-volume-bath-ventilation-fan-with-humidity-sensor/100683885?DM_PersistentCookieCreated=true&langId=-1
How To Do It
- Turn the power off at the breaker and remove the old fan’s cover and housing.
- Check the duct size and route; the new fan must vent outside, never into the attic space.
- Connect the housing to the duct and wiring as the maker directs, or have an electrician do this stage.
- Set the sensor level, restore power, and test with a hot shower until the fan starts on its own.
Pro Tip
Run the tissue test twice a year: hold one square of toilet tissue near the running fan. If it does not hold against the grille, clean the cover and check the duct before assuming the fan has failed.
14. Add Adhesive Corner Shelves Where Bottles Overflow
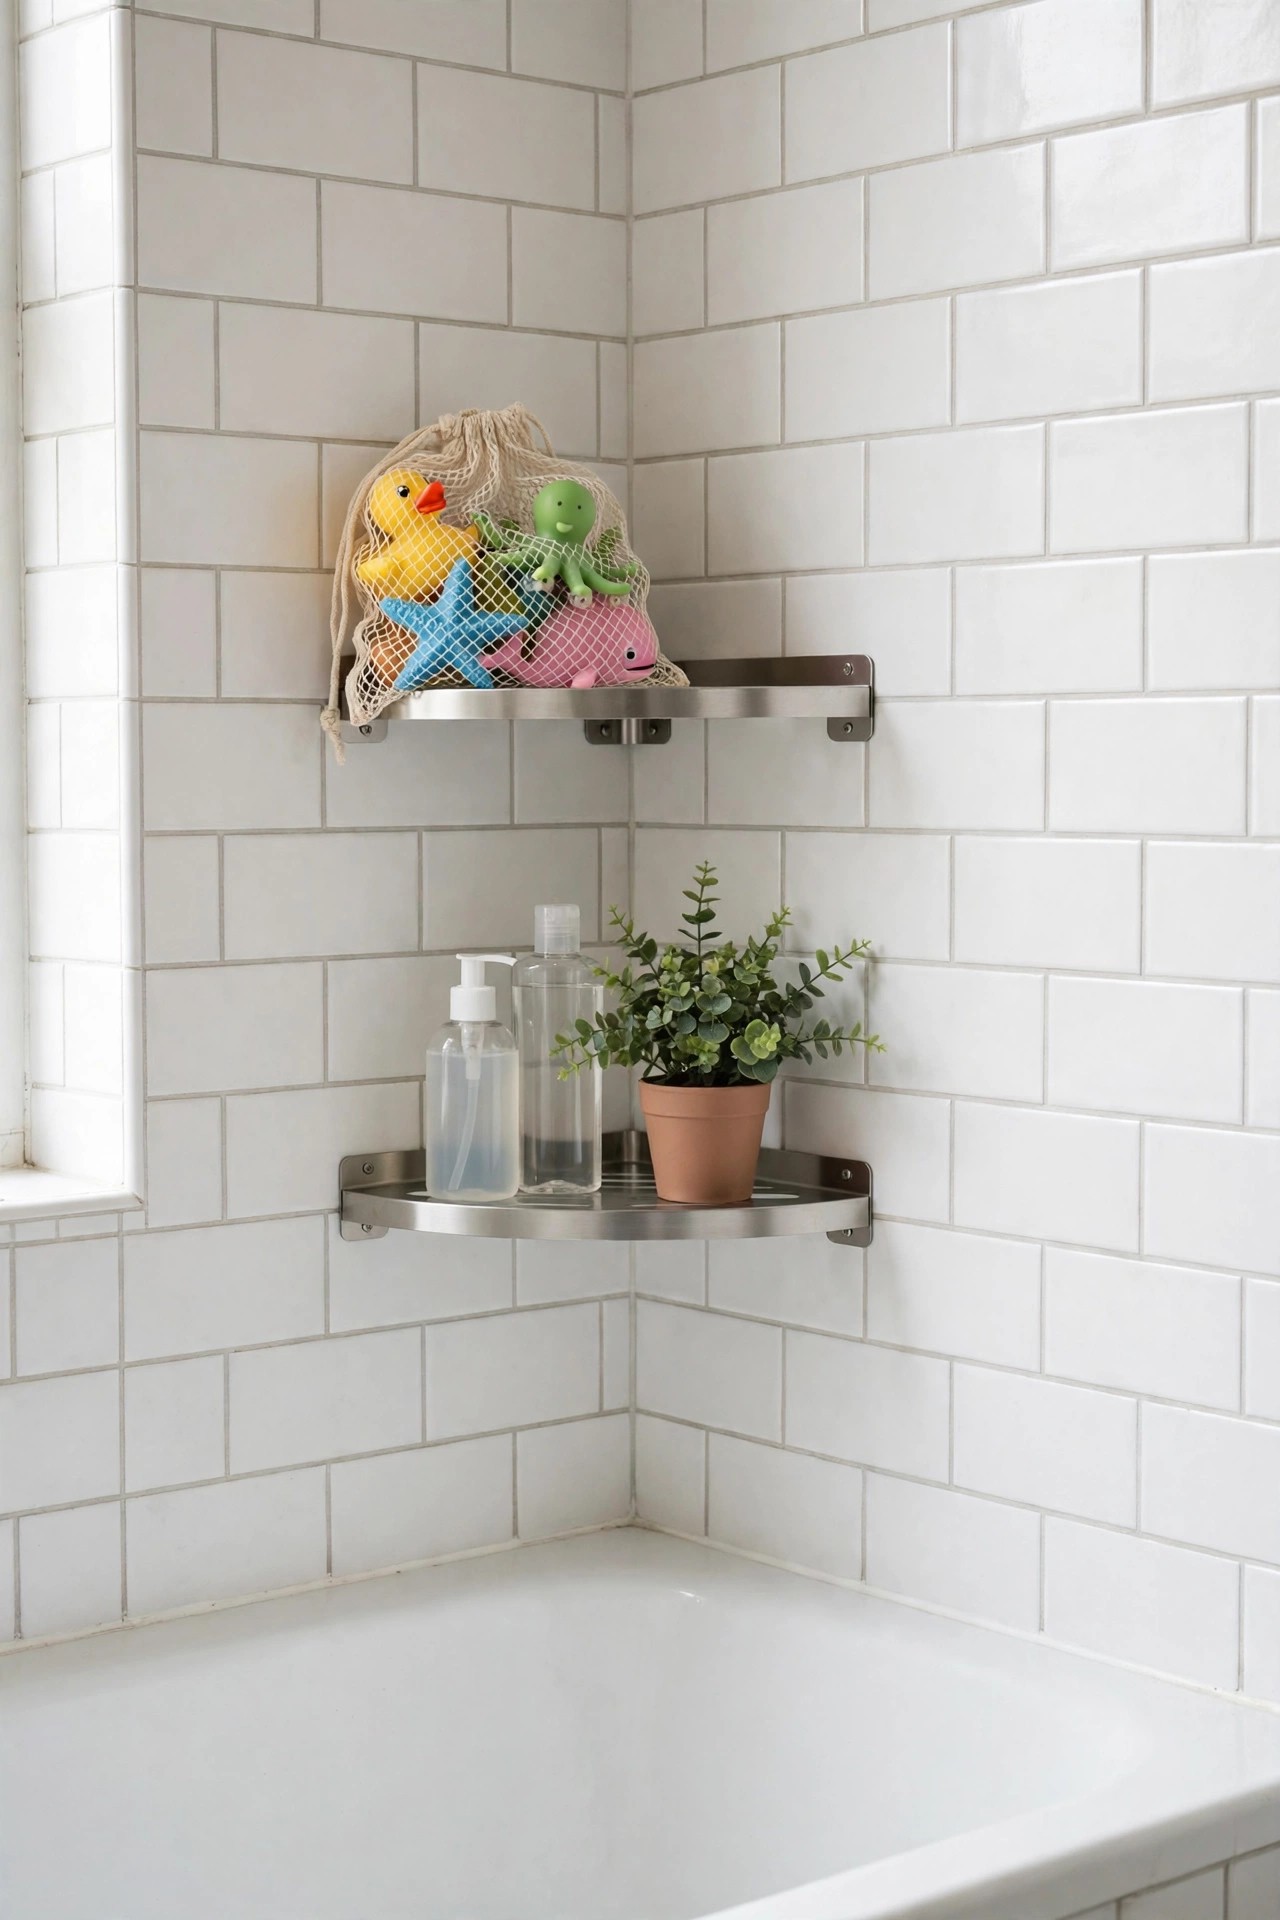
Description: Even with a caddy in the shower corner, a family tub grows a second collection: bath toys, a spare conditioner, the good razor. Adhesive corner shelves on the dry end wall, outside the direct spray, hold that overflow without drilling tile. They work on smooth tile, glass and marble, and they fail on painted drywall and textured stone, so surface choice is the whole decision. Follow the maker’s full curing wait before loading them; most adhesive failures are shelves loaded an hour after sticking.
Best For: Smooth tiled walls at the dry end of the tub that need two more shelves.
Not Ideal For: Painted walls, rough stone and the direct spray zone if your household loads shelves heavily.
Estimated Cost: $25-$40 (estimate) for a two or three shelf adhesive set.
Budget Note: Two smaller shelves placed where you need them beat one long shelf that spans a grout line and peels.
Renter Friendly: With Conditions
Renter Note: The pads remove with heat on tile, but test a hidden corner first and keep loads light near the end of a tenancy.
What You Need
Adhesive corner shelf set, rubbing alcohol or the supplied cleaning cloth, tape measure, pencil for level marks.
Product recommendation (partially verified): YASONIC Corner Shower Caddy Organizer, 3 Pack Adhesive Stainless Steel Shelves with Soap Holder
Why it fits: The set lists two corner shelves plus a soap holder in rustproof stainless steel, with adhesive fitting for tile, glass and marble and a stated 40 pound capacity across the set.
Retailer/product page: https://www.amazon.com/dp/B0D5QD2BT8/ref=cm_sw_r_cso_fm_apin_dp_FM0P6VZZ96EBN9ENPV2R_1?badgeInsights=insights
How To Do It
- Choose smooth tile away from grout lines and clean it with alcohol; let it dry fully.
- Mark level positions, peel the pads and press each one firmly for a full minute.
- Leave the pads to cure for the maker’s stated wait, usually 24 hours, before hanging the shelves.
- Load light and often-used items first and recheck the pads after the first week of showers.
Pro Tip
Put the children’s overflow on the lower shelf and keep one hook free for a mesh toy bag; toys that drain in the bag stop the black-spot problem on the tub rim.
15. Put Warm Light at Face Height Over the Mirror
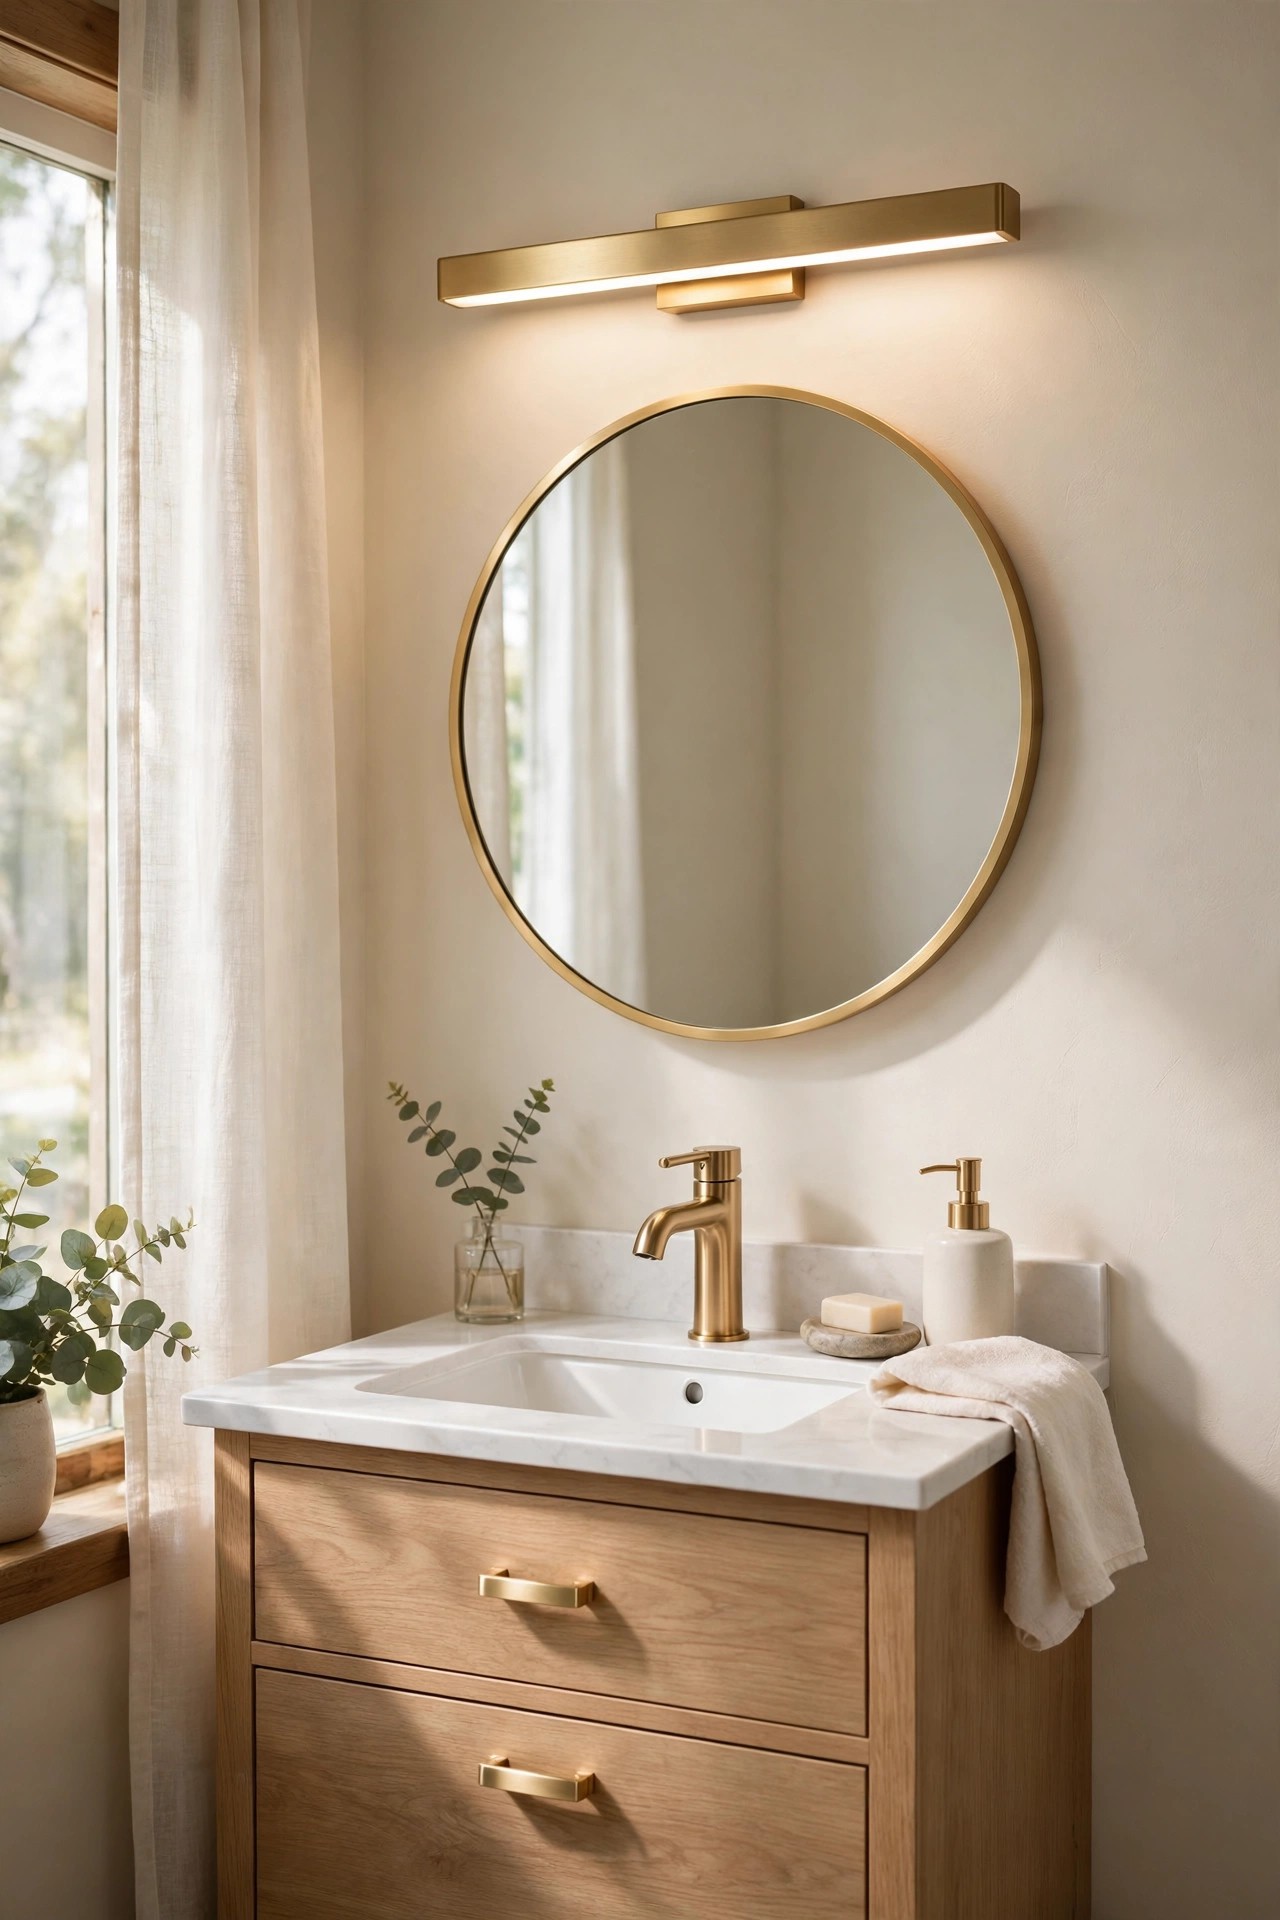
Description: Most small bathrooms are lit by one ceiling fitting that throws shadows where faces need light. A 24 inch LED bar above the mirror, at a warm 3000 to 3500K, evens the light for shaving and makeup, and keeps cream walls warm instead of grey. Match the bar width to the vanity, not the wall, and pick a dimmable model so it can be bright at 7 am and low at night. It is a wired fitting, so it belongs in the owner column unless an electrician is already visiting.
Best For: Vanities lit only by a ceiling light, where faces fall into shadow at the mirror.
Not Ideal For: Bathrooms with no junction box above the mirror; adding one is electrician work and changes the budget.
Estimated Cost: $40-$70 (estimate) for a 24 inch LED vanity bar.
Budget Note: An integrated LED bar ends bulb buying for years, which quietly repays the swap in a high-use bathroom.
Renter Friendly: No
Renter Note: It hardwires into the wall box; renters can instead swap existing bulbs for warm 3000K ones and add a battery sconce from the decor list.
What You Need
LED vanity light bar, screwdriver, wire connectors, voltage tester, and the breaker off before the old fitting comes down.
Product recommendation (partially verified): CCYCOL Gold Bathroom Light Fixture Over Mirror, 24 Inch, 18W LED, 3500K
Why it fits: The listed size is 24 inches long to match a small vanity, the 3500K warm light suits cream and gold finishes, and the output is listed at 1530 lumens with dimming.
Retailer/product page: https://www.amazon.com/dp/B0D6GF32HV/ref=sxbs_pa_sp_phone_search_thematic_btf_sspa
How To Do It
- Switch the breaker off, test that the old fitting is dead, and remove it.
- Connect the new bar to the wall box wires as the maker directs, matching each wire in turn.
- Fix the back plate level, using the mirror centre line rather than the wall edge as your guide.
- Restore power and test the dimmer range before the first steamy shower.
Pro Tip
Set the bar’s centre exactly over the faucet, not the centre of the wall; in small rooms the vanity is rarely centred, and an off-line light makes the whole wall look crooked.
Practical Tips for a Small Full Bathroom
- Measure three things before any order: the door swing, the rough-in distance at the toilet, and the clear height above the tank. Those three numbers rule out more wrong purchases than any style choice.
- Assign storage by frequency, not by person. Twice-daily items belong within arm’s reach of the sink and shower; weekly items can live over the toilet or in the slim cart.
- Keep one finish story. White fixtures, warm wood and one metal finish repeated four or five times make a small room read calm even when it is full of family supplies.
- If your room is smaller than 5×7, the tighter layouts in these tiny bathroom ideas go further on corner fittings and wall-hung pieces.
- Ventilate on a timer or sensor, not on memory. Twenty minutes of fan after a shower protects paint and grout more cheaply than any repaint.
- Leave one empty surface. A clear tub rim or an empty shelf is what makes the room feel finished, so size your storage to hold everything with a little room spare.
Frequently Asked Questions
What size is a small full bathroom?
Most small full bathrooms run about 5×7 to 5×9 feet, roughly 35 to 45 square feet, with a 60 inch tub along one wall, a toilet and a 24 to 30 inch vanity. A full bathroom means it has a tub or shower as well as a toilet and sink; a room with only a toilet and sink is a half bathroom or powder room.
Can a small full bathroom work for a family of four?
Yes, if storage is planned by frequency rather than squeezed in later. A drawer vanity, a medicine cabinet, closed storage over the toilet and a place for four towels cover the daily load. The ideas above are chosen for that shared use, not for a guest room that gets used twice a month.
What should I change first on a small budget?
The curved shower rod, the tension pole caddy and the slim rolling cart together cost under about $120 in estimates and need no tools beyond measuring. They fix the three daily irritations first: a clinging curtain, bottles on the tub rim, and supplies with no home.
Is a compact toilet worth it?
Only when you are replacing a toilet anyway. A short-projection model returns about 4 inches of floor, which is real in a 5×7 room, but paying a plumber solely for those inches rarely makes sense. Check the rough-in measurement before ordering, because a mismatch cannot be fixed with adapters.
How do I stop a small bathroom smelling damp?
Run the fan during every shower and for about 20 minutes after, keep towels drying spread out rather than bunched, and seal the floor line at the tub so water stops reaching the subfloor edge. A humidity-sensing fan removes the remembering part, which is why it appears in this list.
Can renters use these ideas?
Most of the storage ideas are renter workable: the tension rod and pole caddy, the slim cart, the under-sink organizers and the over-door rack need no fixings at all. Adhesive shelves and surface-mounted cabinets need care or permission, and the vanity, toilet, glass panel, fan and light bar are owner projects.
Conclusion
A small full bathroom works when every fitting does two jobs and every bottle has a set place. Start with the change that fixes your worst daily moment: the curved rod if the shower feels tight, the drawer vanity if the counter is the storage, the pole caddy if the tub rim is. Then let the calmer finishes, warm wood, white and brushed gold, pull the room together. Small is not the problem in these rooms; unplanned is.