15 Green Kitchen Cabinets Ideas From Soft Sage to Deep Forest
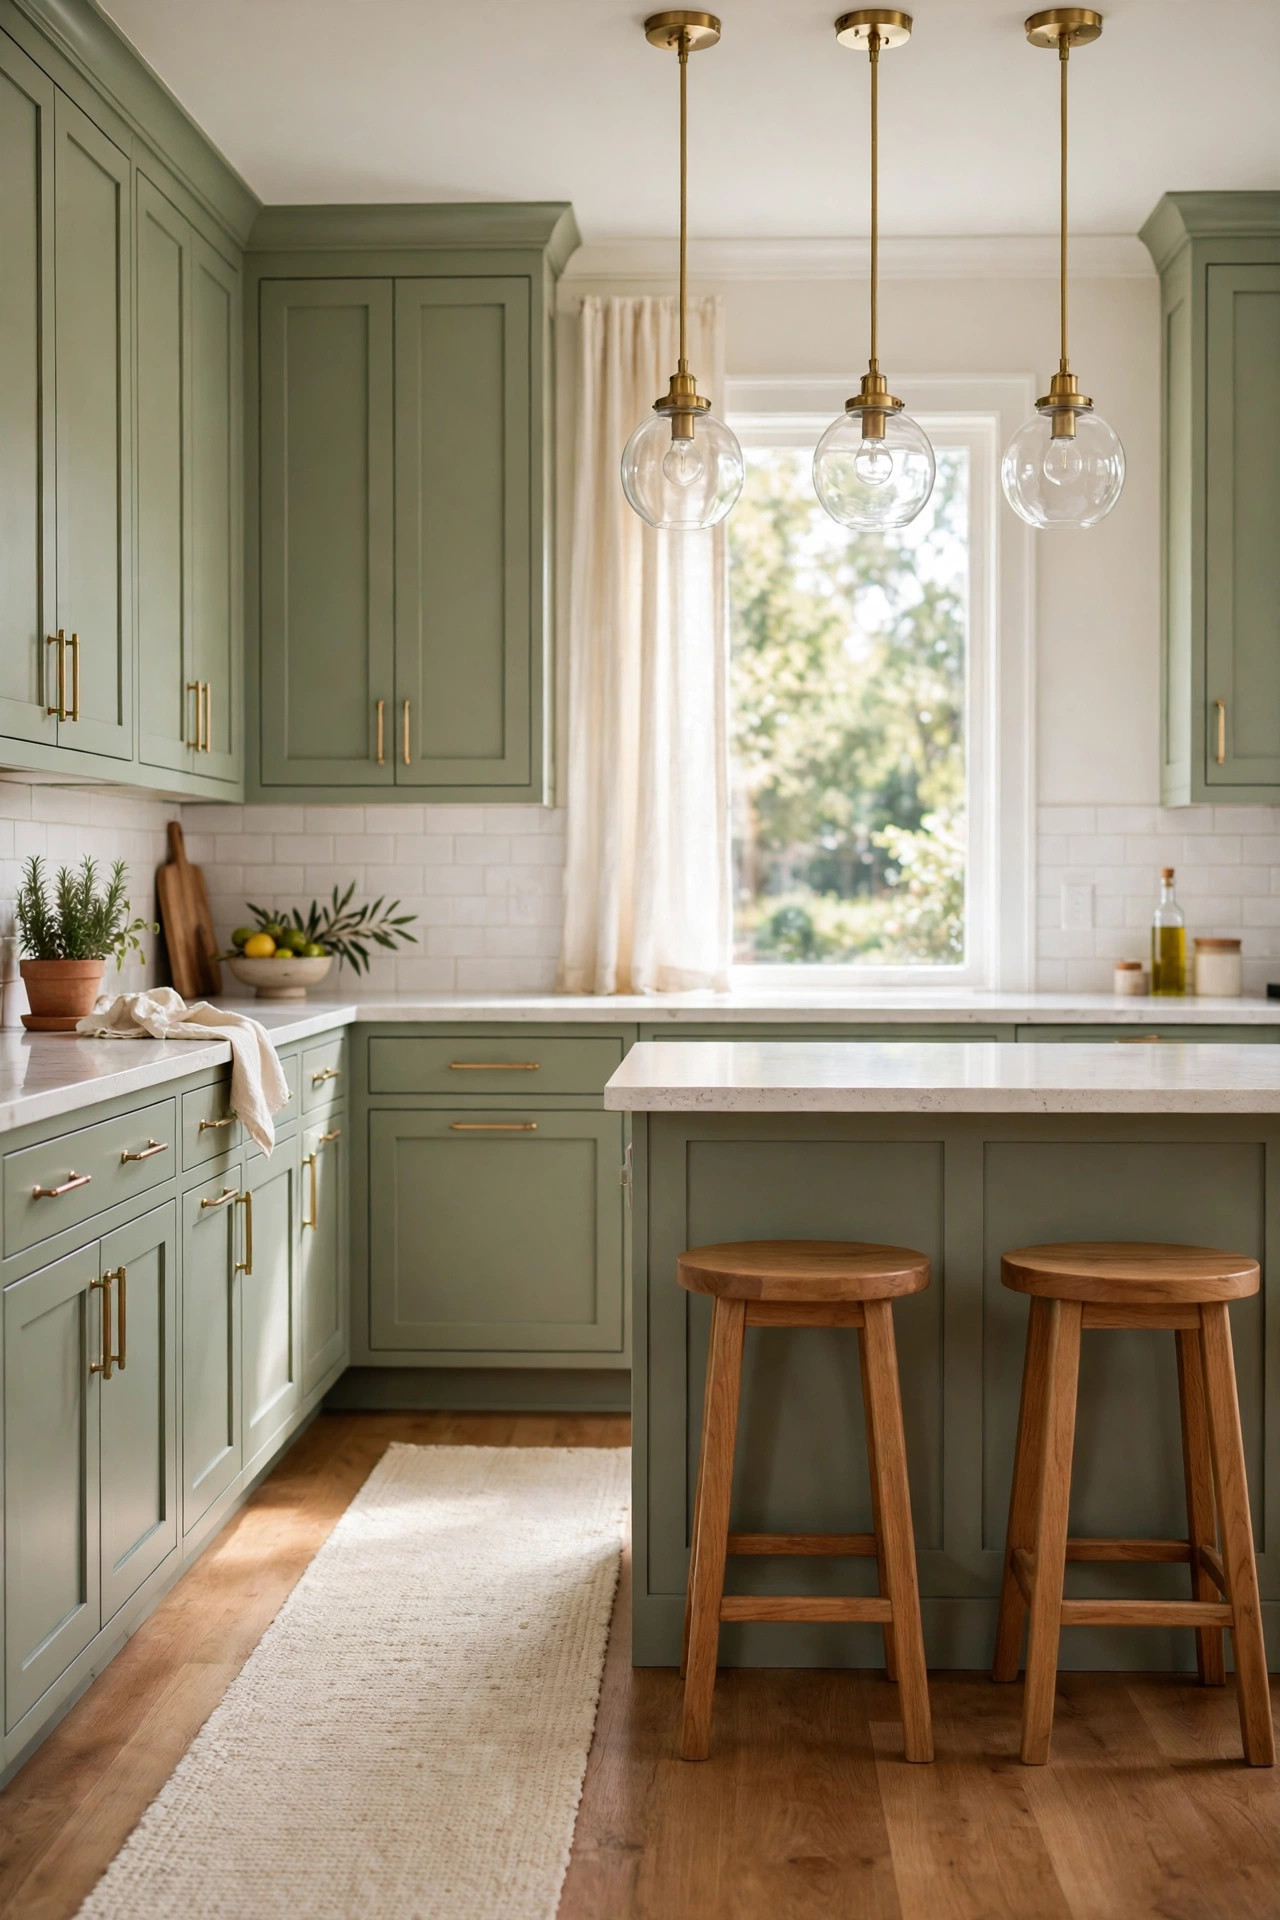
Green is easy to like in a photo and harder to choose in a real kitchen, because the shade that looks soft in morning light can read grey by evening, and a full run of deep forest green is a different commitment from one painted island. This guide to green kitchen cabinets works through 15 genuinely different routes: sage, forest, emerald, olive and mint shades, two-tone layouts that keep the uppers white, an island-only plan, and the three honest ways to get there, painting the cabinets you own, refacing with new doors, or replacing the run entirely, each with realistic costs and effort. Plan the rest of the room around your choice with these kitchen ideas.
1. Sage Green Cabinets With White Quartz and Brushed Brass
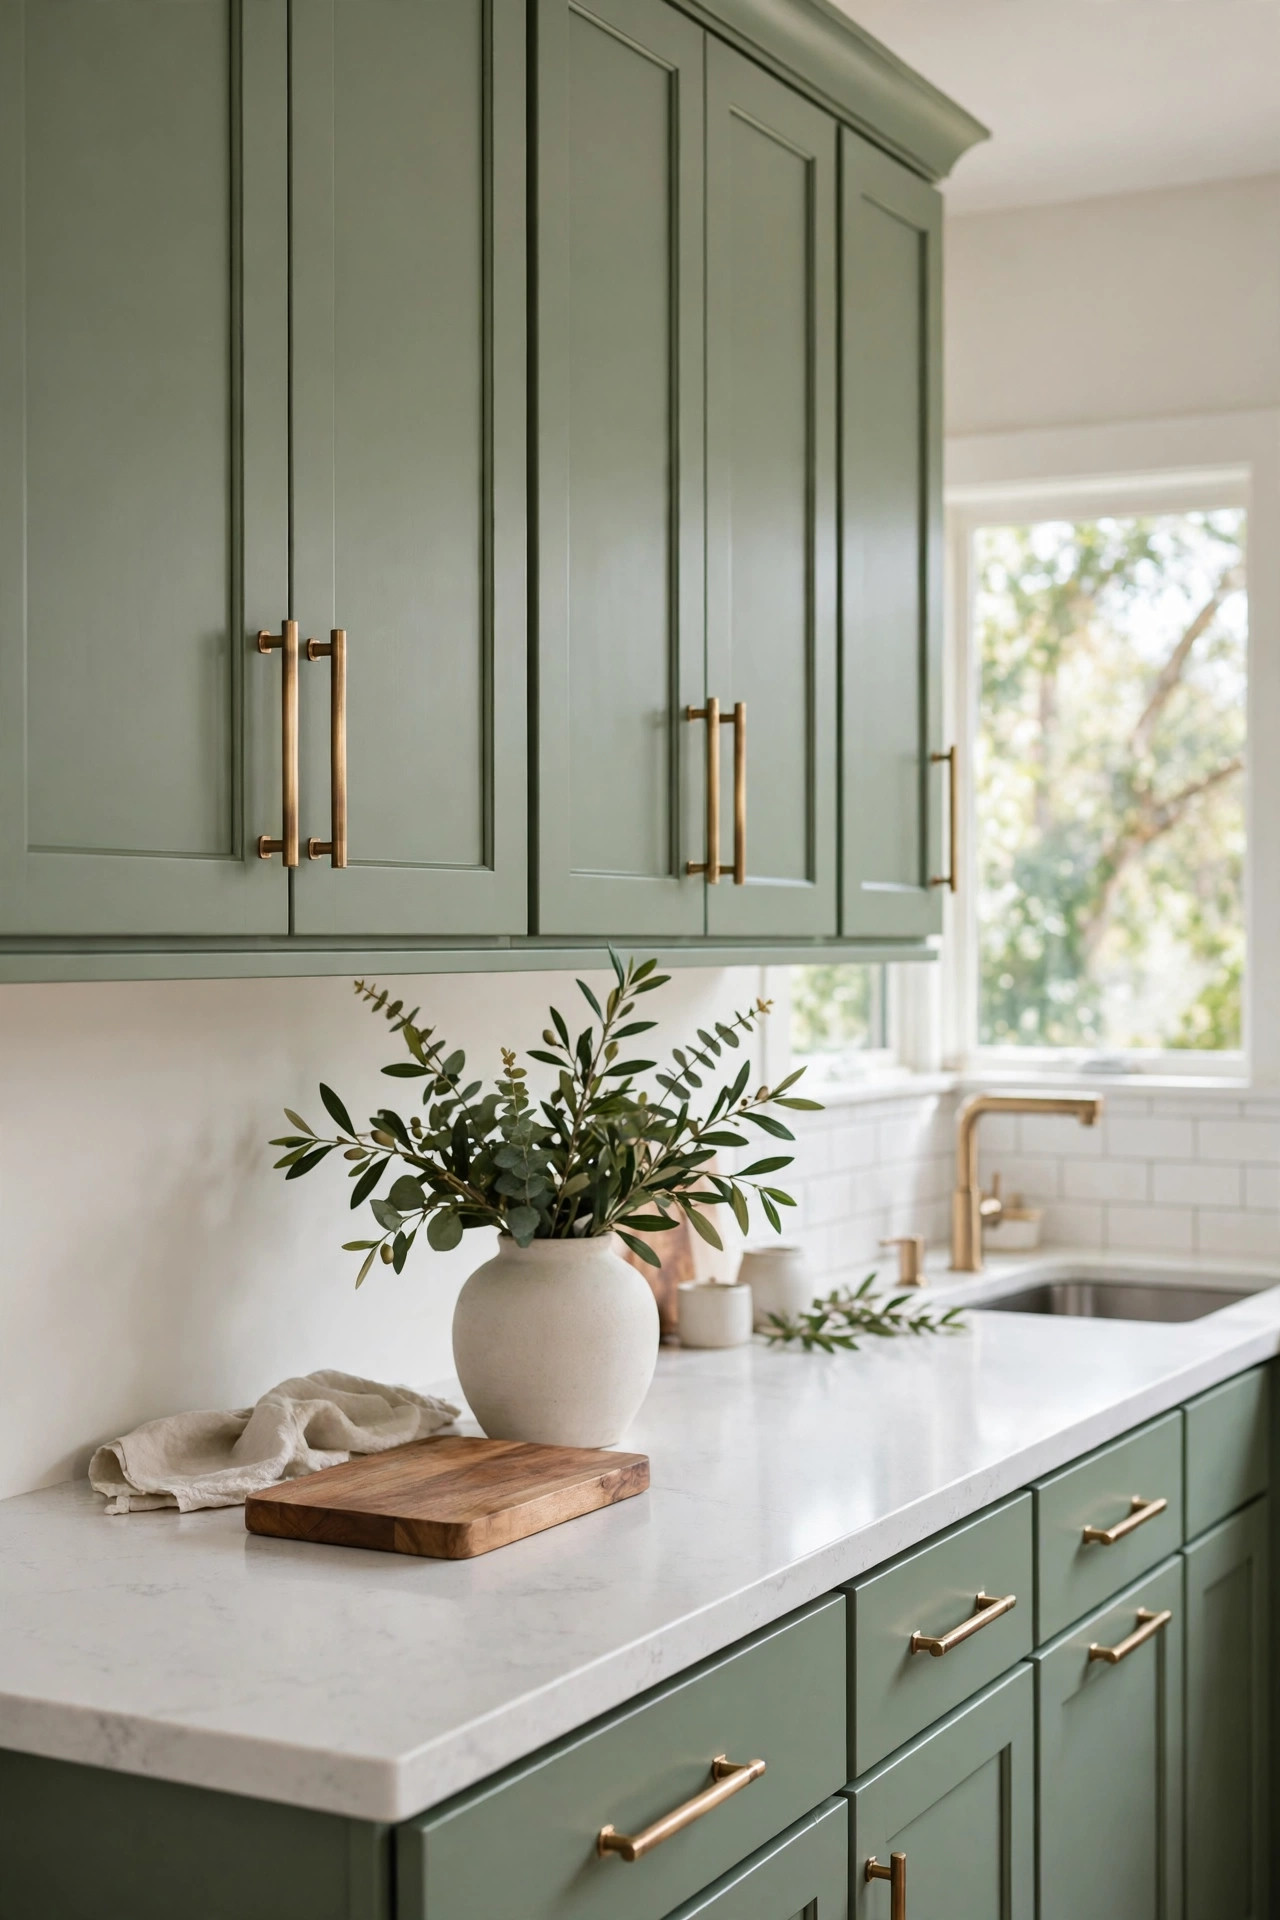
Description: Sage sits between green and grey, so it calms a busy kitchen instead of shouting across it. With white quartz counters the room stays bright even on a dull day, and brushed brass pulls warm the cool undertone in the paint. This is the green most likely to still feel right in ten years. The trade-off is light: in a north facing kitchen sage can read almost grey, so test it on one door before committing the whole run.
Best For: Bright or south facing kitchens that want colour without darkness.
Not Ideal For: Dark north facing rooms, where sage loses its green and reads flat grey by afternoon.
Estimated Cost: $250-$550 (estimate) for cabinet paint, primer and hardware for an average kitchen; counters are not included.
Budget Note: The pulls are usually the second largest cost after paint, so count every door and drawer front before choosing a pack size.
Renter Friendly: No
Renter Note: Painting changes the landlord’s cabinets permanently; renters should use idea 10 in this list instead.
What You Need
Sage green cabinet paint, bonding primer, brushed brass bar pulls that match your existing hole spacing, small foam rollers, an angled brush, degreasing cleaner, painter’s tape, drop cloths.
Product recommendation (partially verified): Amerdeco 20 Pack Brushed Brass Cabinet Pulls, 5 inch (128mm) hole center
Why it fits: The 128mm centres match a common US drawer spacing, and the brushed finish hides fingerprints better than polished brass on the doors beside a sink run.
Retailer/product page: https://www.amazon.com/dp/B09Q38TZ87
How To Do It
- Paint one spare door or a hidden door front sage and check it in morning and evening light.
- Remove doors and hardware, label each one, degrease every surface, then prime and roll two thin coats.
- Refit the doors once fully cured and fit the brass pulls, hand tightening the screws.
- Keep counters, walls and textiles pale so the sage stays the only strong colour in the room.
Pro Tip
Hold a brass pull against the painted door, not the bare one; sage deepens slightly once warm metal sits on it, and that is the combination you are actually choosing.
2. Forest Green Cabinets With Marble Look Counters and Gold
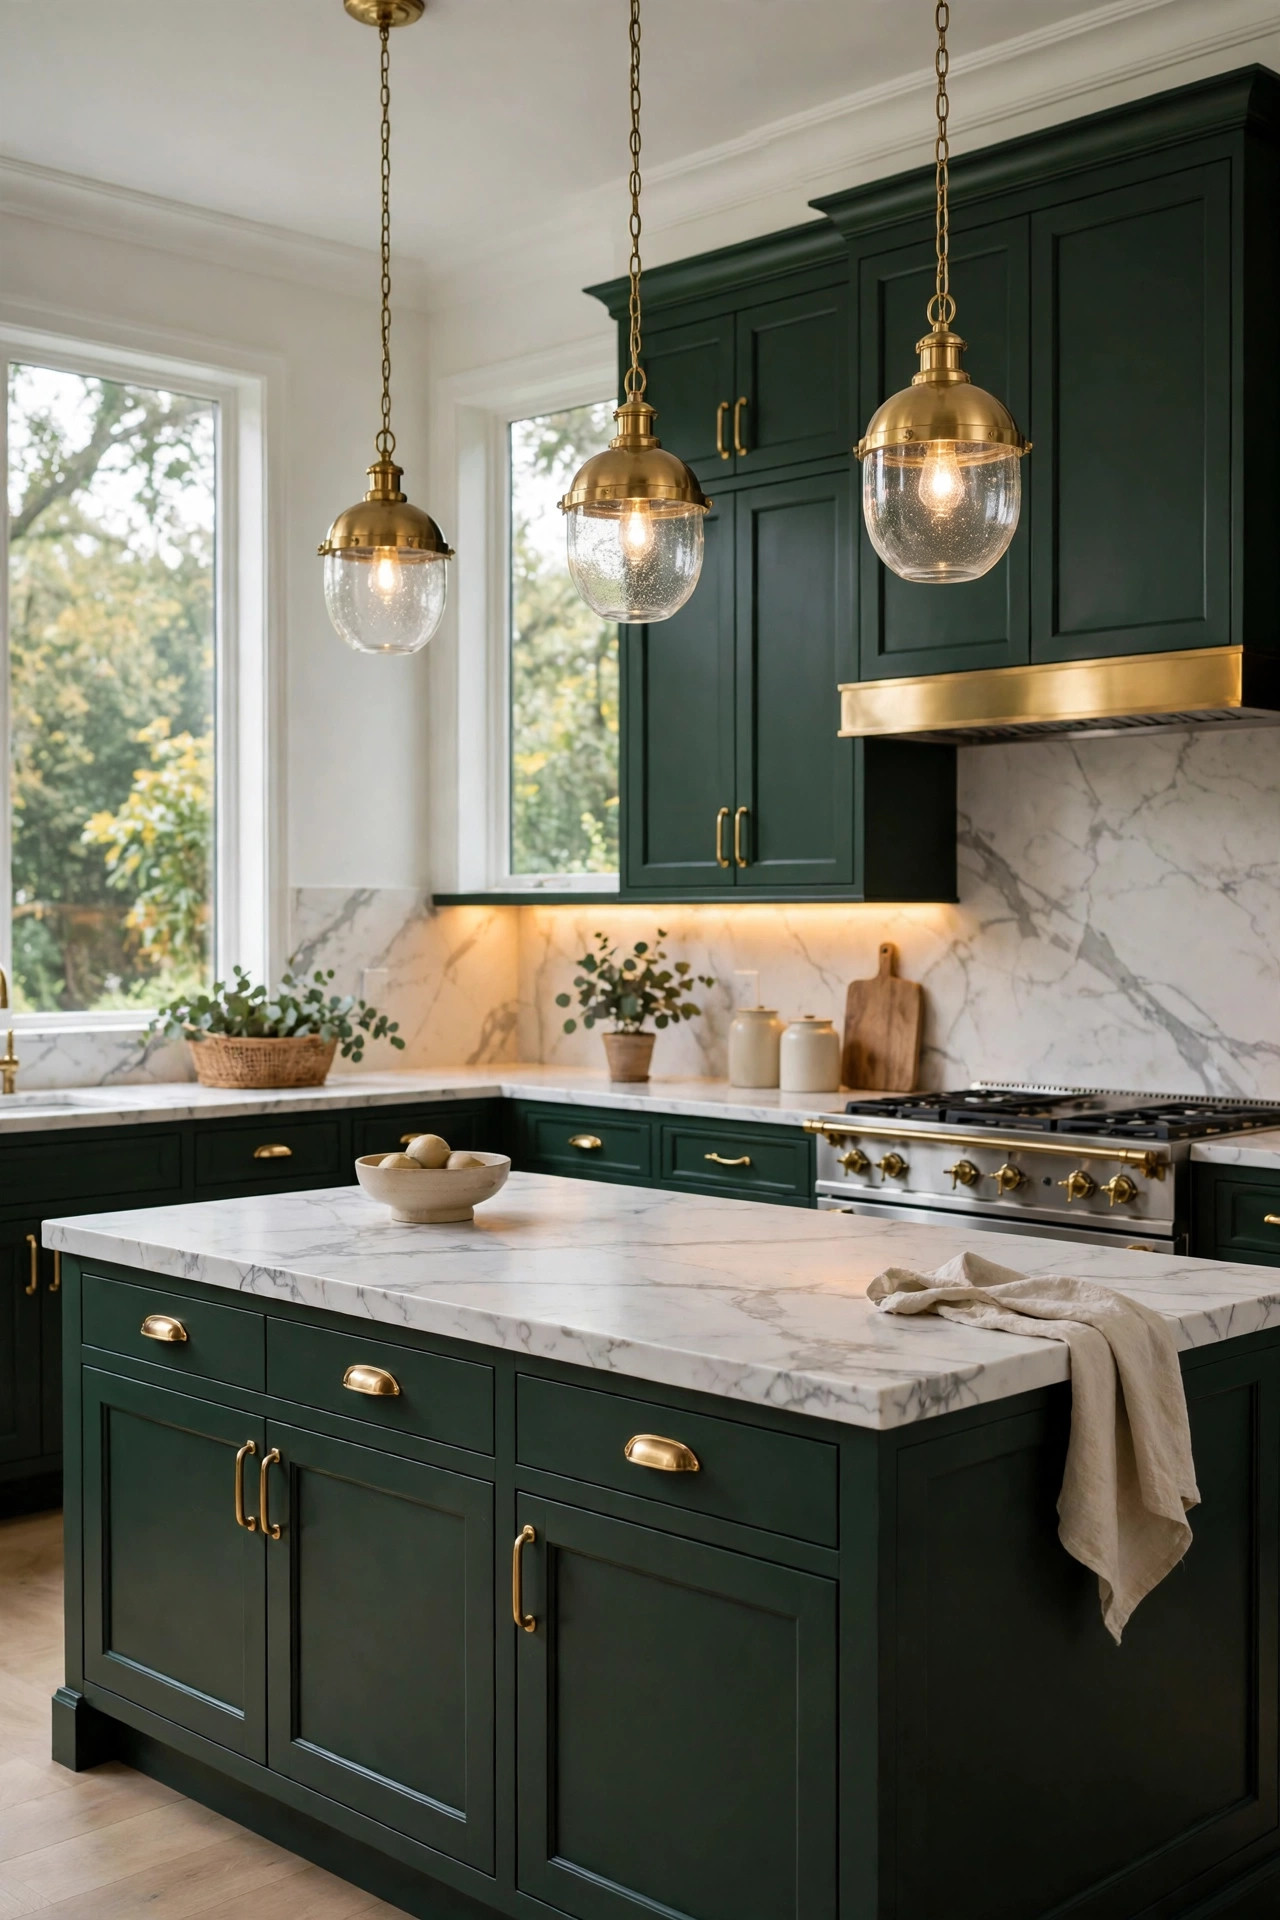
Description: Forest green is the deepest shade in this list that still reads green rather than black. Paired with white marble look counters, the grey veining keeps the room from feeling heavy, and gold toned hardware repeats the warmth in the stone. It suits larger kitchens with good daylight and a pale floor. In a small room with one small window, the same depth can crowd the walls, so keep the ceiling and floor pale if you try it there.
Best For: Larger kitchens with strong daylight and white or pale stone look counters.
Not Ideal For: Small windowless kitchens, where deep green absorbs the little light there is.
Estimated Cost: $450-$1,300 (estimate) for cabinet paint plus DIY marble look laminate counters; real marble costs far more.
Budget Note: A quart of this type of paint covers about 10 to 12 cabinet fronts with two coats, so most kitchens need two quarts rather than a gallon.
Renter Friendly: No
Renter Note: Both the paint and the counter change are permanent; this is an owner’s project.
What You Need
Forest green all-in-one cabinet paint, marble look laminate countertop or a pale stone slab, gold toned knobs or pulls, under cabinet lighting, degreaser, foam rollers and a brush for edges.
Product recommendation (partially verified): Beyond Paint All-in-One Refinishing Paint, Forest Green
Why it fits: The maker’s formula combines bonder, primer and finisher for cabinets and furniture with no stripping or sanding, and the Lowe’s listing shows the colour name Forest Green on the product itself.
Retailer/product page: https://www.lowes.com/pd/Beyond-Paint-Forest-Green-Cabinet-Furniture-Countertop-and-More-Pint/5012490325
How To Do It
- Wash every door and frame with degreaser and let them dry fully; this paint relies on a clean surface instead of sanding.
- Roll the first thin coat and let it dry as the tin directs, then add the second coat.
- Fit the pale counters, or fit them first if a contractor is templating, and add gold toned hardware.
- Add under cabinet lighting so the deep fronts read rich rather than dark at night.
Pro Tip
Deep greens show every roller mark, so use a foam roller, work in one direction, and never go back over a coat that has started to dry.
3. Two-Tone Cabinets: Green Lowers, White Uppers
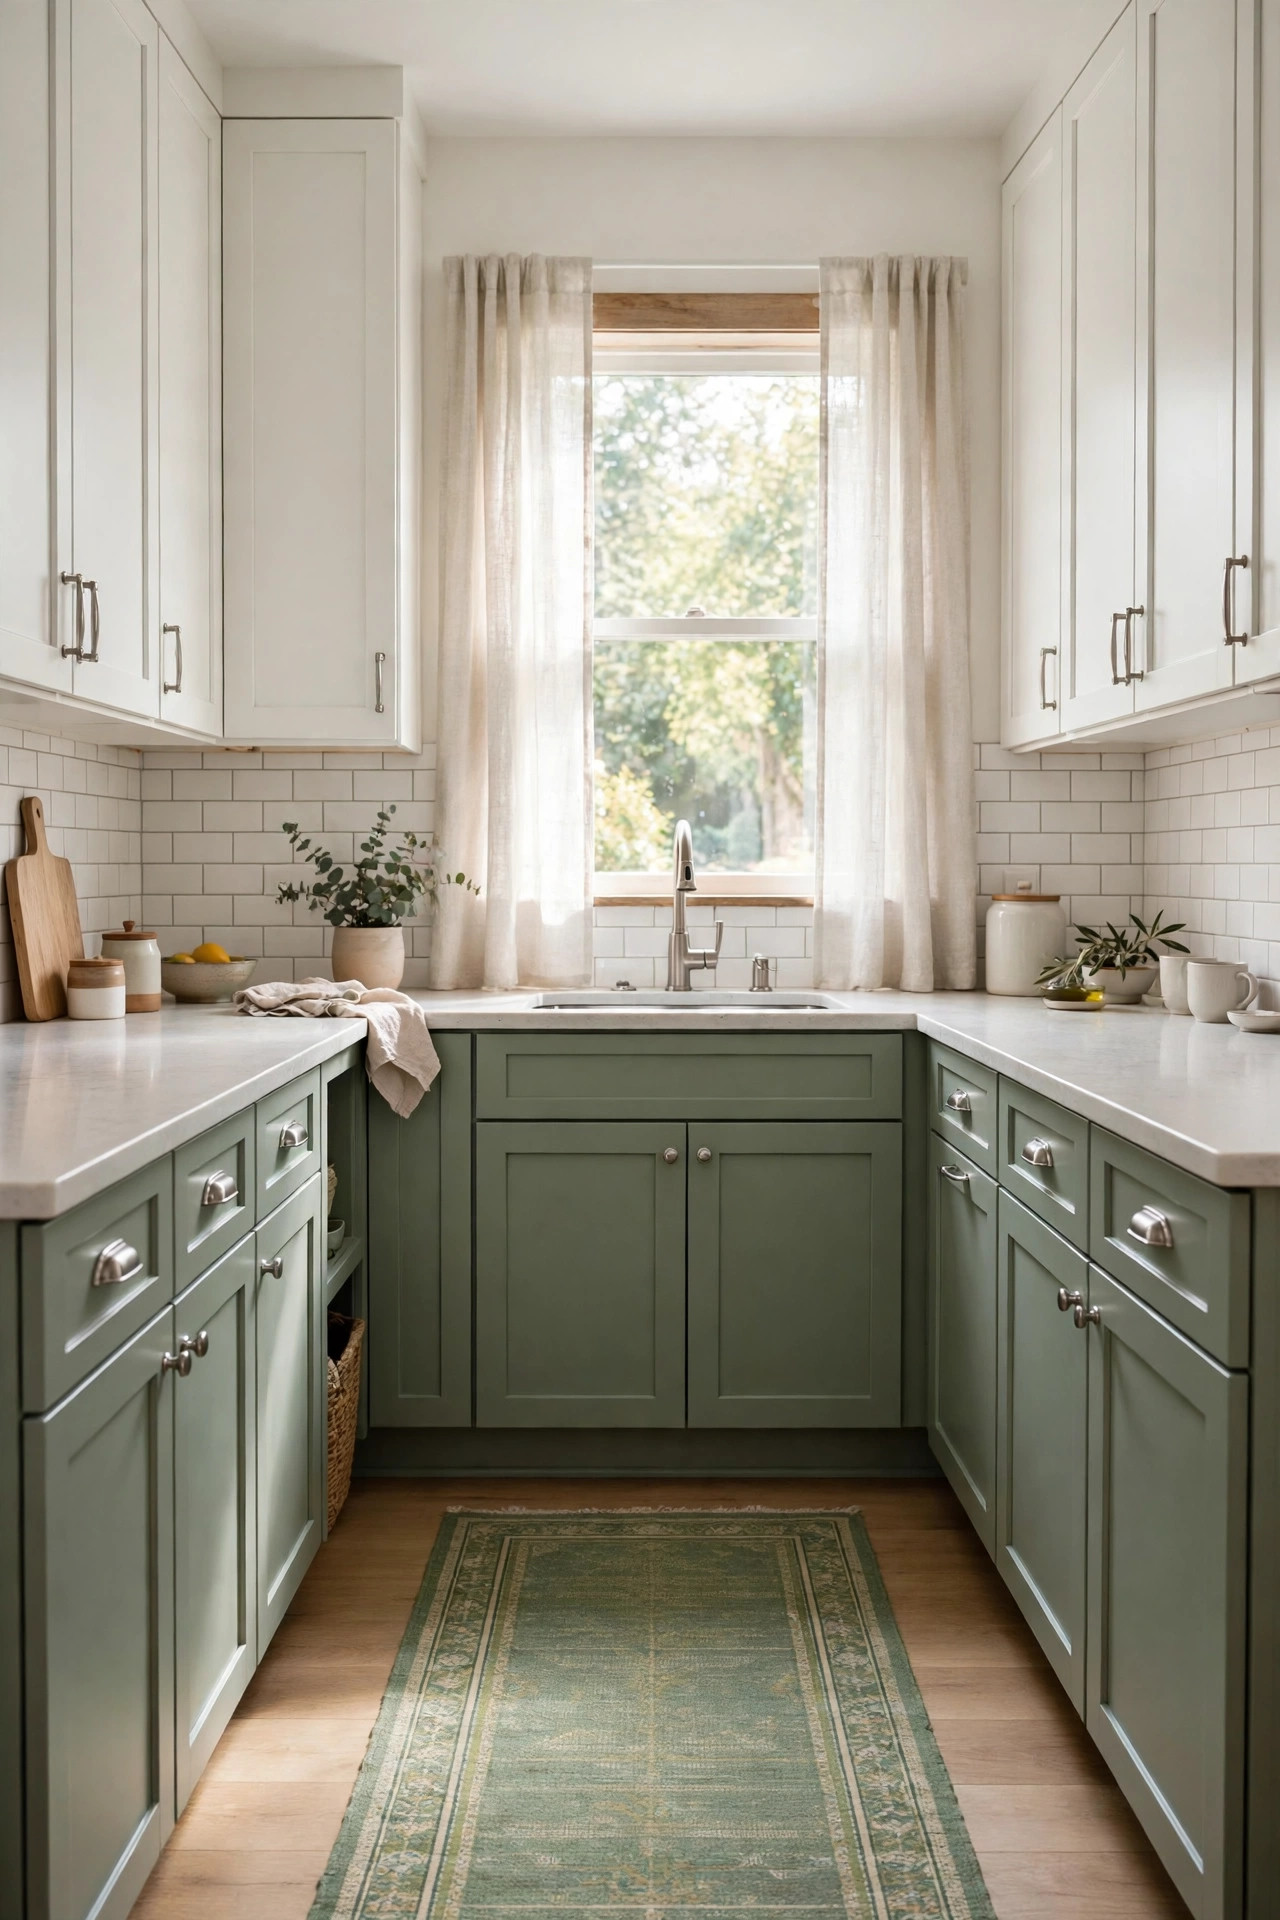
Description: Keeping the uppers white and painting only the lowers green puts the colour where hands and eyes land most, at counter height, while eye level stays light and open. It is also the cheapest full look in this list, because half the doors means roughly half the paint. The risk is a hard horizontal split across the room; repeating the green in a runner, stools or a blind ties the two halves together so the line looks planned.
Best For: Small or low light kitchens that want green without darkening the eye level.
Not Ideal For: Kitchens with very tall upper cabinets, where a wide white band can look top heavy above a darker base.
Estimated Cost: $150-$350 (estimate) for both paints, primer and supplies.
Budget Note: The green only needs a quart or two for the lowers, and the uppers often need just a refresh coat of a sound white.
Renter Friendly: No
Renter Note: Painting either half is a permanent change; there is no reversible version of a painted two-tone.
What You Need
Green gray cabinet paint for the lowers, warm white cabinet paint for the uppers, bonding primer, painter’s tape for the split line, one hardware finish used across both colours, foam rollers.
Product recommendation (partially verified): Heirloom Traditions ALL-IN-ONE Paint, Spruce (gray green), Gallon
Why it fits: The listing describes Spruce as a gray green with a slight blue undertone, a muted shade that sits calmly under white uppers and beside stainless appliances.
Retailer/product page: https://www.amazon.com/dp/B0BCX5ZBML
How To Do It
- Decide the split line, which is normally the underside of the upper cabinets, and tape it cleanly.
- Remove all doors, degrease, prime, and paint the uppers white first so any drips land on unpainted lowers.
- Paint the lowers green in two thin coats and let everything cure.
- Refit all doors with one hardware finish across both colours so the two halves read as one kitchen.
Pro Tip
Use the same sheen for both colours; a matte green under satin white uppers makes the split look accidental instead of designed.
4. A Green Island With White Perimeter Cabinets
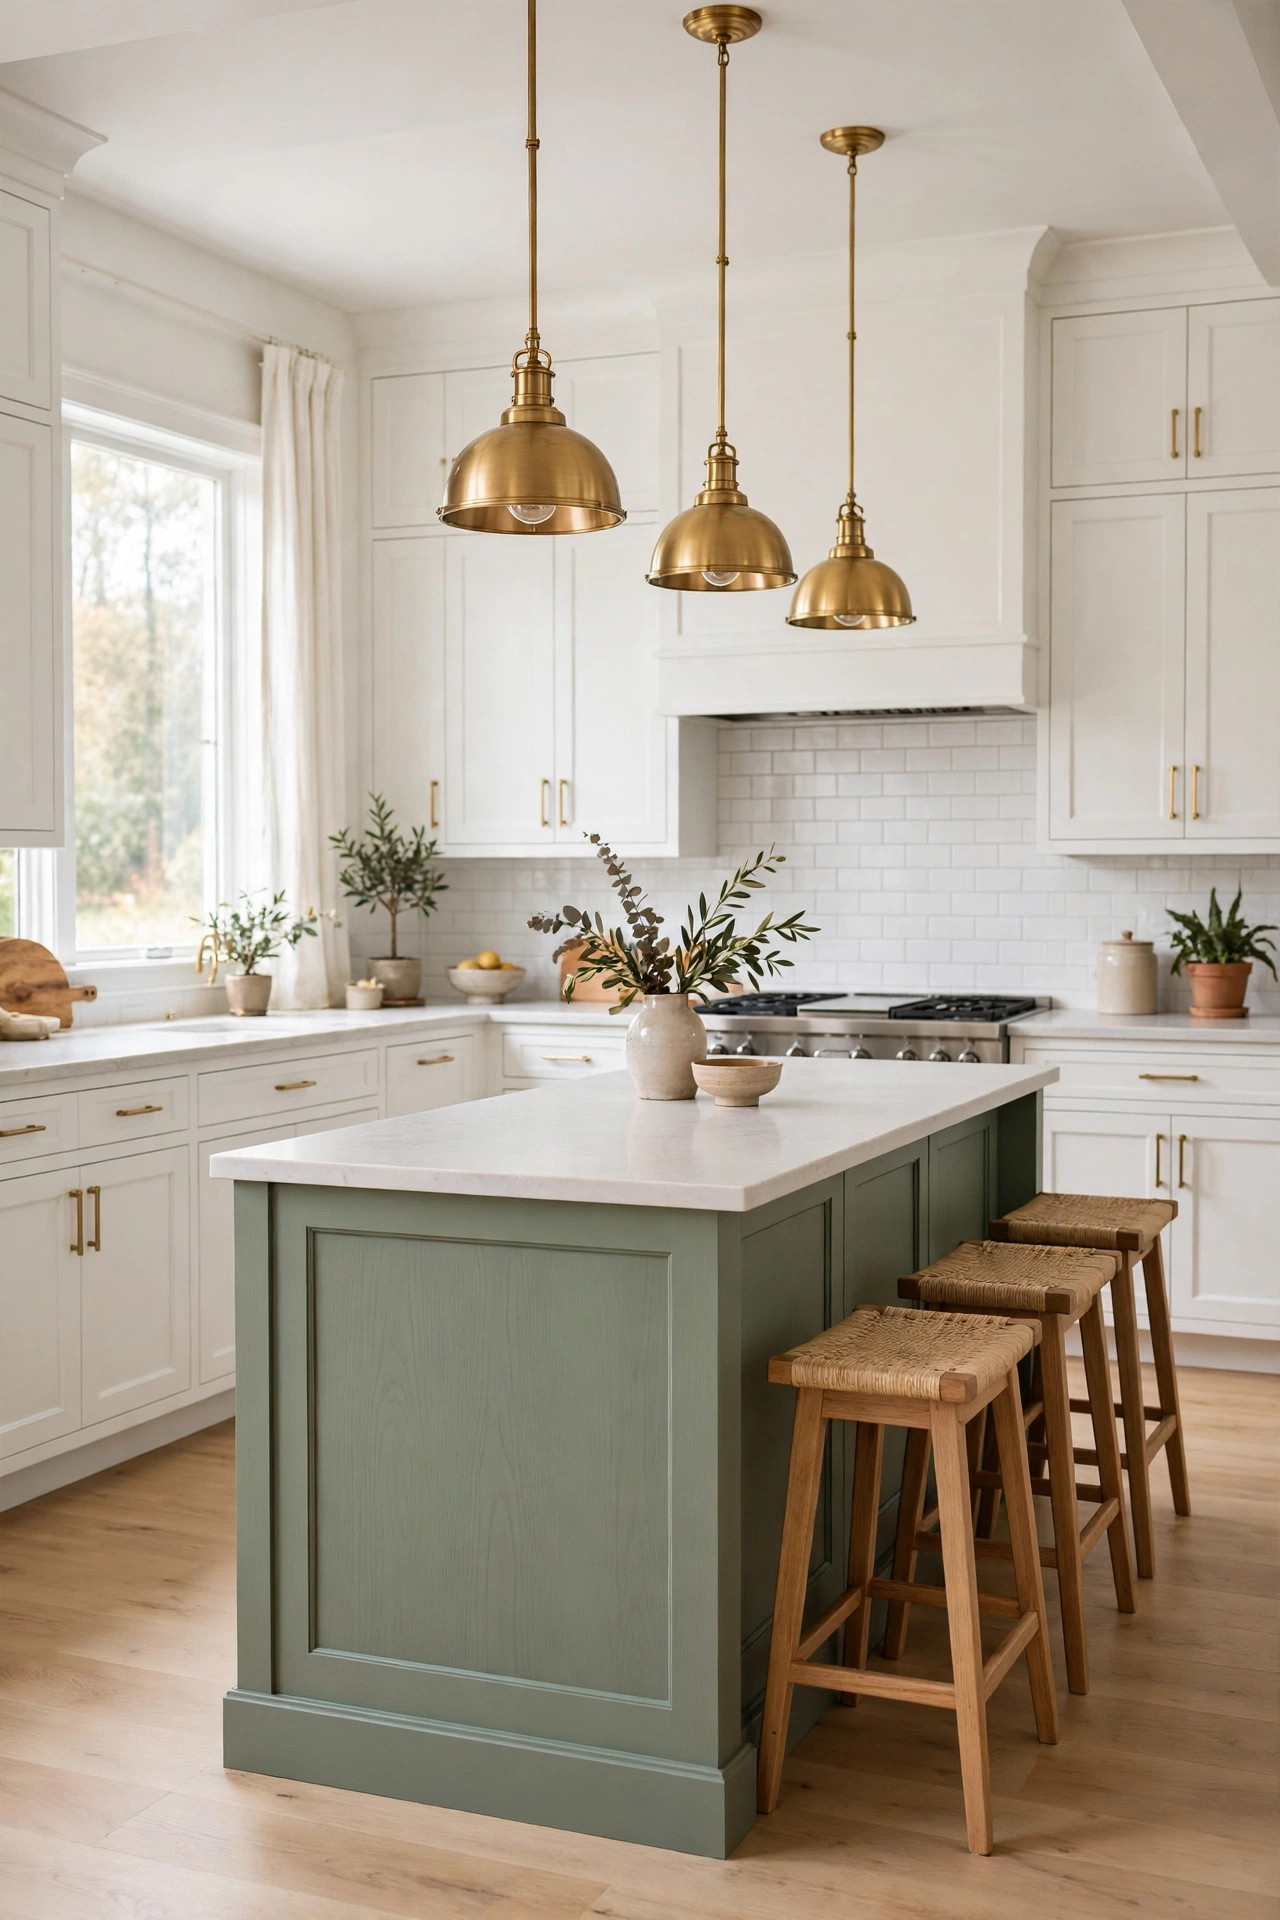
Description: Painting only the island green is the lowest commitment route in this list: one piece of furniture rather than twenty doors. The white perimeter keeps the room bright, and the island becomes the colour anchor for stools, pendants and a runner. If you tire of the shade, repainting one island is a weekend, not a month. It works best when the island is a genuinely separate piece, not an L-shaped run of base cabinets joined to the wall units.
Best For: Open plan kitchens where the island faces the living space and works as a focal point.
Not Ideal For: Peninsula layouts, where the coloured section is joined to the main run and the break can look like a mistake.
Estimated Cost: $80-$220 (estimate) for paint, primer and supplies for one island.
Budget Note: One quart normally covers an island’s panels and drawer fronts with two coats, so the gallon sizes sold for whole kitchens are more than this job needs.
Renter Friendly: No
Renter Note: A built-in island is the landlord’s cabinetry; if your island is a freestanding piece you own yourself, painting it is your own decision.
What You Need
Sage green cabinet paint in a quart size, bonding primer, small foam roller, angled brush, degreaser, drop cloths, painter’s tape for the counter edge.
Product recommendation (partially verified): Heirloom Traditions ALL-IN-ONE Paint, Simply Sage (gray green), Gallon
Why it fits: The listing describes Simply Sage as a gray green, the soft end of the family that suits a single statement piece; check the size options on the page, because an island needs far less than a gallon.
Retailer/product page: https://www.amazon.com/dp/B0CNRYSSV8
How To Do It
- Remove the island’s doors and drawer fronts and label them; leave the perimeter cabinets untouched.
- Degrease the island panels, tape the counter edge and floor line, then prime.
- Roll two thin coats of sage, letting each dry fully, and refit the fronts once cured.
- Repeat the green in one or two small pieces nearby, such as stool cushions or a runner, so the island looks chosen rather than leftover.
Pro Tip
Paint the island’s kick plate the same green; a white kick left behind makes the island look as if it is floating on someone else’s kitchen.
5. Paint Your Existing Cabinets Green: The Honest Method
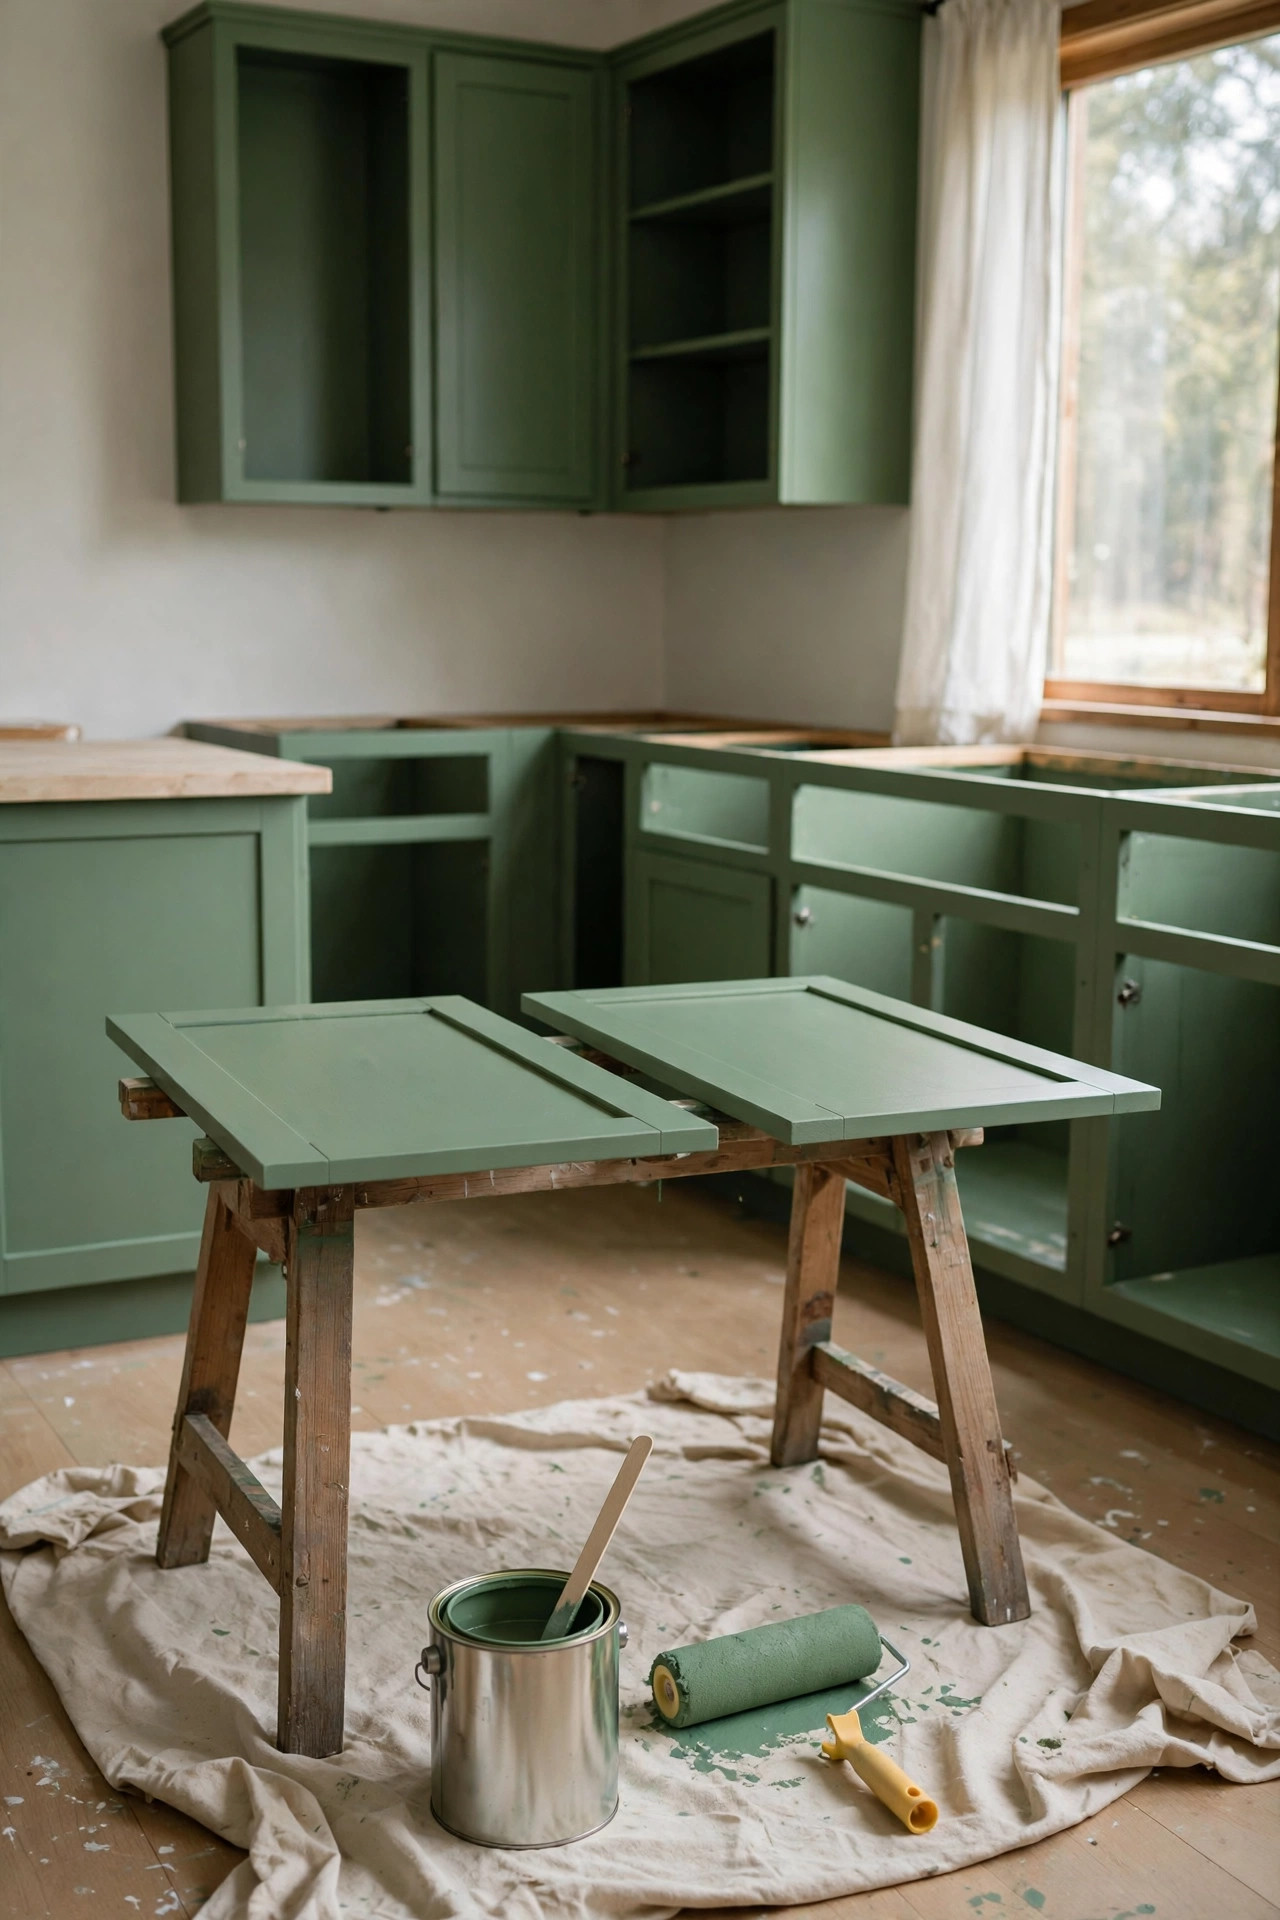
Description: Painting sound cabinets is the cheapest route to green, but the finish lives or dies on preparation, not on the paint brand. Grease film is the main reason cabinet paint peels, so the real work is degreasing, deglossing and thin coats with proper drying between them. Budget a full weekend, plus gentle use while the finish cures over the following days. Doors with peeling laminate, lifting thermofoil or swollen sink bases should be repaired or replaced, not painted over and hoped for.
Best For: Sound wood or laminate cabinets in a dated colour, and owners with a free weekend.
Not Ideal For: Cabinets with water damage, peeling thermofoil or warped doors; paint will not rescue those.
Estimated Cost: $120-$280 (estimate) for a coating kit, extra rollers, tape and cleaner.
Budget Note: The small kit covers about 100 square feet, roughly one average kitchen; very large runs may need the larger kit size instead.
Renter Friendly: No
Renter Note: A painted finish cannot be undone, so this is owners only, whatever the kit promises about ease.
What You Need
A cabinet coating kit with deglosser, bond coat and protective topcoat, with the bond coat tinted to your chosen green at the retailer paint counter, plus foam rollers, an angled brush, painter’s tape, drop cloths and a screwdriver.
Product recommendation (partially verified): Rust-Oleum Cabinet Transformations, Small Kit
Why it fits: It is a four step system built for cabinets, and Rust-Oleum states the bond coat can be tinted to your preferred colour at the retailer’s paint counter, which is how this kit goes green; the linked listing is a pre-tinted colourway, so confirm the tinting counter before you buy.
Retailer/product page: https://www.amazon.com/dp/B006Z6AGRK
How To Do It
- Remove doors and hardware, and label each door and its hinge side with tape on the inside.
- Degloss every surface following the kit directions, then wipe and let everything dry fully.
- Apply two thin bond coats in your green, letting each dry as directed; keep the coats thin to avoid runs on vertical faces.
- Apply the protective topcoat, then let the finish cure before refitting doors and hardware.
Pro Tip
Number each door as it comes off; a kitchen of identical green doors with unmarked hinges is almost impossible to sort out afterwards.
6. Emerald Green Cabinets With Matte Black Hardware
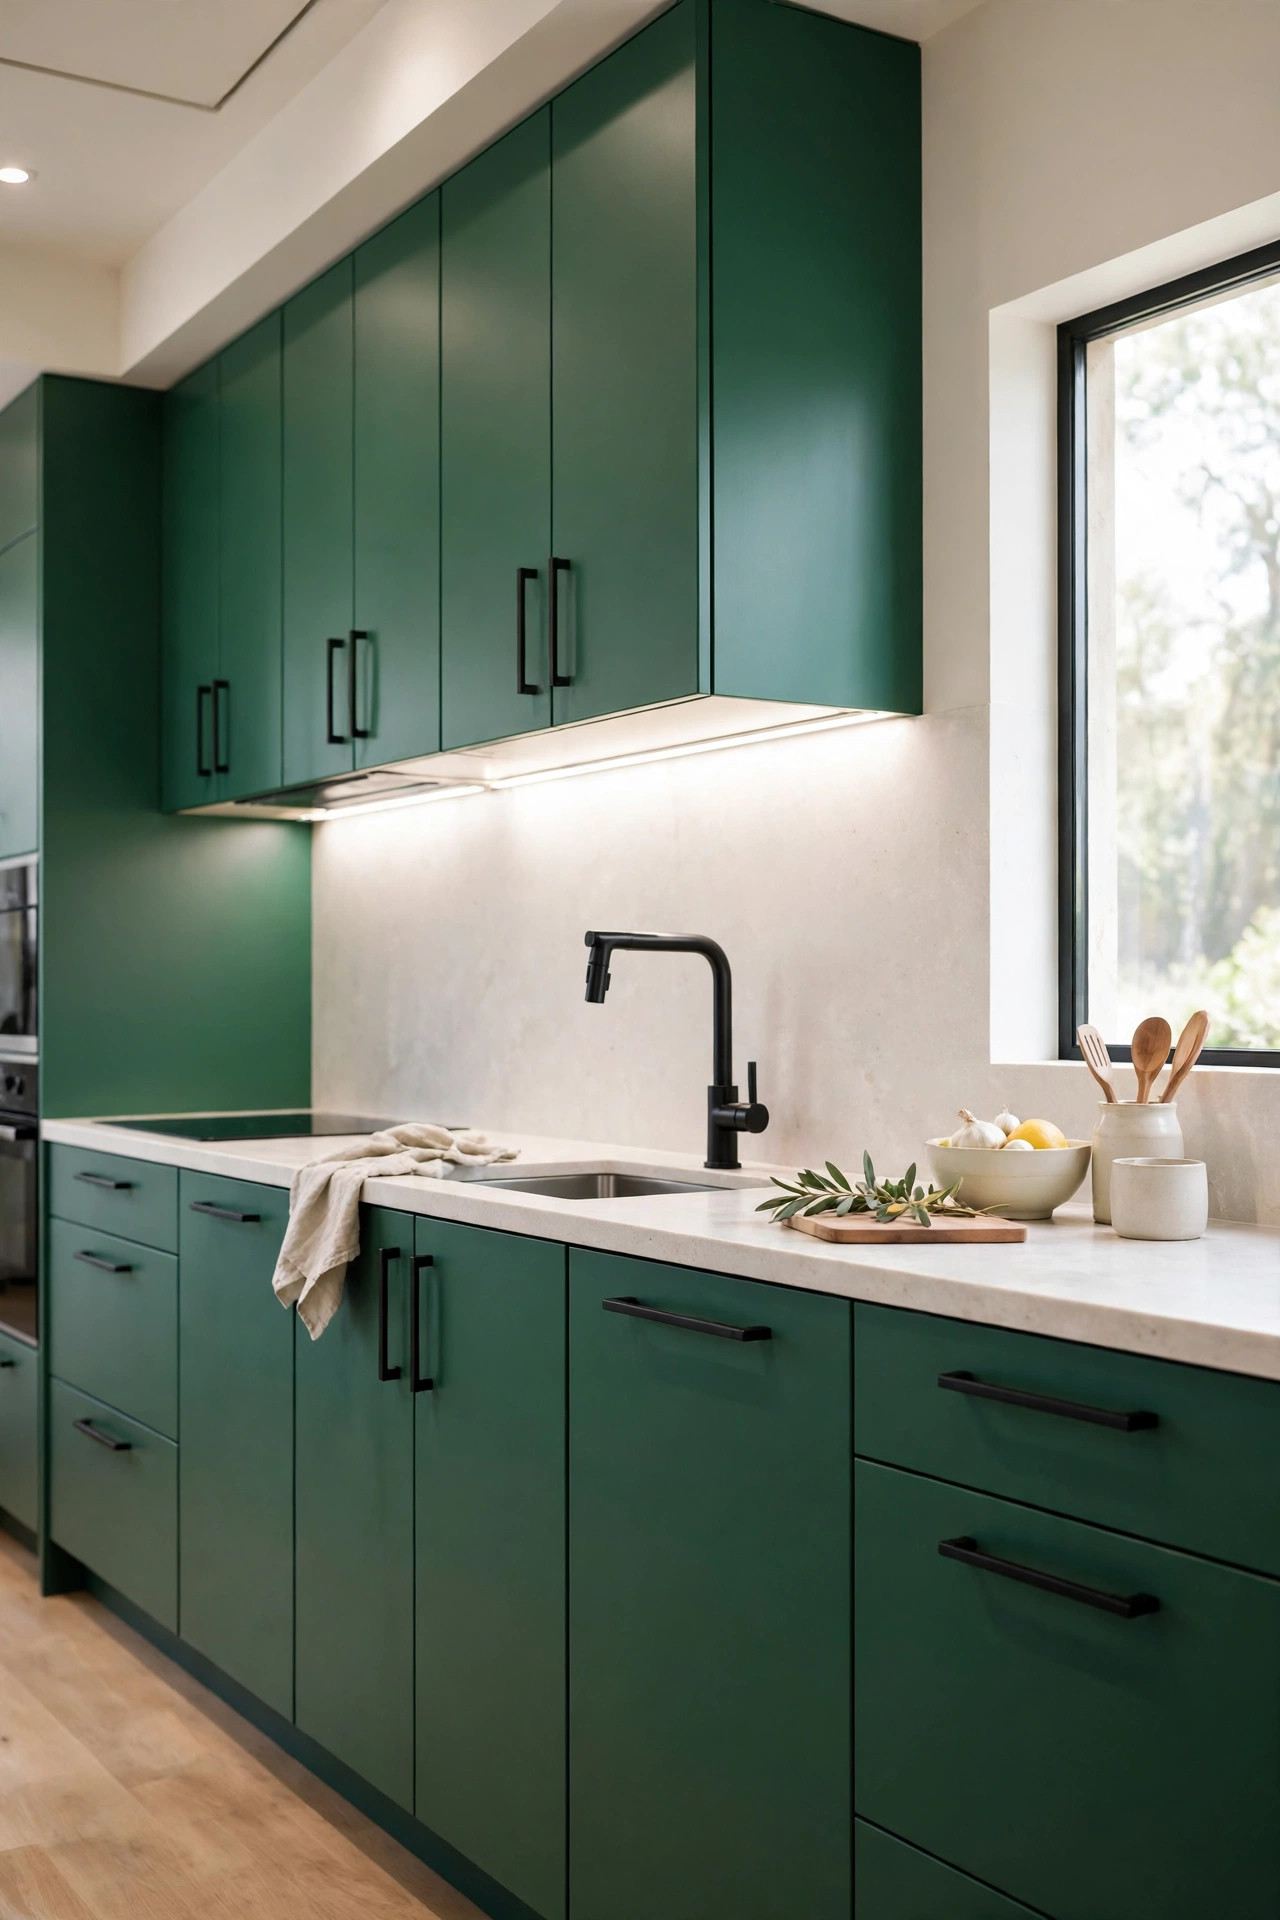
Description: Emerald is the jewel end of green: richer than sage, brighter than forest. Matte black pulls sharpen the colour and stop the look drifting towards cottage, which makes this the modern pairing in the list. Keep counters pale and plain so the colour carries the room on its own. Emerald shows dust and floury handprints more than the mid greens do, so it suits cooks who wipe the fronts as they go rather than once a week.
Best For: Modern kitchens with pale counters, good task light and a simple layout.
Not Ideal For: Busy family kitchens where every fingerprint will show on the saturated fronts.
Estimated Cost: $200-$480 (estimate) for cabinet paint, primer and a full set of black pulls.
Budget Note: Pulls are sold by pack count, and a 30 pack covers most kitchens, so measure the hole centres once and buy one pack rather than singles.
Renter Friendly: No
Renter Note: The hardware swap alone is reversible, but the emerald paint underneath it is not.
What You Need
Emerald green cabinet paint, bonding primer, matte black bar pulls in your existing hole spacing, foam rollers, degreaser, painter’s tape.
Product recommendation (partially verified): Ravinte 30 Pack 5 Inch Square Cabinet Pulls, Matte Black, 3 inch hole center
Why it fits: Stainless steel pulls in a matte black finish, with 3 inch centres that fit the most common US drawer spacing, and one 30 pack covers a typical kitchen in a single consistent finish.
Retailer/product page: https://www.amazon.com/dp/B08QN2D9NR
How To Do It
- Paint one door emerald and check it under your evening lighting before ordering the full set of pulls.
- Order the pulls before painting, so any odd hole spacing can be filled and redrilled while the doors are bare.
- Degrease, prime and paint two to three thin coats; saturated greens often need the third coat for even colour.
- Fit the black pulls, hand tightening the screws so the drawer fronts do not crack.
Pro Tip
Keep everything else in the room monochrome: pale counters, plain walls, black or steel appliances. A second strong colour is what turns emerald from rich to busy.
7. Olive Green Cabinets With Butcher Block Counters
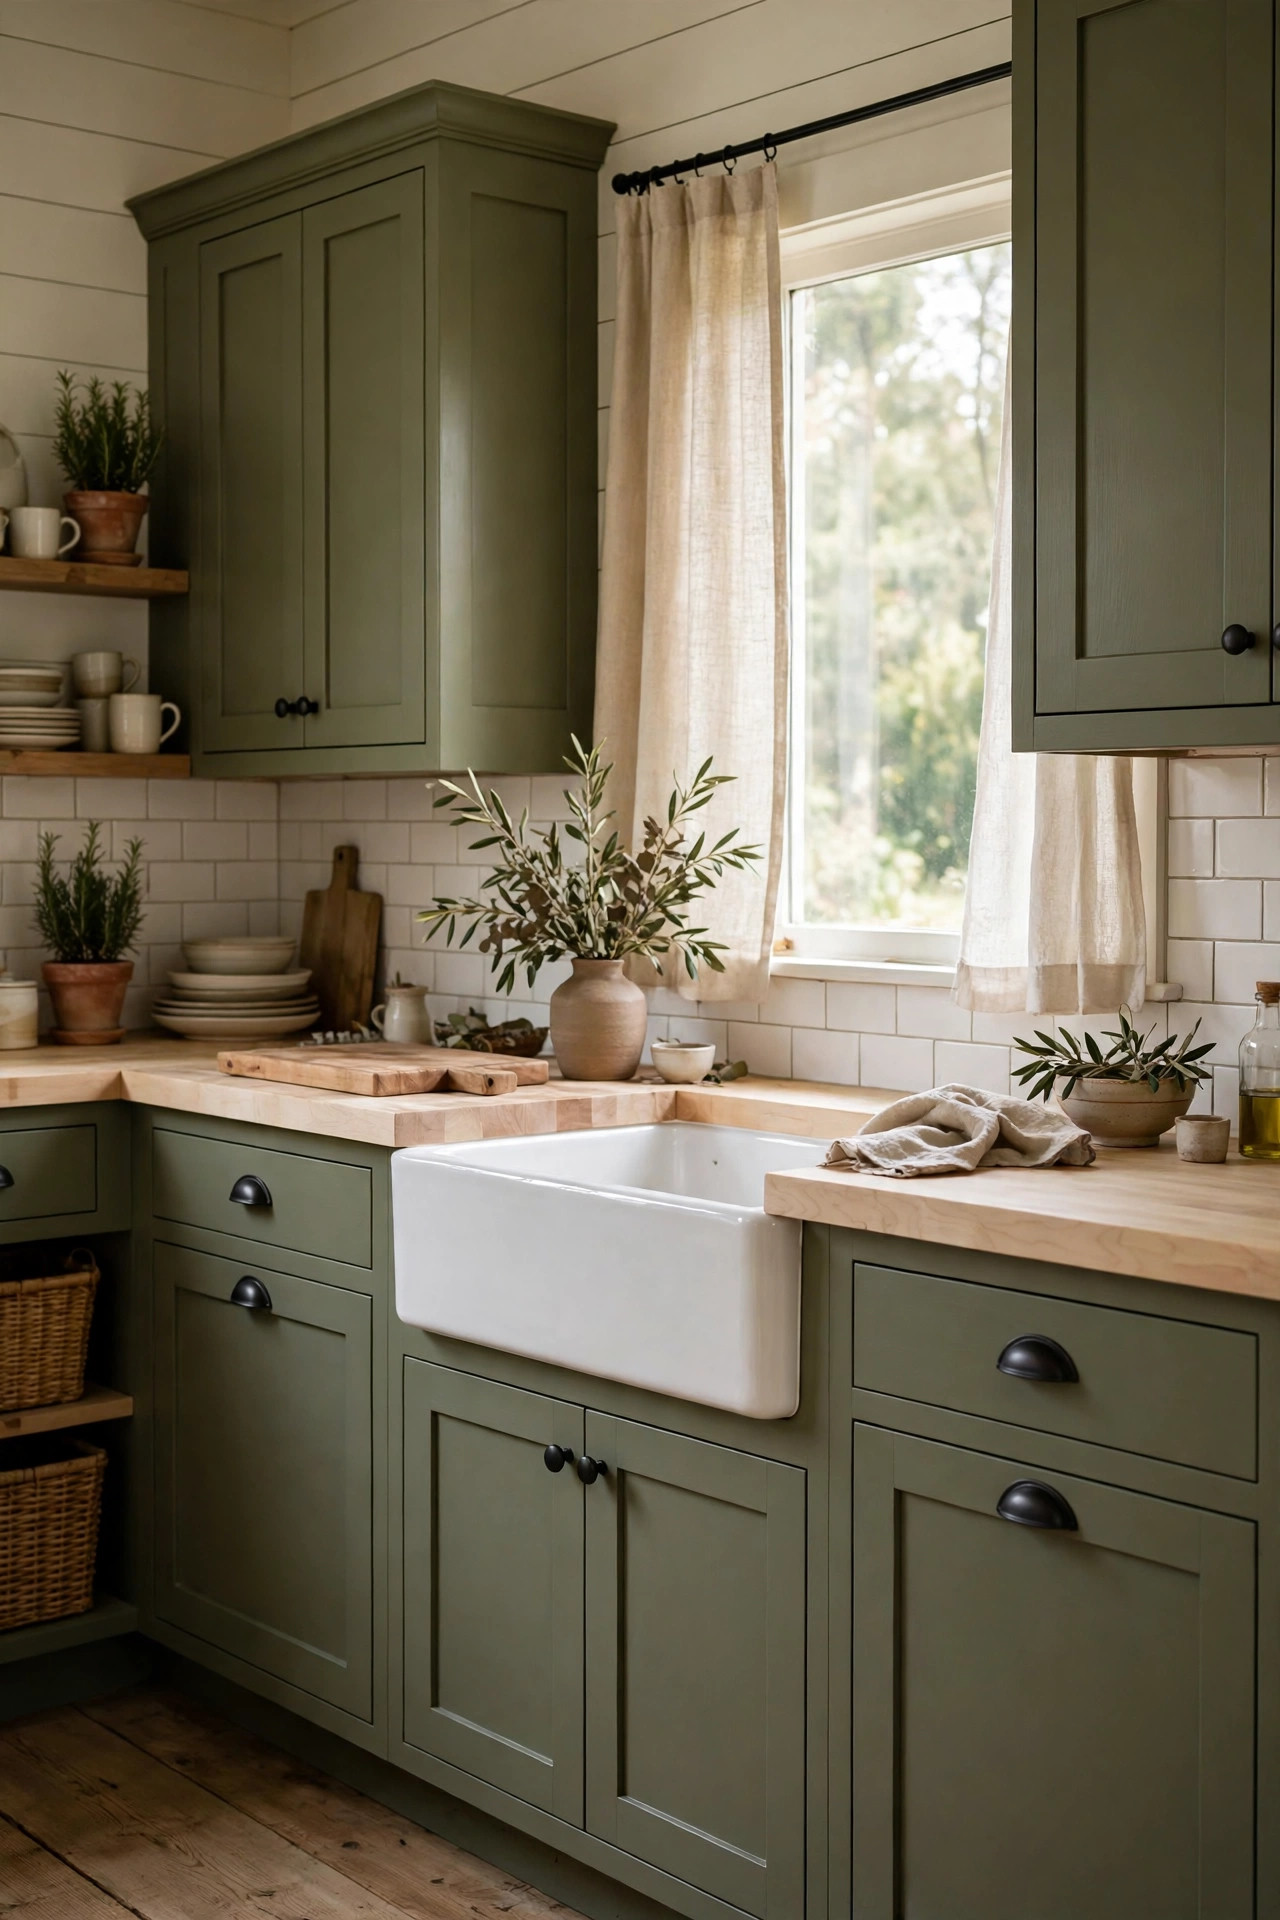
Description: Olive is the warmest green in this list, with yellow in its base, so it pairs naturally with wood. A butcher block counter repeats that warmth and forgives daily use in a way pale stone does not, which makes the combination read earthy rather than glamorous. It suits farmhouse and cottage rooms with warm floors. Butcher block is a maintenance promise, though: it needs sealing on schedule and boards for chopping, or it will stain and darken around the sink.
Best For: Farmhouse and cottage kitchens that already have warm wood floors, beams or furniture.
Not Ideal For: Anyone who wants a zero maintenance counter; wood needs oil or sealant and care around water.
Estimated Cost: $600-$1,600 (estimate) for cabinet paint plus DIY butcher block slabs and sealant.
Budget Note: Unfinished birch slabs sit at the low cost end of butcher block; walnut and custom cut sizes raise the price quickly.
Renter Friendly: No
Renter Note: Both the cabinet paint and a fitted counter are permanent changes to the property.
What You Need
Olive green cabinet paint, an unfinished butcher block slab, food safe sealant or mineral oil, sandpaper in two grits, black or brass pulls, a saw or a store cutting service.
Product recommendation (partially verified): Hardwood Reflections Butcher Block Countertop in Unfinished Birch, 74 x 39 inch island top, 1.5 inch thick, sold at The Home Depot
Why it fits: A solid birch slab sold unfinished, so you choose the sealant yourself; the maker instructs sealing every surface within 48 hours of unwrapping, which is the step that decides how well it ages beside a sink.
How To Do It
- Paint the cabinets olive in two thin coats and let the finish cure.
- Cut the slab to size, sand it smooth, and seal all faces, including the underside, within 48 hours of unwrapping it.
- Fit the slab following the maker’s guidance, leaving a small expansion gap at the walls.
- Keep up the oil or sealant on the maker’s schedule and use boards for chopping and hot pans.
Pro Tip
Seal the sink cutout edges twice; most butcher block water damage starts at an unsealed sink rim, not on the visible top.
8. Mint Green Cabinets for a Cottage Kitchen
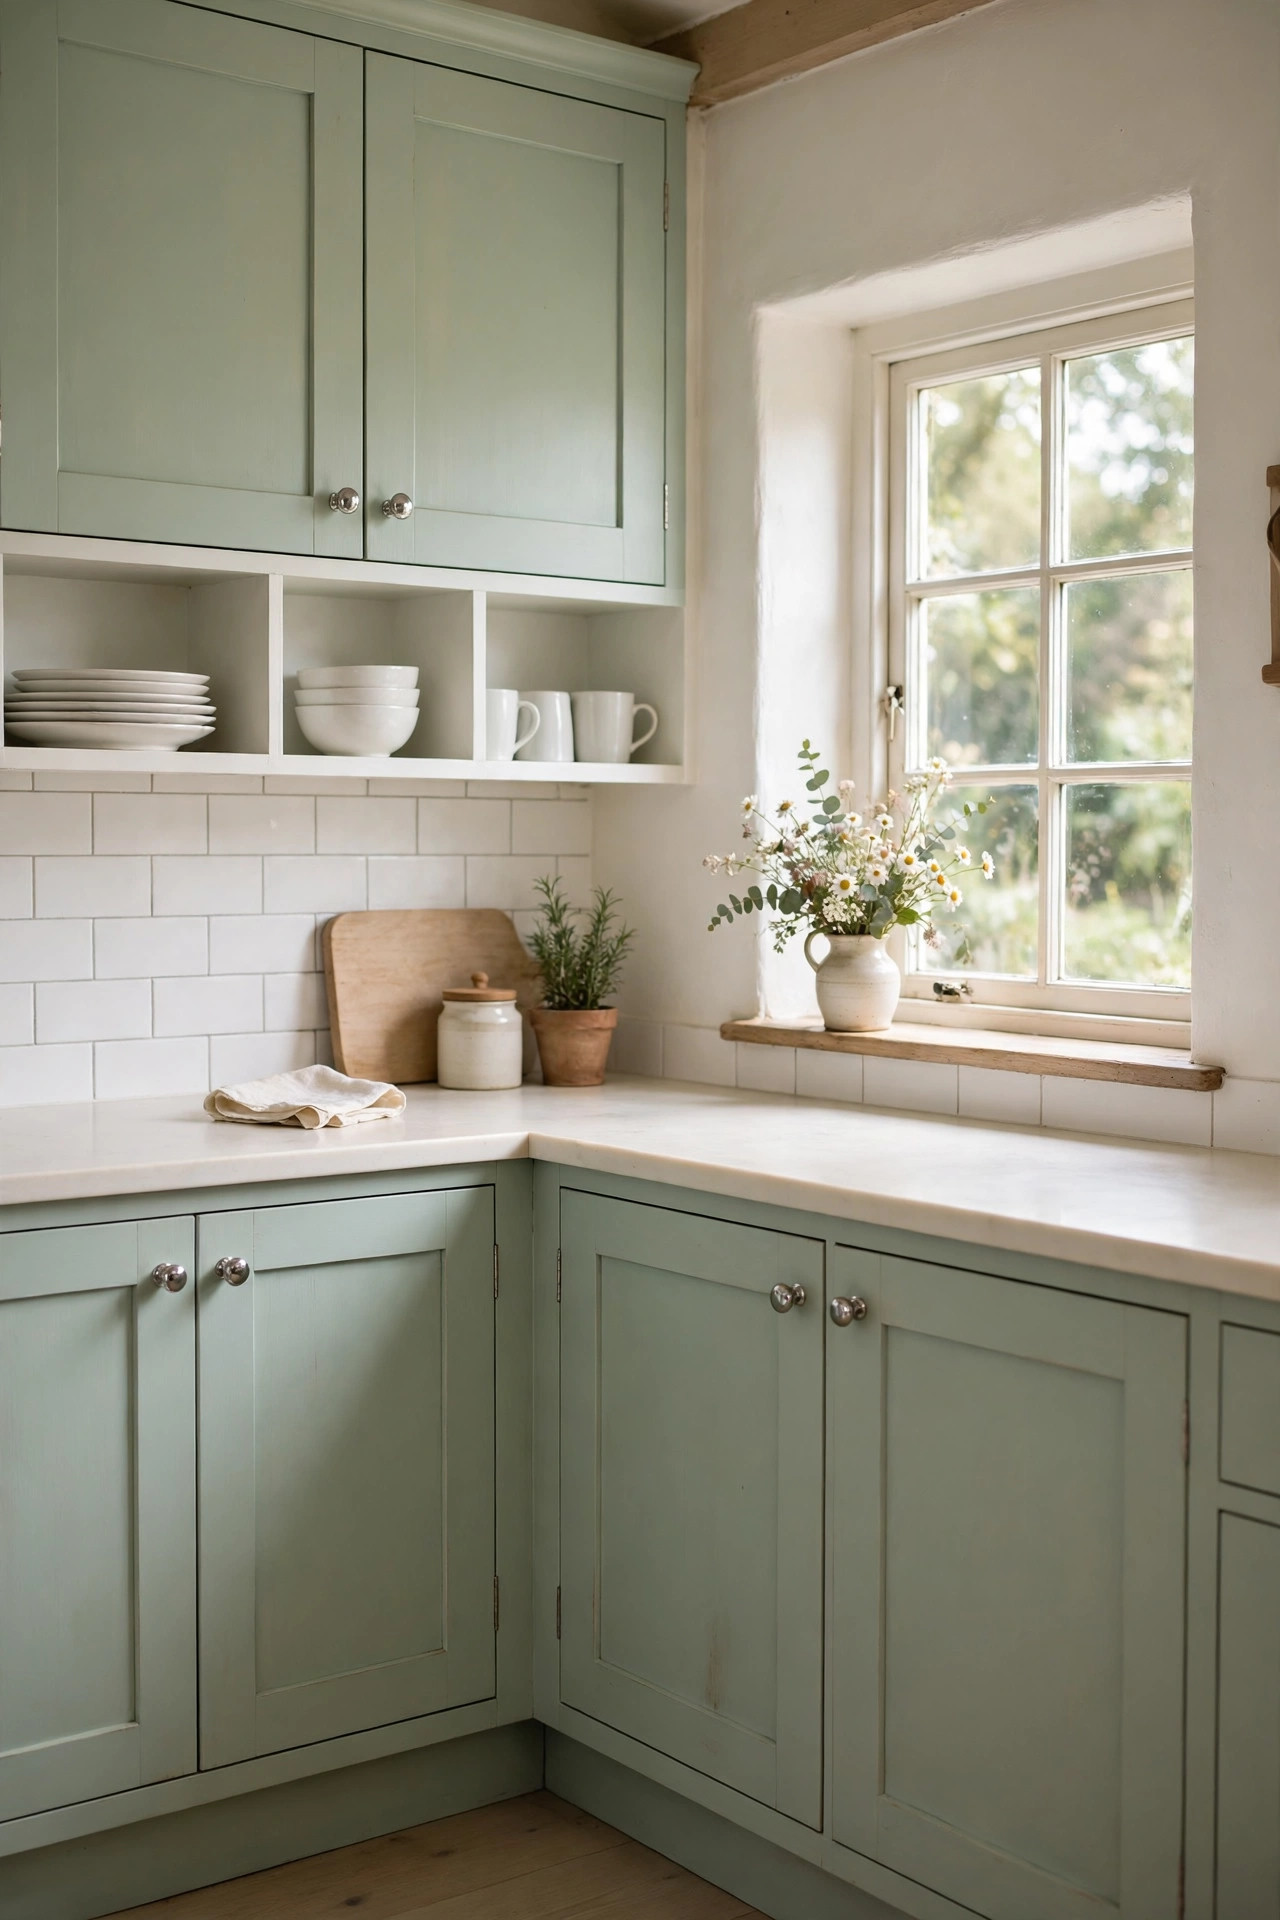
Description: Mint is the lightest green in the list, a soft pastel that suits small cottage kitchens and breakfast nooks where dark colours would close the room in. It looks best with cream counters, simple chrome or nickel hardware and uncluttered worktops. Because it is pale, mint hides scuffs better than white but shows them more than sage does. The failure mode is sweetness: without wood, metal or a darker floor to ground it, mint can drift towards a nursery feel.
Best For: Small bright kitchens, cottages and retro leaning styles.
Not Ideal For: Sleek modern rooms, where a pastel green fights the architecture instead of softening it.
Estimated Cost: $160-$300 (estimate) for one cabinet paint kit plus tape, cloths and basic hardware.
Budget Note: One kit includes the paint and basic tools for about 100 square feet of cabinets, so the main extra costs are preparation supplies and any new knobs.
Renter Friendly: No
Renter Note: A kit finish is still paint, and paint on a landlord’s cabinets needs written permission first.
What You Need
A mint green cabinet paint kit with two cans, brush and rollers, degreaser, painter’s tape, drop cloths, chrome or nickel knobs, and patience for the curing time.
Product recommendation (partially verified): Nuvo Cabinet Paint Kit, Celadon Cove, by Giani
Why it fits: The maker describes Celadon Cove as a serene mint green; the kit includes two 31 ounce cans with a brush and rollers and covers about 100 square feet, which suits a small cottage kitchen in one purchase.
How To Do It
- Clean and degrease every door and frame; this paint and primer in one formula still fails on a greasy surface.
- Brush and roll the first thin coat, keeping edges neat around hinges and handles.
- Add the second coat once the first has dried as directed; pale colours over dark wood may need a third.
- Refit the chrome knobs, then treat the finish gently while it cures; the maker gives a cure time of about 14 days depending on climate.
Pro Tip
Mint shifts blue under cool LED bulbs, so check a painted door under your actual kitchen lighting before you commit to the second coat.
9. Reface With New Green Shaker Doors
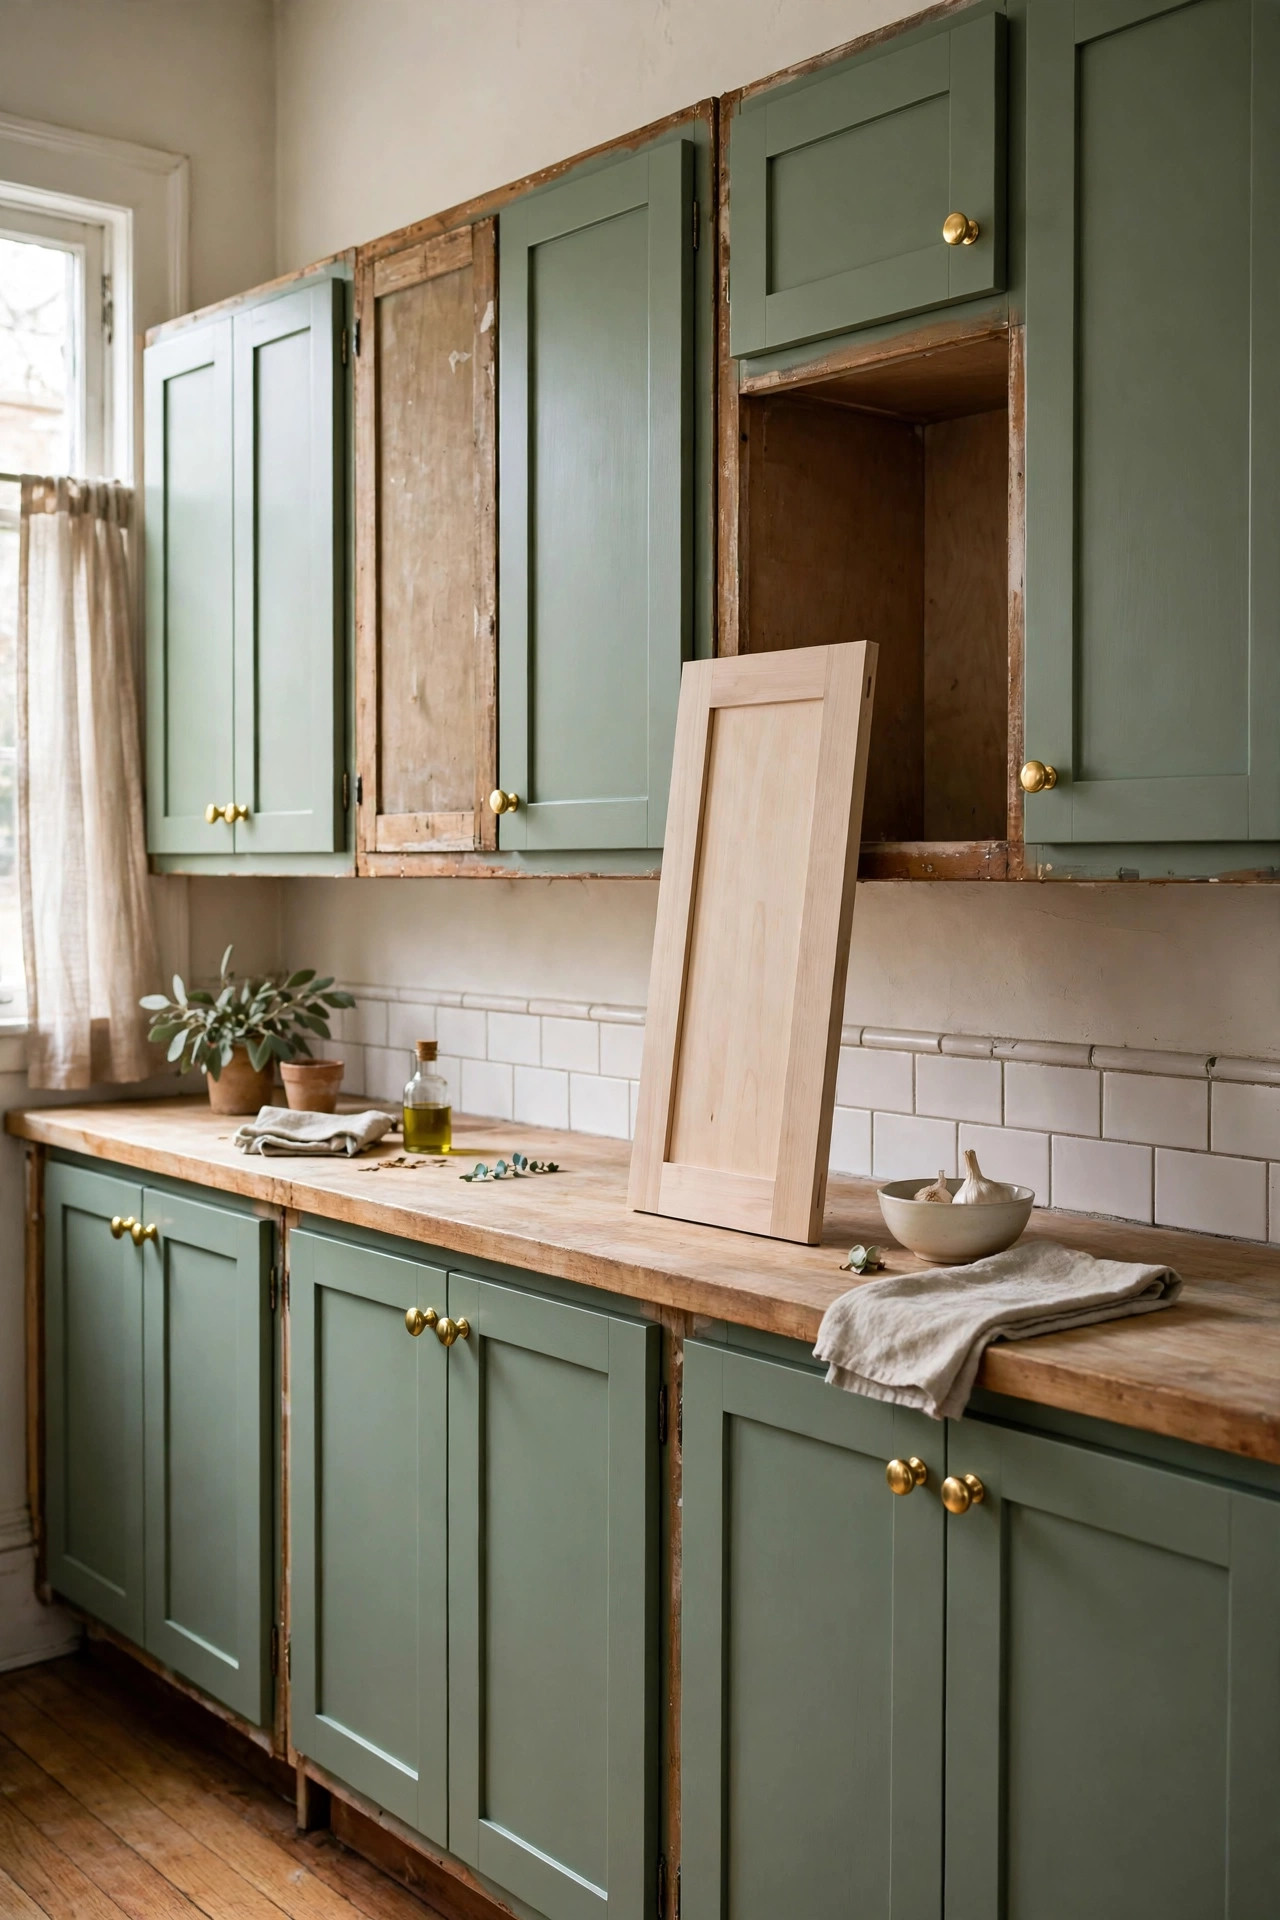
Description: Refacing keeps your cabinet boxes and layout but replaces every door and drawer front, with the new fronts painted green before they are hung. It fixes what paint cannot: warped doors, dated raised panels and chipped edges. The exposed box frames get paint to match. It costs several times a paint job but a fraction of new cabinets, and the kitchen stays usable most evenings because the boxes never leave the wall and the contents stay in place.
Best For: Solid boxes in a layout you like, with doors that are warped, damaged or very dated in style.
Not Ideal For: Kitchens where the layout itself is wrong; refacing locks a bad plan in for years.
Estimated Cost: $900-$2,800 (estimate) for unfinished doors for an average kitchen, plus paint, hinges and pulls.
Budget Note: Doors are priced per piece, so a kitchen with many small drawers costs more than the front count alone suggests.
Renter Friendly: With Conditions
Renter Note: Only with written landlord permission, and keep every original door and hinge stored safely so the kitchen can be returned exactly as you found it.
What You Need
Unfinished solid wood shaker replacement doors measured for each opening, green cabinet paint, soft close hinges, a hinge cup boring guide or a careful drill setup, pulls and knobs, sawhorses for painting.
Product recommendation (partially verified): ONESTOCK Unfinished Oak Shaker Cabinet Door Replacement
Why it fits: Solid red oak including the stiles, rails and centre panel, sold unfinished and ready to paint, and not predrilled, so hinge and pull positions can be set to match your existing boxes; the linked page is one size, with other sizes on the same listing.
Retailer/product page: https://www.amazon.com/dp/B09Z76FRF5
How To Do It
- Measure every existing door itself, not the cabinet opening, to the nearest 1/16 inch, and write the map down.
- Order the doors and paint them green flat on sawhorses before hanging, two thin coats with drying between.
- Bore the hinge cups, fit soft close hinges, and paint the exposed box frames to match.
- Hang the doors, align the gaps evenly, then drill and fit the pulls and knobs.
Pro Tip
Order one door first and test the fit and the colour on the most visible run; a full kitchen of made to measure doors is an expensive way to discover a measuring error.
10. Renter Route: Dark Green Peel and Stick Cabinet Wrap
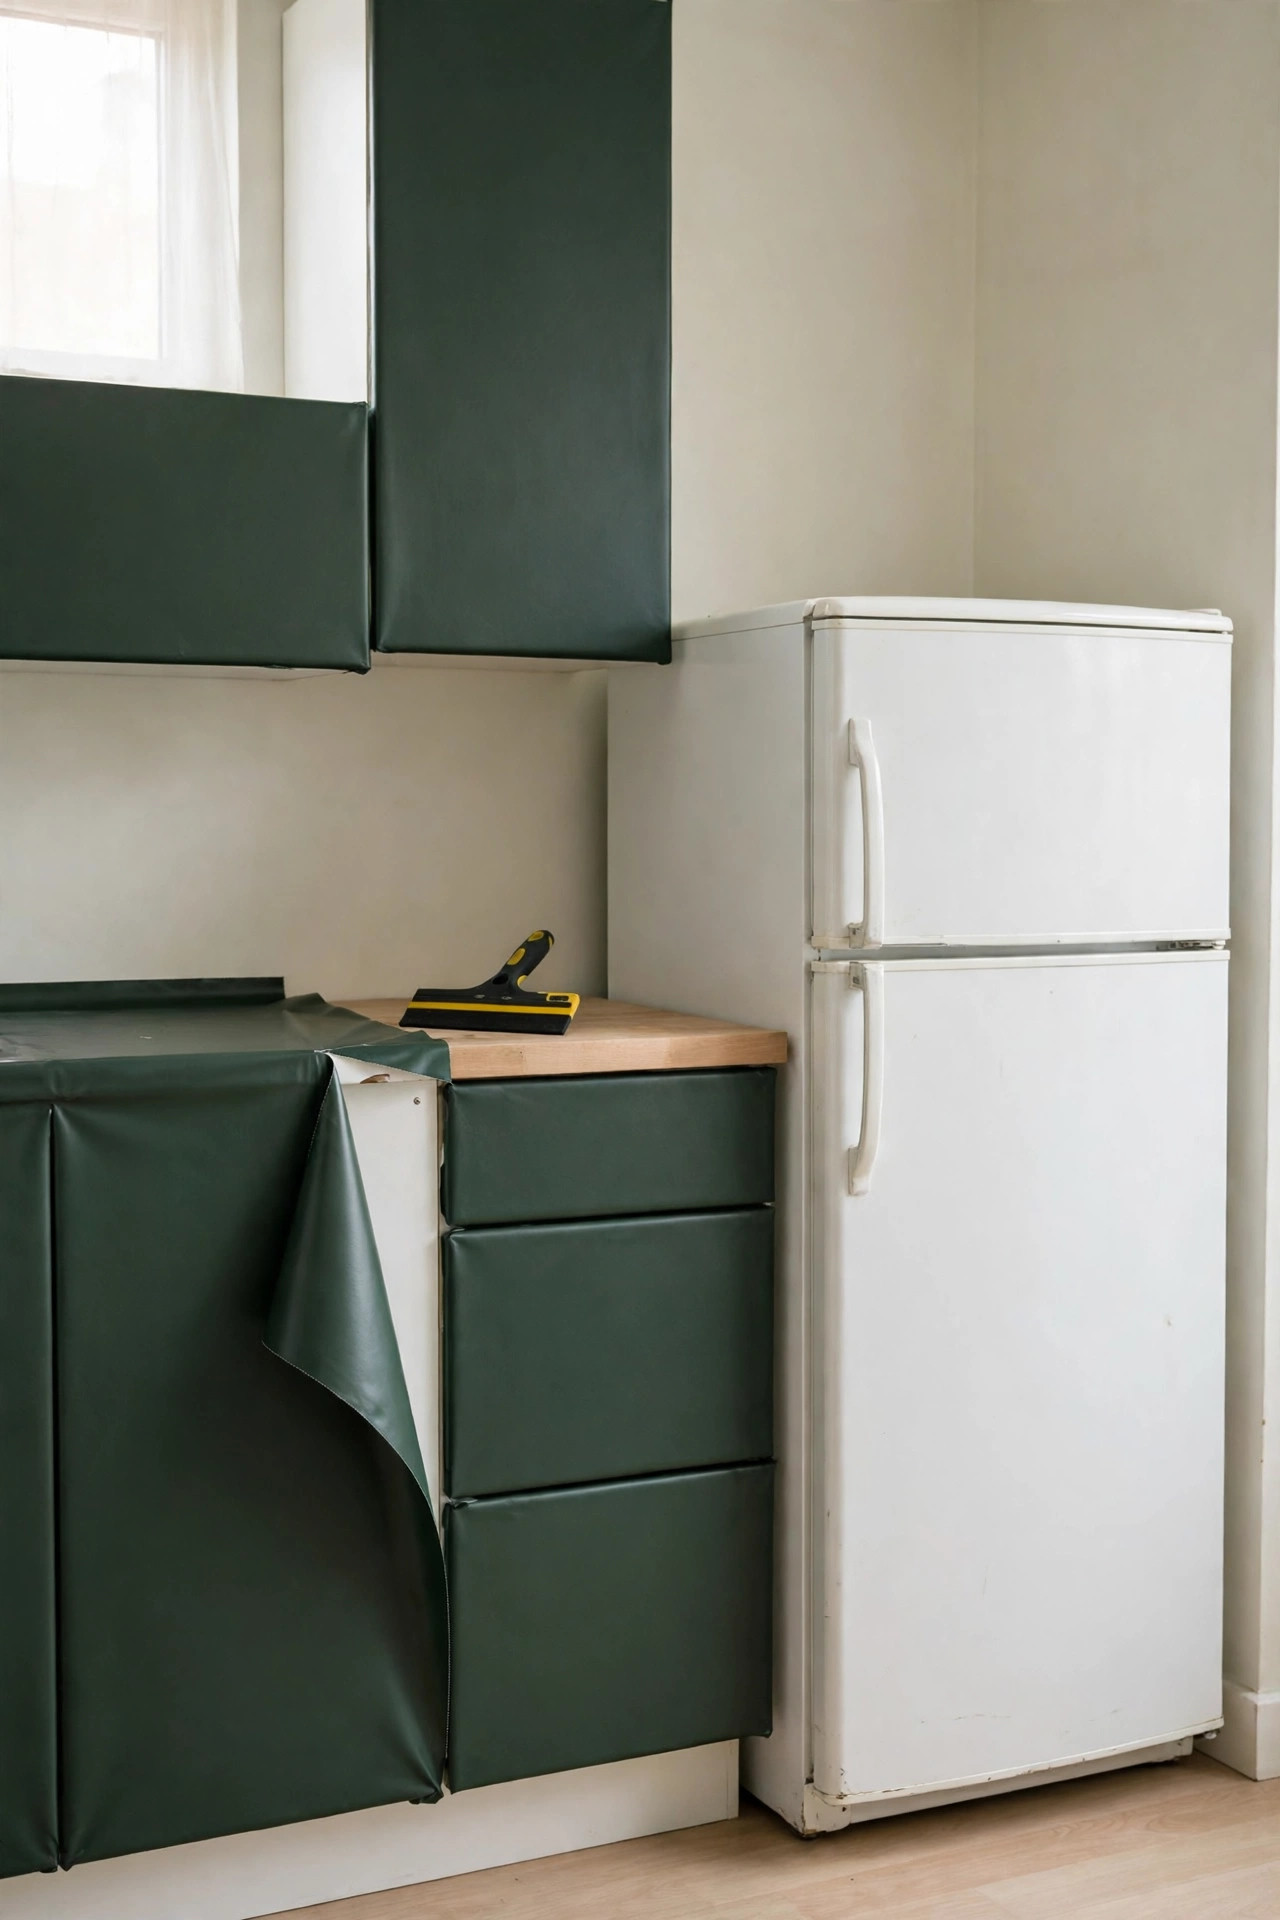
Description: The only fully reversible green in this list is a vinyl wrap: matte dark green contact paper smoothed over flat cabinet fronts. It works on slab doors and smooth shaker fronts, costs little, and peels away when you move out. It will not behave like paint, though. Edges near the stove can lift with heat, seams show on close inspection, and raised detail telegraphs through the film. Treat it as a one to two year refresh rather than a renovation, and check your lease before the first roll is cut.
Best For: Renters with flat, smooth cabinet fronts and a lease that allows removable coverings.
Not Ideal For: Cabinets with raised panel detail, heavy wood grain or damage; the film shows every bump beneath it.
Estimated Cost: $60-$180 (estimate) for enough rolls to cover an average kitchen’s fronts.
Budget Note: One roll of the size below covers about 13 square feet, so measure the fronts and order the whole job in one batch to avoid shade differences between rolls.
Renter Friendly: With Conditions
Renter Note: The maker describes the film as removable, but test one hidden front for a week first, keep it clear of direct burner heat, and confirm your lease allows coverings before you start.
What You Need
Matte dark green peel and stick vinyl rolls, a squeegee, a craft knife and cutting mat, degreaser, a hair dryer for corners, painter’s tape for labelling doors.
Product recommendation (partially verified): Abyssaly Peel and Stick Contact Paper, Dark Green, 15.7 x 118 inch
Why it fits: A vinyl film with a waterproof surface, sold for cabinets and countertops; the 15.7 inch width covers most door widths with one seam at most, and it is sold by the same brand storefront that ships it.
Retailer/product page: https://www.amazon.com/dp/B0DRFFDW1T
How To Do It
- Degrease one door and apply a test patch in a hidden spot; leave it a week and check it peels cleanly.
- Remove the doors and hardware, lay each door flat, and wrap the front, smoothing from the centre outwards with the squeegee.
- Trim the edges with a craft knife and warm the corners with a hair dryer to settle the film around them.
- Refit the hardware through the film and keep a spare roll for repairs and replacements.
Pro Tip
Wrap doors off their hinges and laid flat; working flat is the difference between a smooth front and a field of trapped bubbles.
11. Green Cabinets With a Green Zellige Look Backsplash
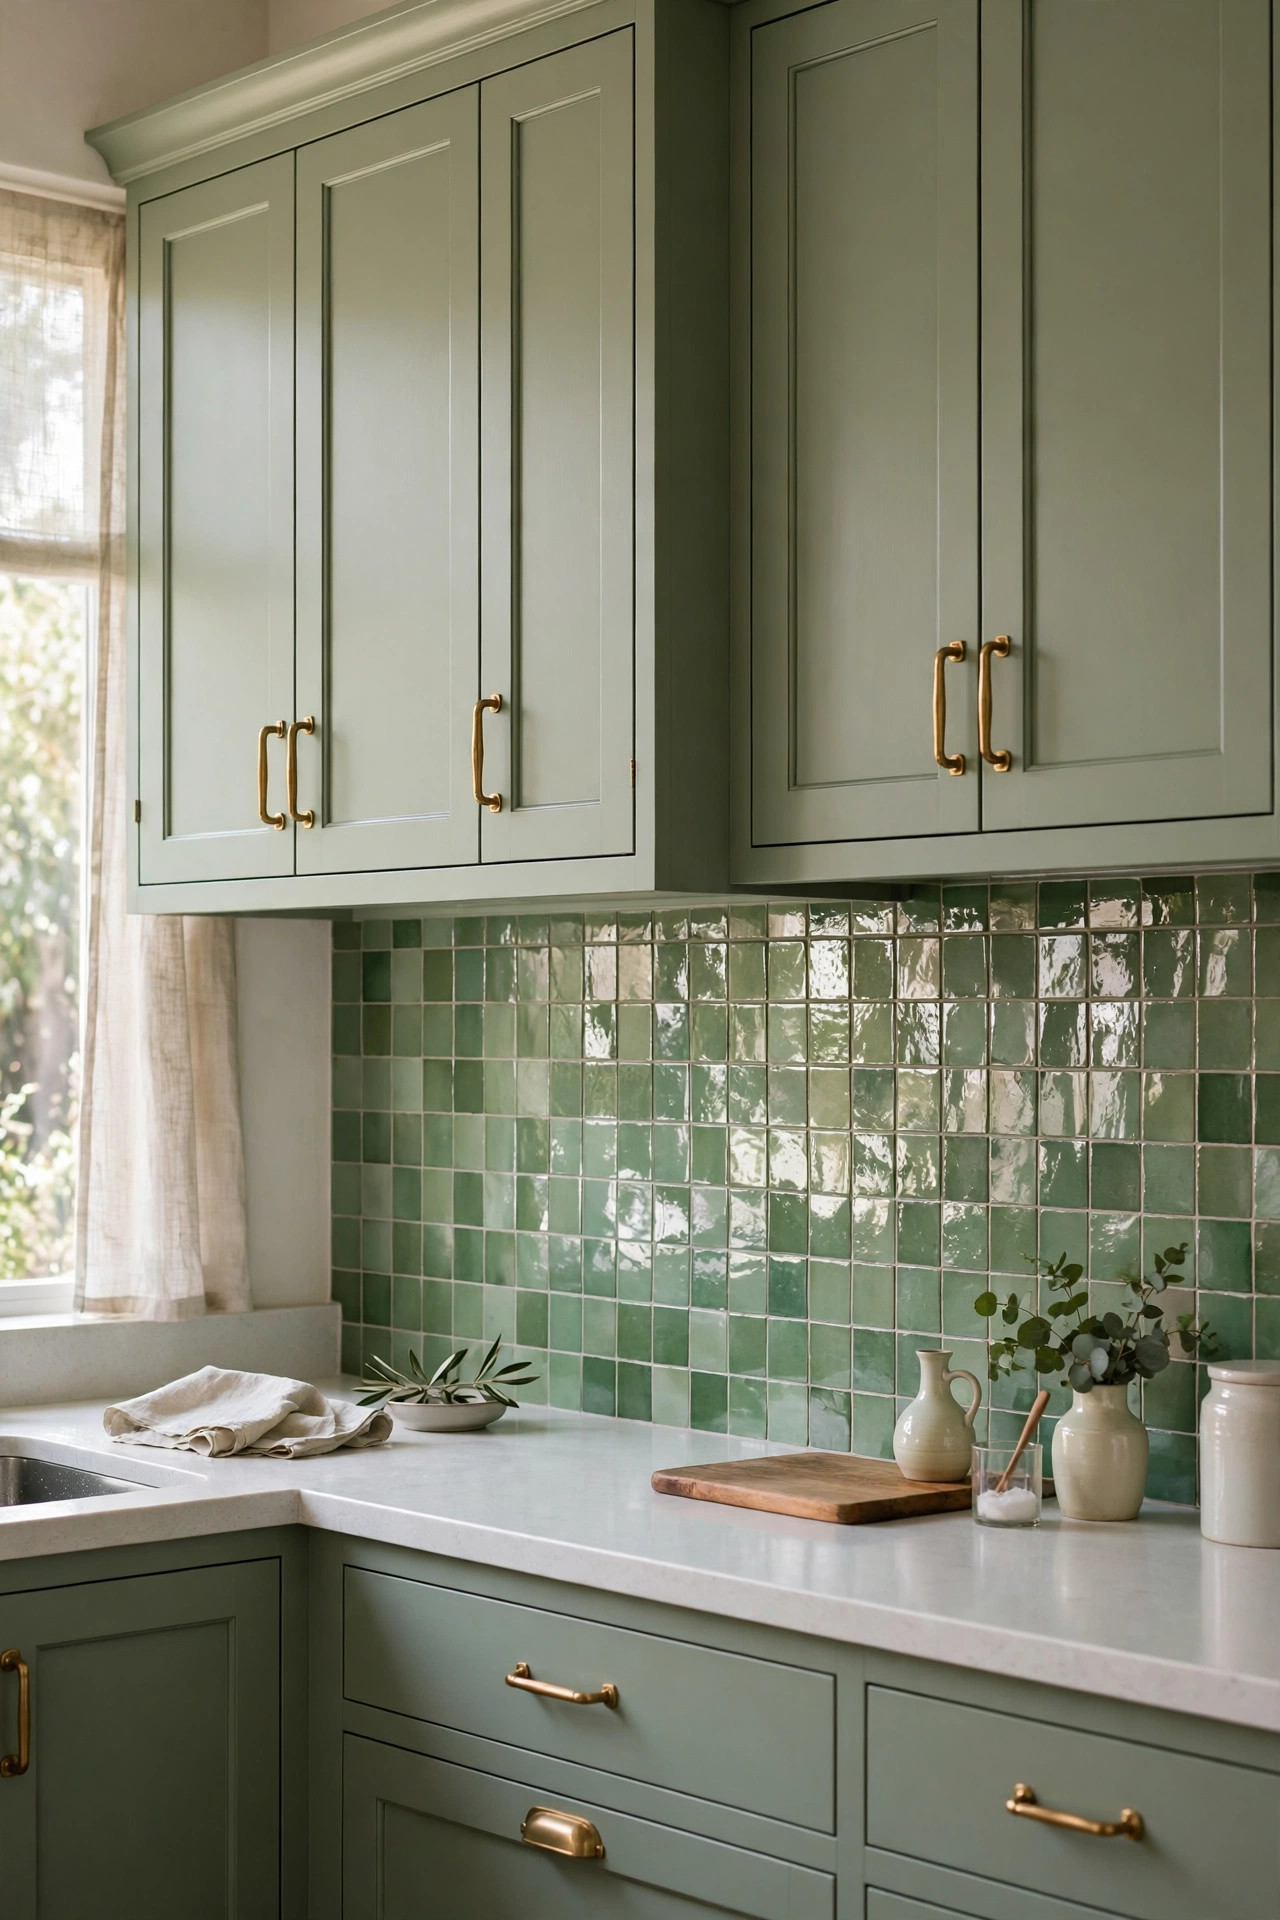
Description: A backsplash in a green close to the cabinet colour gives a calm, layered wall where the tile gloss does the decorating. Zellige style tiles vary slightly per piece, so the surface shimmers instead of sitting flat. Keep counters pale and grout close to the tile colour to hold the single colour effect. The same trick fails in two clashing greens, so match the tile to your paint chip in daylight first; more options sit in these kitchen backsplash ideas.
Best For: Kitchens with pale counters that can carry one full colour wall.
Not Ideal For: Rooms where the cabinets and tile are different greens with different undertones; the clash reads as a mistake.
Estimated Cost: $150-$450 (estimate) for peel and stick zellige look sheets for a typical run; real tile and setting materials cost more.
Budget Note: Peel and stick sheets remove the tiler and the grout from the bill, which is where most of the saving comes from.
Renter Friendly: No
Renter Note: The cabinet paint is permanent; the sheets alone are the removable half, and even they can lift wall paint when they come off.
What You Need
Green zellige look peel and stick tile sheets, a level, a craft knife, degreaser, a tape measure; or, for the permanent version, real zellige tile with adhesive and grout in a matching colour.
Product recommendation (partially verified): Smart Tiles Peel and Stick Backsplash, Taza Green, 5 sheets of 9 x 9 inch
Why it fits: Glossy zellige theme sheets with tonal variation in the surface, self adhesive and sized so two rows cover a standard backsplash height; follow the maker’s heat clearance guidance behind burners.
Retailer/product page: https://www.amazon.com/dp/B0C7LSQWVN
How To Do It
- Hold a sheet against the painted cabinet door in daylight and confirm the undertones agree before opening the rest.
- Degrease the wall, switch off power to the outlets, and mark a level starting line above the counter.
- Stick the sheets from the counter upwards, following the maker’s overlap pattern and cutting around outlets with a craft knife.
- Press every seam firmly, restore power, and keep the clearance behind the burners that the maker specifies.
Pro Tip
Live with one stuck sheet for a week before doing the wall; green on green only works when the undertones match, and a screen cannot tell you whether they do.
12. Green Lowers With Open Wood Shelves Above
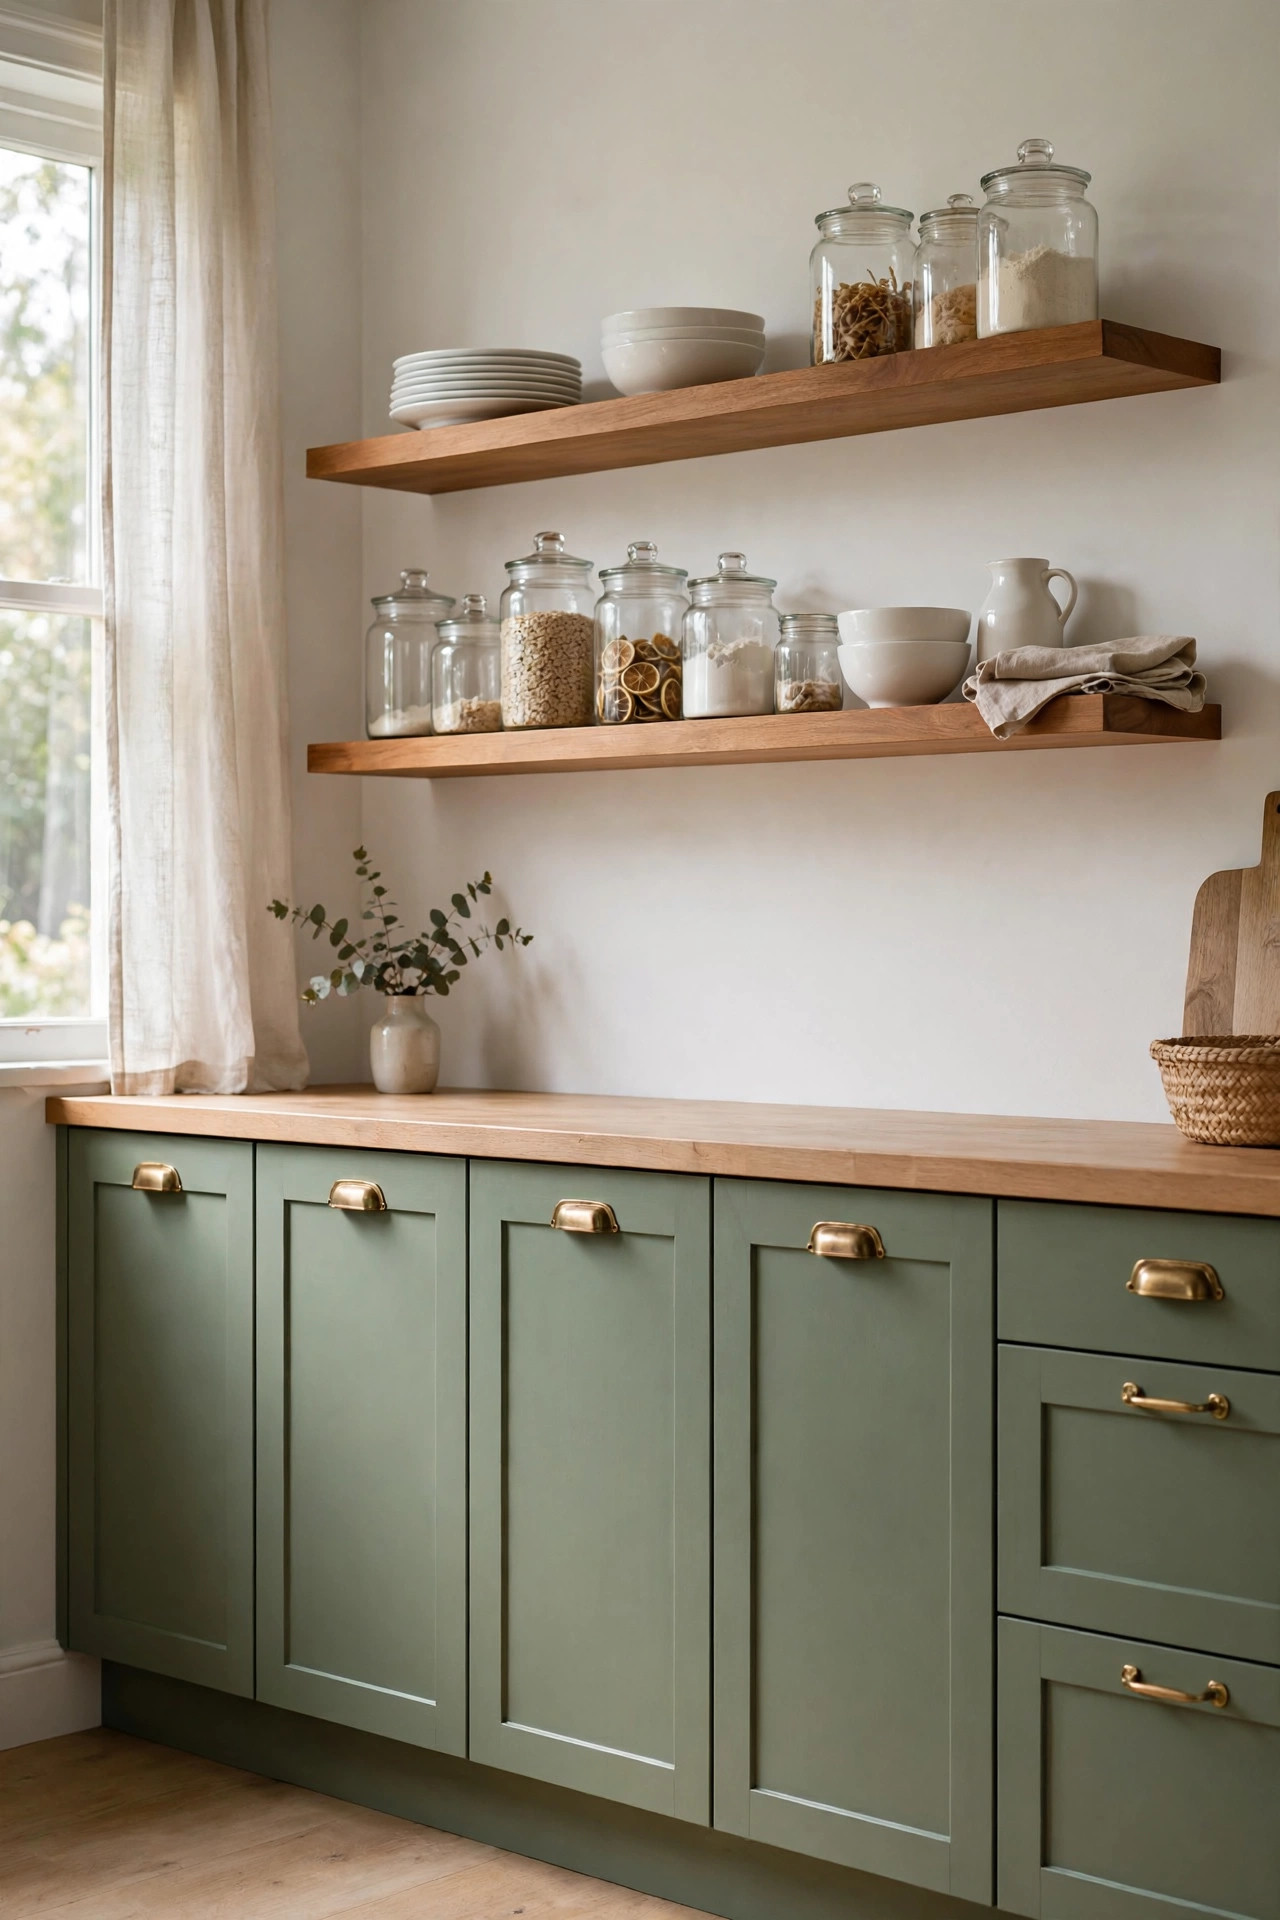
Description: Taking the upper cabinets out and running green lowers only opens the room up, trades closed storage for two wood shelves, and puts daily dishes on show. It suits kitchens with a pantry or a tall unit elsewhere, because you give up roughly a third of your storage to get the look. The shelves have to hold pieces you wash often; anything parked up there just in case gathers a film of grease dust. Green below and warm wood above is also the calmest two-tone in this list.
Best For: Kitchens with a pantry or enough base storage to give up the uppers.
Not Ideal For: Low storage kitchens, or keen bakers whose small appliances all need a closed home.
Estimated Cost: $220-$520 (estimate) for paint for the lowers plus two shelf sets with brackets.
Budget Note: The shelves cost less than the paint and doors you are not buying for the uppers, so the saving is real, but so is the storage loss.
Renter Friendly: No
Renter Note: Removing uppers leaves fixing holes in the wall and the paint is permanent; shelf screws on their own break most rental agreements too.
What You Need
Green cabinet paint for the lowers, two rustic wood floating shelves around 24 inches wide, a stud finder, a level, wall fixings suited to your wall type, brass pulls.
Product recommendation (verified): QEEIG Floating Shelves, 23.6 inch, Rustic Brown, set of 2
Why it fits: Engineered wood shelves at 23.6 x 9.3 x 1.5 inches with hidden brackets, shipped from Amazon and sold by QEEIG; the 9.3 inch depth takes dinner plates and mixing bowls, not only mugs and jars.
Retailer/product page: https://www.amazon.com/dp/B08P2STS1R
How To Do It
- Remove the upper cabinets, fill the fixing holes and paint the wall.
- Paint the lower cabinets green in two thin coats and let the finish cure.
- Find the studs, level the brackets and fix the shelves, keeping the shelf you will load heaviest lowest.
- Load daily dishes only, and leave clear space at both ends so the shelves read calm rather than crowded.
Pro Tip
Put the shelf you use every day at shoulder height or lower; a shelf you need a stool for becomes decoration instead of storage within a month.
13. Moody Deep Green Cabinets With Black Counters
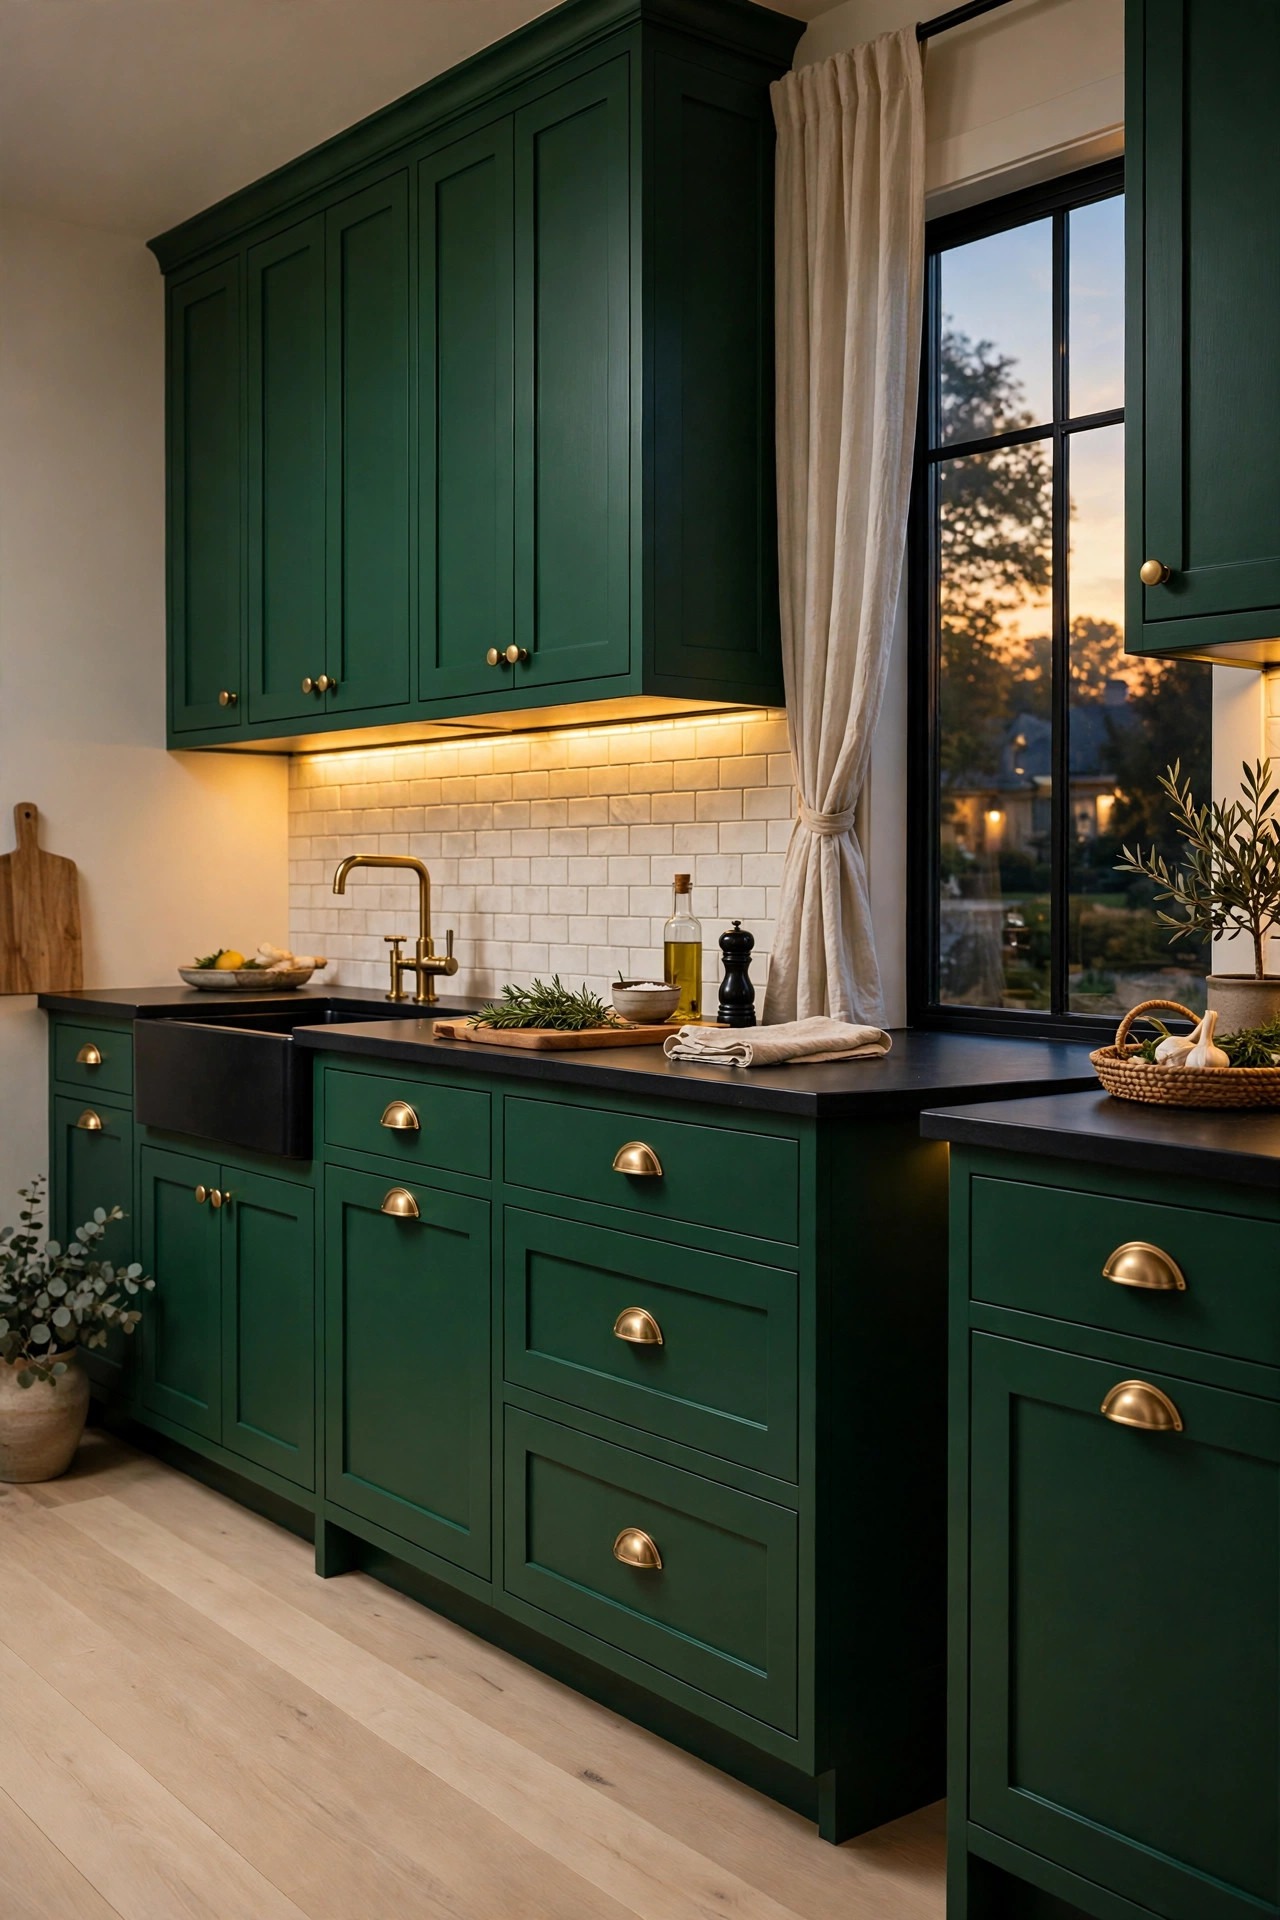
Description: This is the evening version of green: deep blue green cabinets, matte black counters, and brass touches that glow under warm light. It is the most dramatic pairing in the list and the least forgiving, because dark fronts show dust, flour and water spots clearly under downlights. It works best where the kitchen opens onto a dining space used at night, so the mood is shared. Keep the floor pale or warm wood, or the room will feel as if it is closing in.
Best For: Open plan kitchens used for evening cooking and entertaining.
Not Ideal For: Hard water homes or cooks who dislike wiping fronts; every mark shows on a deep matte colour.
Estimated Cost: $300-$750 (estimate) for deep cabinet paint plus matte black laminate counters or a quality counter film, fitted yourself.
Budget Note: Black stone is the expensive version of this look; matte black laminate gives the same read for a fraction of a slab’s price.
Renter Friendly: No
Renter Note: Paint and counters are both permanent here; there is no partial version of this one for a rental.
What You Need
Deep blue green cabinet paint, matte black laminate countertop or counter film, brass pulls, warm white bulbs, under cabinet lighting, foam rollers.
Product recommendation (partially verified): Heirloom Traditions ALL-IN-ONE Paint, Irish Garden (blue green), Quart
Why it fits: The listing describes Irish Garden as a blue green, the undertone that keeps a deep green from turning muddy against black counters; the quart size suits a single kitchen without paying for a gallon.
Retailer/product page: https://www.amazon.com/dp/B0789P3GYS
How To Do It
- Paint a test door first; deep green darkens as it dries, and the dried colour is the one you are choosing.
- Apply two to three thin coats with full drying time between them.
- Fit the black counters or counter film, then the brass hardware.
- Swap the bulbs to warm white and add under cabinet light; cool bulbs turn deep green murky.
Pro Tip
Add the under cabinet lighting before you decide the colour is too dark; most deep green kitchens that disappoint are under lit, not over coloured.
14. Green and Cream Vintage Cabinets With Brass Cup Pulls
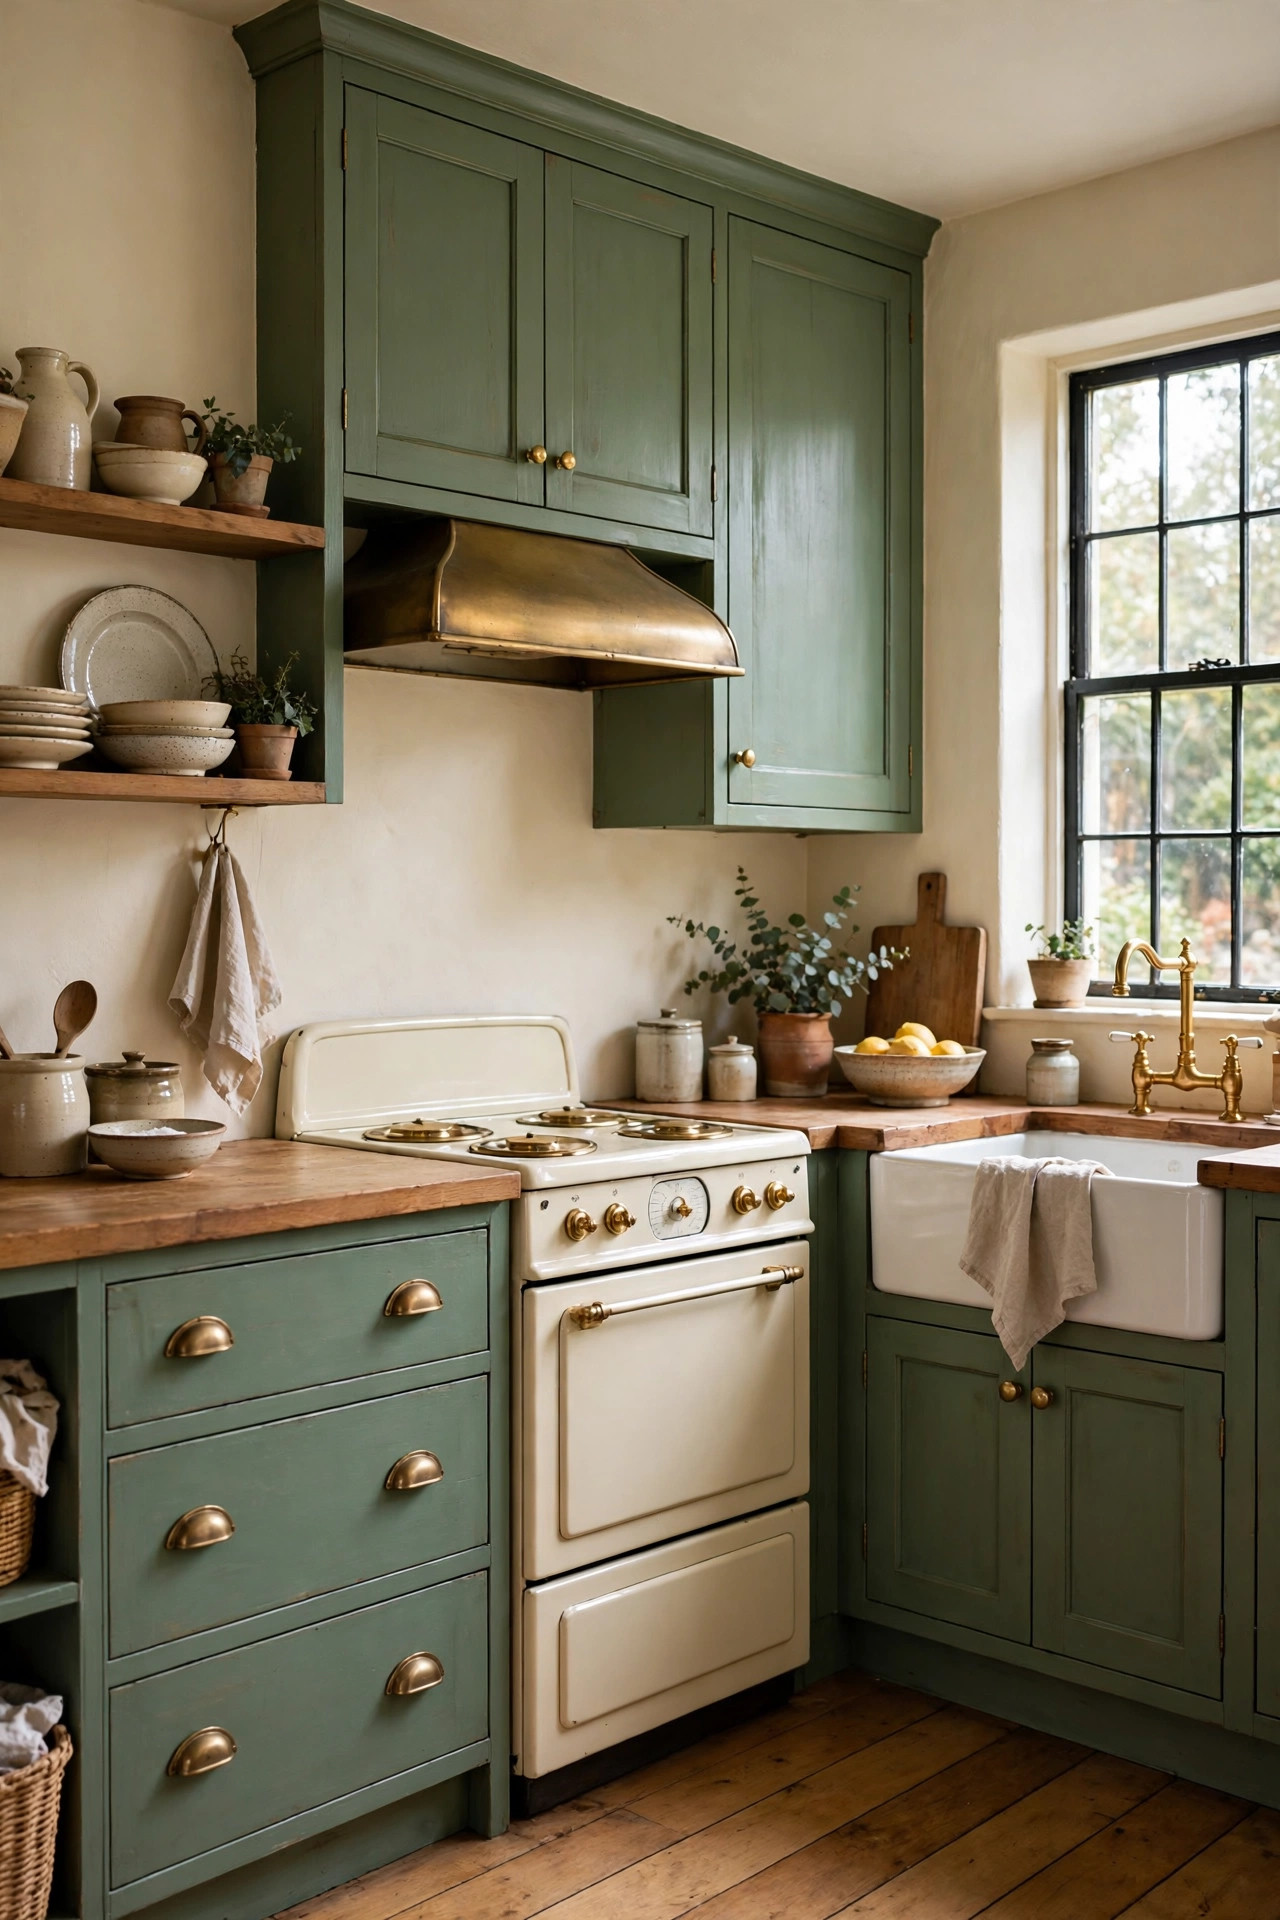
Description: A mid green under cream walls, with cup pulls on the drawers and small knobs on the doors, gives the hardware pattern of an older kitchen while the colour keeps it current. It suits houses where a sleek modern kitchen would fight the architecture. The brass here is unlacquered, so it darkens where hands touch it and builds a patina over the first year. That change is the point of the look, but only choose it if you genuinely like metal that ages.
Best For: Older or character homes and farmhouse styles with cream or warm white walls.
Not Ideal For: Anyone who wants hardware to look new forever; unlacquered brass marks and darkens with touch.
Estimated Cost: $220-$480 (estimate) for paint, cup pulls for the drawers and knobs for the doors.
Budget Note: Cup pulls come in small packs, so give the drawers the cups and use plainer matching knobs on the doors to hold the hardware bill down.
Renter Friendly: No
Renter Note: The paint rules this out for renters, although cups and knobs that reuse existing holes are reversible on their own.
What You Need
Mid green cabinet paint, solid brass cup pulls for the drawers, brass knobs for the doors, a centre punch or tape for marking, a screwdriver, cream wall paint if the walls need it.
Product recommendation (verified): QOGRISUN Unlacquered Brass Cabinet Cup Pulls, 2 pack, 3 inch hole center, solid brass
Why it fits: Solid brass with no lacquer coat, so it takes the natural patina this look depends on; the 3 inch centres suit standard drawers, and the pulls are shipped from Amazon and sold by QOGRISUN.
Retailer/product page: https://www.amazon.com/dp/B0D939RGB5
How To Do It
- Paint the cabinets green and let the finish cure fully before any hardware touches it.
- Mark the centre of each drawer front and fit the cup pulls along the top rail of the drawers.
- Fit the knobs to the doors, keeping one consistent height from the top corner.
- Leave the brass unpolished afterwards; wipe it with a dry cloth only, so the patina builds evenly.
Pro Tip
Fit one drawer with its cup pull and live with the darkening for a month before doing the whole run; unlacquered brass is a commitment to change, not a fixed finish.
15. Flat Panel Green Cabinets for a Full Replacement
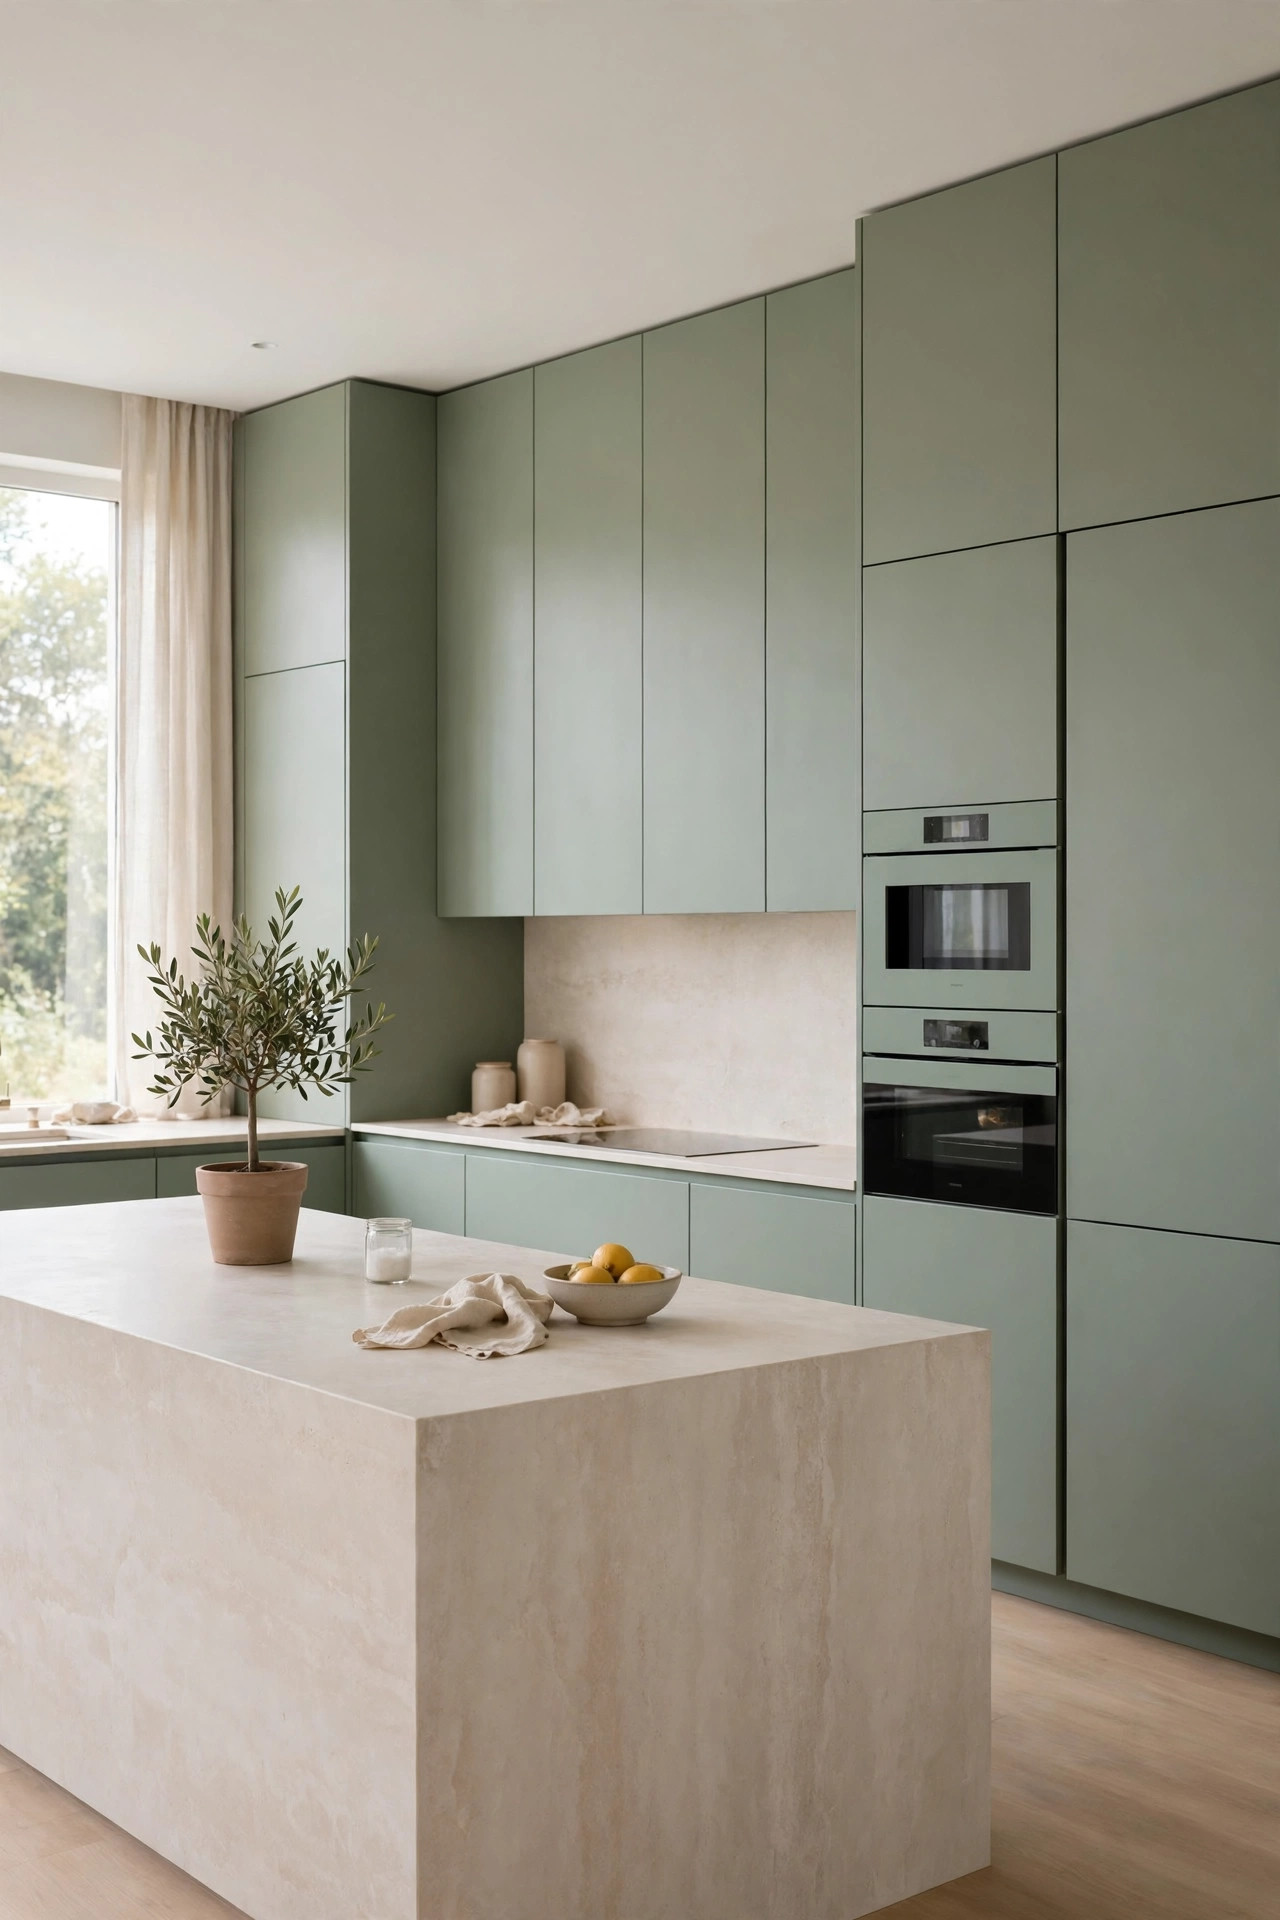
Description: Sometimes the boxes themselves are the problem: swollen particleboard, doors beyond repair, or a layout that wastes every corner. A full replacement in flat panel green is the modern version of the colour, plain slab fronts with no frame detail, opened by push latches instead of handles. It is the most expensive route in this list by a wide margin and the only one that can fix the layout itself. Order a sample door first; slab fronts show colour differences across a run more than shaker fronts do.
Best For: Kitchens with damaged boxes or a layout that genuinely needs to change.
Not Ideal For: Tight budgets or sound cabinets; replacement costs many times a reface for the same colour at the end.
Estimated Cost: $6,000-$18,000 (estimate) for stock to semi custom cabinets for an average kitchen with DIY installation at the low end; counters, appliances and professional installation are extra.
Budget Note: The cabinets are only part of the bill; counter templating, fitting and plumbing reconnections commonly add a third again.
Renter Friendly: No
Renter Note: Replacing fitted cabinets is a building change, not a decorating one, and is never a rental option.
What You Need
Made to measure flat panel cabinets in your chosen green, a sample door ordered first, push to open latches, soft close hinges, accurate room measurements, and a fitter or a careful DIY plan.
Product recommendation (partially verified): ZKRIOC Magnetic Push Latch, 4 pack, push to open
Why it fits: A spring push latch with an adjustable magnetic tip; the listing states the tip adjusts the door gap between 2 and 9mm, which is what keeps handleless slab fronts sitting flush and even across a run.
Retailer/product page: https://www.amazon.com/dp/B0DT43HSQJ
How To Do It
- Order one sample door in the exact green and finish, and judge it at home in your own light.
- Measure the room twice, confirm services and appliance sizes, and only then order the full run.
- Remove the old cabinets and make good the walls and floor before anything new arrives.
- Install the new boxes level, hang the slab doors, fit the push latches and adjust each door gap evenly.
Pro Tip
Photograph every wall after the old cabinets come out and before the new ones go in; it is the only chance you will ever get to record where the pipes and wires run.
Practical Tips for Green Kitchen Cabinets
- Test the green on a door, not a paint chip. A chip is two inches of colour under shop light; a door is the real surface under your light, next to your floor, and greens shift more between the two than most colours do.
- Choose the undertone before the shade. Yellow based greens such as olive and warm sage sit happily with wood floors and brass; blue based greens such as forest and emerald suit pale stone and steel. Most disappointing green kitchens are an undertone problem, not a shade problem.
- Order hardware before you paint. If your existing holes are an unusual spacing, filling and redrilling is a ten minute job on a bare door and a paint repair job on a finished one.
- Respect curing time. Cabinet paints feel dry long before they are hard; plan gentle use for the first days and full curing before heavy pans start knocking the drawer fronts.
- In an open plan room, the green does not stop at the kitchen. Repeat it once in the living side, in cushions, a throw or art, so the cabinets look connected rather than stranded; the same thinking shapes these open kitchen design layouts.
- Keep one pale surface in any deep green scheme. Pale counters, a pale floor or a pale ceiling: a deep shade needs one of the three, or the room loses its light by evening.
Frequently Asked Questions
What shade of green is easiest to live with on kitchen cabinets?
Sage, as in idea 1. Its grey undertone makes it the most forgiving shade for changing light, mixed metals and resale, and it hides everyday marks better than either mint or emerald. Blue greens look richer but demand better light and more wiping.
Should I paint, reface or replace my cabinets to get green ones?
Paint if the doors are sound and the layout works, as in idea 5; it is the cheapest route by far. Reface, as in idea 9, when the doors are warped or dated but the boxes and layout are good. Replace only when the boxes are damaged or the layout itself wastes space, because idea 15 costs many times the other two.
What colours go with green kitchen cabinets?
Warm metals first: brushed brass and gold warm every green in this list, while matte black sharpens the deeper shades. For surfaces, white and cream counters keep light greens fresh, marble look stone suits forest green, and butcher block is the natural partner for olive. Very cool grey counters fight most greens, so test them together.
Can renters have green kitchen cabinets?
Only by removable routes. The wrap in idea 10 is the one fully reversible option, and even that needs a lease check and a test patch. Painting, refacing and tiling all change the landlord’s property. A landlord who is planning to repaint between tenancies may say yes to paint in writing, so it is worth asking before you settle for less.
Does green work in a bathroom the same way?
Partly. A vanity can be painted with the same cabinet paints used here, and the prep rules are identical, but bathroom humidity is harder on finishes than kitchen air, so ventilation matters more. The colour pairing logic carries over, as these bathroom decor ideas show with green tiles and painted woodwork.
Are green cabinets a risk when I sell the house?
A painted finish is one weekend of work for a buyer to change, so mid greens such as sage and olive rarely worry valuers or viewers. The deeper shades are a stronger statement, and a full replacement in a bold green is the only version that is genuinely expensive to undo, which is worth weighing before idea 15.
Conclusion
Start with the decision that matters most: how much green, and by which route. A painted island or a two-tone lower run will tell you whether you want the whole room in the colour, and sage will be there if the answer is yes to everything. Keep one pale surface, warm metal and a tested undertone, and any shade in this list can work.