
15 Open Kitchen Design Ideas for a Calm, Connected Home
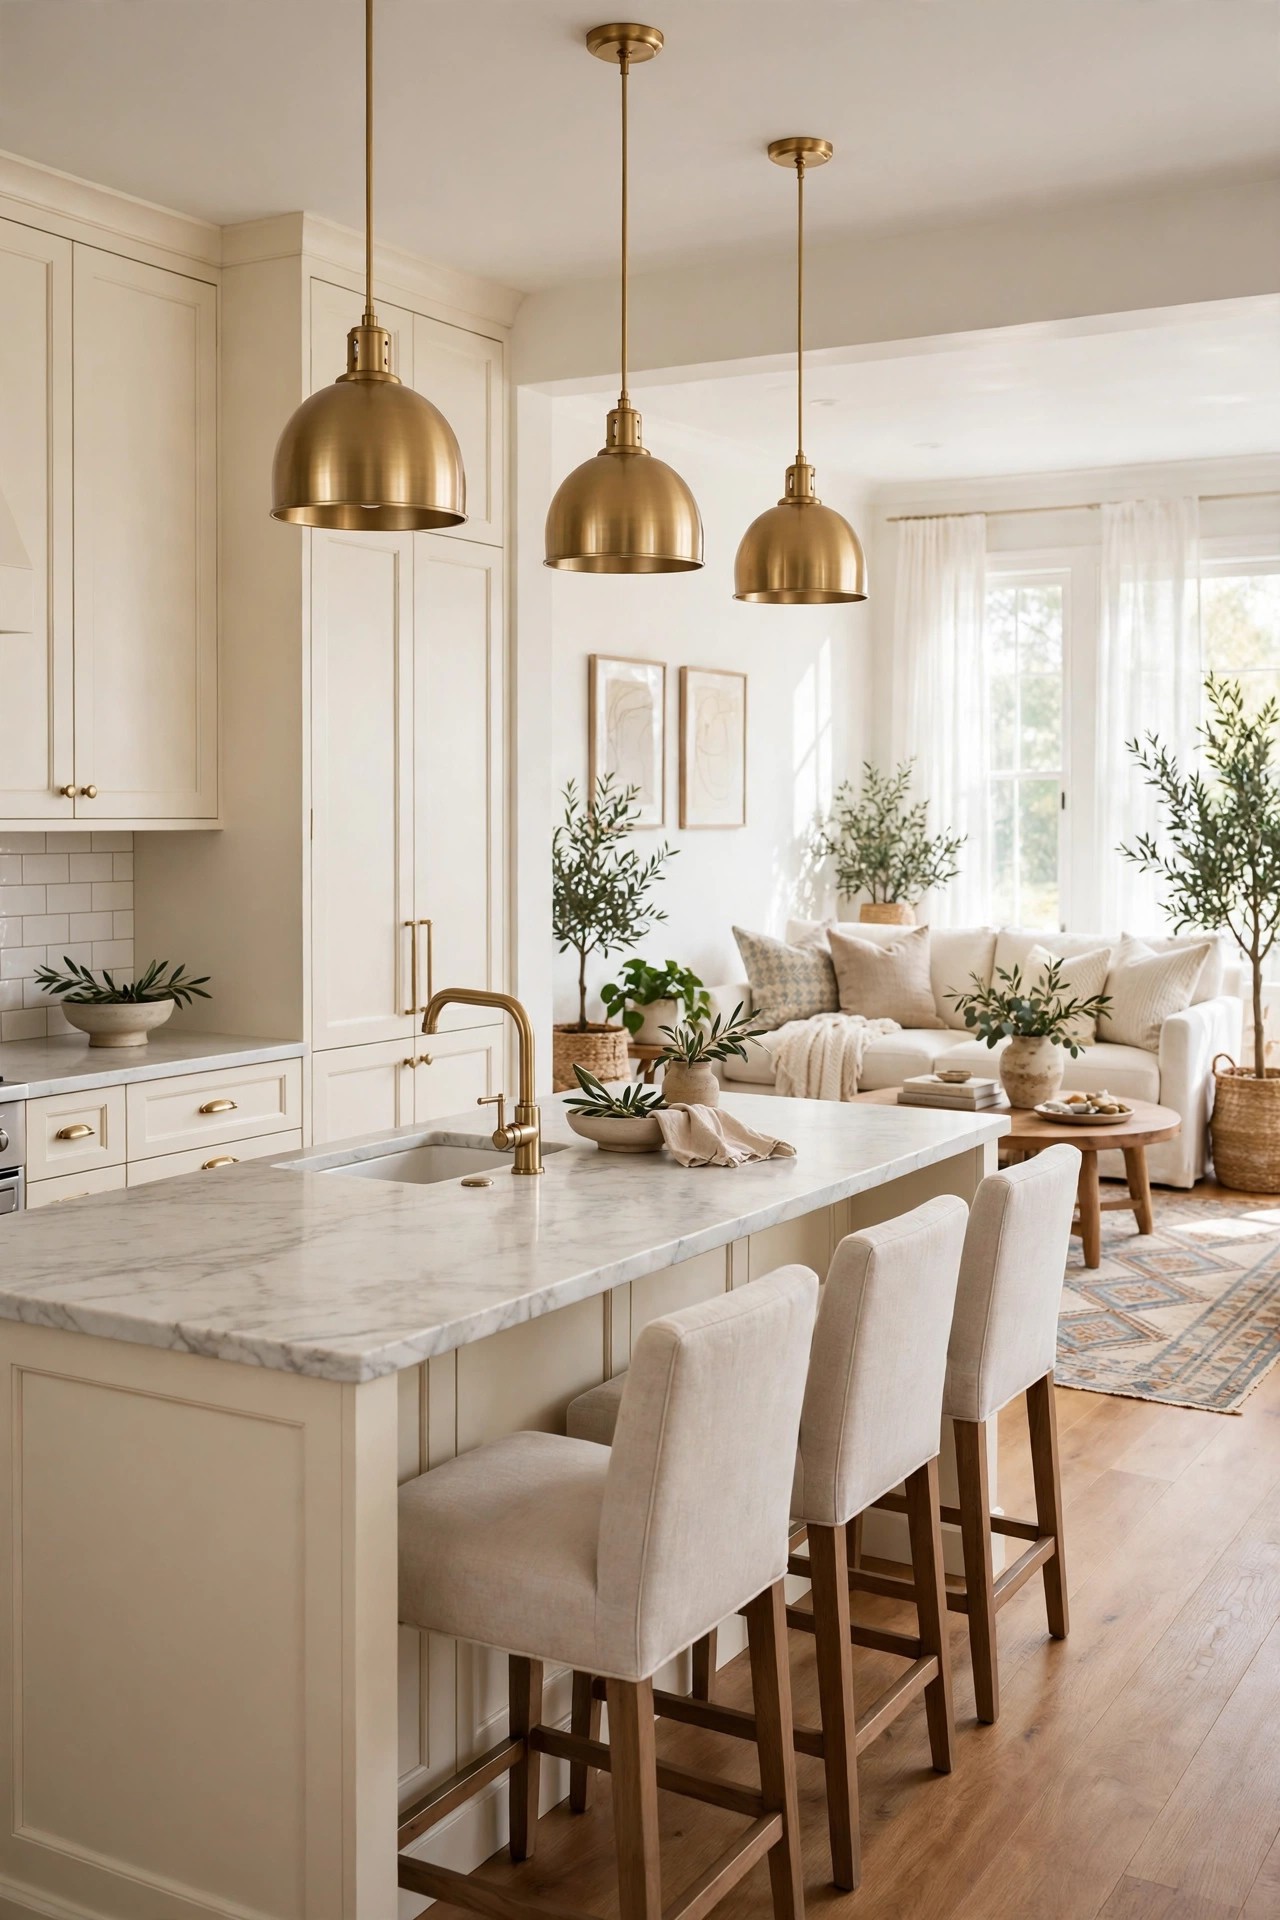
An open kitchen design has to do two jobs at once: work hard as a kitchen and sit quietly as part of the living room. Most open plan rooms fail on the second job, not the first. The counters collect clutter, the finishes change at an invisible line, and one ceiling light flattens the whole space. The fixes are mostly layout and styling decisions, not building work. These 15 ideas zone the room with an island, a rug and low furniture, run one floor and one palette through every zone, layer the lighting, and give storage a proper home. If you are still planning the cooking space itself, start with our wider guide to kitchen ideas and then use these ideas to connect it to the rest of the room.
1. Make the island the anchor between kitchen and living
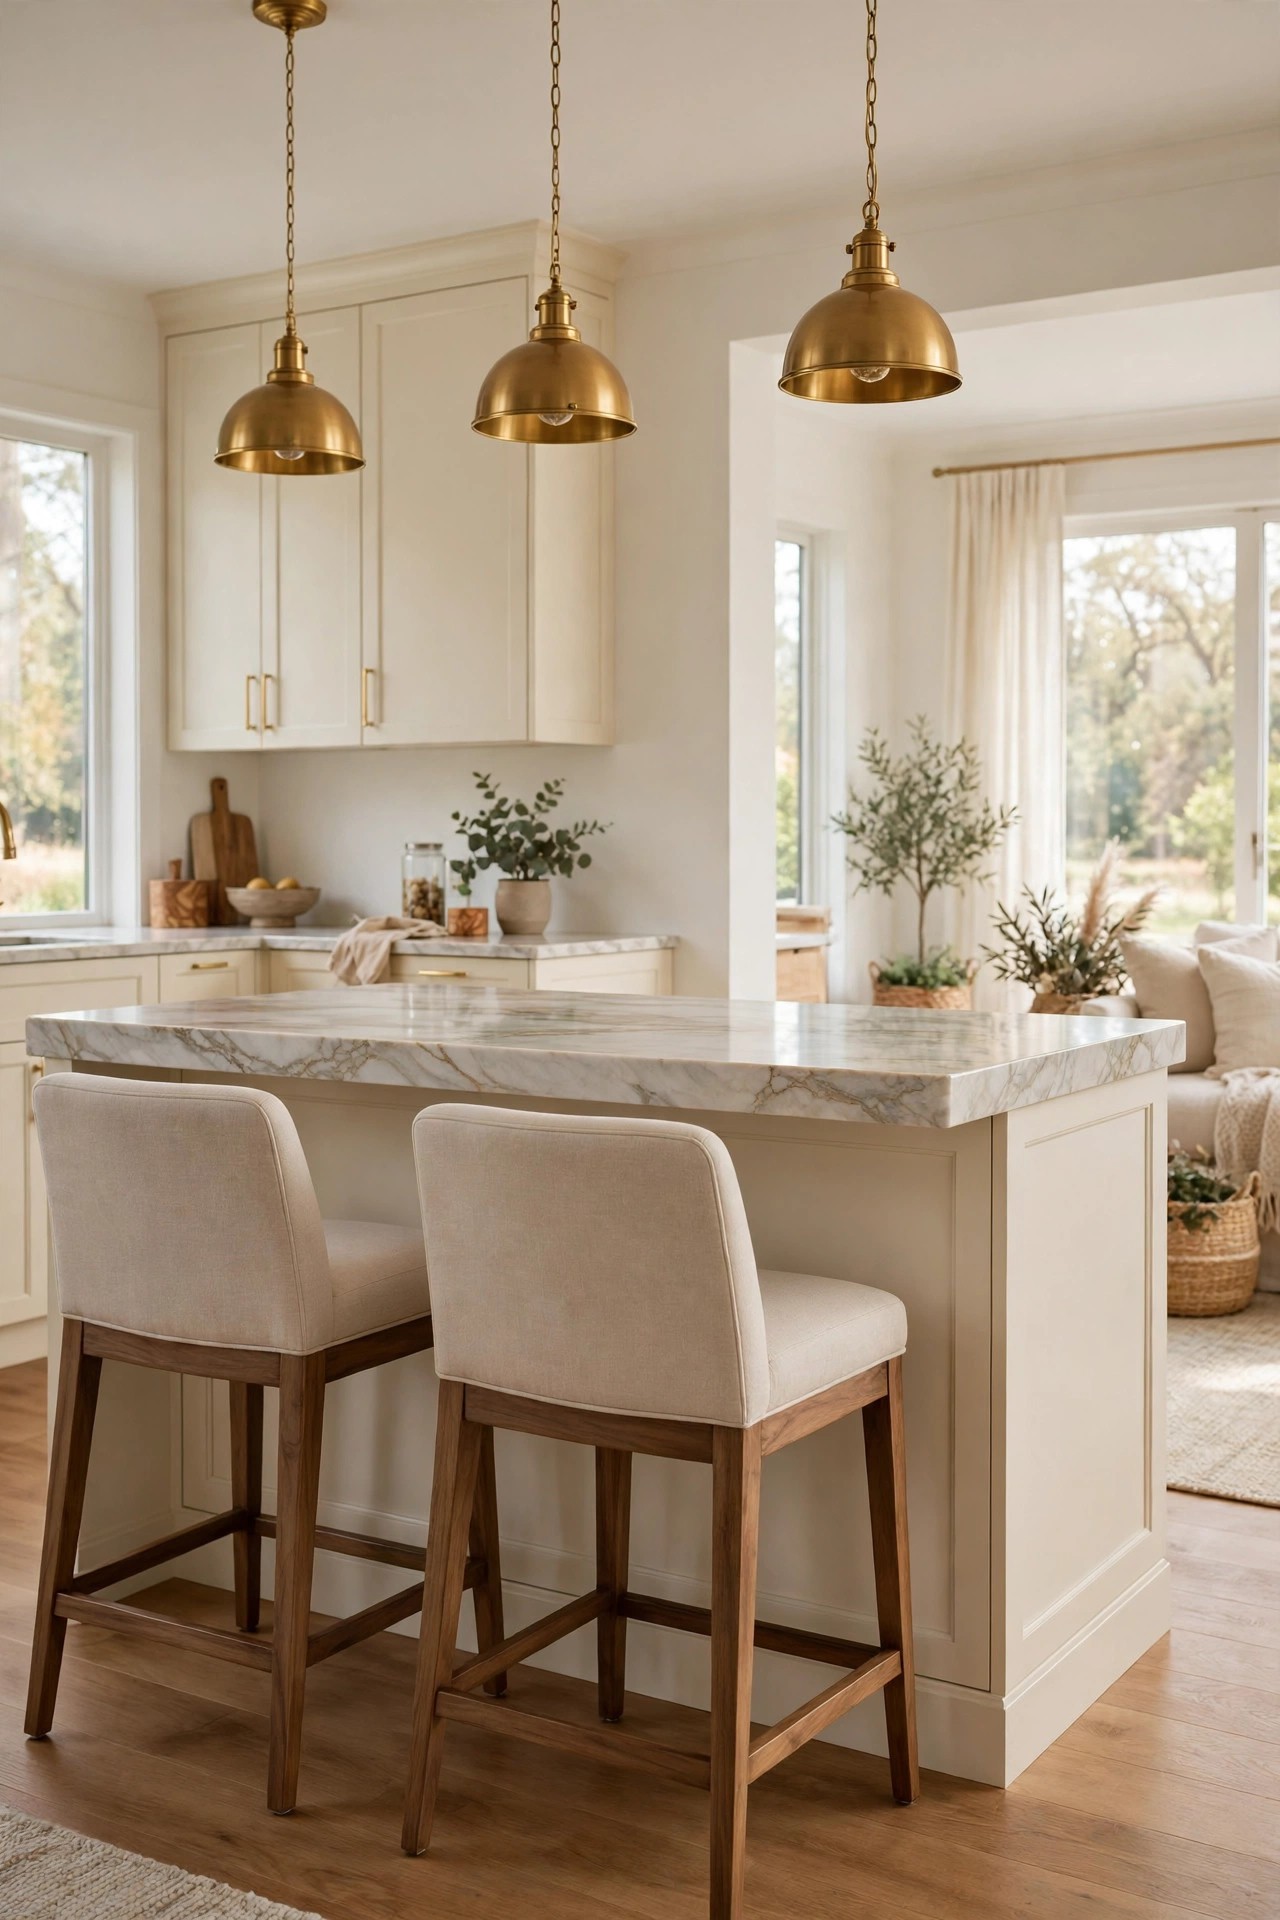
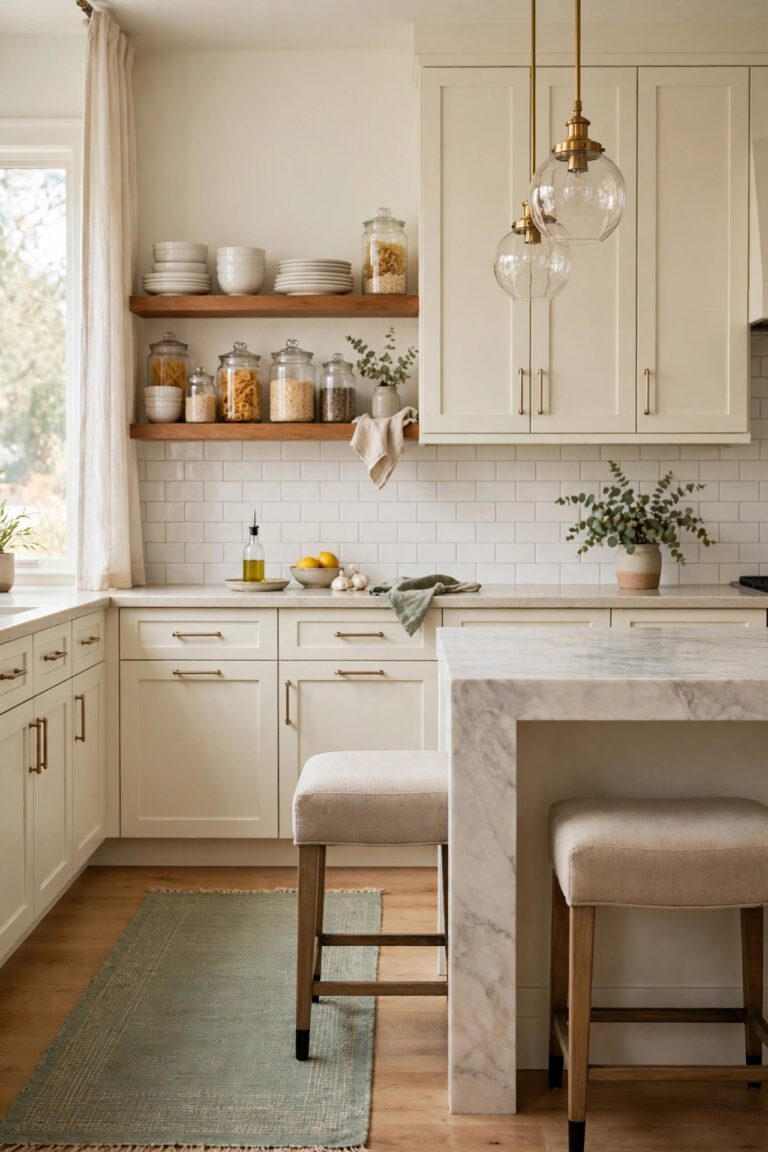
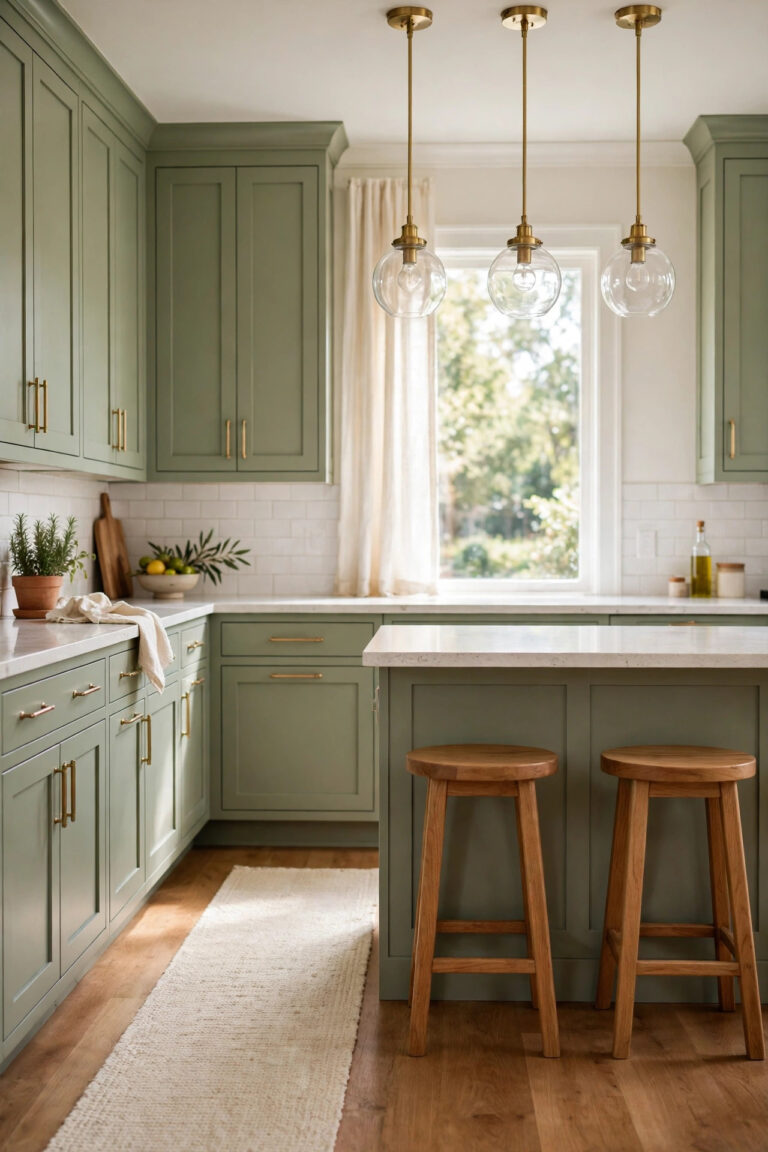
In an open plan, the island is the piece both rooms share, so treat it as the anchor rather than extra counter. Give it the best surface in the room, keep the working side plain for prep, and put seating on the living side so guests face into the room, not the cooking. When the island carries the seating, the pendants above it and the room’s main materials, the two zones read as one planned space instead of a kitchen that lost its wall.
Best For
Homes with an island or room for one, and cooks who host while they work.
Not Ideal For
Very narrow rooms where an island would leave less than about 36 inches of walkway on any side.
Estimated Cost
Estimated cost for seating and styling only: about $180 to $450 (estimate) if the island already exists. A new island build is a renovation project with its own quote. Prices change, so check the retailer page before you buy.
Budget Note
Stools and lighting carry the whole anchor effect, so spend there before you change any surface.
Renter Friendly
With Conditions
Renter Note
Stools, lighting and styling are fine anywhere. Adding or moving an island is structural work for the owner, not a renter project.
What You Need
Counter stools at the right height for your counter, two or three pendants or one long light above the island, and one tray or board to mark the seating end.
Product recommendation (partially verified): Christopher Knight Home Ryland 26 inch Counter Height Bar Stools, Set of 2, Beige and Walnut
Why it fits: The 26 inch seat height suits a standard 36 inch island counter, the beige fabric keeps the living side soft, and the walnut rubberwood legs repeat the warm wood used across the open plan palette.
Retailer/product page: https://www.amazon.com/dp/B0DZJ1HMBJ
How To Do It
- Measure the gaps around the island and keep about 36 to 42 inches clear on the working sides.
- Choose stools with a 24 to 26 inch seat height and allow about 24 inches of counter length per seat.
- Hang the pendants so the light centres on the island, not on the walkway.
- Style only the seating end with one tray group so the prep end stays clear.
- Cook one real meal with the setup before you buy a third or fourth stool.
Pro Tip
If the island is short, two slightly wider stools look calmer than three narrow ones squeezed together.
2. Zone the space with one large rug
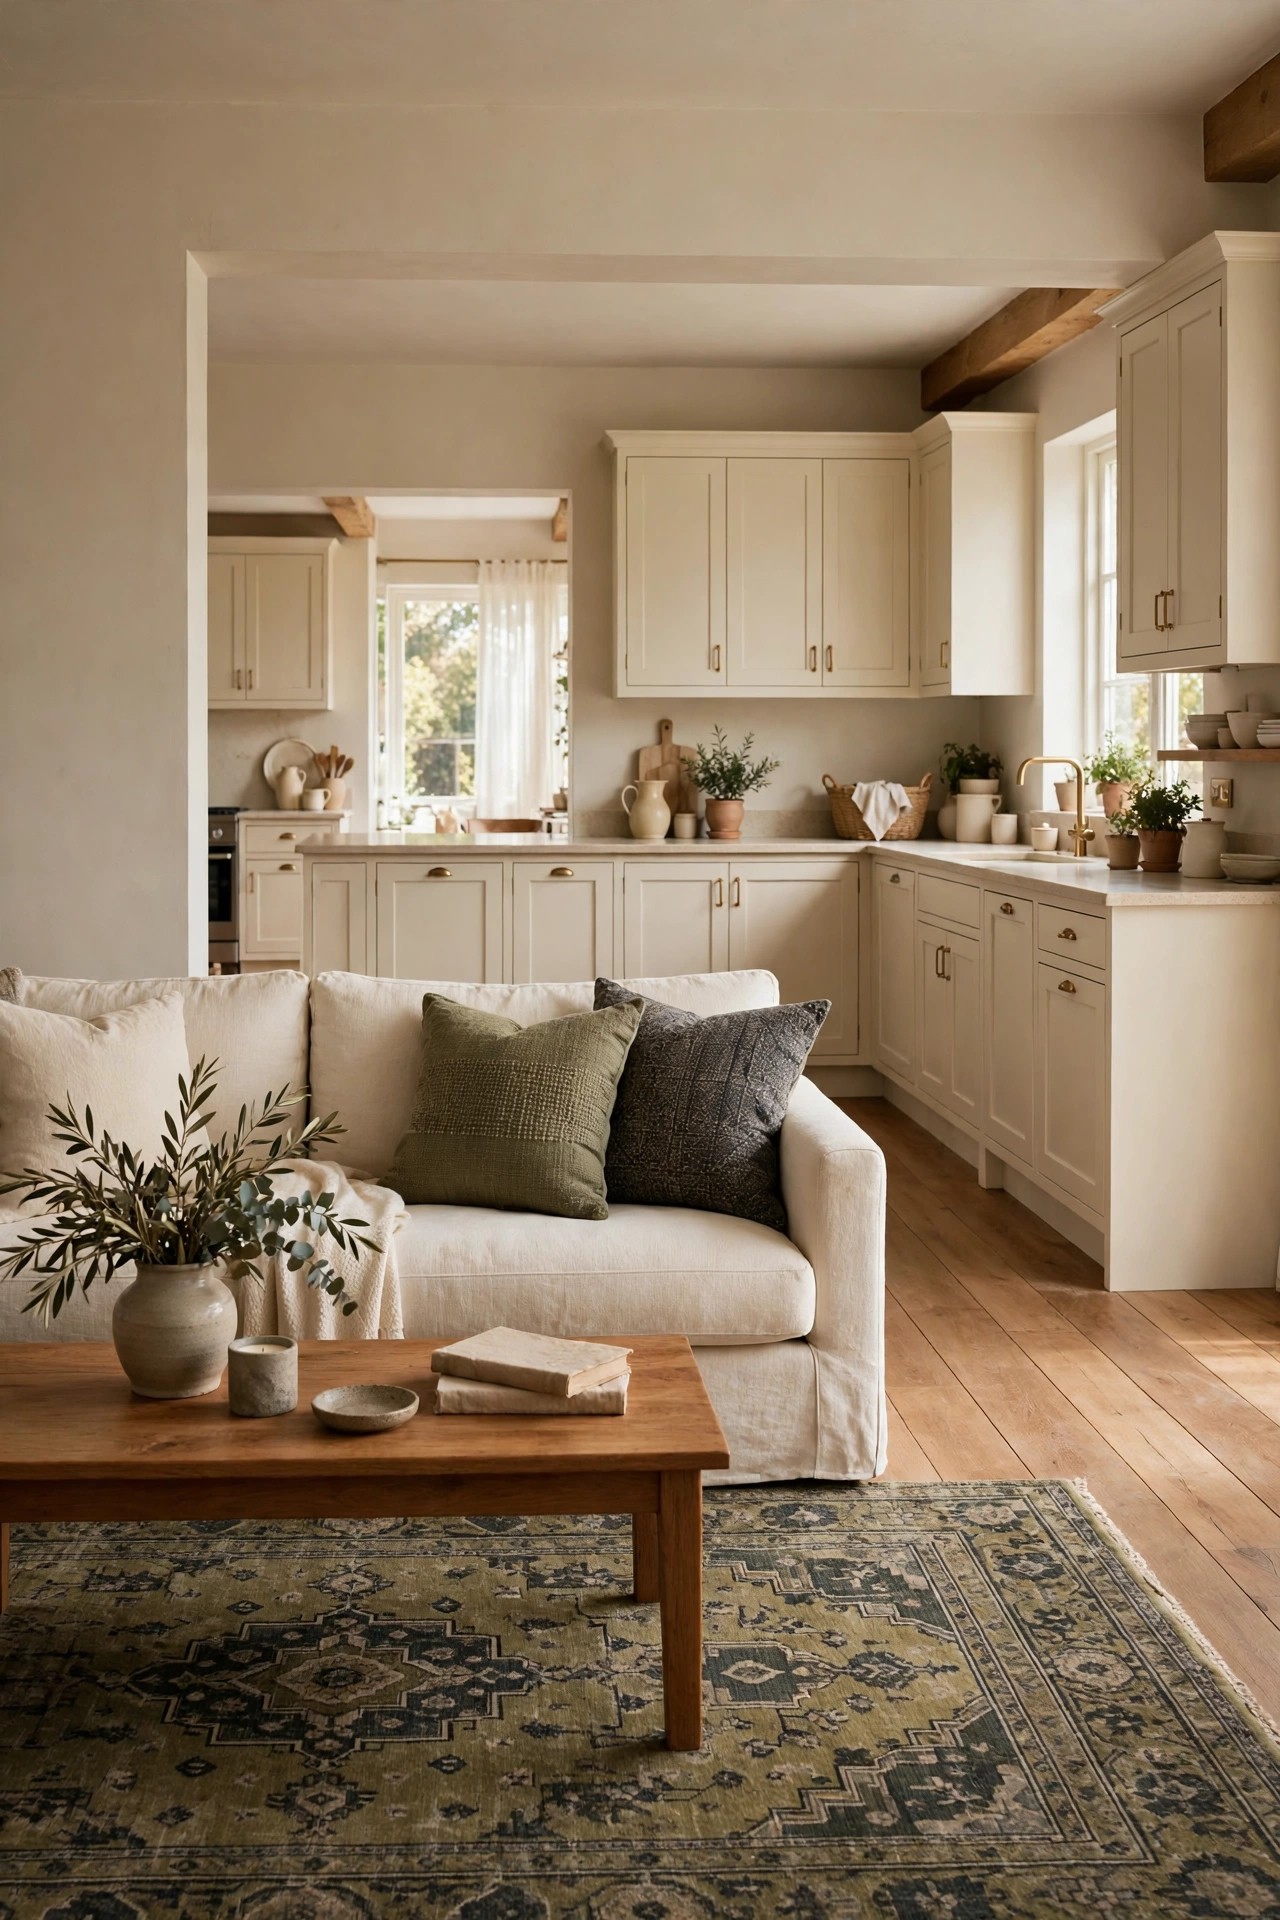
Open plan rooms feel unsettled when nothing marks where one use ends and another begins. One large rug under the seating or dining group draws that line on the floor without a wall or a step. Choose a rug big enough for the front legs of the sofa and chairs to sit on it, and let its colours borrow from the kitchen cabinets or counter so the zone still belongs to the same room.
Best For
Long rectangular rooms and rentals where the layout cannot change.
Not Ideal For
Placing a rug under the cooking zone itself, where spills and splashes land daily. Rugs belong under seating and dining, not in front of the stove.
Estimated Cost
Estimated cost: about $120 to $350 (estimate) for a large low pile rug in the 8 x 10 ft range. Prices change, so check the retailer page before you buy.
Budget Note
Size matters more than fibre here, so buy the bigger simple rug rather than the smaller premium one.
Renter Friendly
Yes
Renter Note
A rug is the classic renter zoning tool. Use a non slip pad under it so it does not creep across hard floors.
What You Need
One large low pile rug sized to the seating or dining group, a non slip rug pad, and painter’s tape to test the outline on the floor first.
Product recommendation (verified): Loloi II Layla Collection LAY-03 Area Rug, Olive and Charcoal, 7 ft 6 in x 9 ft 6 in
Why it fits: The vintage olive and charcoal pattern zones the seating area without shouting, and the very low printed pile (about 0.13 inches) copes with dining chairs moving across it daily.
Retailer/product page: https://www.amazon.com/dp/B07K1K72Z5
How To Do It
- Tape the rug outline on the floor and live with it for a day.
- Check that doors, drawers and island stools still move freely.
- Lay the pad first, then the rug, with the front furniture legs on the rug.
- Repeat one rug colour in a kitchen towel or stool fabric to tie the zones together.
- Keep the rug out of the cooking triangle so it stays out of the splash zone.
Pro Tip
A low pile patterned rug hides the crumbs that open plan living drops daily better than a pale flat weave.
3. Run one floor surface through every zone
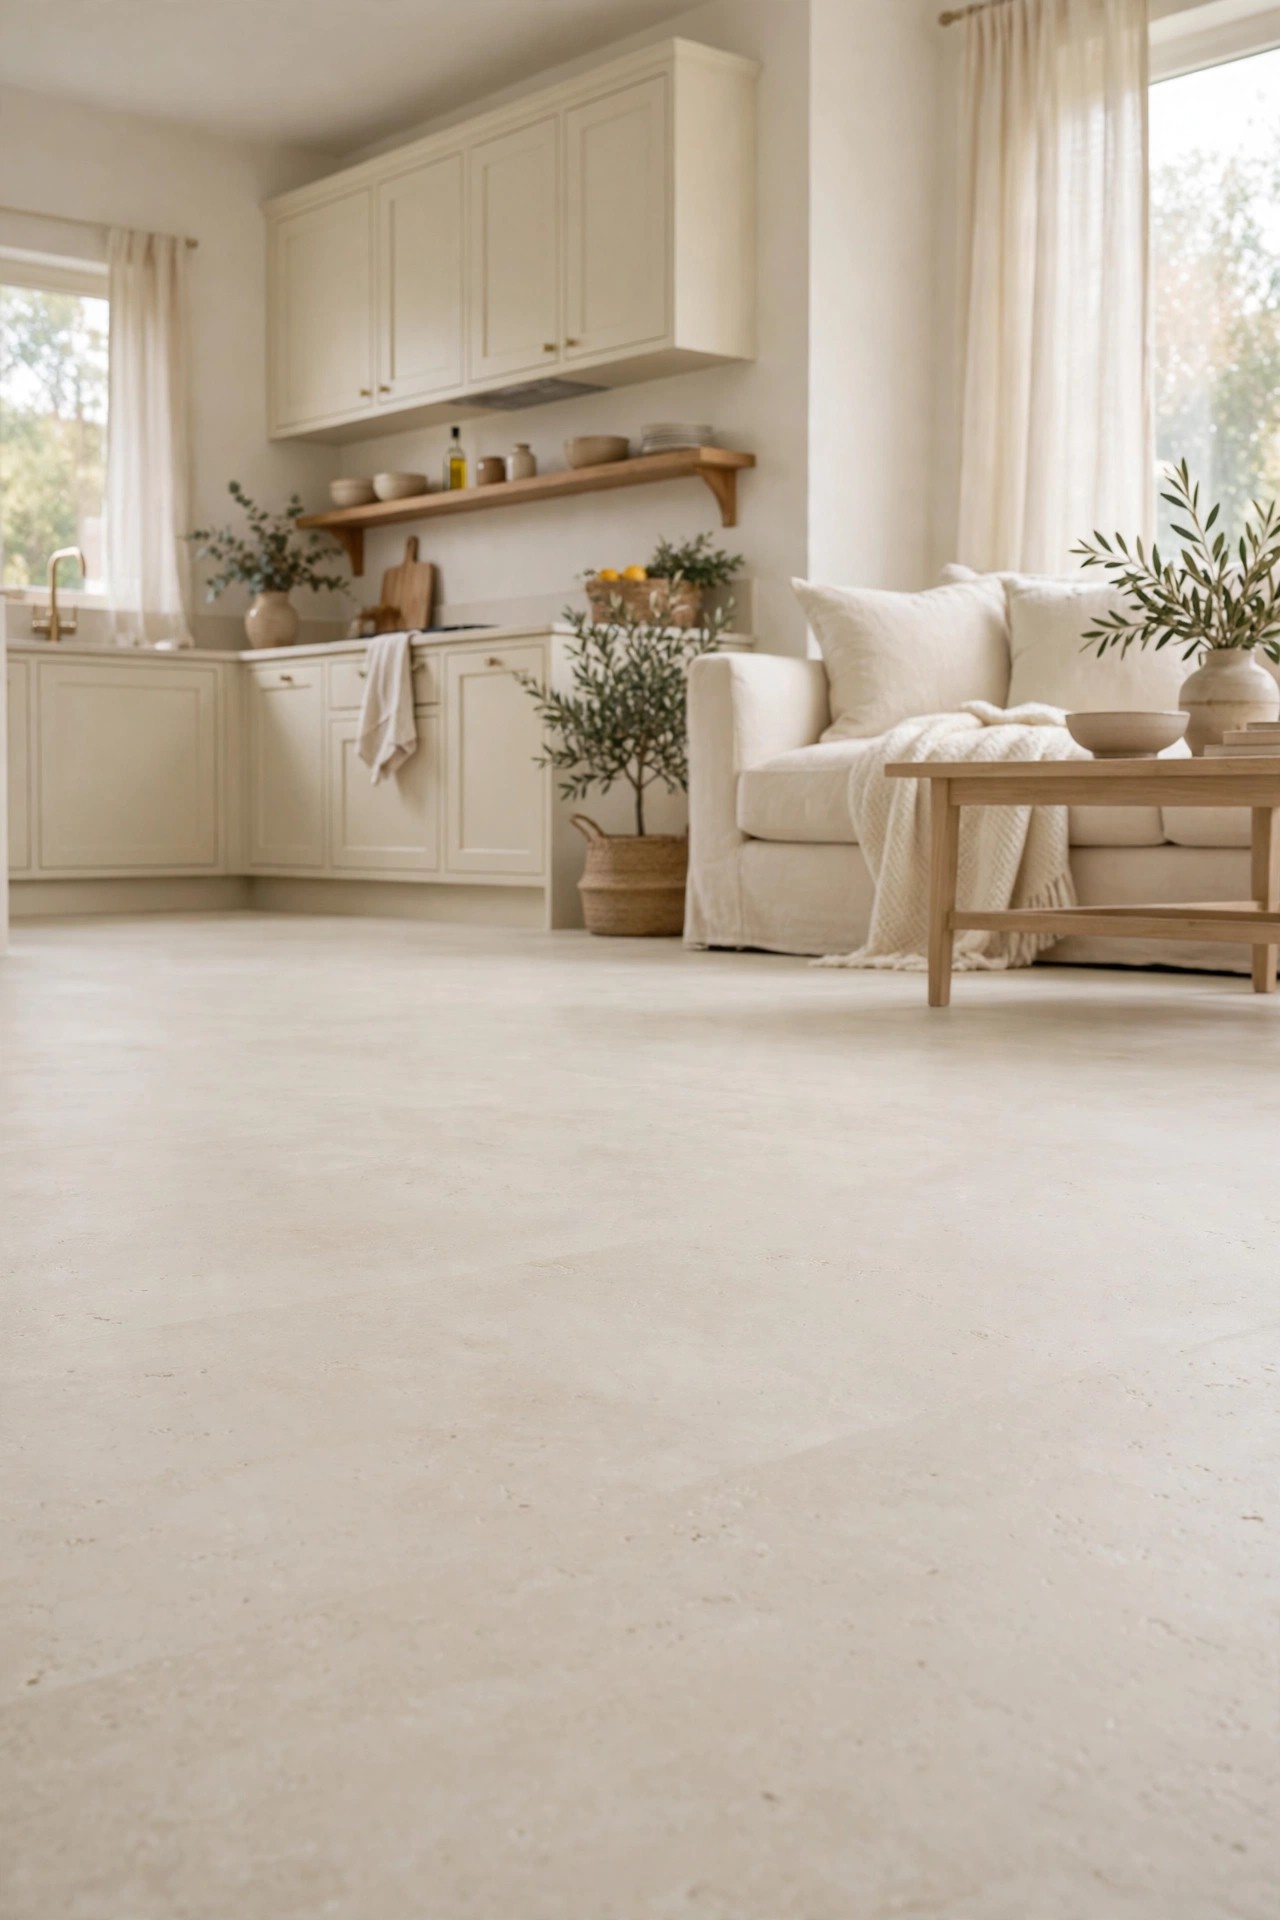
Nothing chops an open plan room into pieces like a floor that changes at an invisible line. One surface running from the cabinets to the sofa stretches the room and removes the trip edge between zones. A full refloor is a renovation, but pale peel and stick tiles over an existing hard floor give the same continuous look for a weekend’s work, as long as the floor below is smooth, dry and sound.
Best For
Rooms where tile meets wood or laminate at an awkward line across the open space.
Not Ideal For
Floors that are uneven, soft or damp, and any rental where the landlord has not agreed in writing. Peel and stick needs a smooth, dry base.
Estimated Cost
Estimated cost: about $1 to $3 per square foot (estimate) for peel and stick tile, plus a utility knife and straight edge. A full refloor costs far more and needs its own quote. Prices change, so check the retailer page before you buy.
Budget Note
Order about 10 percent extra tiles for cuts and mistakes, and keep a spare pack for future repairs.
Renter Friendly
With Conditions
Renter Note
Peel and stick is removable on many floors, but test one tile in a hidden corner first and get the landlord’s written okay before you cover a whole room.
What You Need
Peel and stick floor tiles, a tape measure, a straight edge and utility knife, and a degreasing cleaner so the adhesive bonds properly.
Product recommendation (partially verified): FloorPops FP3296 Cameron Peel & Stick Floor Tiles, White, pack of 10
Why it fits: The pale marble look tile reads as one calm surface across kitchen and living zones, each 12 x 12 inch tile is water resistant vinyl, and a pack of 10 covers 10 square feet for easy measuring.
Retailer/product page: https://www.amazon.com/dp/B09V6YXMW8
How To Do It
- Measure the whole open area as one room, not two.
- Clean and dry the floor fully, then leave a test tile in a hidden corner overnight.
- Start from the room’s visual centre line and work outward so the cuts land at the edges.
- Press or roll each tile firmly and keep spacing even across the zone change.
- Stand at the door and check the run reads as one surface before you finish the edges.
Pro Tip
Run the tile pattern in the same direction as the longest wall to make the room feel longer.
4. Pick one palette and repeat two materials everywhere
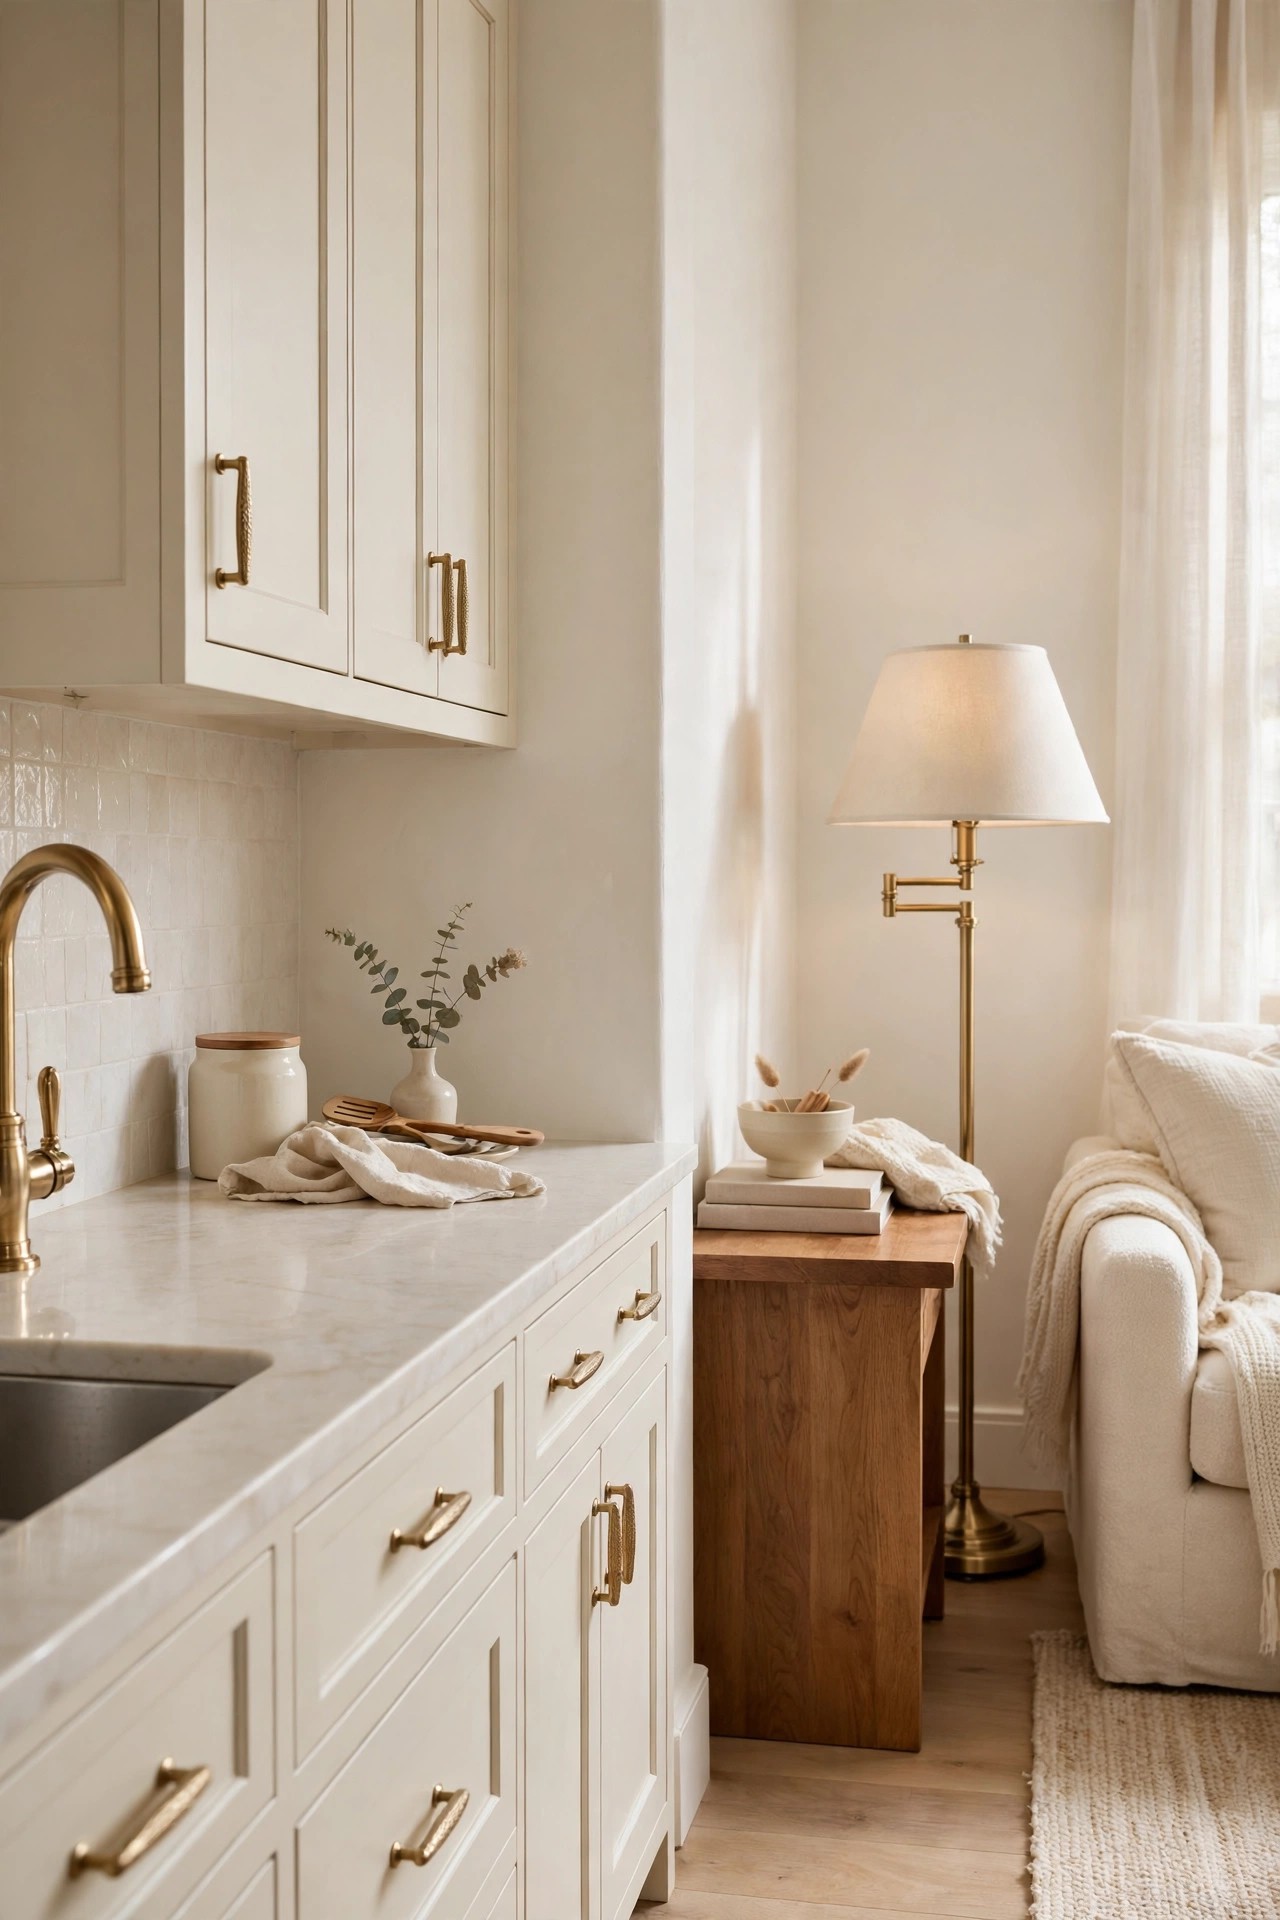
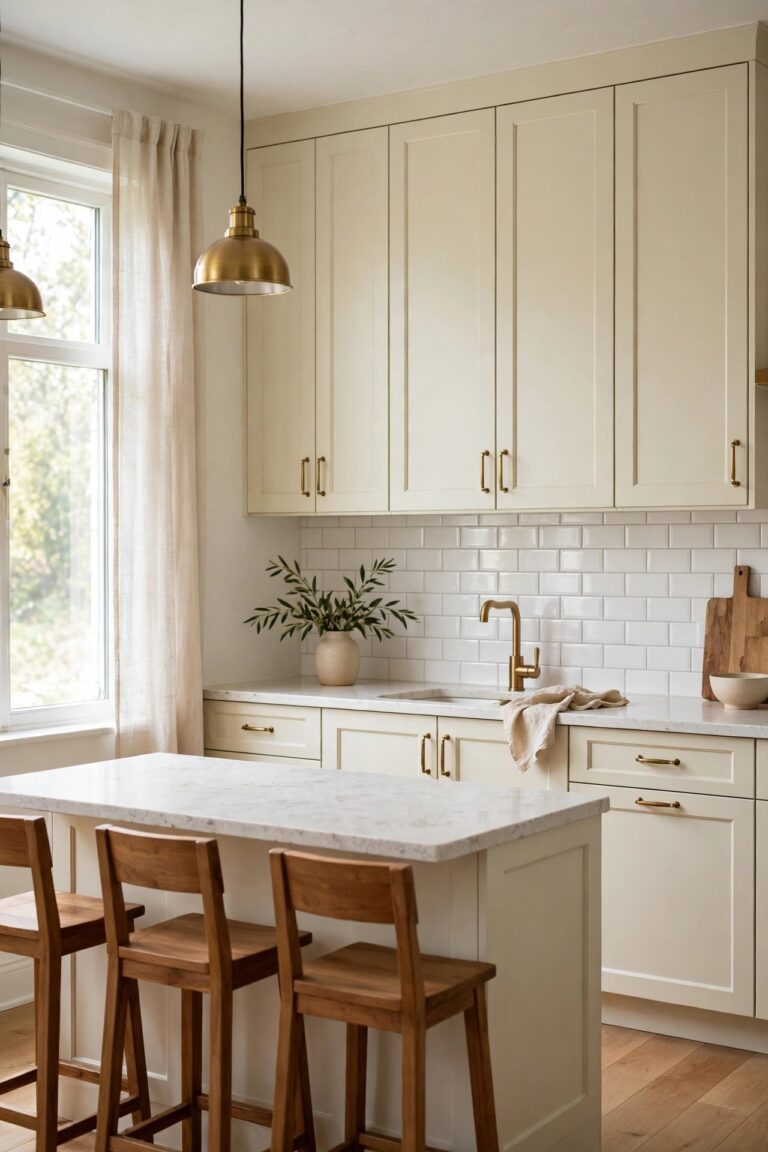
The fastest way to make an open plan feel designed is to stop introducing new finishes at the zone line. Choose one metal and one wood tone, then repeat only those in both rooms: pulls and faucet in the kitchen, lamp bases and frames in the living zone, stool legs and boards in the same wood. The splashback counts as part of the palette too, and our guide to kitchen backsplash ideas shows how to choose one that suits it.
Best For
Rooms furnished over time from different shops and different years.
Not Ideal For
Anyone hoping a palette will fix a layout problem. Flow and clearances come first; finishes come second.
Estimated Cost
Estimated cost: about $60 to $180 (estimate) to swap a full set of cabinet pulls and add two matching living room accents. Prices change, so check the retailer page before you buy.
Budget Note
Hardware is the cheapest repeat in the room, so change the pulls before you touch the furniture.
Renter Friendly
Yes
Renter Note
Swapping pulls uses the existing screw holes. Keep every old pull in a labelled bag so you can refit them when you leave.
What You Need
One full set of matching cabinet pulls measured to your existing hole spacing, a screwdriver, and two or three living room accents in the same metal, such as a lamp or a tray.
Product recommendation (partially verified): goldenwarm 25 Pack 5 Inch Brushed Gold Cabinet Pulls, LSJ12GD128
Why it fits: A 25 pack covers a whole open plan run in one matching finish, the brushed gold suits cream cabinets and warm wood, and the 5 inch hole centres fit many existing doors and drawers.
Retailer/product page: https://www.amazon.com/dp/B07BFTXQD3
How To Do It
- Photograph every finish in the room and pick the two you see most.
- Measure the hole spacing on your current pulls before you order.
- Swap the kitchen pulls in one session so the room never sits half done.
- Add the same metal in the living zone at two heights, one low and one high.
- Store pieces in a third metal that now stands out against the scheme.
Pro Tip
Brushed and satin finishes forgive fingerprints and small batch differences better than polished ones.
5. Layer the lighting so each zone glows on its own
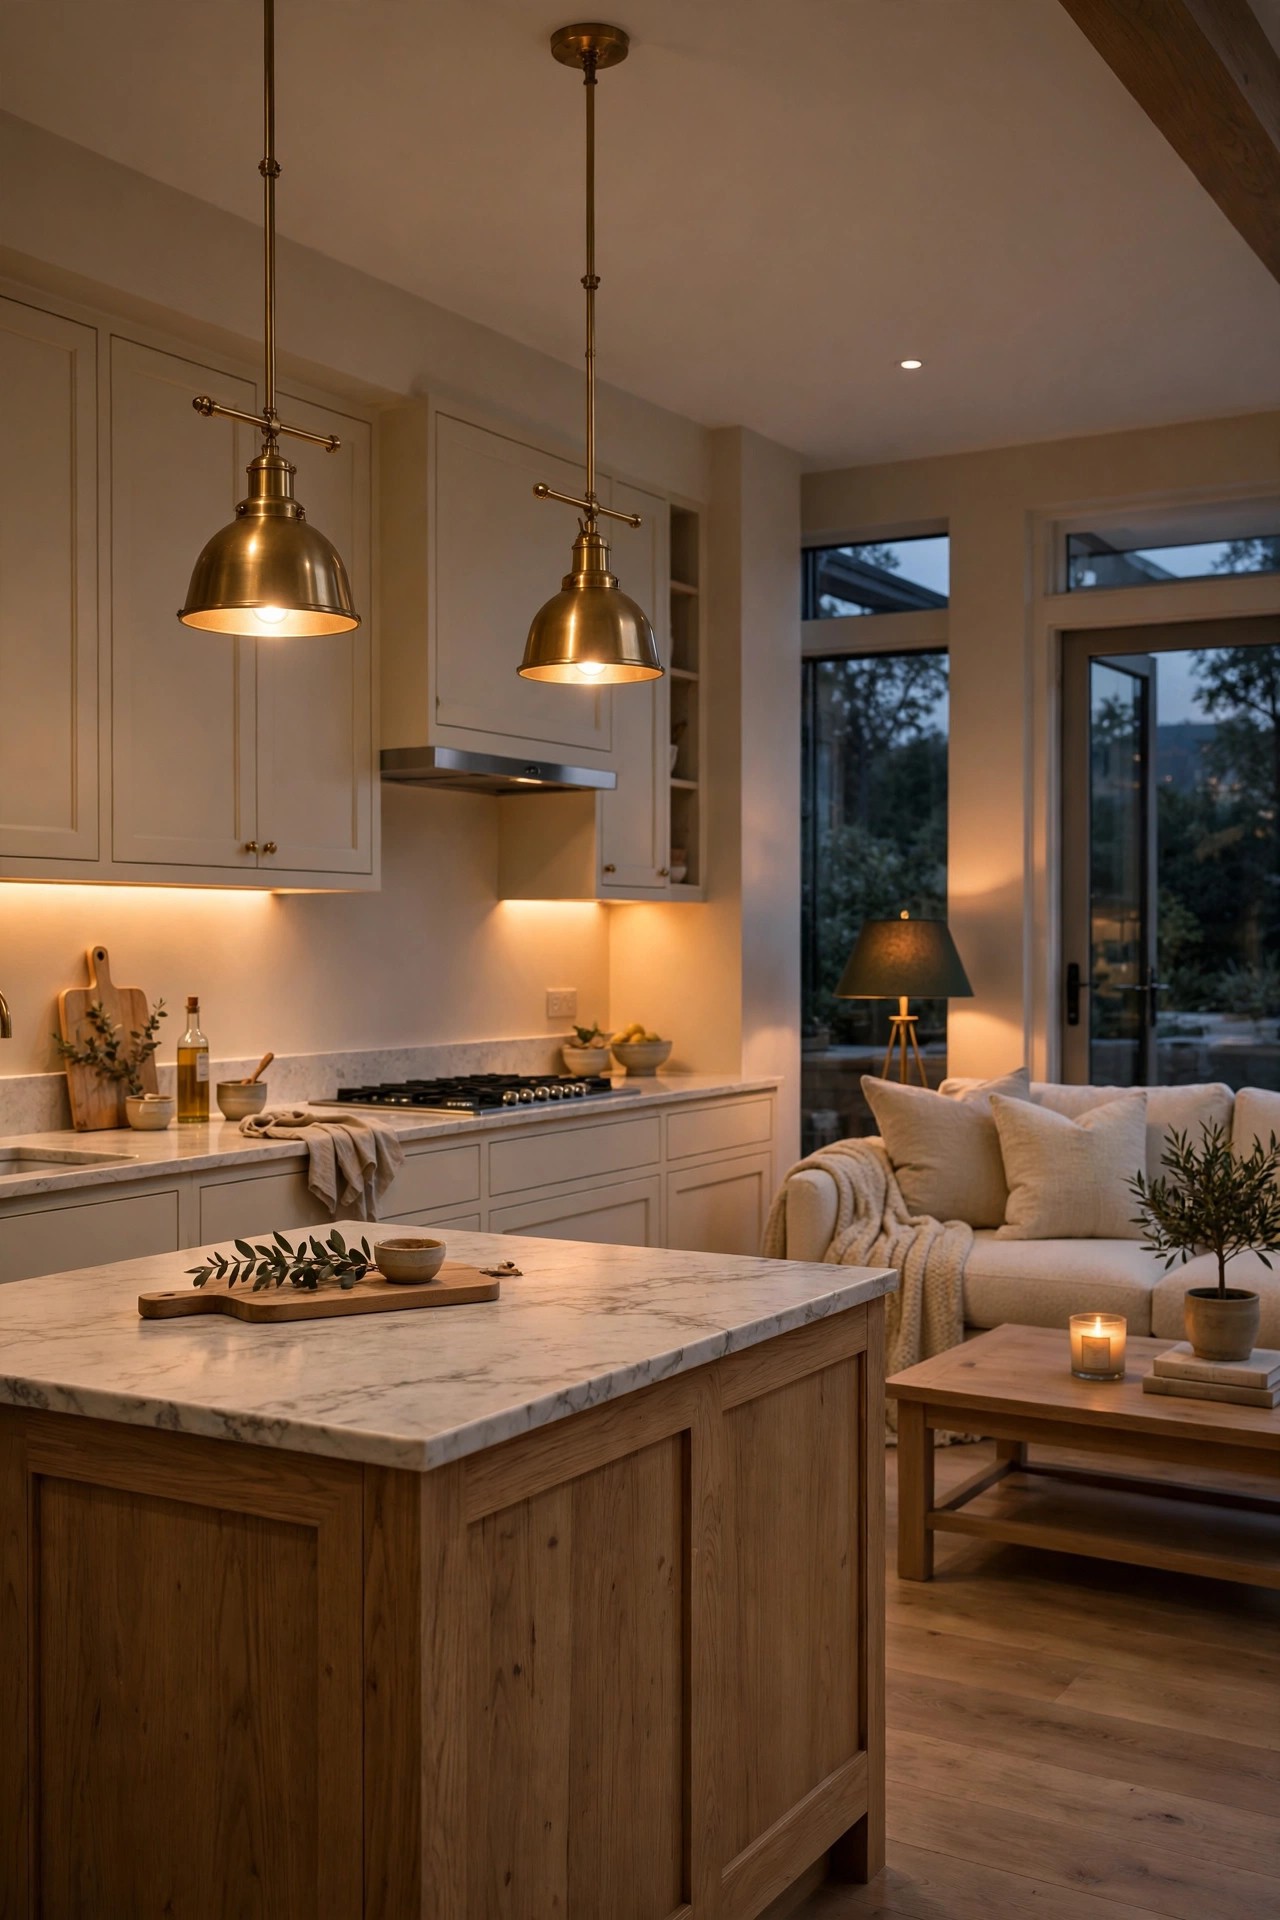
One ceiling light for a whole open plan room leaves the kitchen harsh and the sofa corner flat. Layer instead: pendants over the island for the kitchen’s centre, light under the upper cabinets for the work counters, and one warm lamp in the living zone. Each layer switches on its own, so the room can be bright for cooking and soft for the evening, and never lit like a shop floor.
Best For
Rooms that feel fine by day and stark or dull at night.
Not Ideal For
Anyone planning new hardwired circuits as a DIY job. New wiring, moved outlets and ceiling work belong to a licensed electrician.
Estimated Cost
Estimated cost: about $90 to $300 (estimate) for a plug in pendant, a set of battery cabinet lights and warm bulbs throughout. Prices change, so check the retailer page before you buy.
Budget Note
Plug in and battery layers give the layered effect with no electrician’s bill, so start there.
Renter Friendly
Yes
Renter Note
The plug in and battery route needs no wiring at all. Any hardwired change in a rental needs the landlord’s written agreement and a licensed electrician.
What You Need
Pendants or one plug in pendant over the island, battery under cabinet lights, one lamp for the seating zone, and bulbs in one warm colour temperature throughout.
Product recommendation (partially verified): Globe Electric 65116 Edison 1-Light Plug-In Pendant, Antique Brass
Why it fits: It plugs into a normal outlet and hangs on a swag hook, so renters get a real island pendant with no wiring; the antique brass shade matches the palette and the in line rocker switch keeps control simple.
Retailer/product page: https://www.amazon.com/dp/B00L5KWS4A
How To Do It
- List the jobs each zone does after dark and give each one its own light.
- Hang or swag the pendant so its light lands on the island, not on the walkway.
- Fit the cabinet lights under the uppers where your hands actually work.
- Put the living zone lamp on its own switch or a smart plug.
- Match every bulb to one warm temperature so the layers blend.
Pro Tip
Put the pendants and the lamp on separate switches so the kitchen can go dark while the seating corner stays lit.
6. Give storage a full-height wall of its own
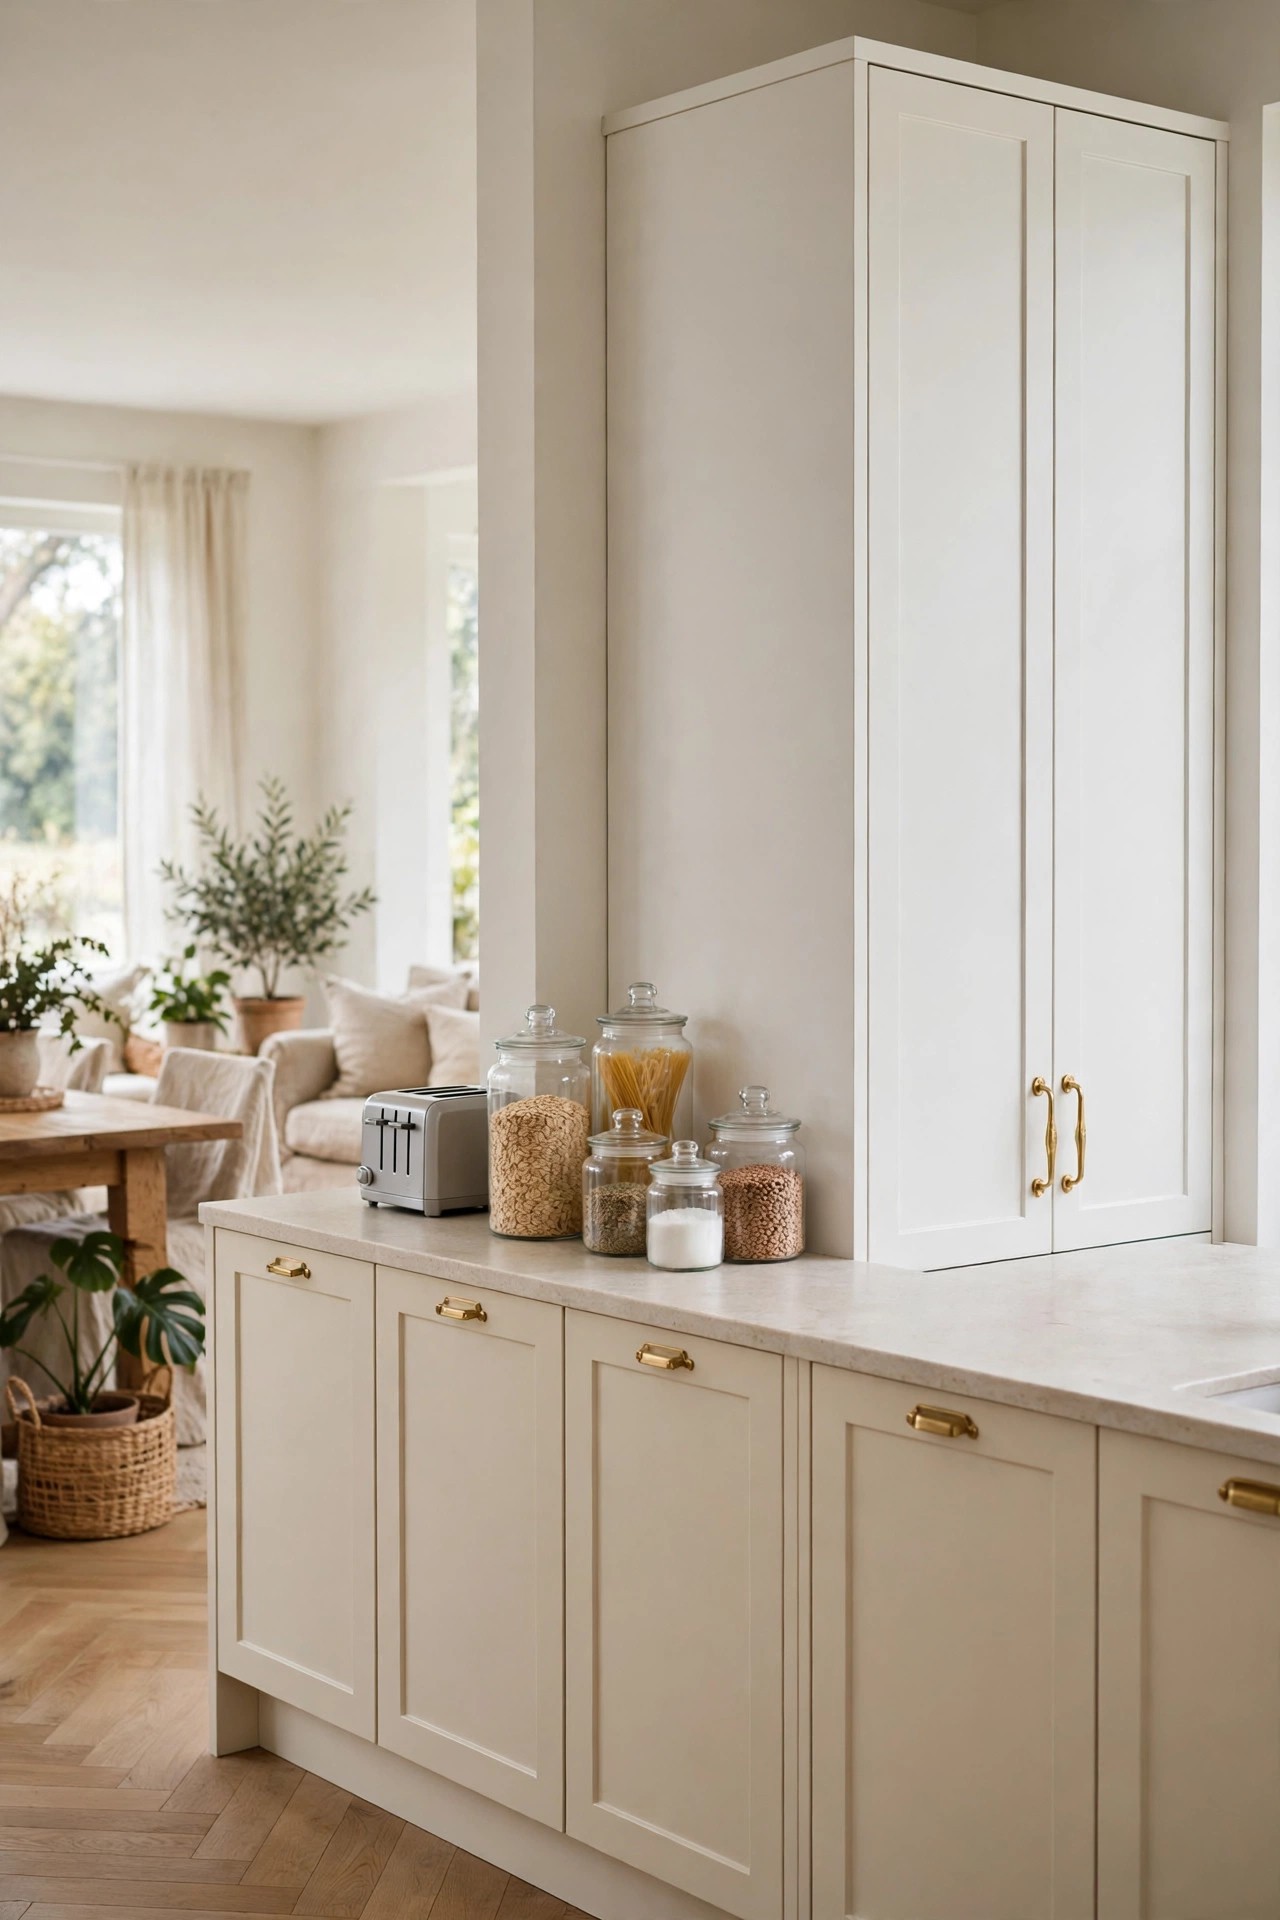
Open plan kitchens fail quietly through clutter, because everything stored in the room is also on show in the living room. One tall storage piece at the end of the run swallows the small appliances, packets and bottles that otherwise colonise the counters. With the clutter behind doors, the counters stay clear and the whole space reads calm from the sofa.
Best For
Kitchens with little built in pantry space and counters that collect appliances.
Not Ideal For
Tight rooms where a tall piece would block a window, a door swing or the walkway past the island.
Estimated Cost
Estimated cost: about $200 to $450 (estimate) for a freestanding tall pantry cabinet with adjustable shelves. Prices change, so check the retailer page before you buy.
Budget Note
One tall cabinet stores more per dollar than several small organisers, so buy the storage once.
Renter Friendly
With Conditions
Renter Note
Freestanding pieces move with you, but tall cabinets must be anchored to a wall stud to prevent tipping, and anchor fixings need the landlord’s agreement.
What You Need
One tall freestanding pantry cabinet with adjustable shelves, an anti tip anchor kit, storage boxes for the top shelves, and a step stool for safe reaching.
Product recommendation (partially verified): Sauder Select Storage Cabinet and Pantry, Soft White
Why it fits: At about 30 inches wide and 71 inches high it fills the end of a run like a built in, the four adjustable shelves plus a fixed shelf take appliances and food together, and the soft white finish sits quietly beside cream cabinets.
Retailer/product page: https://www.amazon.com/dp/B01M0QM2O7
How To Do It
- Measure the end of the run and the ceiling height before you order.
- Anchor the cabinet to a wall stud with the anti tip kit before you load it.
- Put daily items at waist height, heavy items low and rare items high.
- Give the small appliances one shelf together so the counters stay clear.
- Leave the top of the cabinet empty; stored clutter up high undoes the calm.
Pro Tip
Match the cabinet colour to the kitchen units, not the living furniture, so it reads as part of the kitchen run.
7. Swap the dining table for a breakfast bar
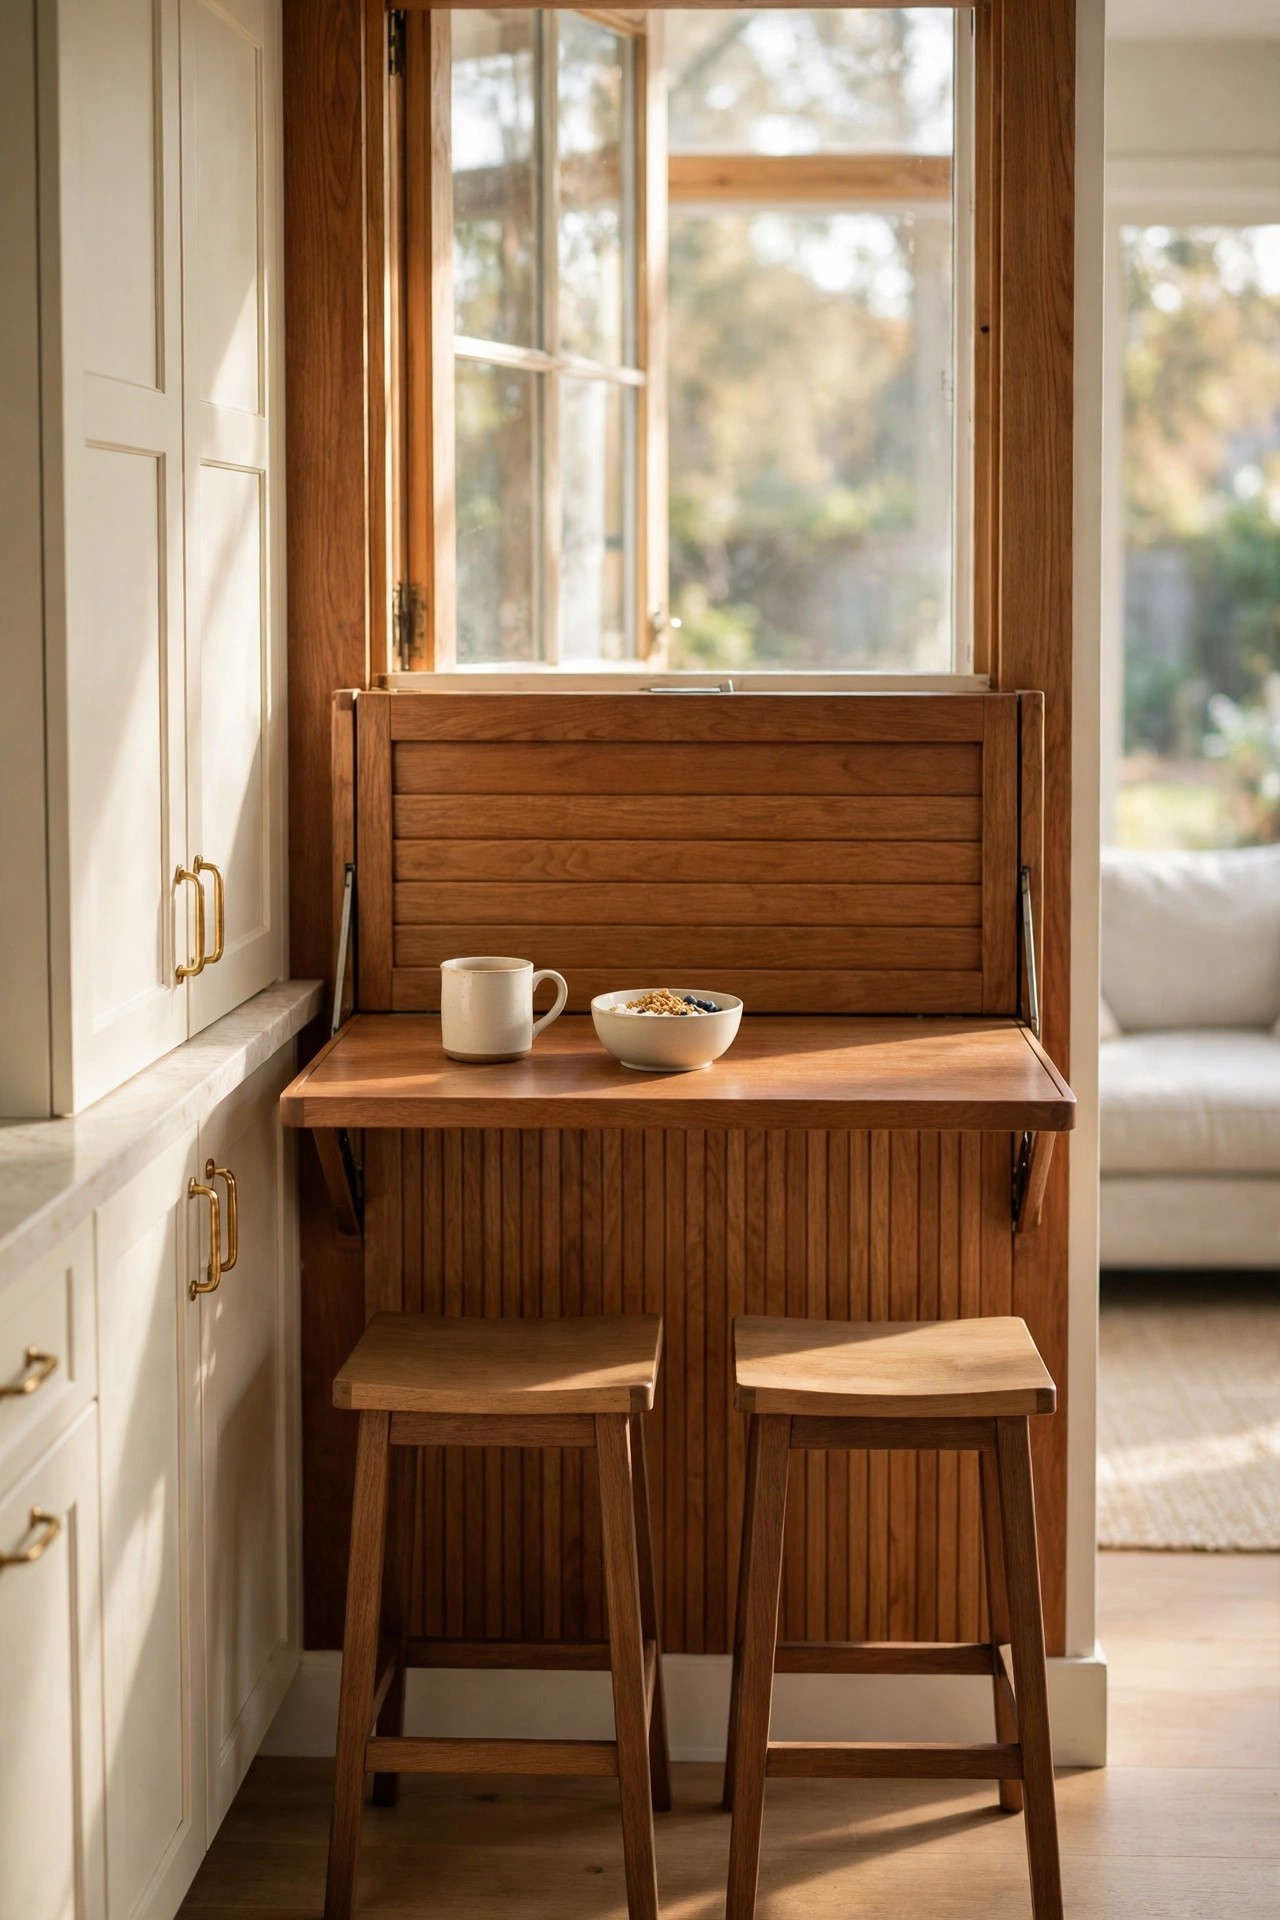
In many open plan rooms the dining table is the piece that does not fit: too big for daily use and always in the walkway. A wall mounted drop leaf bar under a window or along a short wall seats two for breakfast and laptops, then folds flat when the room needs to breathe. It keeps eating inside the kitchen zone and frees the floor the table used to take.
Best For
Small open plan rooms and households of one or two.
Not Ideal For
Families who eat together at a table every night, and any wall that cannot take fixings into studs. A folding bar is a two person perch, not a dining table replacement for six.
Estimated Cost
Estimated cost: about $120 to $260 (estimate) for a solid wood wall mounted folding table with brackets, plus two stools. Prices change, so check the retailer page before you buy.
Budget Note
A folding bar costs far less than a table and chairs, and you may already own stools that fit it.
Renter Friendly
No
Renter Note
The brackets must fix into wall studs with screws, so this is an owner project unless the landlord agrees in writing.
What You Need
A wall mounted folding table with folding brackets, a stud finder, a drill and level, and two stools that tuck fully underneath.
Product recommendation (partially verified): Antourlamm Wall Mounted Folding Table, Solid Wood Drop Leaf with Brackets, 39 x 24 inch
Why it fits: The 39 x 24 inch solid wood top seats two properly, the folding brackets drop it flat against the wall when the room needs the floor, and the warm wood tone repeats the open plan palette.
Retailer/product page: https://www.amazon.com/dp/B0C9Z19VLG
How To Do It
- Find and mark the studs; the brackets must land on studs, not on plasterboard alone.
- Set the top at about 36 inches high to match counter stool seating.
- Fix the brackets level, then hang the top and test the fold several times.
- Load the bar gently first and check for any movement before daily use.
- Keep the fold path clear so the top can drop flat without moving furniture.
Pro Tip
A bar under a window becomes the favourite seat in the house; add thin cushion pads to the stools and it will be used daily.
8. Use glass-front uppers as the display break
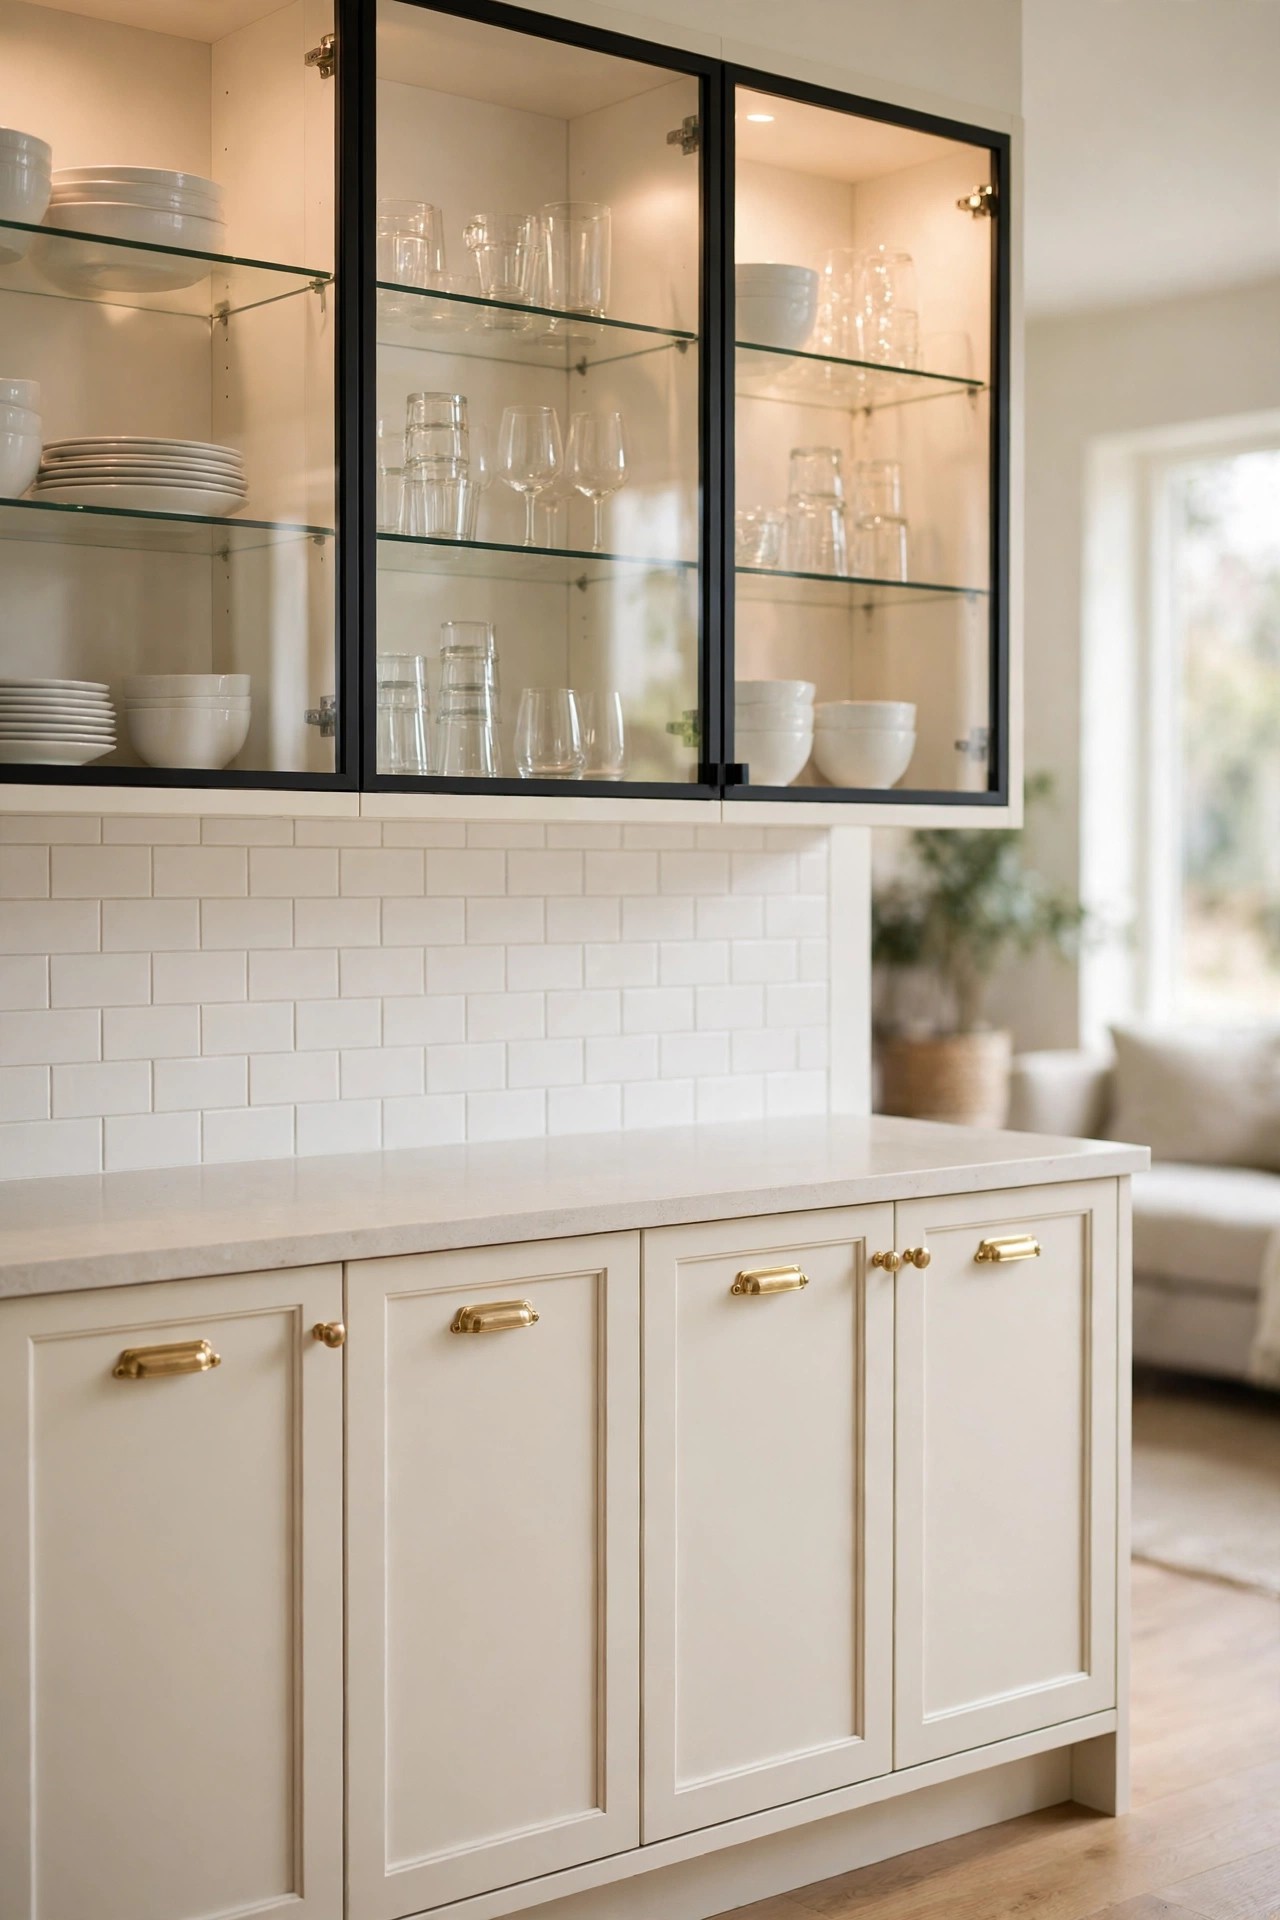
A long run of solid doors can feel heavy in a room you also relax in. Changing two upper cabinets to glass fronts breaks up the run and shows the dishes you are proud of, while everyday pieces earn the display shelves. Add battery lights inside and the cabinet glows softly into the living zone at night, doing the work of a display cabinet without taking any floor space.
Best For
Kitchens with pretty everyday dishes and long solid cabinet runs.
Not Ideal For
Anyone whose shelves hold a jumble of packets and mismatched plastic. Glass shows everything, so the contents need a quick edit first.
Estimated Cost
Estimated cost: about $40 to $120 (estimate) for a set of rechargeable cabinet lights if the glass fronts already exist. New glass doors are a cabinet maker’s job with its own quote. Prices change, so check the retailer page before you buy.
Budget Note
Light the glass you already have before you pay for new doors; the glow is most of the effect.
Renter Friendly
Yes
Renter Note
Battery lights with magnetic or adhesive mounts change the look with no wiring and no door changes. Swapping doors themselves is owner work.
What You Need
A set of rechargeable cabinet lights that fit inside the uppers, charging access, and one colour family of dishes worth showing.
Product recommendation (verified): EZVALO 6 Pack Under Cabinet Lighting, 10 inch, Rechargeable with Motion Sensor
Why it fits: The six 10 inch lights cover a run of glass uppers, the 2000mAh batteries recharge instead of being replaced, the three colour temperatures include a warm 3000K for evening glow, and the magnetic mounts need no screws.
Retailer/product page: https://www.amazon.com/dp/B0DR8J6MF8
How To Do It
- Edit the cabinet contents down to one colour family of dishes and glasses.
- Charge the lights fully, then mount them inside the top front edge of each cabinet.
- Set the colour temperature to warm so the glow matches the room’s lamps.
- Use the motion setting so the lights greet you and switch off by themselves.
- Keep one solid door cabinet for the honest clutter every kitchen has.
Pro Tip
Frosted or seeded glass hides more sins than clear glass if your shelves will never stay perfect.
9. Go handleless for the calmest cabinet line
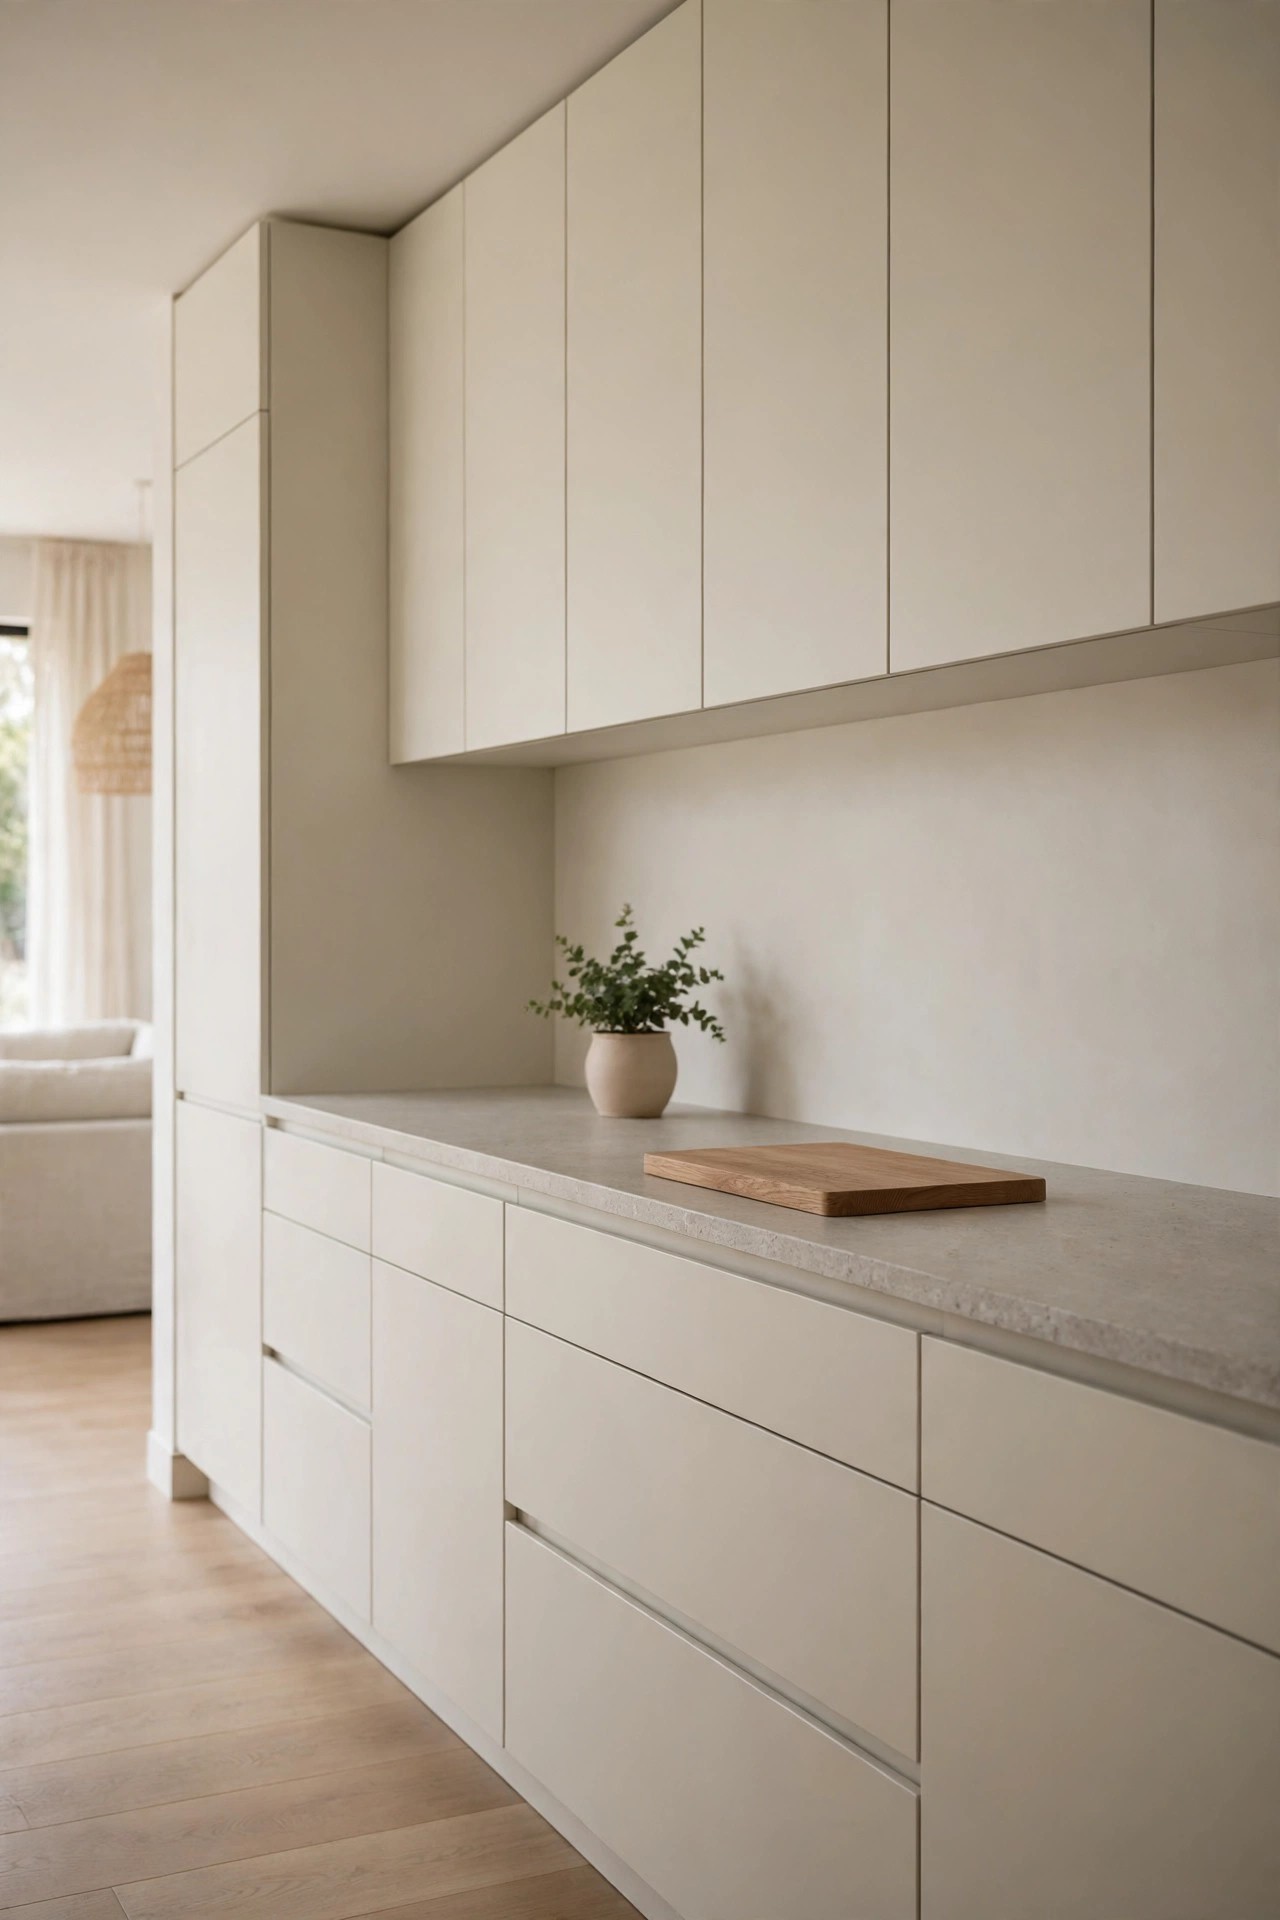
Handles are small, but a long open plan run has dozens of them, and every one catches light and adds visual noise you can see from the sofa. Flat slab fronts with finger edge pulls keep the opening grip but remove the jewellery look, so the kitchen wall reads as calm panelling. The change suits modern flat cabinets best and is simplest when doors are being replaced anyway.
Best For
Modern flat front kitchens that feel busy from the living side.
Not Ideal For
Traditional shaker or framed cabinets, where the style expects visible handles, and doors too thin for edge screws, which must be checked before ordering.
Estimated Cost
Estimated cost: about $30 to $90 (estimate) for a set of finger edge pulls across a typical run, if the doors stay. Prices change, so check the retailer page before you buy.
Budget Note
Edge pulls cost little; the money question is the doors, so only do this when the fronts already suit it.
Renter Friendly
With Conditions
Renter Note
Edge pulls screw into the door edge and leave small holes, so this is owner work, or renter work only with written permission.
What You Need
Finger edge pulls sized to your door thickness, a drill with a small bit, a screwdriver, and painter’s tape to mark positions evenly.
Product recommendation (partially verified): Goldenwarm Gold Finger Edge Pulls, Champagne Gold, 5 pack
Why it fits: The aluminium edge pull grips from behind the door’s top edge, so the front stays completely clean; the champagne gold finish keeps a thread of the palette, and the low profile suits slab doors and drawers.
Retailer/product page: https://www.amazon.com/dp/B0CGCZ7C1F
How To Do It
- Check the door edge thickness against the pull’s fitting range before ordering.
- Remove one old handle and test one edge pull through a week of cooking.
- Mark every door at the same height with tape before you drill anything.
- Fit pulls to the top edge of base doors and the bottom edge of wall doors.
- Wipe the top edges weekly; finger pulls collect grease where hands land.
Pro Tip
Keep one statement handle on a pantry or fridge door so the calm run still has a focal point.
10. Keep sightlines low and style one vignette only
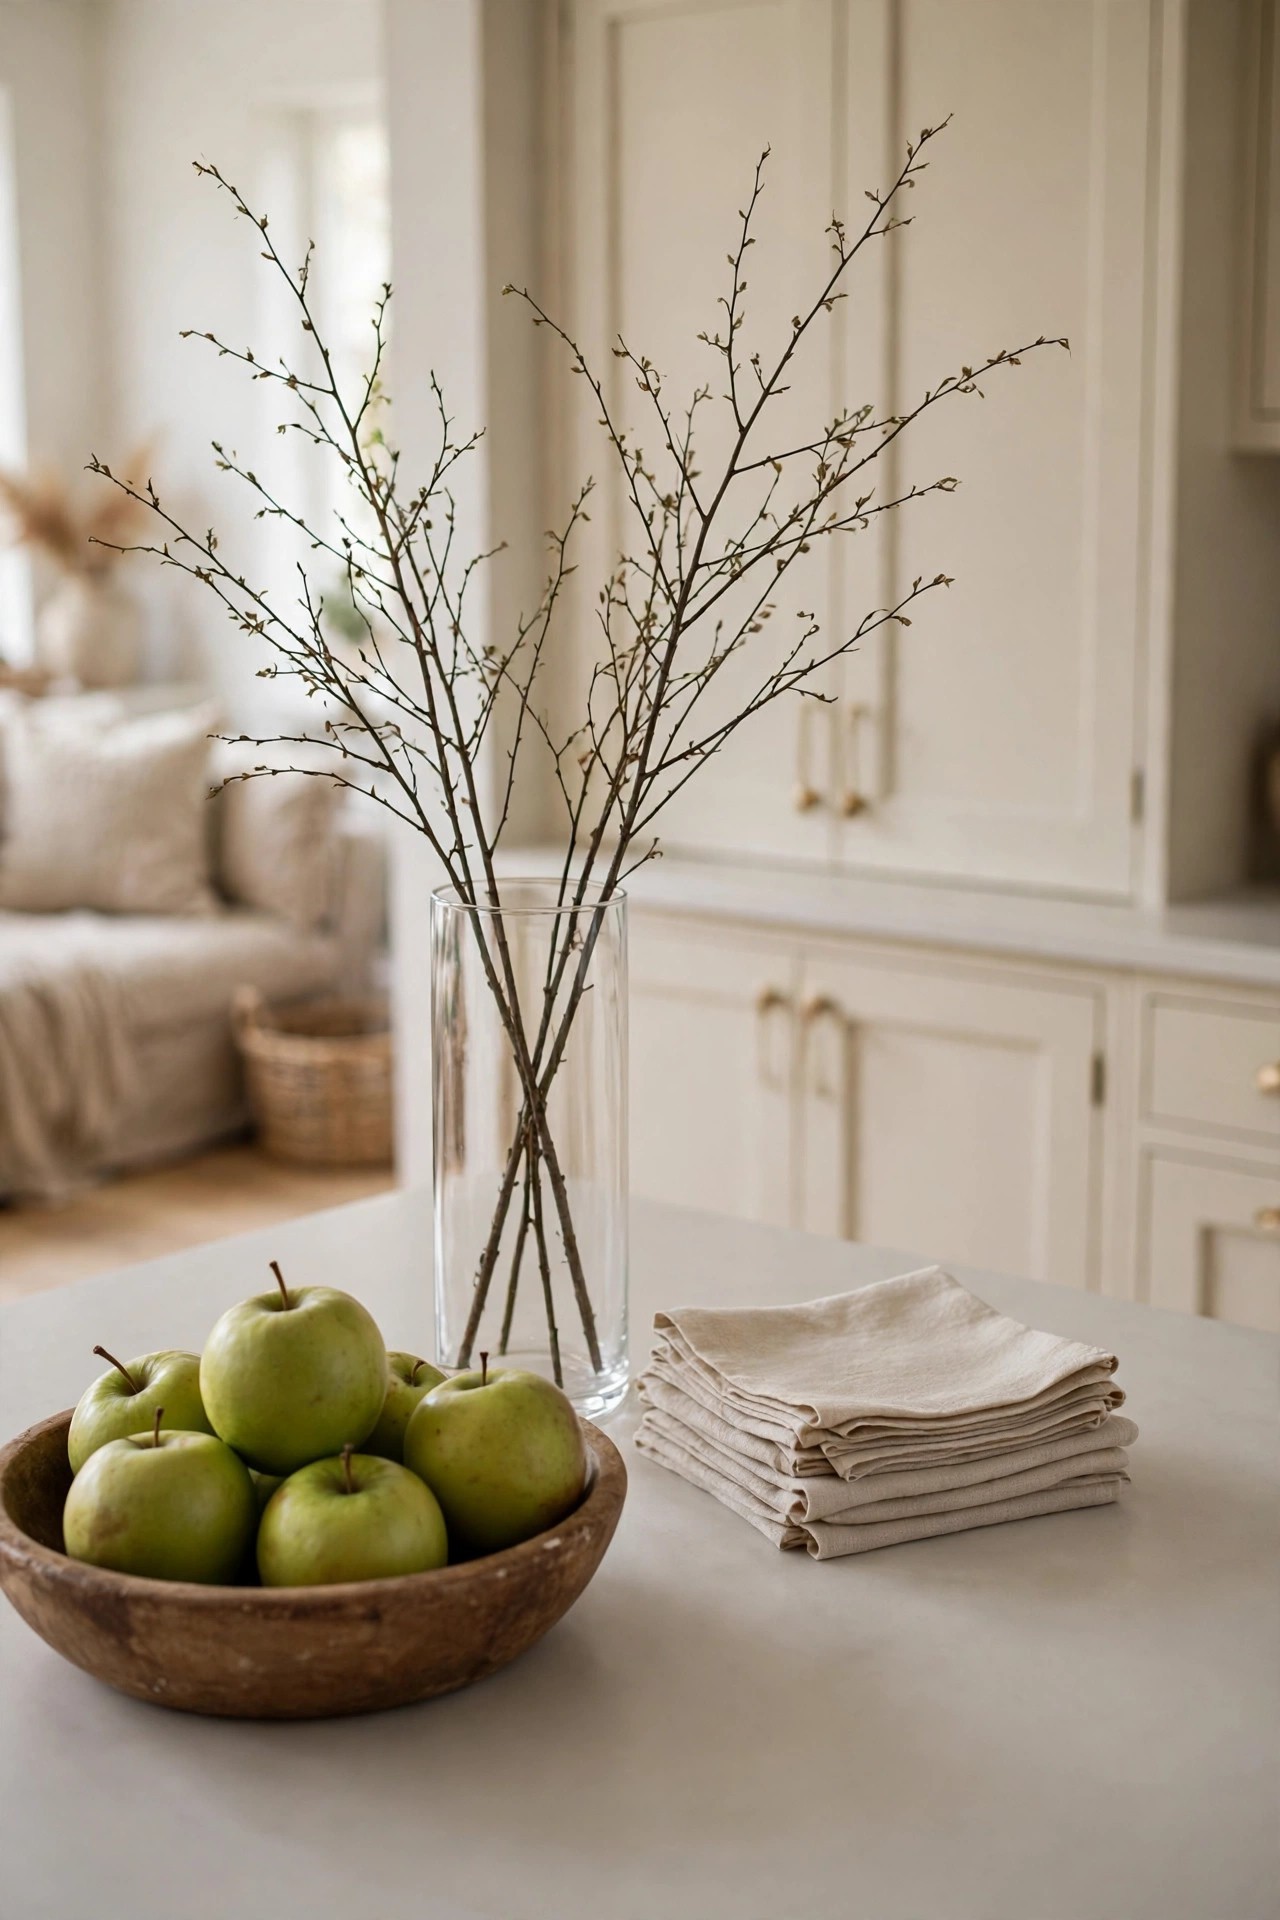
From the sofa, an open plan kitchen is a picture you look at all evening. It reads calm when everything on the counters stays low and only one styled group asks for attention: a wooden bowl of fruit, a tall vase with branches and a folded linen stack at the island’s end. Everything else, the toaster, the post and the charging cables, lives behind doors so the picture stays simple.
Best For
Anyone whose kitchen looks untidy from the sofa even right after tidying.
Not Ideal For
Cooks who genuinely need every appliance out and plugged in. Be honest, and give those pieces one grouped corner instead of the whole counter.
Estimated Cost
Estimated cost: about $25 to $70 (estimate) for a wooden bowl and a tall vase if you own neither. Prices change, so check the retailer page before you buy.
Budget Note
This idea mostly costs storage habits, not objects; one good bowl beats five small decorations.
Renter Friendly
Yes
Renter Note
Pure styling, nothing fixed or changed. Fully renter friendly.
What You Need
One low wooden bowl, one tall vase or jug, branches or stems, a short stack of linen napkins, and a home behind doors for everything else.
Product recommendation (verified): Jowgut Paulownia Wood Dough Bowl, 9.5 inch, with Rope Handles and Bead Garland
Why it fits: The compact 9.5 inch paulownia bowl is light, low and warm toned, big enough to anchor the vignette with fruit without eating prep space, and the rope handles and bead garland add texture without colour noise.
Retailer/product page: https://www.amazon.com/dp/B0FP14WTPW
How To Do It
- Clear the counters completely and clean them.
- Put back only the appliances you used in the last two days.
- Build one group of three at the island’s living end: bowl, vase and linen.
- Keep every other surface empty for one week and notice what you actually miss.
- Photograph the room from the sofa to check the sightline honestly.
Pro Tip
Height belongs in exactly one place in the group; two tall pieces fight each other across an open room.
11. Let one counter surface run across both zones
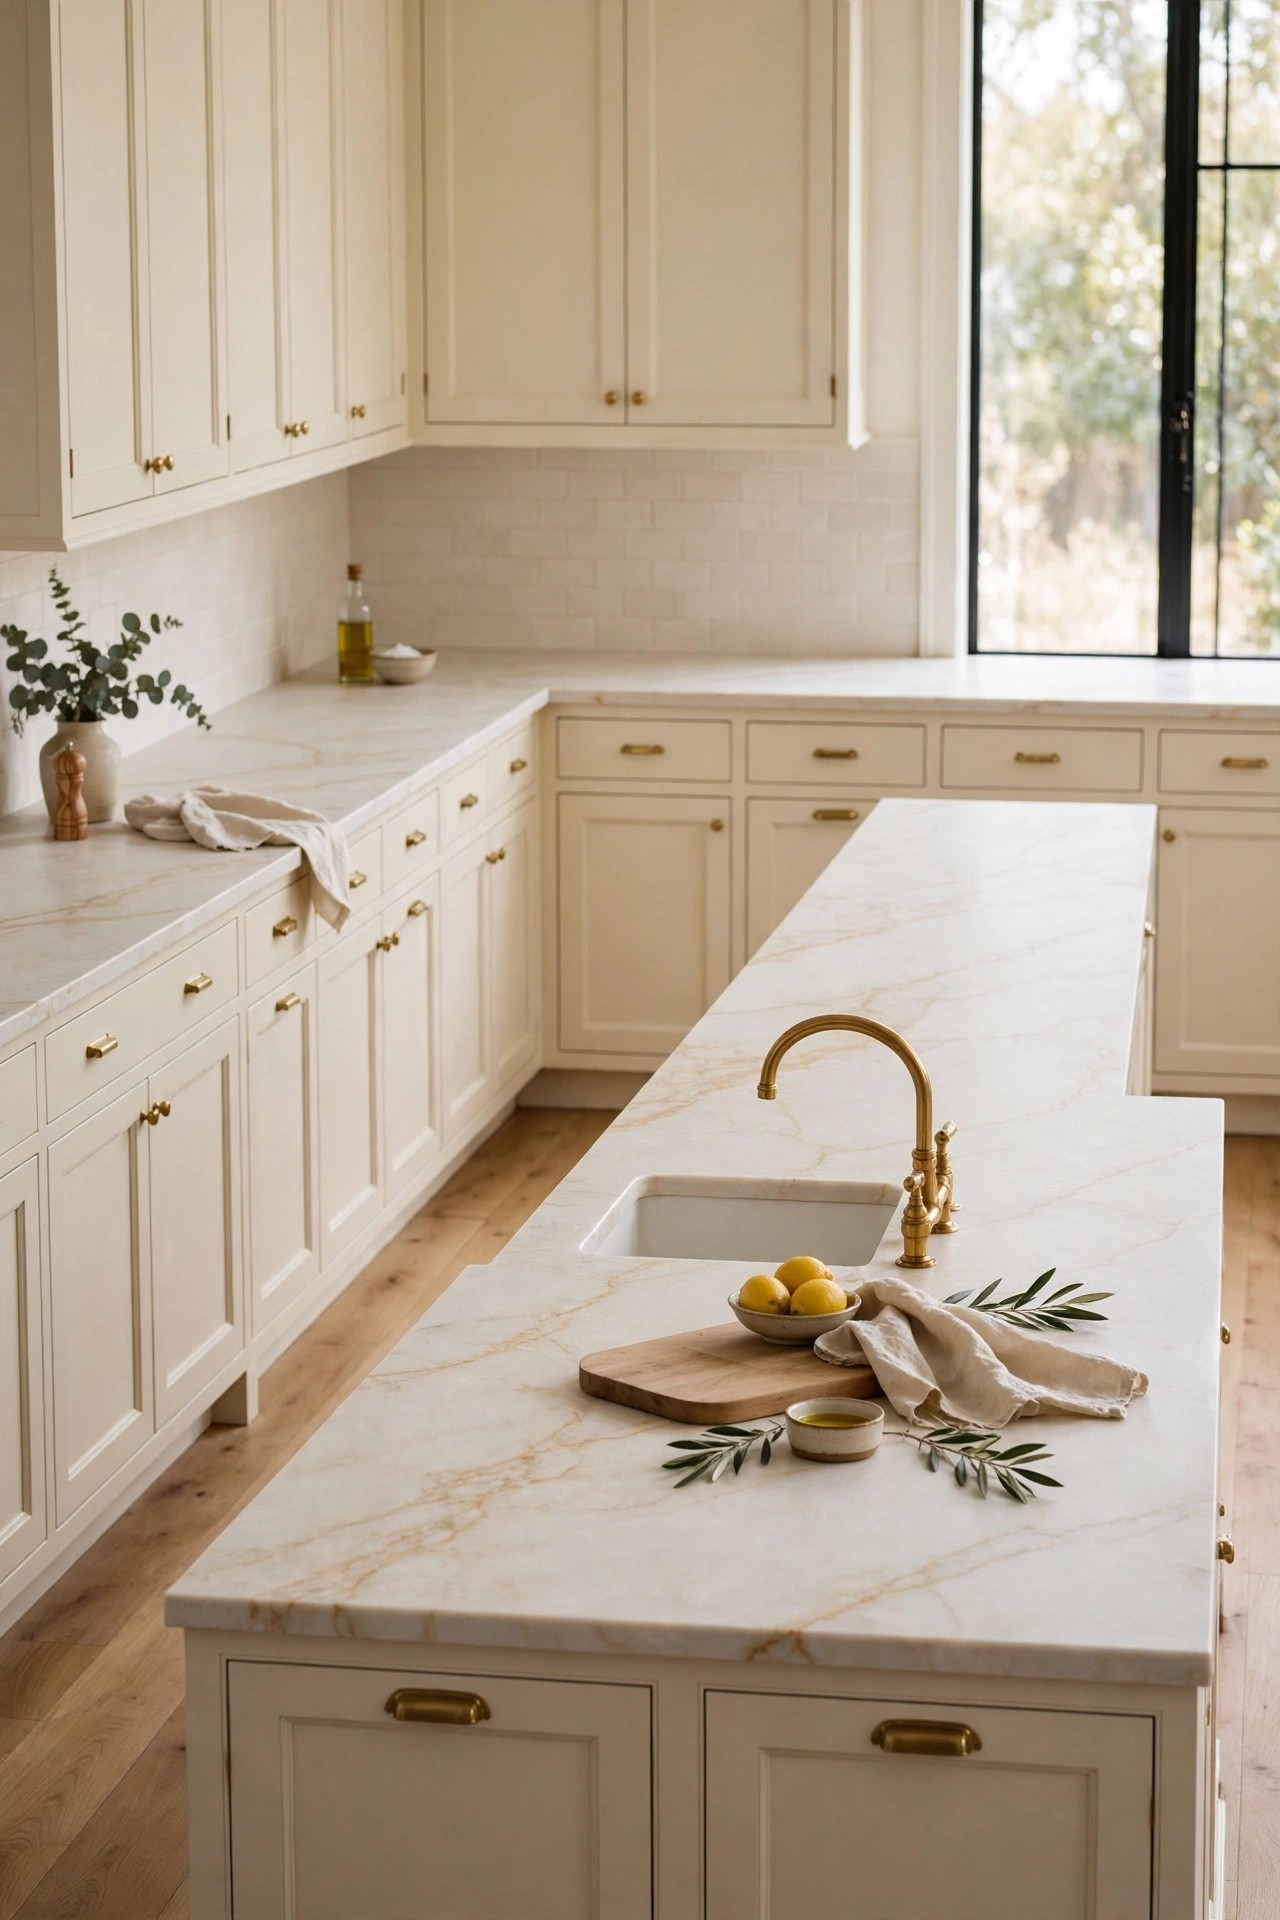
When the wall run and the island wear different counters, an open plan kitchen reads as two projects. One surface across both, even a marble look film over existing counters, pulls the room together and bounces light between the zones. Film is a cosmetic cover with honest limits: it resists water and stains, it is not stone, and it must stay away from direct heat, so trivets become a household rule.
Best For
Sound but mismatched counters, and budget updates planned before a bigger renovation.
Not Ideal For
Counters with deep damage, swelling or lifting edges, and homes where hot pans land directly on the surface daily. Film cannot fix a failing counter.
Estimated Cost
Estimated cost: about $40 to $110 (estimate) for marble look film to cover a wall run and a modest island. Prices change, so check the retailer page before you buy.
Budget Note
Measure twice and order one continuous roll; joins in film show more than joins in stone.
Renter Friendly
With Conditions
Renter Note
The film is removable, but test a hidden patch first, keep it away from heat sources, and agree it with the landlord before covering a whole kitchen.
What You Need
Marble look counter film in one roll wide enough for your deepest counter, a squeegee, a craft knife, a hairdryer for edges, and trivets for every hot pan.
Product recommendation (partially verified): VEELIKE Beige Gold Marble Contact Paper for Countertops, 32 x 354 inch
Why it fits: The 32 inch width covers a standard counter depth with fewer seams, the beige gold marble pattern matches the warm palette, and the vinyl is listed as waterproof and stain resistant for daily kitchen use.
Retailer/product page: https://www.amazon.com/dp/B0CH8GYYCF
How To Do It
- Clean, degrease and fully dry the counters; film shows every crumb trapped under it.
- Cut pieces oversize and start on the island, where mistakes show least from the door.
- Squeegee from the centre outward and use gentle heat only on corners and edges.
- Trim the edges last, with a fresh blade.
- Keep film away from burners and always use trivets; heat will blister it.
Pro Tip
Run the same film up a small backsplash return behind the sink for a fitted, deliberate finish.
12. Divide the zones with a low open shelf
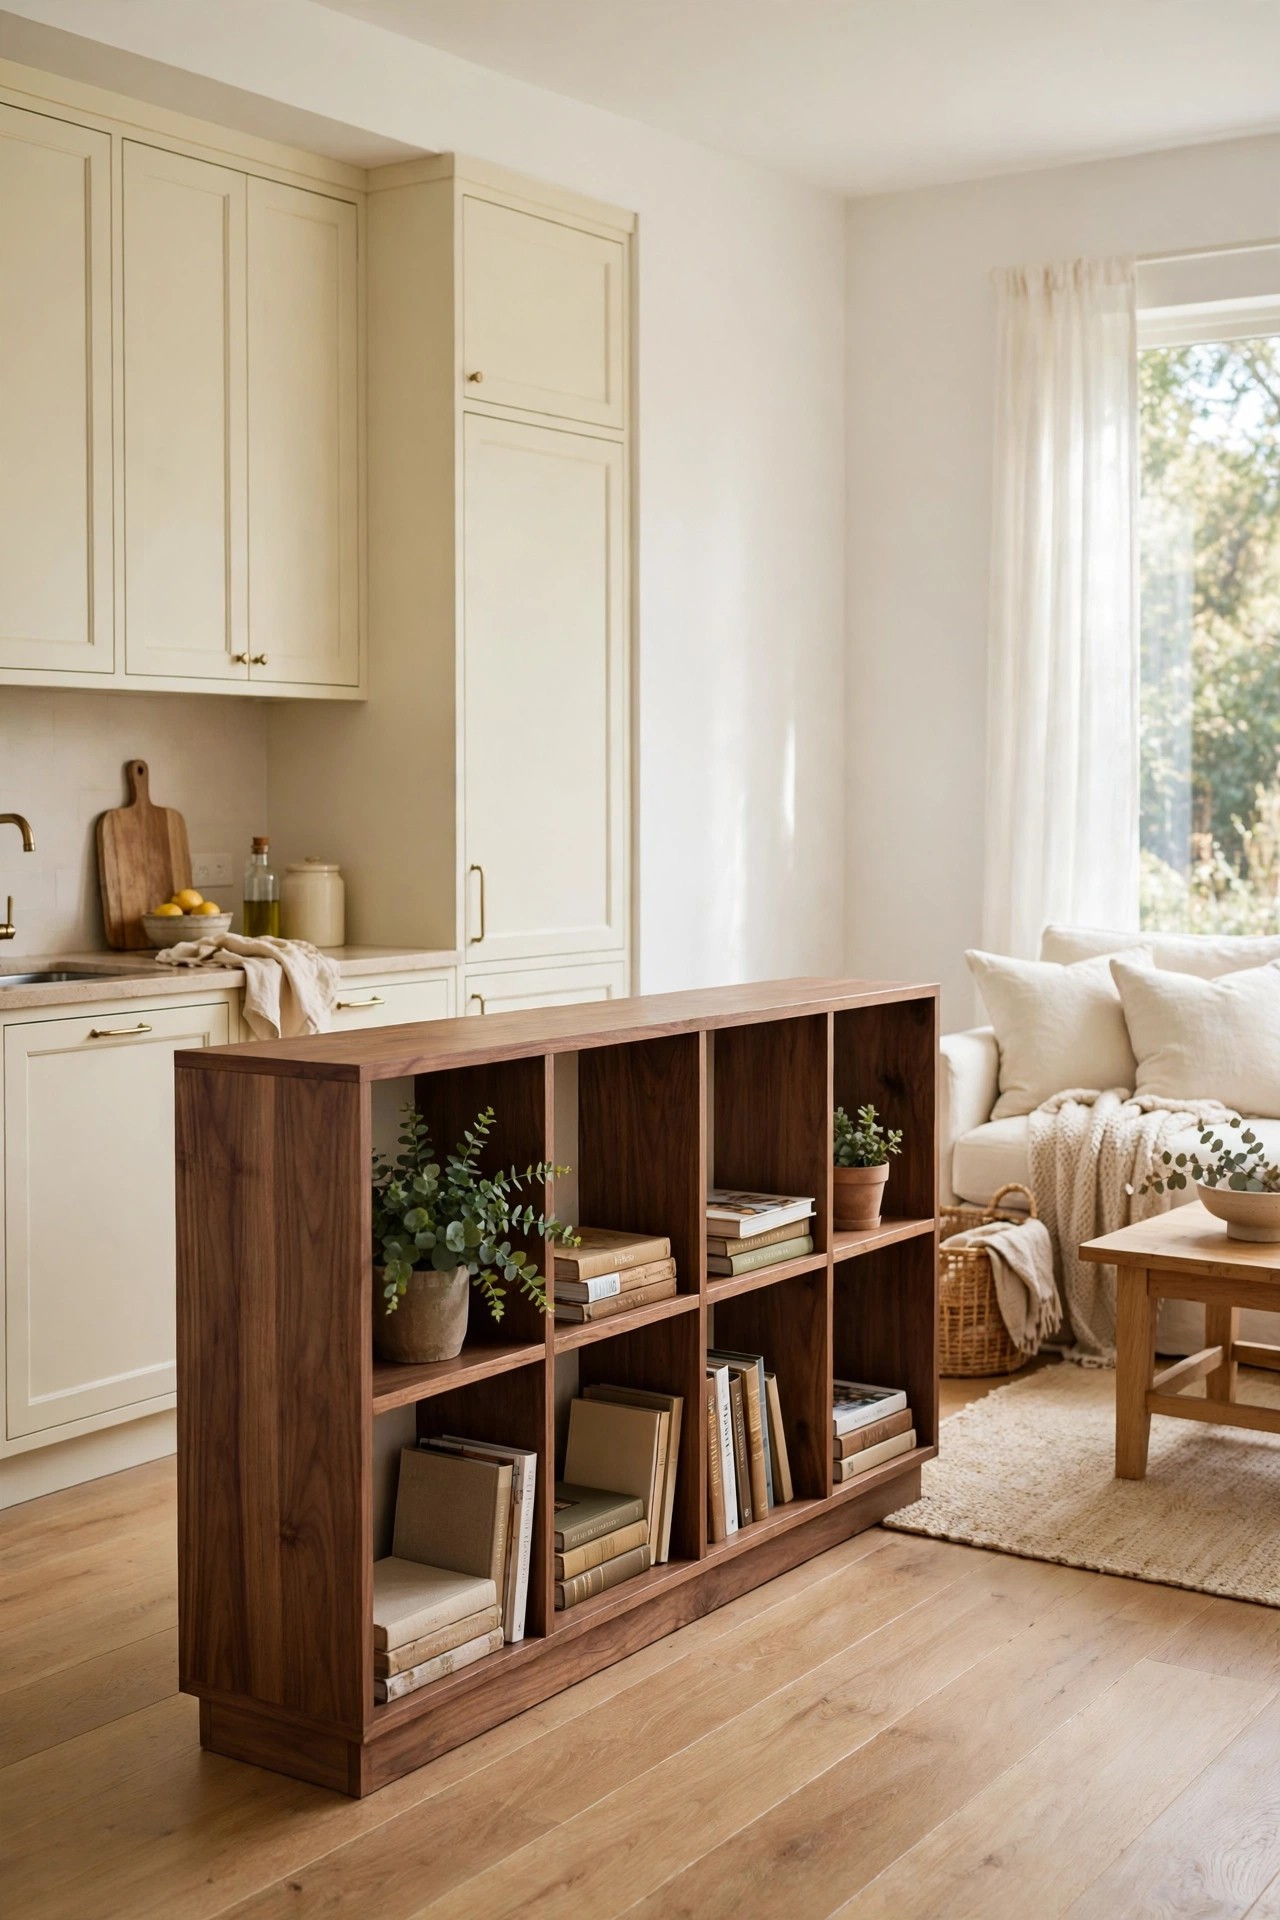
Where a room needs a boundary but not a barrier, a low open bookcase does the job a wall would undo. At counter height or below, it marks the kitchen’s edge, stores cookbooks and baskets, and still lets light, talk and the television cross it. Open shelves matter: a solid back would block the light and slowly recreate the wall you removed, one cube at a time.
Best For
Studio style rooms and wide openings with no natural boundary.
Not Ideal For
Homes with climbing toddlers, unless heavy items stay low and the piece is kept stable. It is furniture, not a safety barrier.
Estimated Cost
Estimated cost: about $130 to $280 (estimate) for a low six cube freestanding bookcase in wood or wood finish. Prices change, so check the retailer page before you buy.
Budget Note
The divider earns its floor space by storing things, so count the storage as part of the price.
Renter Friendly
Yes
Renter Note
Freestanding with no wall fixings. Keep heavy items on the bottom cubes so the piece stays stable.
What You Need
A low open cube bookcase under about 36 inches high, storage baskets for two cubes, cookbooks or board games for the living side, and felt pads for the feet.
Product recommendation (verified): IOTXY Freestanding Open Cubes Bookcase, 2-Tier 6-Cubes, Walnut
Why it fits: At 33.07 inches high it sits just below counter height, so the boundary reads clearly while sightlines cross it; the six open cubes store from both sides and the walnut finish repeats the warm wood palette.
Retailer/product page: https://www.amazon.com/dp/B095PK88GC
How To Do It
- Place the shelf on the zone line and check the walkways stay near 36 inches.
- Load heavy items into the bottom cubes first.
- Face kitchen storage to the kitchen and books to the living side.
- Leave the top mostly clear, with one plant or one lamp at most.
- Walk the room at night to check the shelf does not break the lighting plan.
Pro Tip
A divider slightly shorter than the opening looks intentional; wall to wall looks like a blockage.
13. Mark the kitchen zone on the ceiling
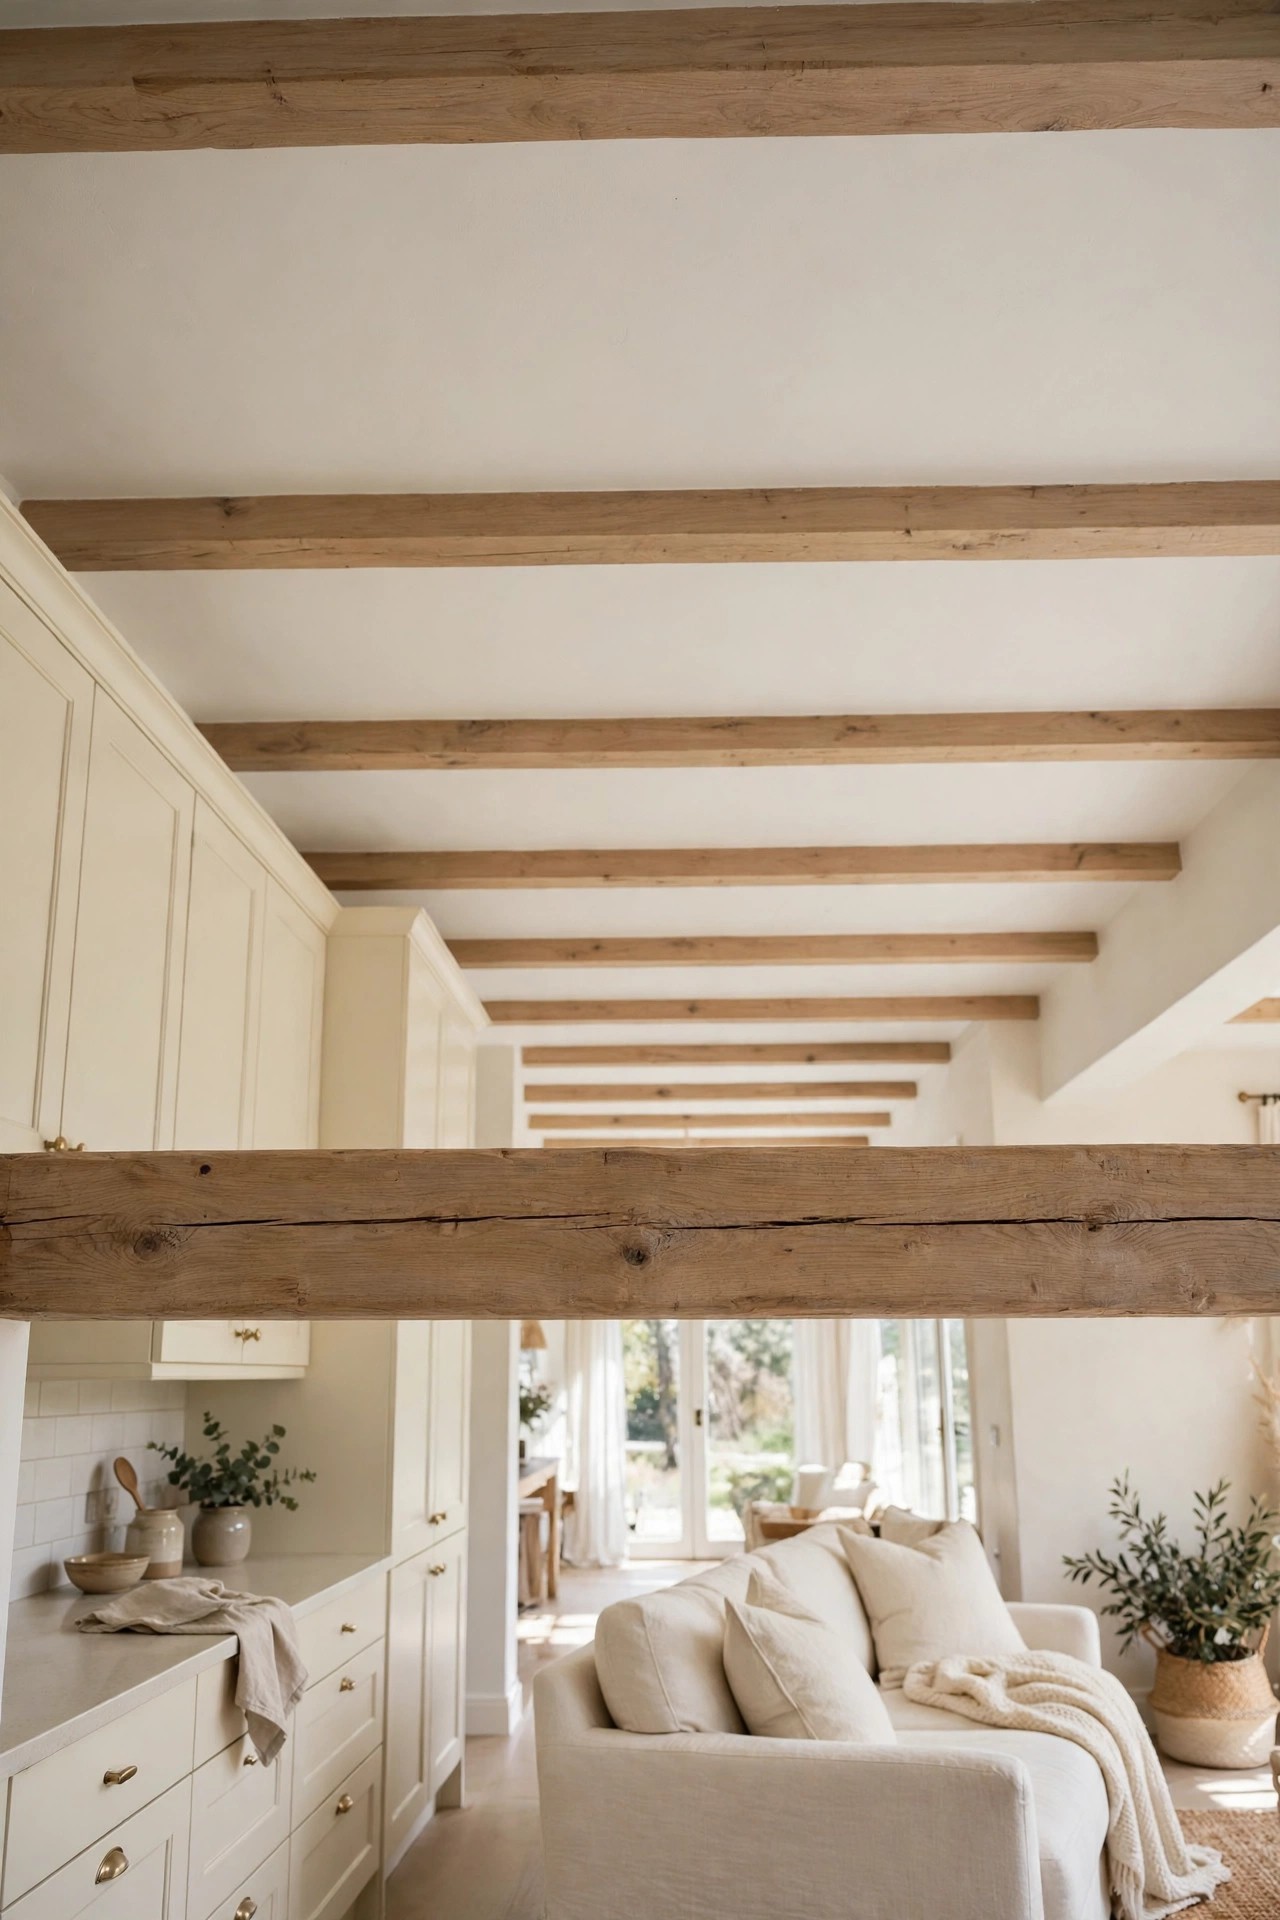
Zones can be drawn overhead as well as on the floor. One faux wood beam fixed where the kitchen ends and the living area begins gives the room a line the eye understands instantly, without touching the floor plan. Faux beams are hollow and light, so they are a decoration project rather than building work, but they must fix into ceiling joists, which makes this a careful weekend job for owners.
Best For
High or plain ceilings in open plan rooms that feel like one big box.
Not Ideal For
Low ceilings under about 8 feet, where beams crowd the room, and renters, since fixings go into joists. The beams are purely decorative and must never be treated as structural.
Estimated Cost
Estimated cost: about $250 to $600 (estimate) for one long faux beam, mounting blocks and fixings. Longer rooms and professional fitting cost more. Prices change, so check the retailer page before you buy.
Budget Note
One beam on the zone line does the work; a full beamed ceiling costs several times more for little extra effect.
Renter Friendly
No
Renter Note
Fixings into ceiling joists are not reversible decor, so this is an owner only project.
What You Need
One faux wood U-beam long enough to span the room, mounting blocks, a stud and joist finder, a drill, screws suitable for ceiling fixing, and a helper for the lift.
Product recommendation (partially verified): Ekena Millwork 3-Sided U-Beam, 6 inch W x 4 inch H x 20 ft L, Hand Hewn, Buttercream
Why it fits: The hollow Endurathane beam weighs about 23 pounds, so two people can lift a 20 foot span; the 6 x 4 inch profile reads clearly from the floor, and the pale buttercream finish suits a cream scheme better than dark stain.
Retailer/product page: https://www.amazon.com/dp/B0CYLZTBG7
How To Do It
- Find and mark the ceiling joists across the whole span.
- Fix mounting blocks to the joists exactly on the zone line.
- Dry fit the beam with a helper before any adhesive or screws.
- Fix the beam to the blocks and check it sits level and tight to the ceiling.
- Never hang lights, plants or anything else from a decorative beam.
Pro Tip
Paint grade beams finished in the ceiling colour give the line without the rustic look, if wood feels too heavy.
14. Give mismatched appliances one finish
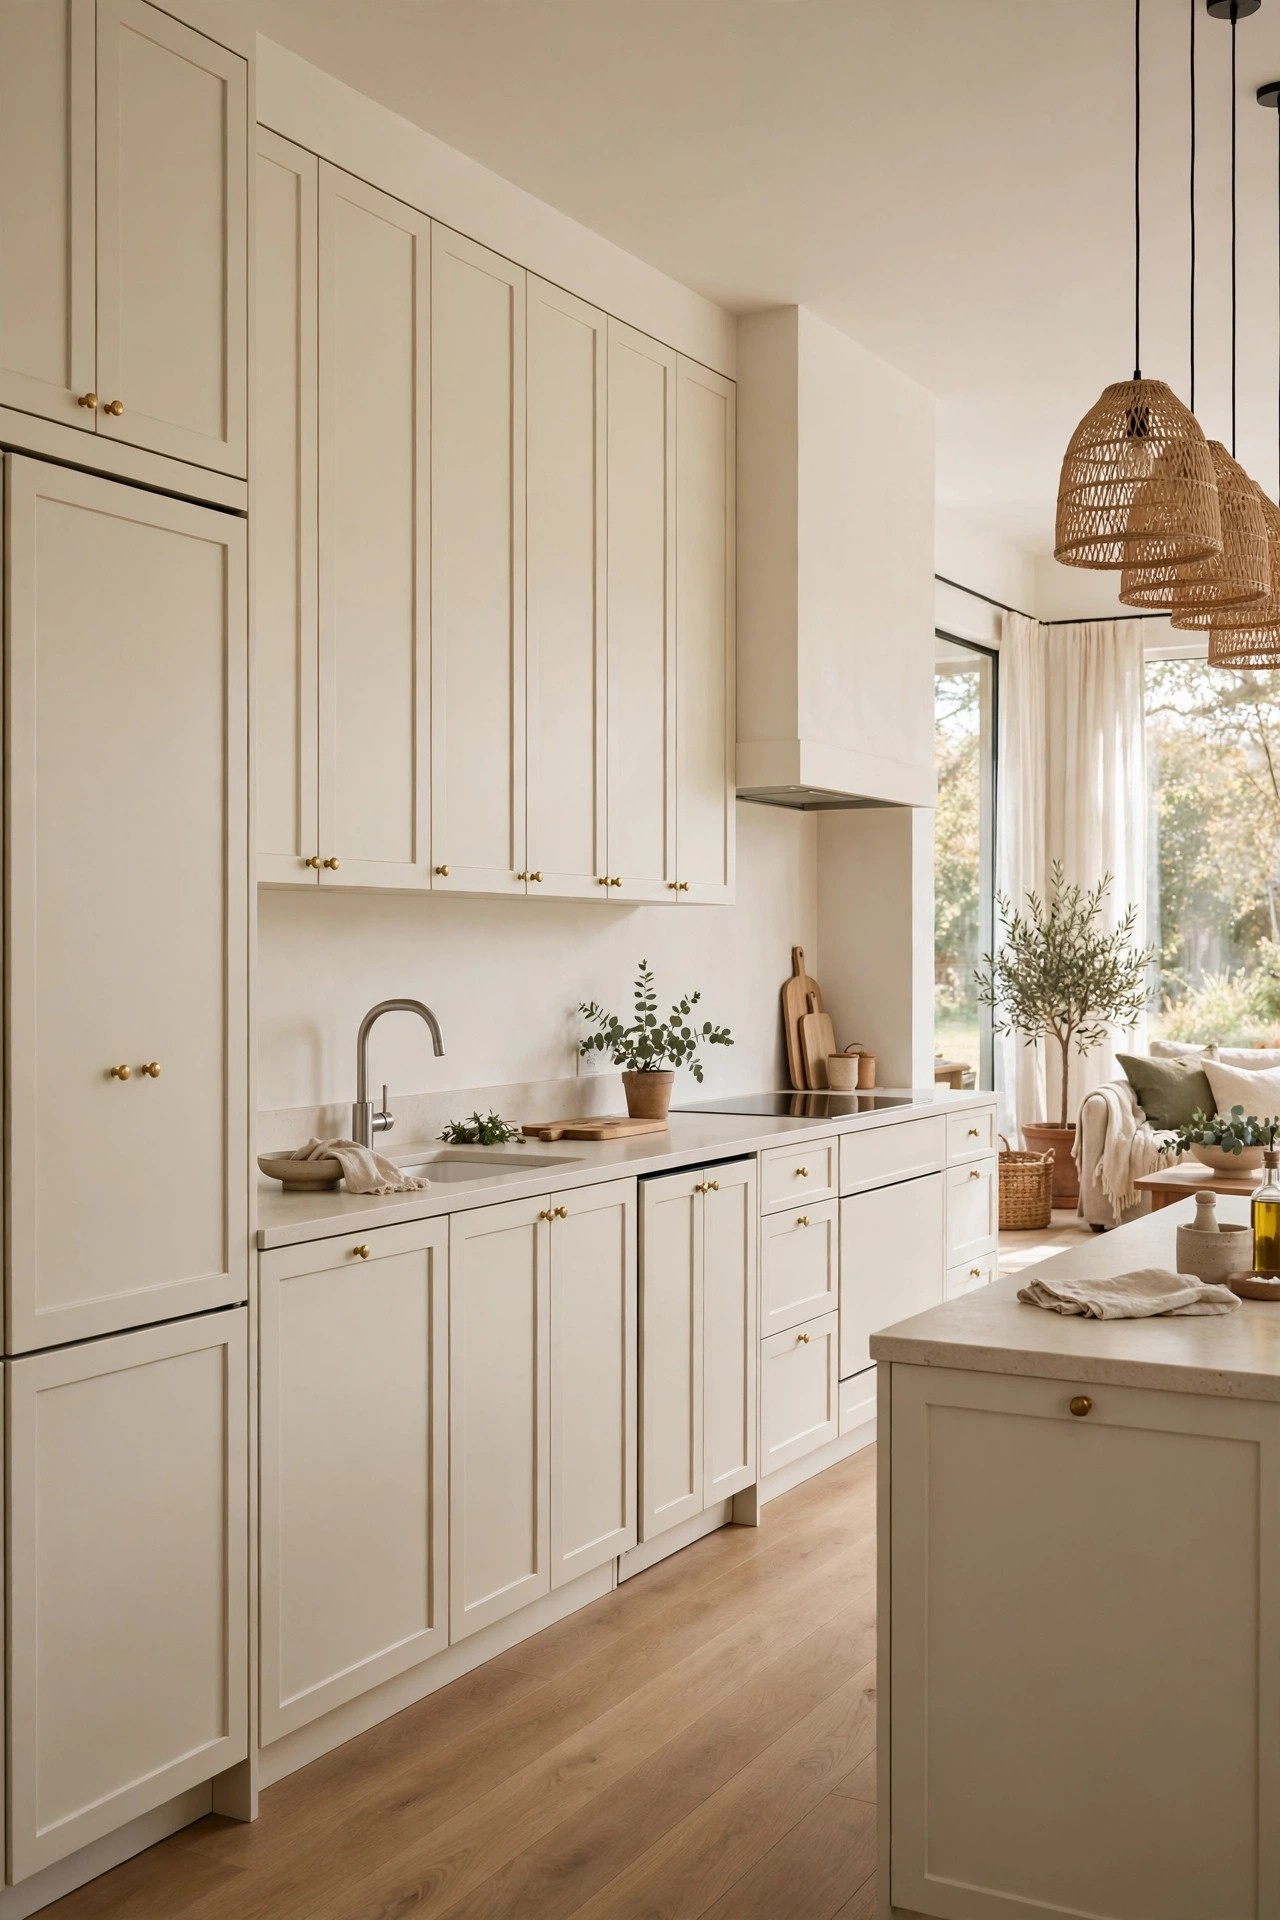
A white fridge, a black dishwasher and a steel oven shout three different decades into the living room. The calm versions of this room hide appliances behind cabinet panels, but existing appliances can share one finish instead: brushed metal film across the fridge and dishwasher fronts lines them up as a set. It is a surface cover, not new appliances, so vents, seals and heat sources stay uncovered and maker guidance wins.
Best For
Sound appliances in clashing finishes, and pre renovation updates.
Not Ideal For
Appliances under a warranty that covering could affect, and any surface that gets hot, including oven doors and hob surrounds. Check the maker’s guidance first.
Estimated Cost
Estimated cost: about $25 to $60 (estimate) for brushed metal film to cover a fridge front and a dishwasher front. Prices change, so check the retailer page before you buy.
Budget Note
Film costs less than one appliance, so it buys time while you save for the real replacement set.
Renter Friendly
With Conditions
Renter Note
The film is removable, but appliances belong to the landlord in most rentals, so written permission comes first.
What You Need
Brushed metal appliance film, a squeegee, a craft knife, a cleaner for degreasing, and the appliance maker’s guidance on vents and seals.
Product recommendation (partially verified): Livelynine Brushed Nickel Stainless Steel Contact Paper for Appliances, 15.8 inch wide roll
Why it fits: The brushed nickel finish gives a fridge and a dishwasher one shared metal look, the aluminium and vinyl film is removable, and the 15.8 inch width covers a dishwasher front in a single pass.
Retailer/product page: https://www.amazon.com/dp/B07RM1H45N
How To Do It
- Read the maker guidance and mark every vent, seal and display that must stay clear.
- Clean and degrease the fronts fully.
- Apply film to the dishwasher first, as the practice piece.
- Squeegee outward and trim around handles and seals, never over them.
- Keep film off oven doors and any surface that heats up.
Pro Tip
Do the fridge and the dishwasher on the same day from the same roll so the brushed direction matches.
15. Open the plan out to the patio
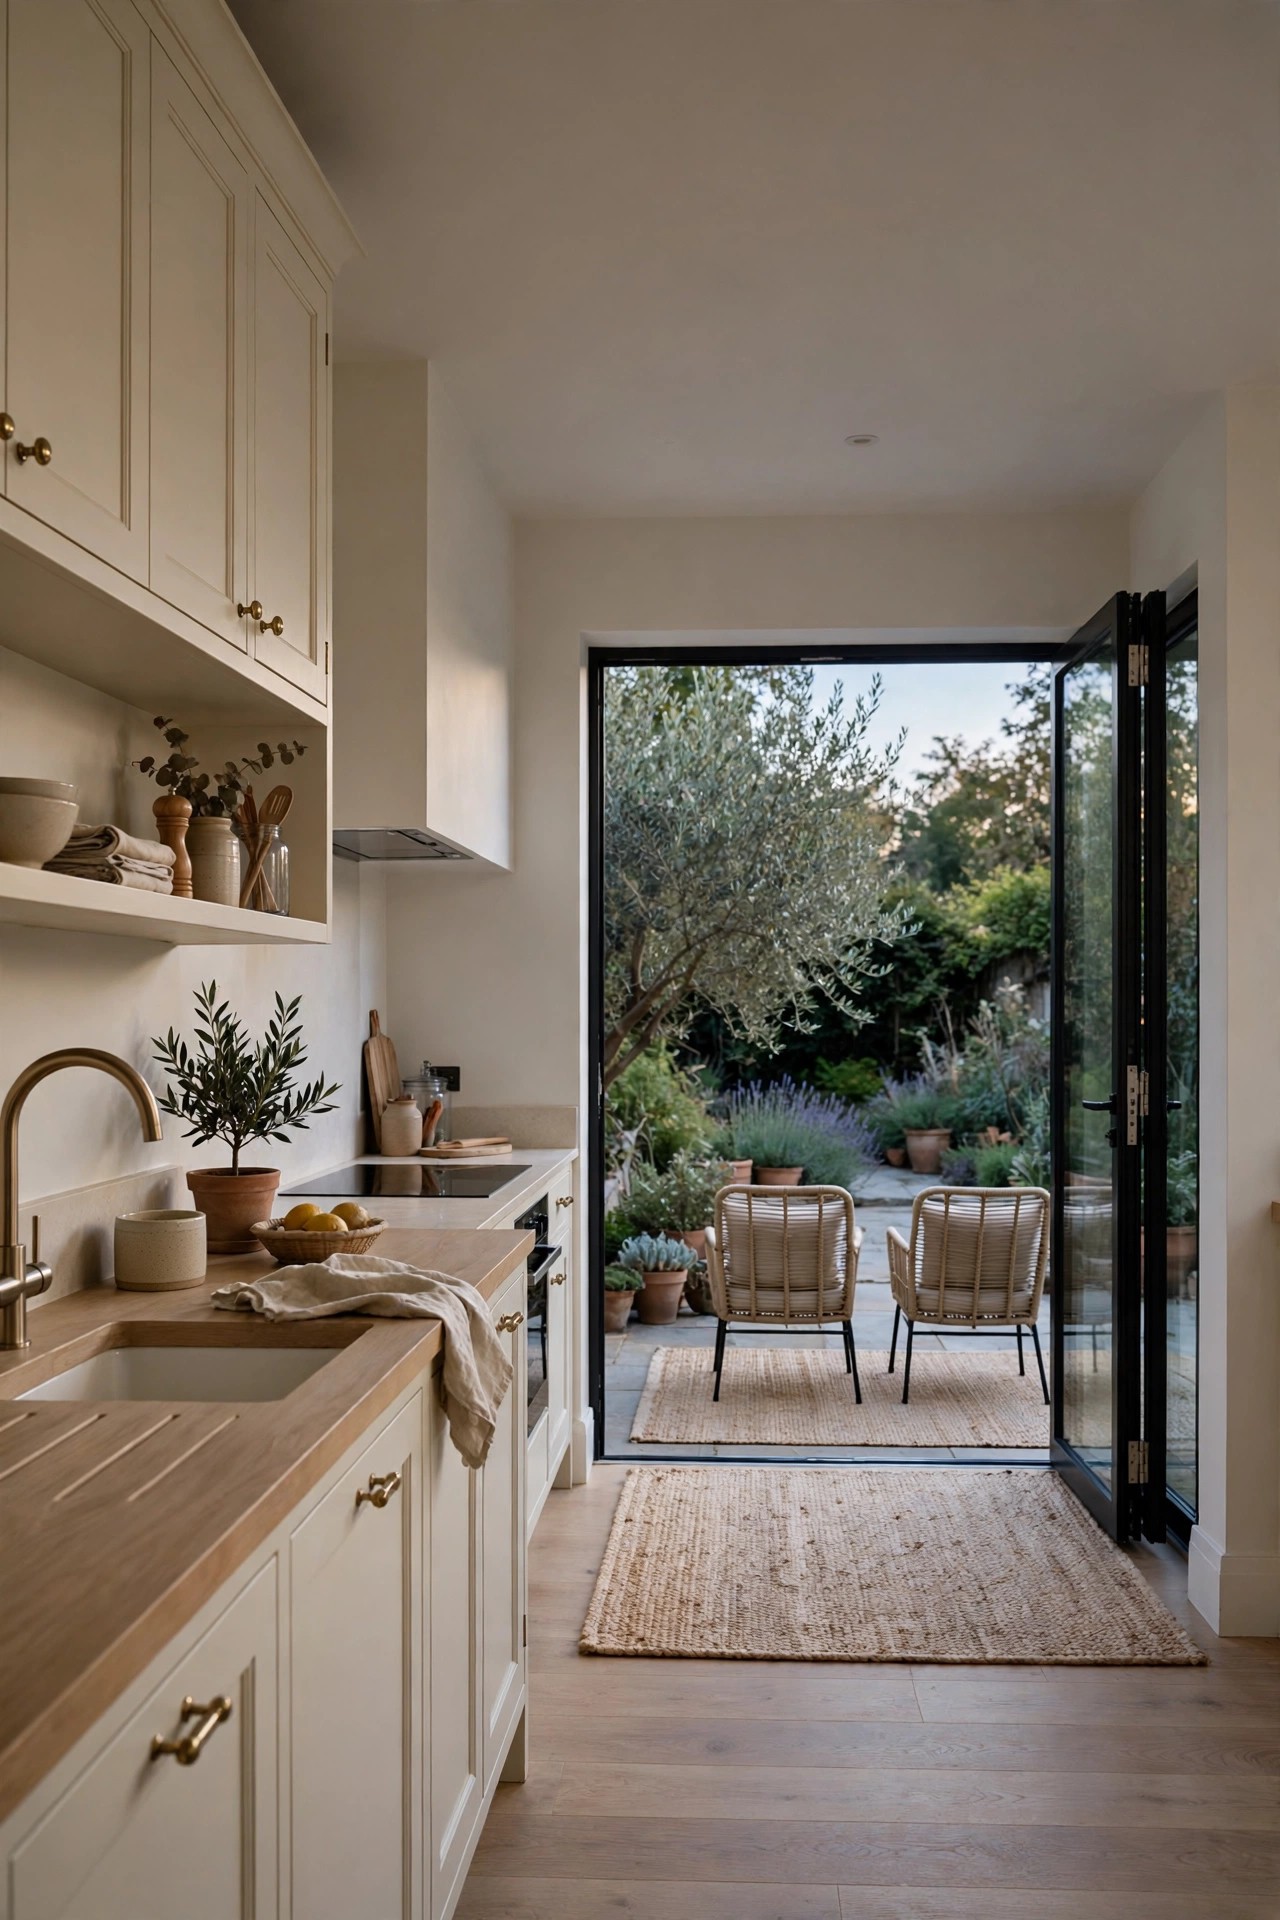
Where the kitchen ends at garden doors, the patio is the third zone of the same room. Treating it that way, one rug language inside and out, the same cushion colours and a clear path to the doors, stretches the living space all summer. A woven plastic outdoor rug takes the weather, dries fast and shakes clean, so the outside zone can be styled as confidently as the inside one.
Best For
Kitchen diners with doors opening to a patio or deck.
Not Ideal For
Doors that must stay closed for security or weather most of the year, where the effort belongs inside instead.
Estimated Cost
Estimated cost: about $45 to $110 (estimate) for a large reversible outdoor rug in the 9 x 12 ft range. Prices change, so check the retailer page before you buy.
Budget Note
One big outdoor rug changes the patio more than any single piece of garden furniture.
Renter Friendly
Yes
Renter Note
Nothing is fixed; the rug lifts, shakes and stores. Keep door swings and thresholds completely clear.
What You Need
One large reversible outdoor rug, two outdoor cushions that echo the indoor palette, a door mat at the threshold, and a furniture plan that leaves the door path open.
Product recommendation (partially verified): SAND MINE Reversible Mats, Plastic Straw Rug, 9 x 12 ft, Black and Beige
Why it fits: The 9 x 12 ft woven polypropylene mat is waterproof, reversible for two looks, and light enough to shake out; the black and beige pattern is neutral enough to sit under most patio furniture.
Retailer/product page: https://www.amazon.com/dp/B08NTC2TRF
How To Do It
- Clear the path from kitchen to doors; nothing may narrow it.
- Lay the outdoor rug under the patio seating, with the front legs on it.
- Repeat the indoor palette in two outdoor cushions.
- Lay the door mat flat so the doors open over it freely.
- Hose or shake the rug clean monthly so the zone stays inviting.
Pro Tip
The reversible side gives you a fresh pattern mid season, which makes the whole garden room feel redone for free.
Practical Tips for Open Kitchen Design
- Measure the walkways first. Open plan rooms fail on inches, not taste: about 36 to 42 inches around the island and between furniture keeps cooking, seating and passing traffic comfortable at the same time.
- Choose living furniture at kitchen scale. In one shared room the sofa and chairs are part of the kitchen’s picture, so read our notes on living room furniture before you replace any seating.
- Repeat the calm palette in the bathroom too. Guests read the whole floor as one home, and the same cream and brass story in bathroom decor makes the place feel planned end to end.
- Edit before you buy. One clear out of counters, shelves and the top of the fridge changes an open plan room more than most purchases, because everything in it is always on show.
- Light the room for the evening, not the showroom. Warm bulbs, pendants over the island and one lamp in the seating zone are what make guests stay at the table.
- Change one zone at a time and live with it for a week. Open plan rooms punish rushed decorating, because every change shows from everywhere.
Frequently Asked Questions
How do I divide an open plan kitchen without building walls?
Use the floor, the furniture and the ceiling instead: a rug under the seating group, an island or low open shelf on the boundary, and one beam or a lighting change overhead. Each one marks the zone while light and conversation still cross it.
How much space should I leave around a kitchen island?
About 36 inches is the minimum working gap, 42 inches feels comfortable, and 48 inches is better where two cooks pass each other. Measure with the dishwasher and fridge doors open, not closed.
Should the flooring match across an open plan room?
One continuous surface makes the room feel bigger and calmer, and it removes trip edges between zones. If a full match is not possible, keep the tones close and let rugs, not floor changes, mark the zones.
What colours make an open kitchen feel calm and connected?
Warm whites and creams with one repeated metal and one wood tone. The repeat matters more than the exact shades: when the same brass and the same wood appear in every zone, the room reads as one scheme.
Can renters make an open plan kitchen feel designed?
Yes. A large rug, matching pulls using the existing holes, plug in and battery lighting, and strict counter styling need no permission in most rentals and change the room more than any single purchase.
Do I need an island for an open kitchen design?
No. A breakfast bar, a low bookcase on the zone line, or even a rug and a lighting plan can zone the room. An island helps because it seats people, but it is one tool among several in this list.
Conclusion
An open kitchen design works when the room is planned as one space with quiet jobs, not as a kitchen with furniture parked in it. Zone it with an island, a rug or a low shelf, run one floor and one palette through every part, light each zone on its own switch, and give storage and appliances a calm, shared finish. Start with the cheapest layer, the edit and the rug, and the room will already feel connected before you spend on anything bigger.
One Comment
Comments are closed.