15 Kitchen Ideas for Small Spaces That Actually Fit
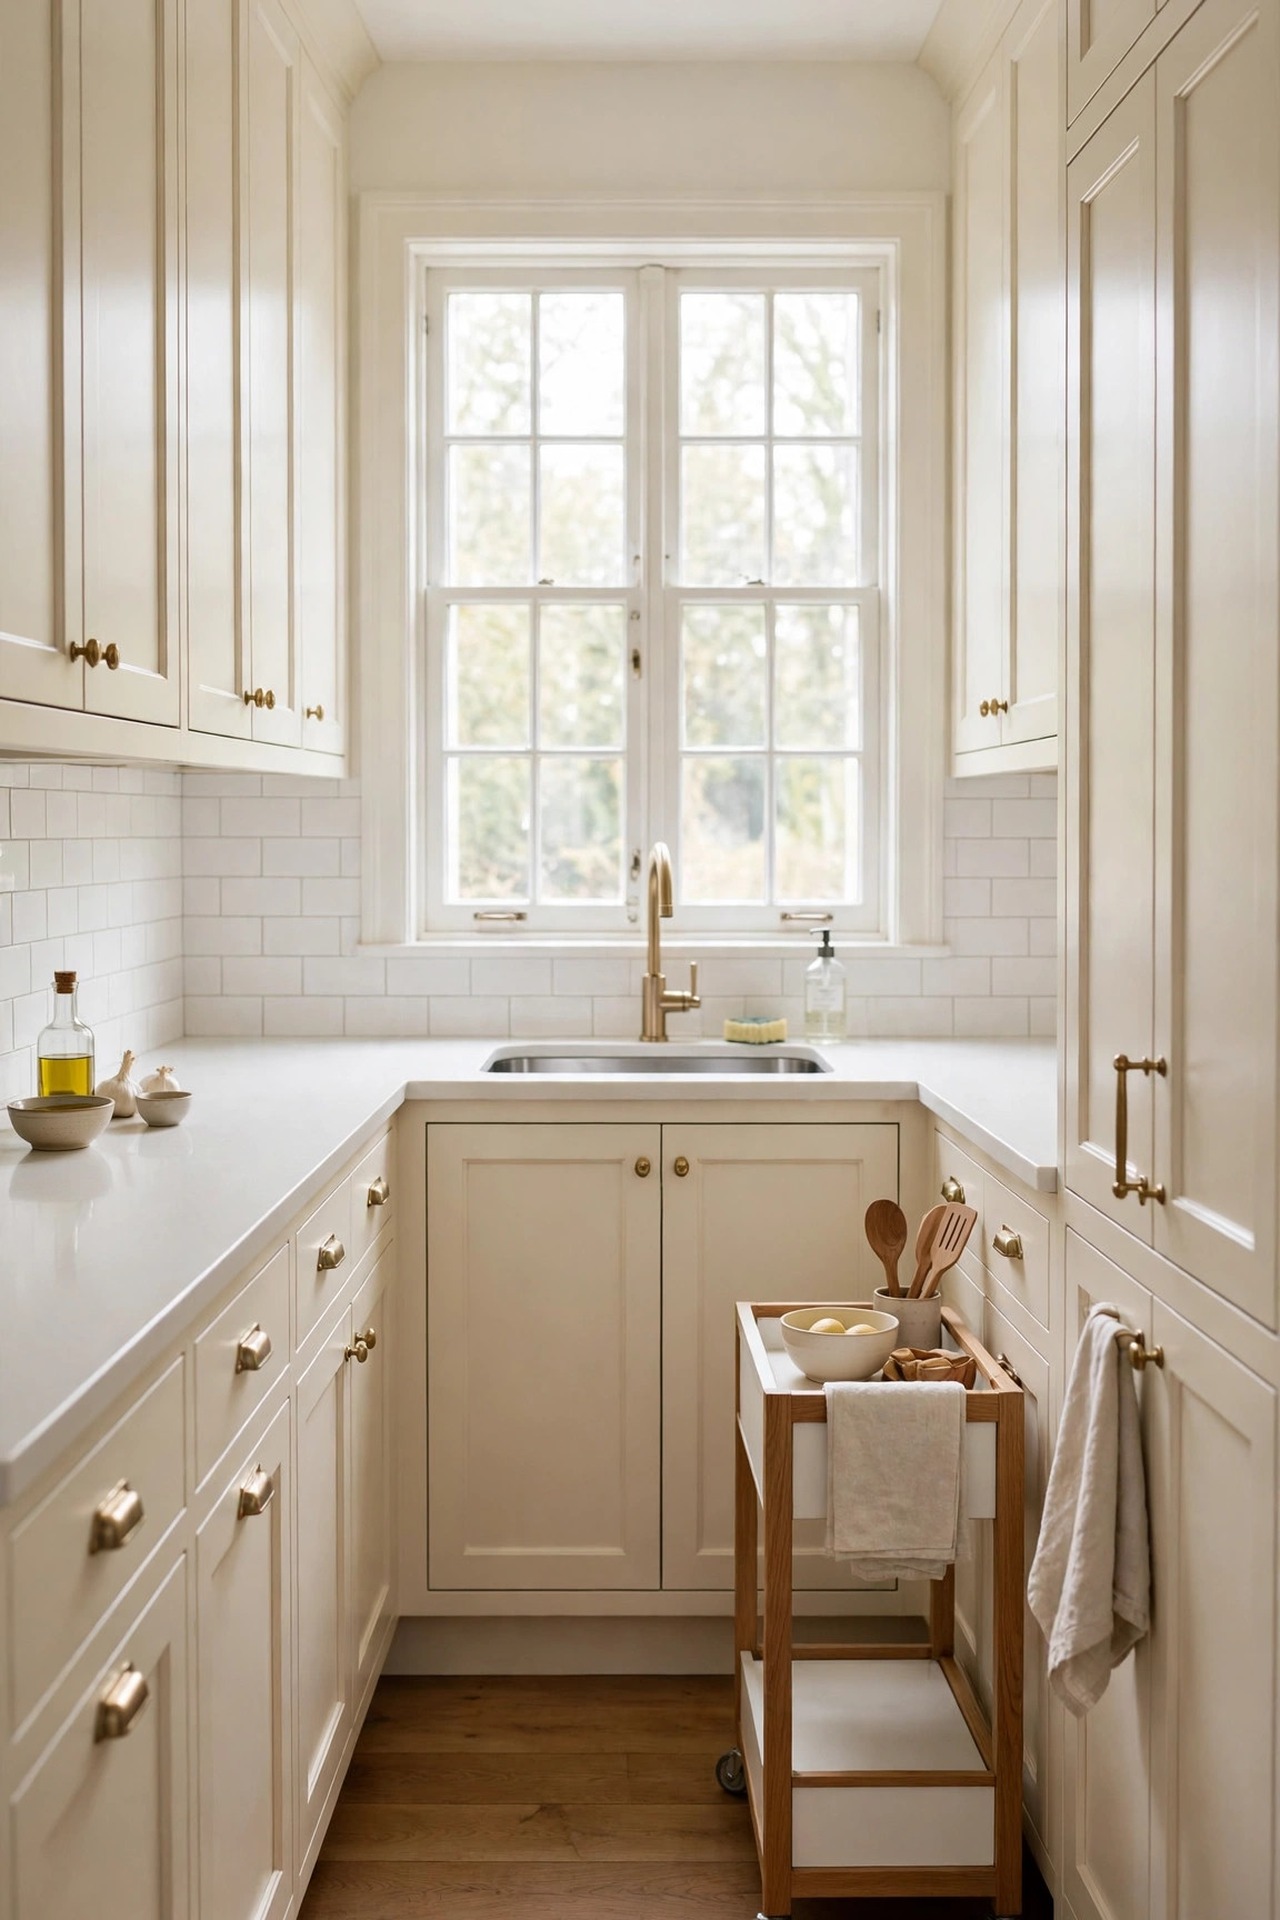
A small kitchen rarely fails because of its size. It fails because everything lands on the same short run of counter, the cabinets waste their top and bottom thirds, and the gap beside the fridge collects dust instead of storage. These kitchen ideas for small spaces are built for galley and apartment kitchens, and every one states the measurement that decides whether it fits: cart widths, shelf depths, door clearances and the walkway space you must keep. Start with the ideas that match your tightest spot, and use the broader kitchen ideas list for colour and style once the space itself works.
1. Roll In a Slim Cart as a Movable Island
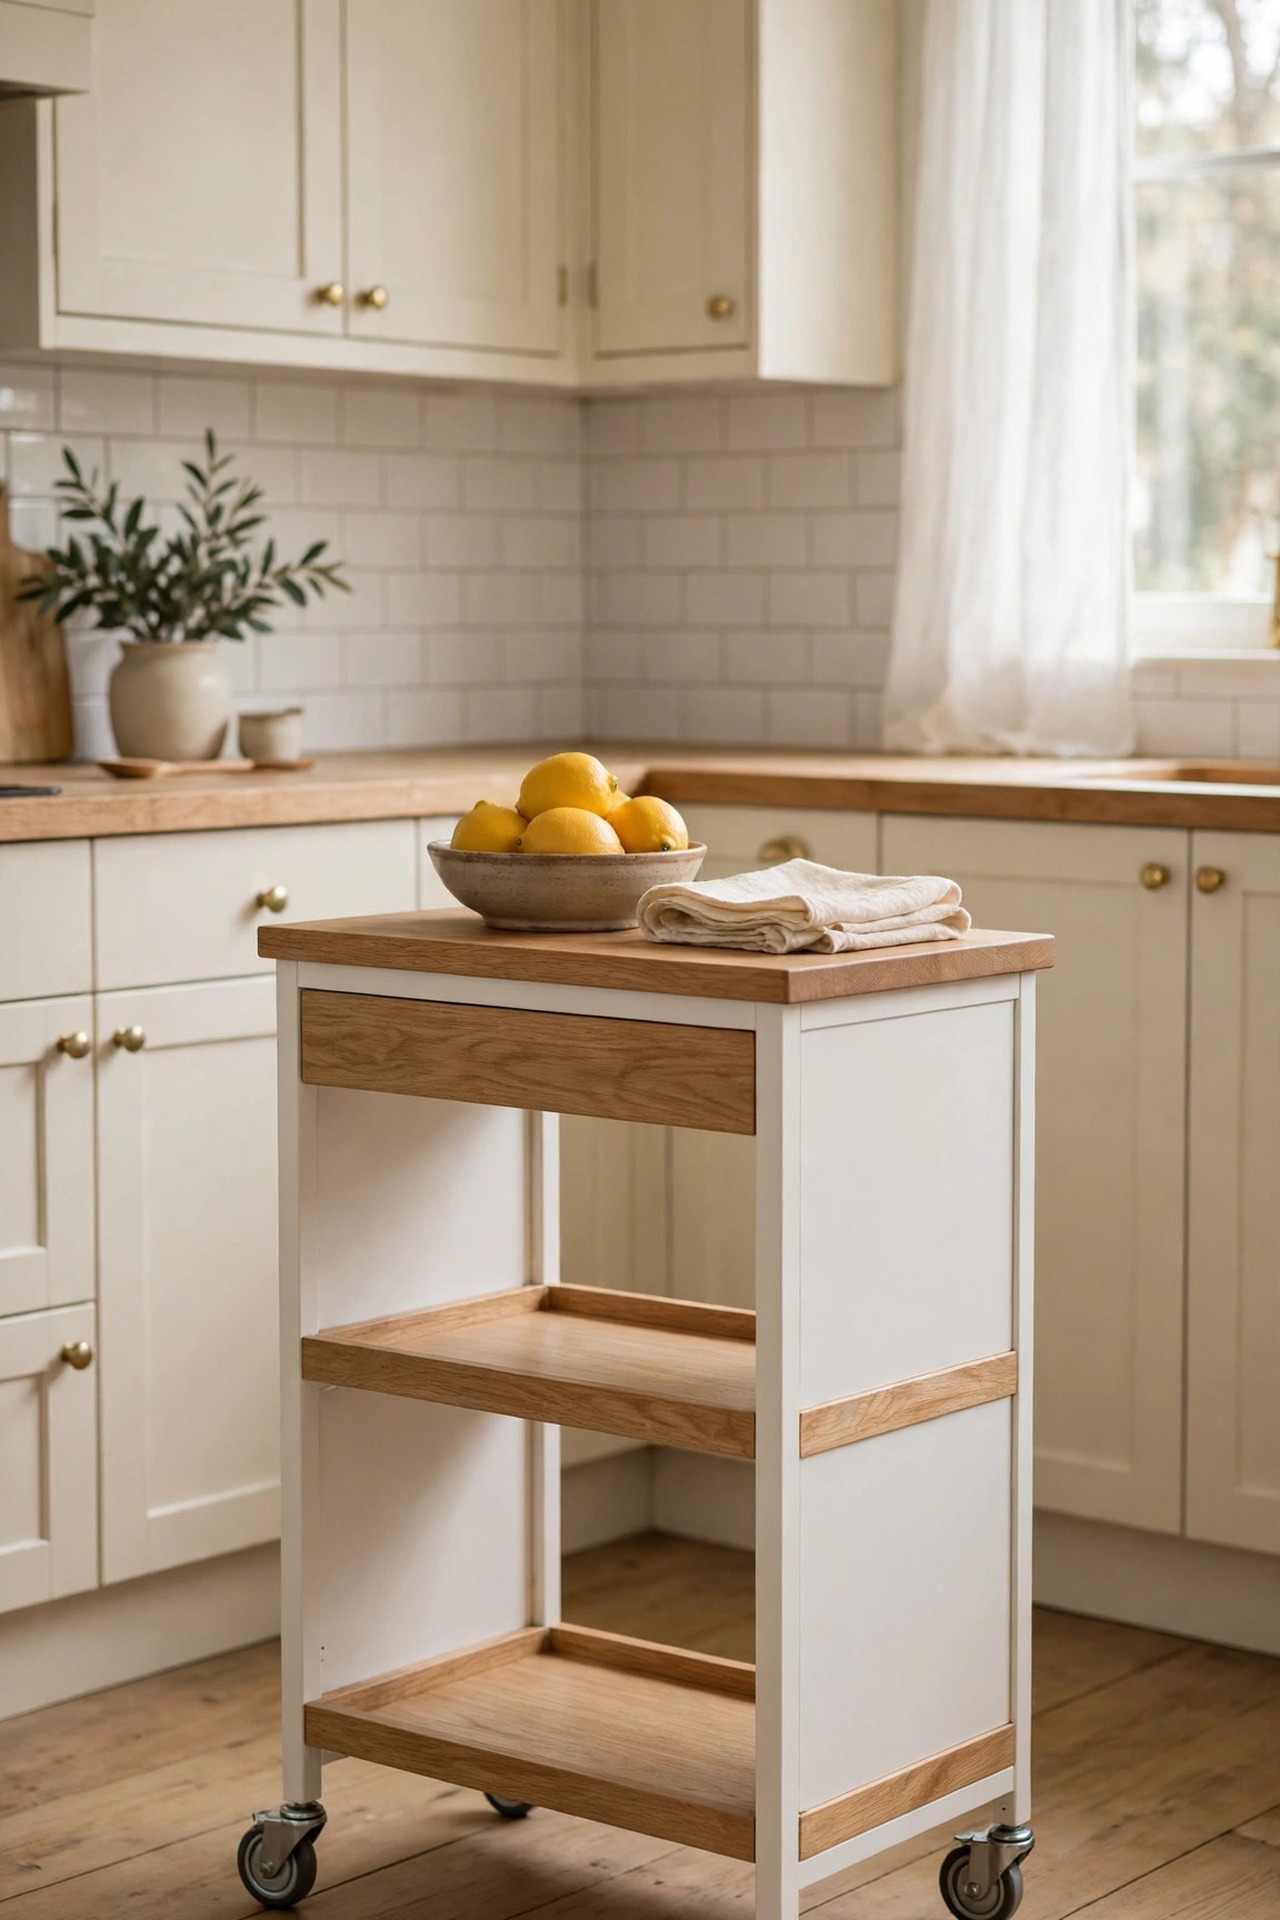
Description: A galley kitchen has no room for a fixed island, but it still needs a landing place between the stove and the sink. A slim rolling cart gives you a worktop and shelves that park against the end wall when you need the floor. The fit rule is the walkway: keep at least 36 inches clear between the cart and the opposite counter, and choose a cart no wider than 24 inches so it can turn in the space.
Best For: Galley and one-wall kitchens with a clear end wall and a walkway of 36 inches or more.
Not Ideal For: Kitchens where the cart would block a door swing, the fridge door, or the oven door when it opens.
Estimated Cost: $80-$140 (estimate) for a slim cart with a drawer and lockable wheels.
Budget Note: One cart replaces a prep table and a shelf unit, so measure once and buy the size that parks flush against your end wall.
Renter Friendly: Yes
Renter Note: It stands on wheels and fixes to nothing, so it leaves with you and marks nothing.
What You Need
Slim rolling cart under 24 inches wide, tape measure, baskets or jars for the shelves, a folded towel for the side hook.
Product recommendation (verified): VASAGLE Kitchen Rolling Island, Mobile Kitchen Cart with Storage on Wheels, 17.7 x 23.6 x 35.4 Inches, Drawer, 2 Hooks, Oak Beige and Matte White (UKKI007Y01)
Why it fits: At 23.6 inches wide and 17.7 inches deep it turns inside a galley walkway, the 35.4 inch height sits just below a standard 36 inch counter, and the listing gives a total load capacity of 257.9 lb, with two hooks for towels on the side.
Retailer/product page: https://www.amazon.com/dp/B0F4DDJ5GW/ref=sxin_17_pa_sp_search_thematic_sspa
How To Do It
- Measure the walkway at its narrowest point and confirm at least 36 inches will stay clear with the cart in working position.
- Build the cart on a flat floor and tighten every bolt before loading it.
- Roll it into place, lock the casters, and press down firmly on the top before using it for chopping.
- Load heavy jars on the lowest shelf so the cart stays steady when it moves.
Pro Tip
Park the cart across the end of the galley, not along the run; end parking keeps the full walkway open and still puts the worktop within one step of the stove.
2. Slide a Slim Pantry Into the Fridge Gap
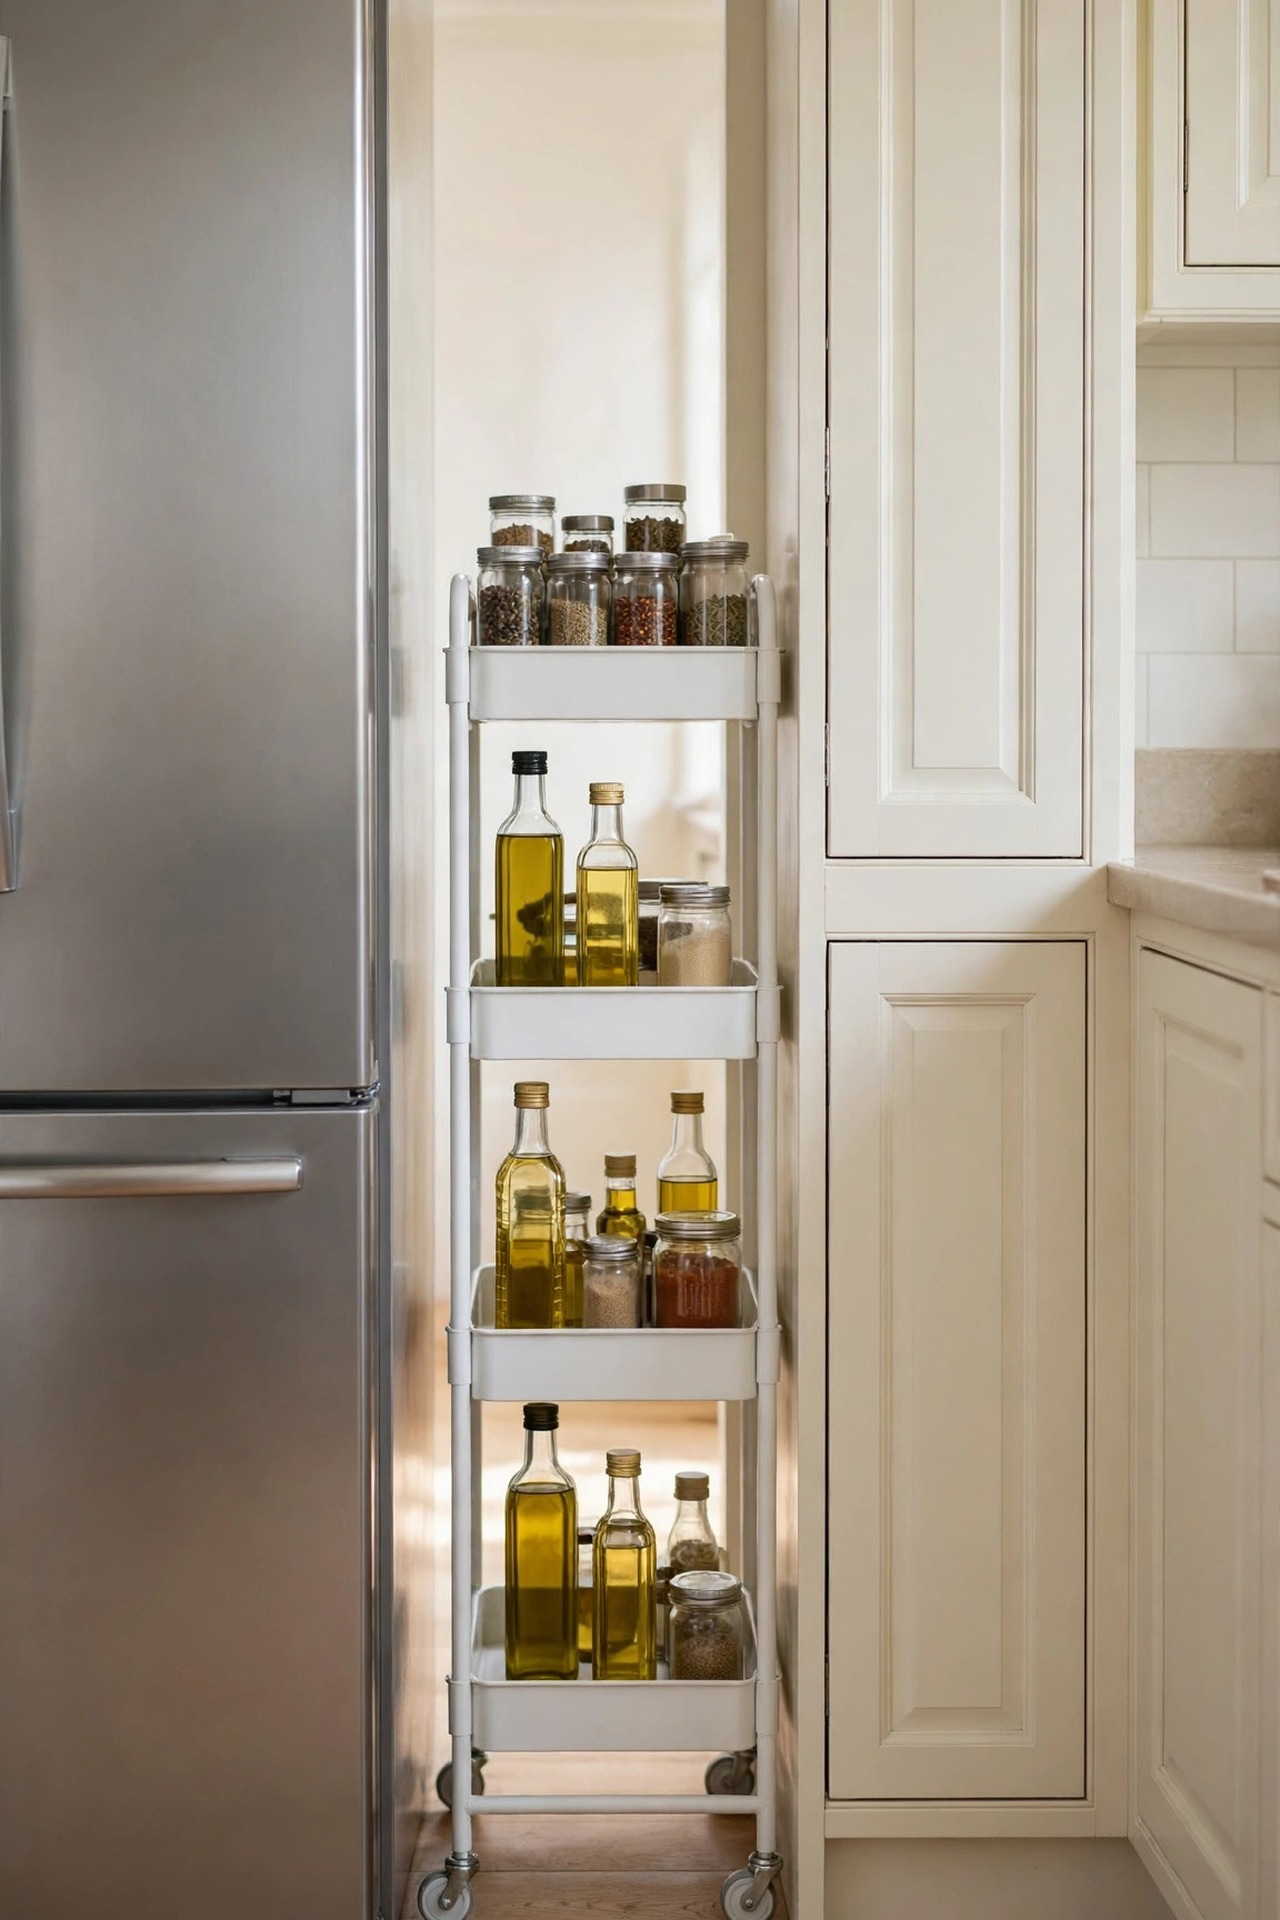
Description: Most kitchens have a dead gap of 5 to 7 inches between the fridge and the counter or wall. A slim rolling cart built for that gap turns it into four tiers of storage for spices, oils and cans, close to the stove where you use them. Measure the gap at floor level and at counter height, because cabinets and skirting boards often narrow it, and leave half an inch of breathing room so the cart rolls freely.
Best For: Kitchens with a clear gap of at least 5.25 inches beside the fridge, stove or washer.
Not Ideal For: Gaps blocked by skirting boards, pipes or a fridge door that opens into the space.
Estimated Cost: $25-$45 (estimate) for a four tier slim cart.
Budget Note: The gap decides the size, not the other way round; a cart half an inch too wide is a full refund errand.
Renter Friendly: Yes
Renter Note: The cart simply rolls in and out, with no fixing, no drilling and no marks.
What You Need
Slim rolling cart matched to your gap width, tape measure, small jars and bottles for the shelves.
Product recommendation (verified): SPACEKEEPER Slim Rolling Storage Cart, 4 Tier, 15.75″ x 4.75″ x 34″
Why it fits: The 4.75 inch depth fits gaps from about 5.25 inches, the four tiers are sized for spice jars and oil bottles, and the listing gives a 20 lb capacity per shelf with the heaviest items placed low.
Retailer/product page: https://www.amazon.com/dp/B0D147F5FB/ref=cm_sw_r_as_gl_api_gl_i_dl_PH2NBJZ1C7B05PX4VJJH
How To Do It
- Measure the gap at the floor, at counter height and at the back wall, and note the smallest number.
- Build the cart and check it rolls the full depth of the gap without scraping either side.
- Load spices and oils on the middle tiers, cans low, and nothing taller than the tier above it.
- Pull the cart out by its top edge slowly; a level load stops bottles tipping as it moves.
Pro Tip
Keep one tier for the bottles you use daily at the stove and store backup stock elsewhere; a gap cart you unload to reach the front row stops being useful.
3. Double Cabinet Space With Stackable Shelf Risers
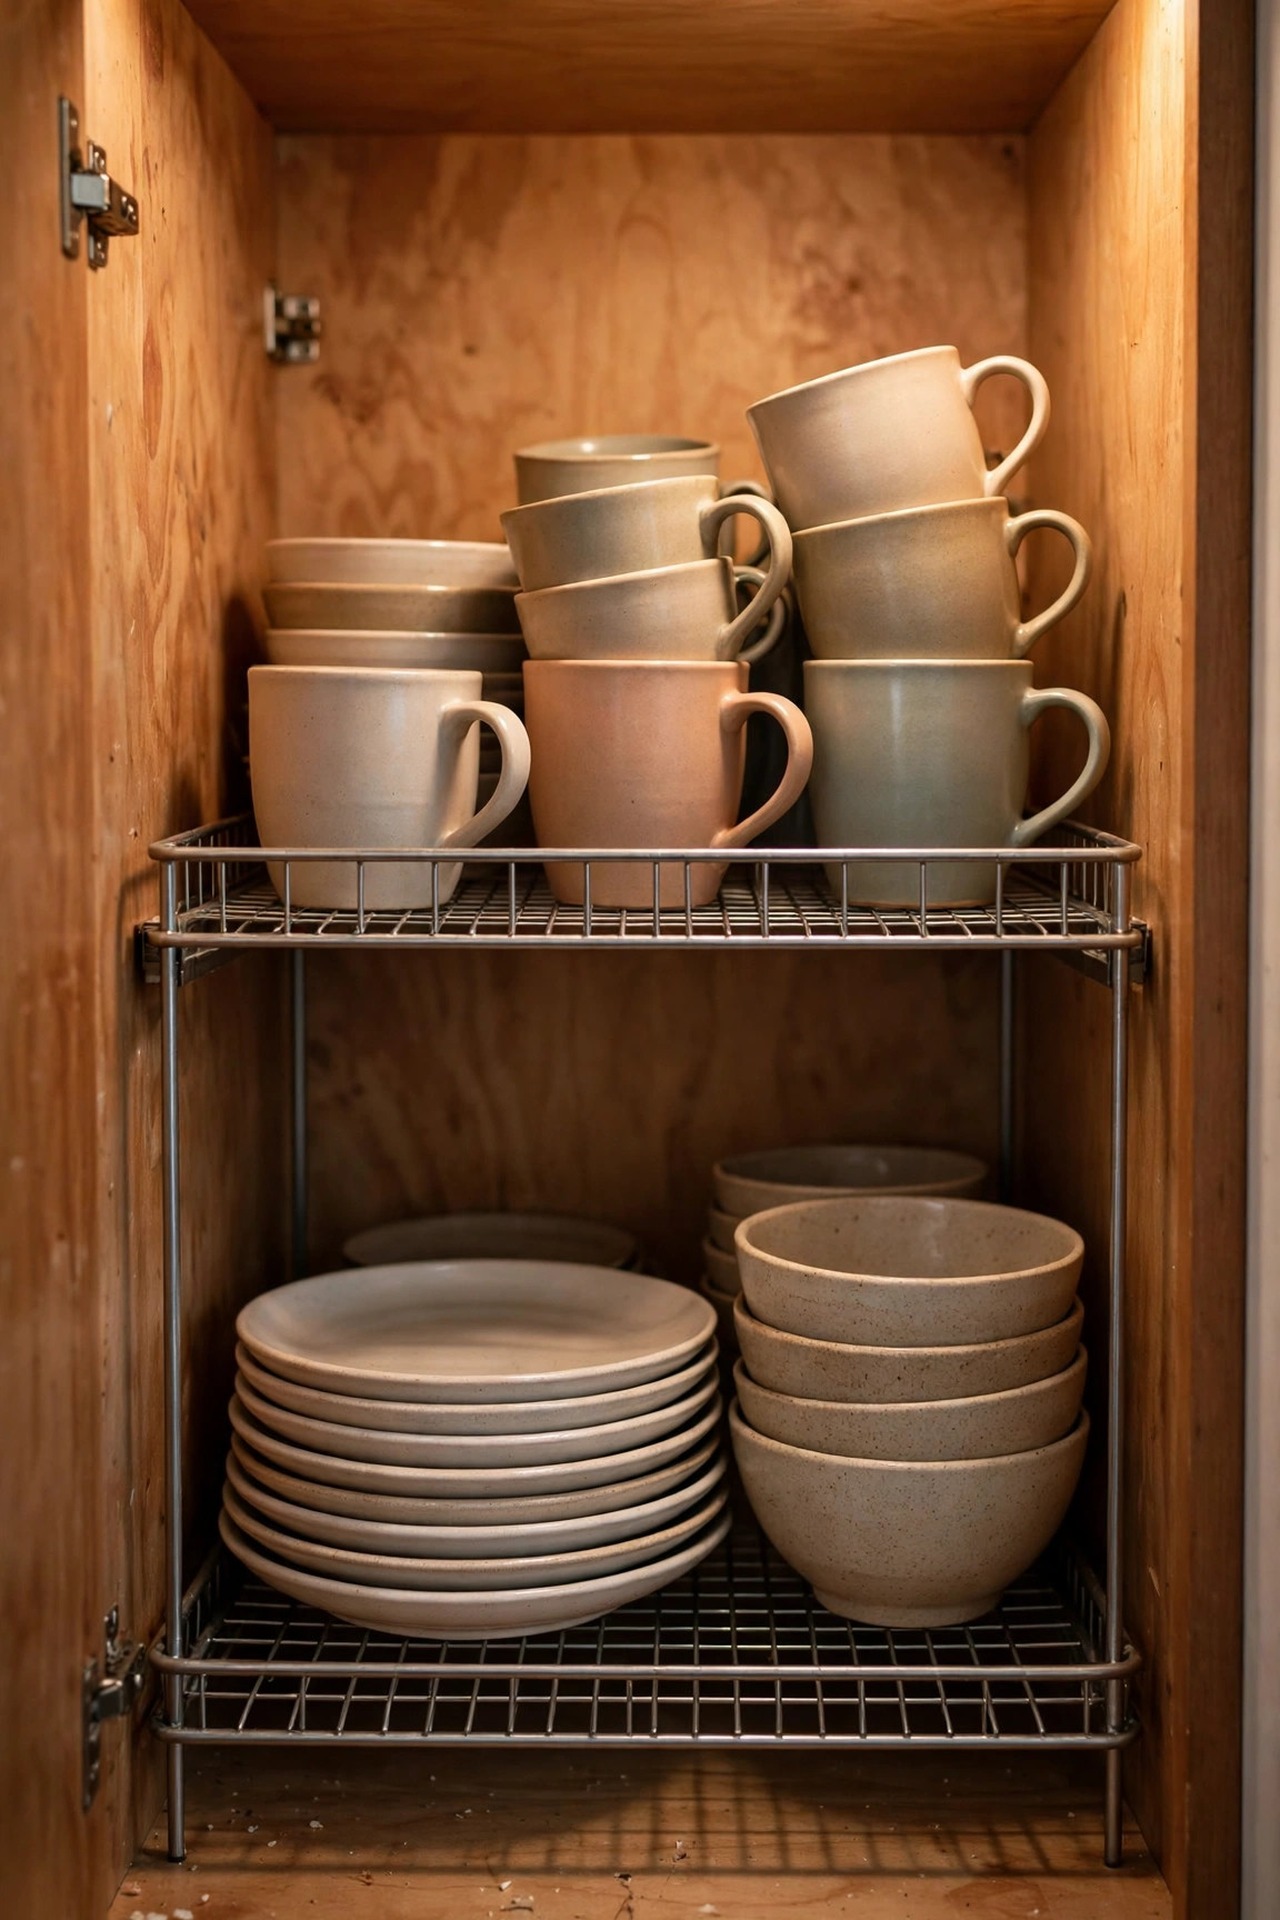
Description: Most cabinet shelves leave 12 to 15 inches of height above a stack of plates, and that air stores nothing. A stackable riser splits the space into two levels, so bowls sit above plates and mugs get their own row. The depth matters more than the width: choose a riser no deeper than 9 inches in a standard 12 inch deep wall cabinet, so doors close without pushing items back off the edge.
Best For: Cabinets with tall empty space above plates, bowls or food storage boxes.
Not Ideal For: Cabinets already fitted with an adjustable shelf you could simply lower; move the shelf first, it is free.
Estimated Cost: $20-$35 (estimate) for a two pack of metal risers.
Budget Note: Measure the cabinet interior before ordering; the wrong depth is the usual reason risers get returned.
Renter Friendly: Yes
Renter Note: Risers stand loose on the shelf and lift out in seconds, leaving no trace.
What You Need
Two stackable shelf risers matched to your cabinet depth, tape measure, the plates and bowls you plan to store.
Product recommendation (verified): Nxconsu 2Pack Cabinet Shelves, Stackable Organizer Rack Riser, Tall version 16.1″W x 8.3″D x 9.5″H
Why it fits: The 8.3 inch depth leaves room inside a 12 inch cabinet for the door to close, the two heights (7.3 and 9.5 inches) suit plates below and bowls above, the listing gives a 50 lb capacity, and the set ships from Amazon, sold by Nxconsu.
Retailer/product page: https://www.amazon.com/dp/B0BCPLLCJ8/ref=pfb_spv01_0a27b4606cb0cb01b5e64fd2de516bc7
How To Do It
- Measure the cabinet’s inside depth and the height from shelf to the underside of the shelf above.
- Set the riser in place and stack it only if the total height still clears the cabinet opening.
- Load plates on the lower level and lighter bowls or mugs on top.
- Close the door slowly to confirm nothing touches the door face or the hinge side.
Pro Tip
Put the riser toward the back of the cabinet and keep the front 3 inches of the main shelf empty; that landing strip is where you set things down while loading.
4. Hang Baskets Under the Shelves You Already Have
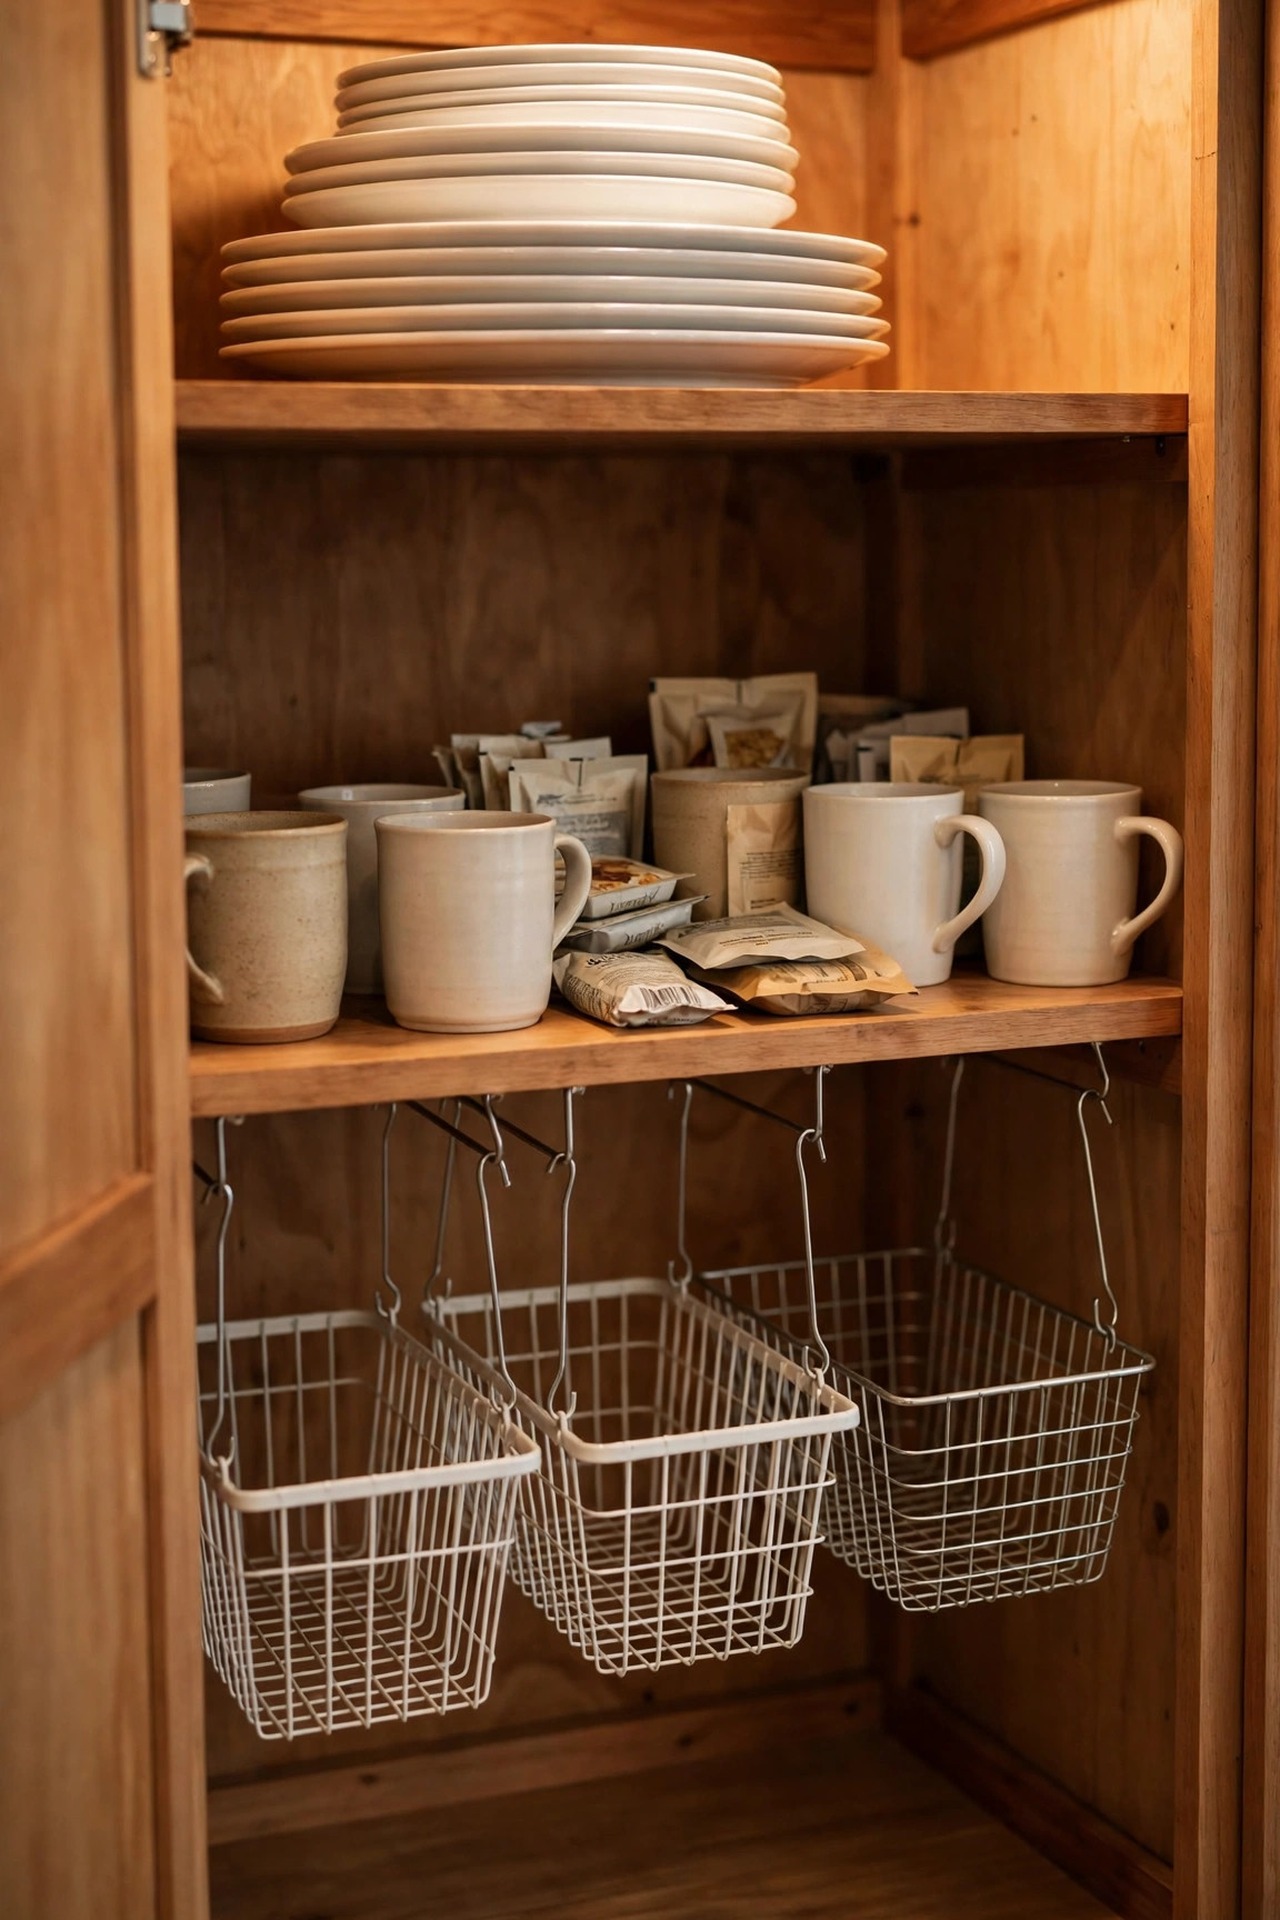
Description: The underside of a cabinet shelf is storage nobody uses. A slide-in basket hangs from the shelf itself and holds mugs, packets or cleaning cloths in the space between shelf levels, without giving up the shelf below. Check two numbers before buying: the shelf board thickness the clamp accepts, and the drop of the basket, which needs about 5 inches of clear height inside for mugs to fit without scraping.
Best For: Cabinets and pantries where shelf levels are far apart and small items get buried.
Not Ideal For: Cabinets with very thick framed shelves or adjustable shelves with metal support pins in the way.
Estimated Cost: $18-$30 (estimate) for a two pack of slide-in baskets.
Budget Note: Two baskets in the busiest cabinet beat four spread around cabinets you open once a week.
Renter Friendly: Yes
Renter Note: The baskets clamp onto the shelf edge and slide off again, so there is nothing to repair when you move.
What You Need
Two under-shelf baskets, tape measure for the shelf board thickness, mugs or packets to store.
Product recommendation (verified): Nxconsu 2Pack Under Shelf Storage Basket Organizer, Hanging Holder, White, Small, 11.02″W x 8.85″D x 7.08″H
Why it fits: The clamp fits shelf boards from 0.2 to 1.77 inches thick, the basket gives about 4.88 inches of usable height for mugs and packets, and the set ships from Amazon, sold by Nxconsu.
Retailer/product page: https://www.amazon.com/dp/B0GCD1S98X/ref=cm_sw_r_cso_fm_apin_ct_D88WH1KKGC0GK55X40Y1
How To Do It
- Measure the thickness of the shelf board and confirm it falls inside the clamp range.
- Slide the basket onto the shelf from the front and tighten the clamp by hand.
- Load the tallest item first and check it clears the shelf below as the cabinet door closes.
- Keep heavy jars out; these baskets are for light items like mugs, packets and cloths.
Pro Tip
Hang one basket directly above where you stand to make tea or coffee; small daily items stored at the point of use stop migrating onto the counter.
5. Use the Inside of the Cabinet Doors
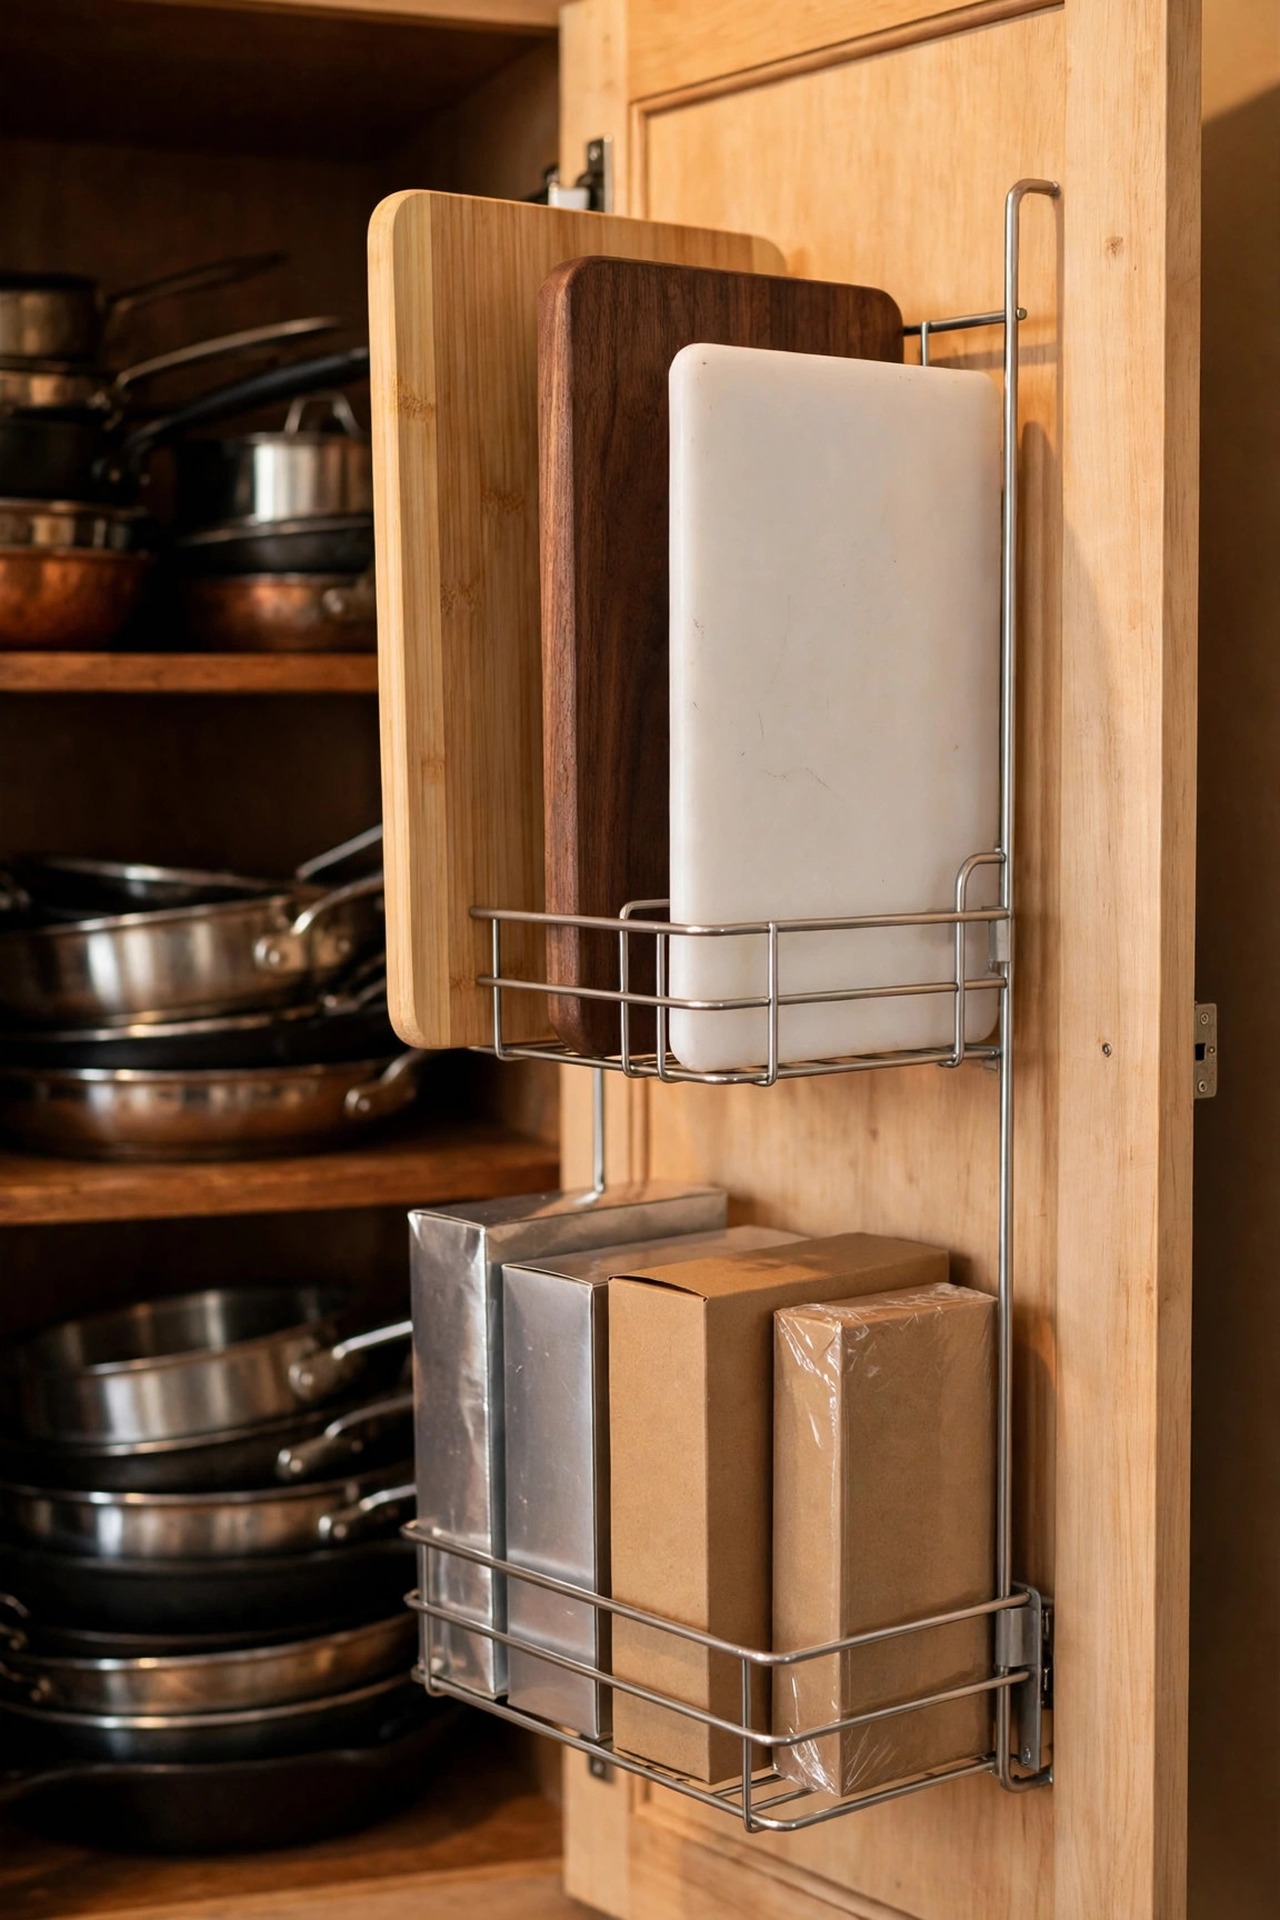
Description: Cutting boards, baking trays and foil boxes are flat, awkward and always under something else. A slim rack hooked over the inside of a cabinet door holds them upright in a space that is otherwise empty air. The honest check is clearance: the rack and its contents together need about 3 inches inside the door, so measure what is stored behind the door first, and test the close with your thickest board before loading the rest.
Best For: Small kitchens short on drawers for boards, trays and wraps.
Not Ideal For: Narrow doors under 12 inches wide, or cabinets where pans already reach the door face.
Estimated Cost: $20-$35 (estimate) for a two pack of door racks.
Budget Note: A two pack covers the board door and the wrap door, which is all most small kitchens need.
Renter Friendly: Yes
Renter Note: In hook-on mode the racks need no screws and leave no marks; felt pads protect painted door faces.
What You Need
Two over-door cabinet racks, felt pads, tape measure, your thickest cutting board for a test fit.
Product recommendation (verified): Simple Houseware Over the Cabinet Door Organizer Holder, 2 pack, Silver
Why it fits: The pack gives two sizes (13.5 inch and 12.5 inch wide, both 18.5 inch tall) for boards, wraps and lids, hooks over the door or screw mounts if preferred, and ships from Amazon, sold by EPFamily Direct.
Retailer/product page: https://www.amazon.com/dp/B081K9BSTB
How To Do It
- Measure the inside width of the door and the depth of what is stored behind it.
- Hook the rack over the top of the door and add felt pads at the contact points.
- Load your thickest board first and close the door slowly to confirm clearance.
- Fill the second rack with wrap and foil boxes on the next door along.
Pro Tip
Store boards with the used side facing the door; the clean face stays clean, and boards dry faster upright than stacked flat.
6. Put Knives on a 16 Inch Magnetic Strip
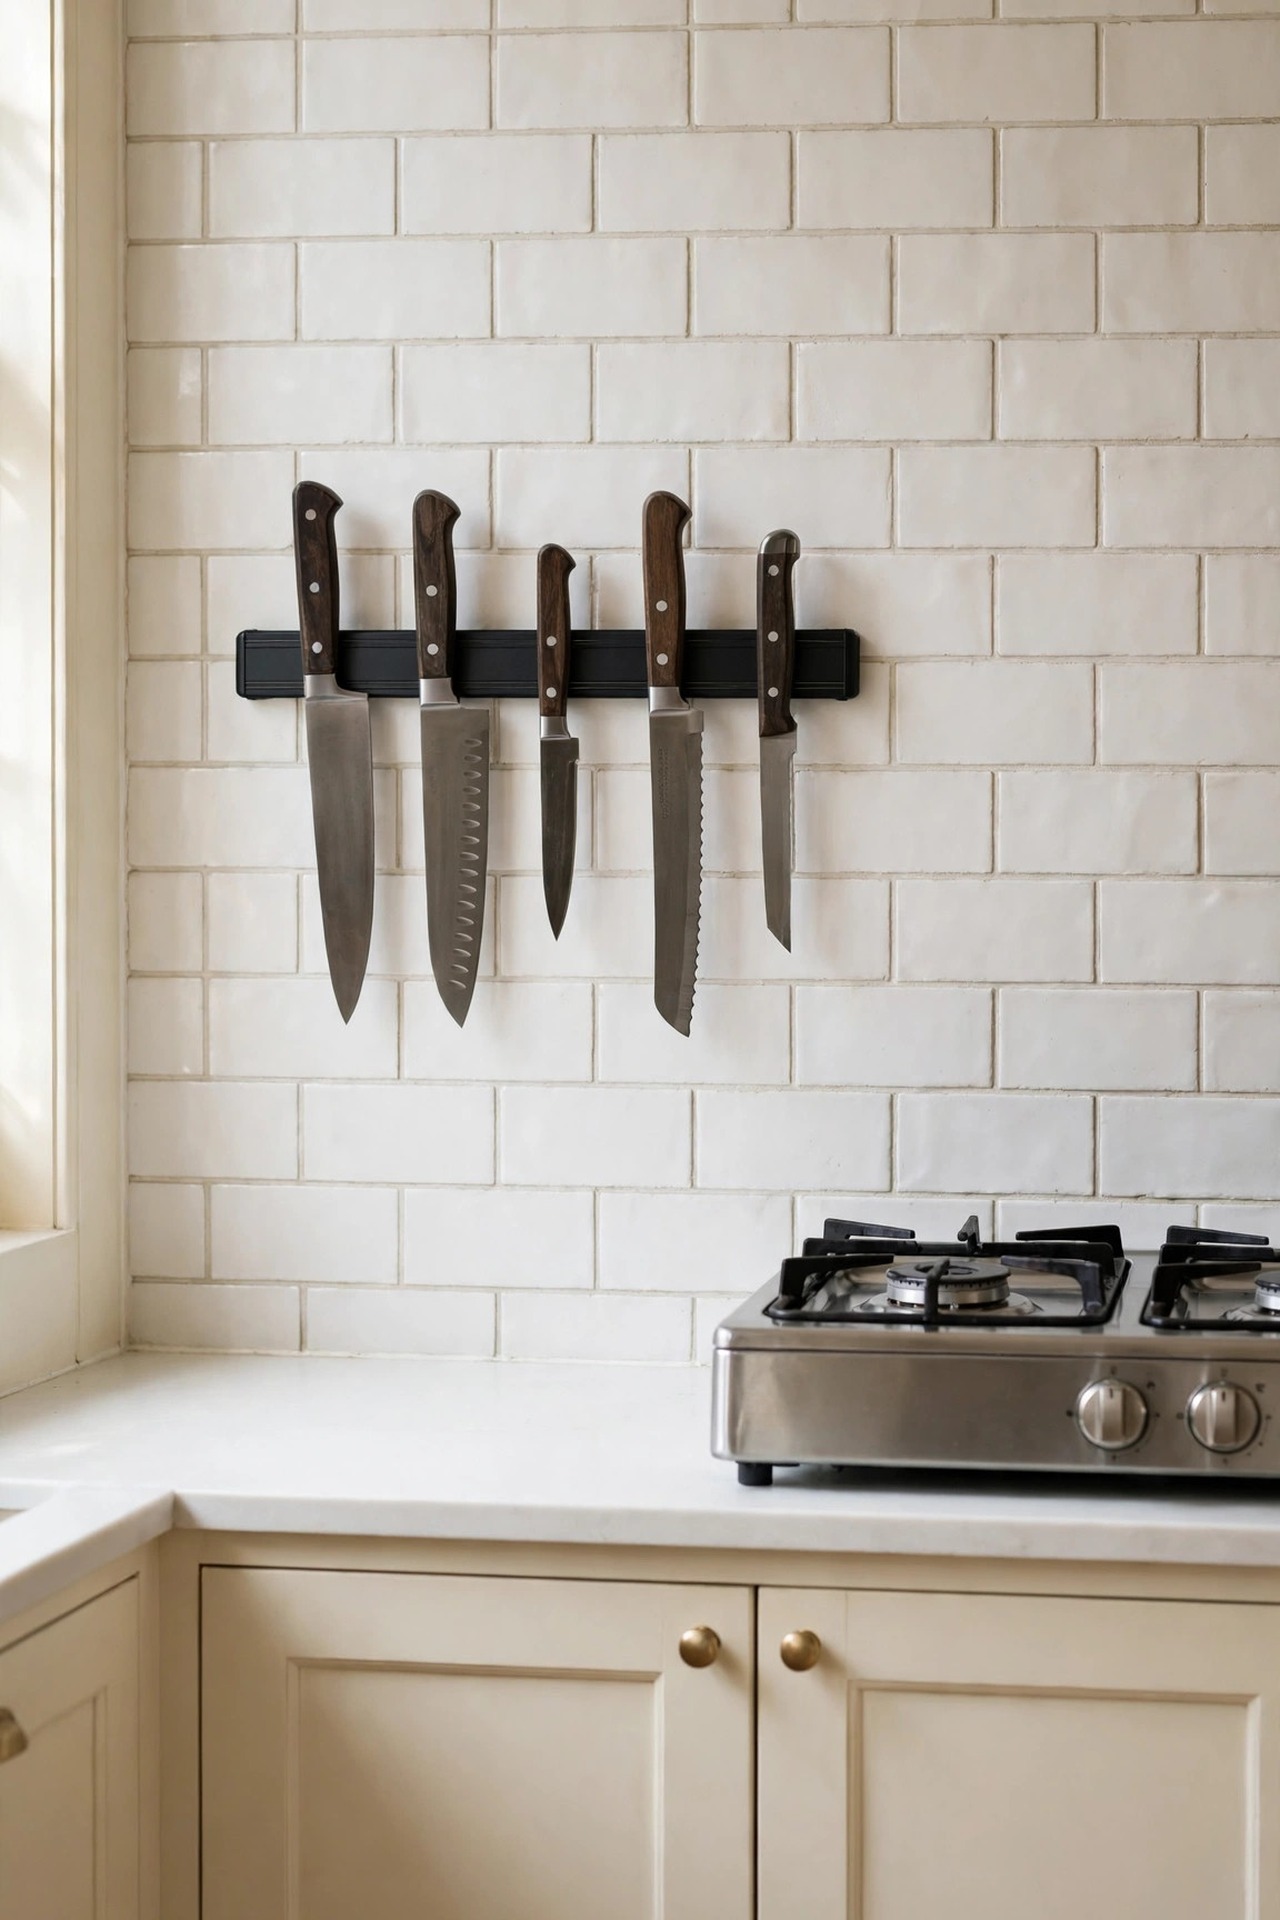
Description: A knife block eats about 8 by 5 inches of counter, which is a real loss on a short run. A magnetic strip puts the same knives on 16 inches of wall you were not using, within reach of the board. Fit it beside the stove or prep zone, high enough that handles clear the counter, and never above a walkway where a falling knife could land. Screw mounting is the secure option; adhesive suits light sets on smooth tile only.
Best For: Kitchens where the knife block sits in the middle of the only prep space.
Not Ideal For: Homes where small children can reach the strip, or walls of rough stone the adhesive cannot grip.
Estimated Cost: $18-$30 (estimate) for a 16 inch strip with hooks.
Budget Note: One strip replaces the block and frees its counter space permanently, so it earns its cost in one move.
Renter Friendly: With Conditions
Renter Note: Use the adhesive mount on smooth tile and keep the set light, or get permission for the two screw holes; the listing advises screws for heavier knives.
What You Need
Magnetic knife strip about 16 inches, adhesive pads or screws and anchors, level, the knives you use weekly.
Product recommendation (partially verified): Dmore Magnetic Knife Holder for Wall, 16 Inch, Black Stainless Steel, with 3 Hooks, No Drilling adhesive tape and screws included
Why it fits: The strip measures 15.7 x 1.77 x 0.59 inches, holds five to eight knives on one short wall run, and offers both adhesive and screw mounting so renters and owners can each fit it properly.
Retailer/product page: https://www.amazon.com/dp/B0BS3Z3B4L/ref=cm_sw_r_fa_ud_dp_CKBJM840689WPF4G5RBY?oas=true
How To Do It
- Choose a wall section beside the prep zone, out of reach of children and clear of the stove’s heat.
- Mark a level line at a height where knife handles hang clear of the counter.
- Fix the strip with screws into studs or sound anchors, or with the adhesive on smooth tile as the maker directs.
- Add knives one at a time, blade edge facing up and away, and check each one holds firm before letting go.
Pro Tip
Leave a finger’s width between knives; crowded blades chip each other’s edges every time one is pulled off the strip.
7. Dry Dishes on a Roll-Up Rack Over the Sink
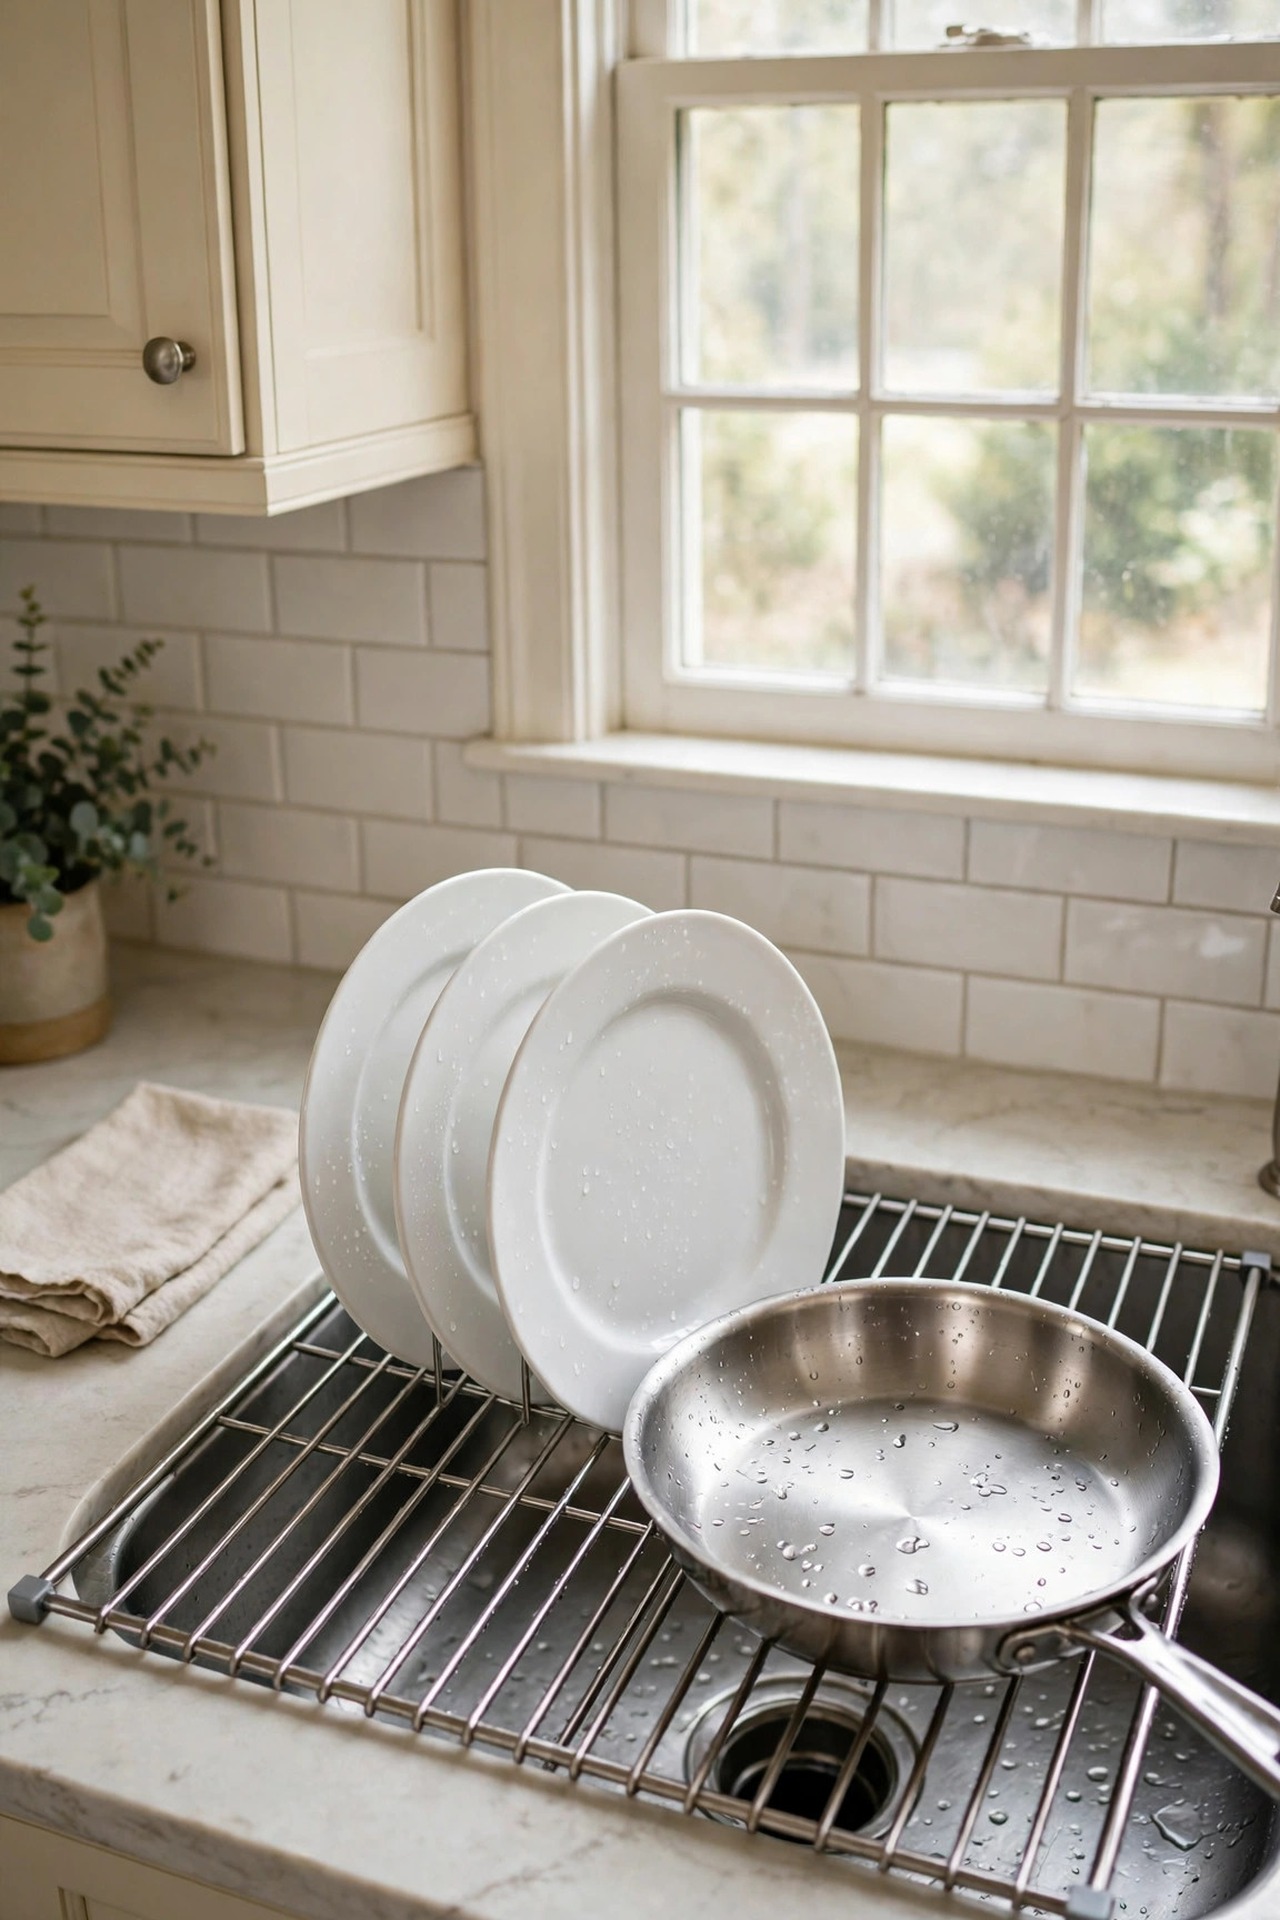
Description: A counter dish rack claims about 17 by 12 inches of the surface a small kitchen can least spare. A roll-up rack unrolls over the sink instead, so dishes drip straight into the bowl, and when everything is put away it rolls into a drawer. The measurement that decides the fit is the sink opening: the rack must be at least 2 inches longer than the sink is wide, so it rests on the counter edges on both sides.
Best For: Kitchens with no dishwasher, or a dishwasher too small for pans and boards.
Not Ideal For: Farmhouse apron-front sinks and very wide double bowls the rack cannot bridge in one piece.
Estimated Cost: $15-$25 (estimate) for a stainless roll-up rack.
Budget Note: Measure the sink before choosing the size; the 17.5 inch size suits most apartment sinks, and the wrong size is the only real way to waste money here.
Renter Friendly: Yes
Renter Note: It rests on the sink edges and stores in a drawer, so nothing is fitted or changed.
What You Need
Roll-up dish rack sized to your sink, tape measure, a drawer or hook for storage.
Product recommendation (verified): MERRYBOX Roll Up Dish Drying Rack, Over The Sink, 17.5″ x 13″, Silicone Coated Steel
Why it fits: The 17.5 x 13 inch size bridges most single apartment sinks, the silicone coated steel rods are heat resistant to 400 degrees so it doubles as a trivet, and it rolls up small enough for a cutlery drawer.
Retailer/product page: https://www.amazon.com/dp/B0BLZ9S52N/ref=cm_sw_r_as_gl_api_gl_i_dl_MFMKGKJA898G7G73D9RD
How To Do It
- Measure the sink opening across the direction the rack will bridge, and add at least 2 inches.
- Unroll the rack over the sink and check both ends rest flat on the counter.
- Load heavy pans in the middle, where the rods are best supported.
- Dry, roll and store the rack after use so the sink stays fully open for prep.
Pro Tip
Keep the rack half rolled as a permanent landing strip for washed vegetables and hot lids; it gives you a work surface over the sink without giving up the bowl.
8. Fit a Pull-Out Organizer Under the Sink
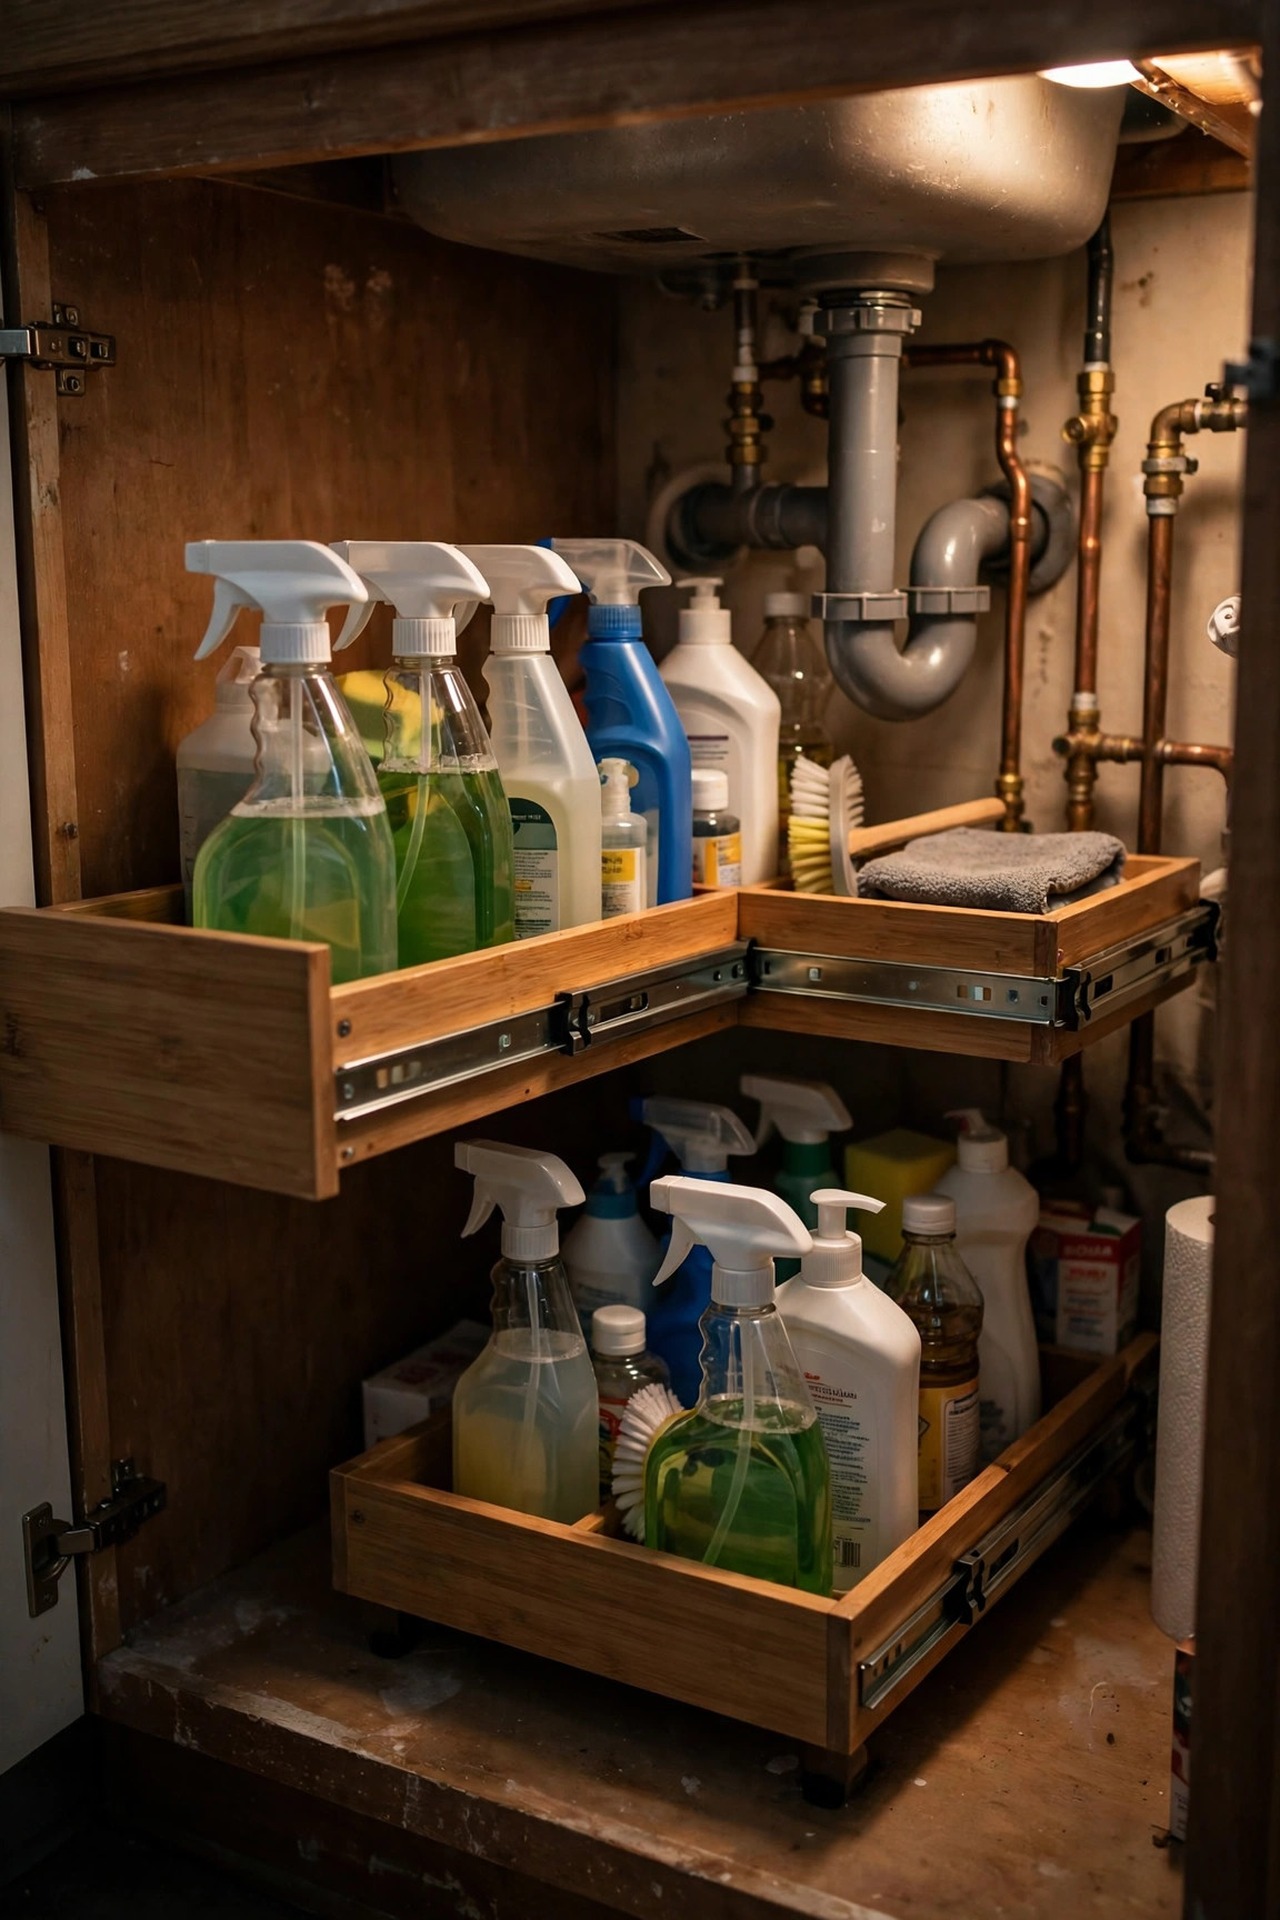
Description: The under-sink cabinet is the deepest space in a small kitchen and usually the least usable, because the pipes split it into odd corners and everything hides at the back. An L-shaped pull-out organizer wraps around the plumbing, with a narrow top basket beside the trap and a wide sliding drawer below for bottles. Measure the cabinet’s inside width and the position of the trap before ordering; the trap, not the cabinet, sets the real limit.
Best For: Under-sink cabinets where bottles get lost behind the pipes.
Not Ideal For: Cabinets with a low trap and a disposal unit filling most of the width; measure those carefully first.
Estimated Cost: $35-$55 (estimate) for a two pack of steel organizers.
Budget Note: A two pack suits a kitchen sink and a bathroom sink in one order, which brings the per-cabinet cost down.
Renter Friendly: Yes
Renter Note: The units stand on the cabinet floor and anchor with suction cups or pads, so there is no drilling and nothing to undo.
What You Need
Two L-shaped pull-out organizers, tape measure, a mat for the cabinet floor, cleaning bottles to load.
Product recommendation (verified): REALINN Under Sink Organizer and Storage, 2 Pack, Pull Out Cabinet Organizer, L-Shape, 14.2 x 10.6 x 11 inches
Why it fits: The assembled size of 14.2 x 10.6 x 11 inches fits a standard sink base, the narrow 4.8 inch top basket leaves room for the trap, the steel frame is rated to 50 lb, and the bottom tier holds bottles up to 8 inches tall.
Retailer/product page: https://www.amazon.com/dp/B0C5DBMYZF/ref=tsm_1_fb_lk
How To Do It
- Empty the cabinet and measure its inside width, depth and the trap position.
- Build the organizer outside the cabinet and choose which side the top basket sits on to suit your pipes.
- Slide it in, set it level, and fix the suction cups or pads so it does not creep forward.
- Load tall bottles in the bottom drawer and small items in the top basket, then test the slide with a full load.
Pro Tip
Photograph the pipe layout with measurements before ordering any under-sink storage; the photo ends the guesswork that causes most returns in this category.
9. Turn a Closet or Pantry Door Into Storage
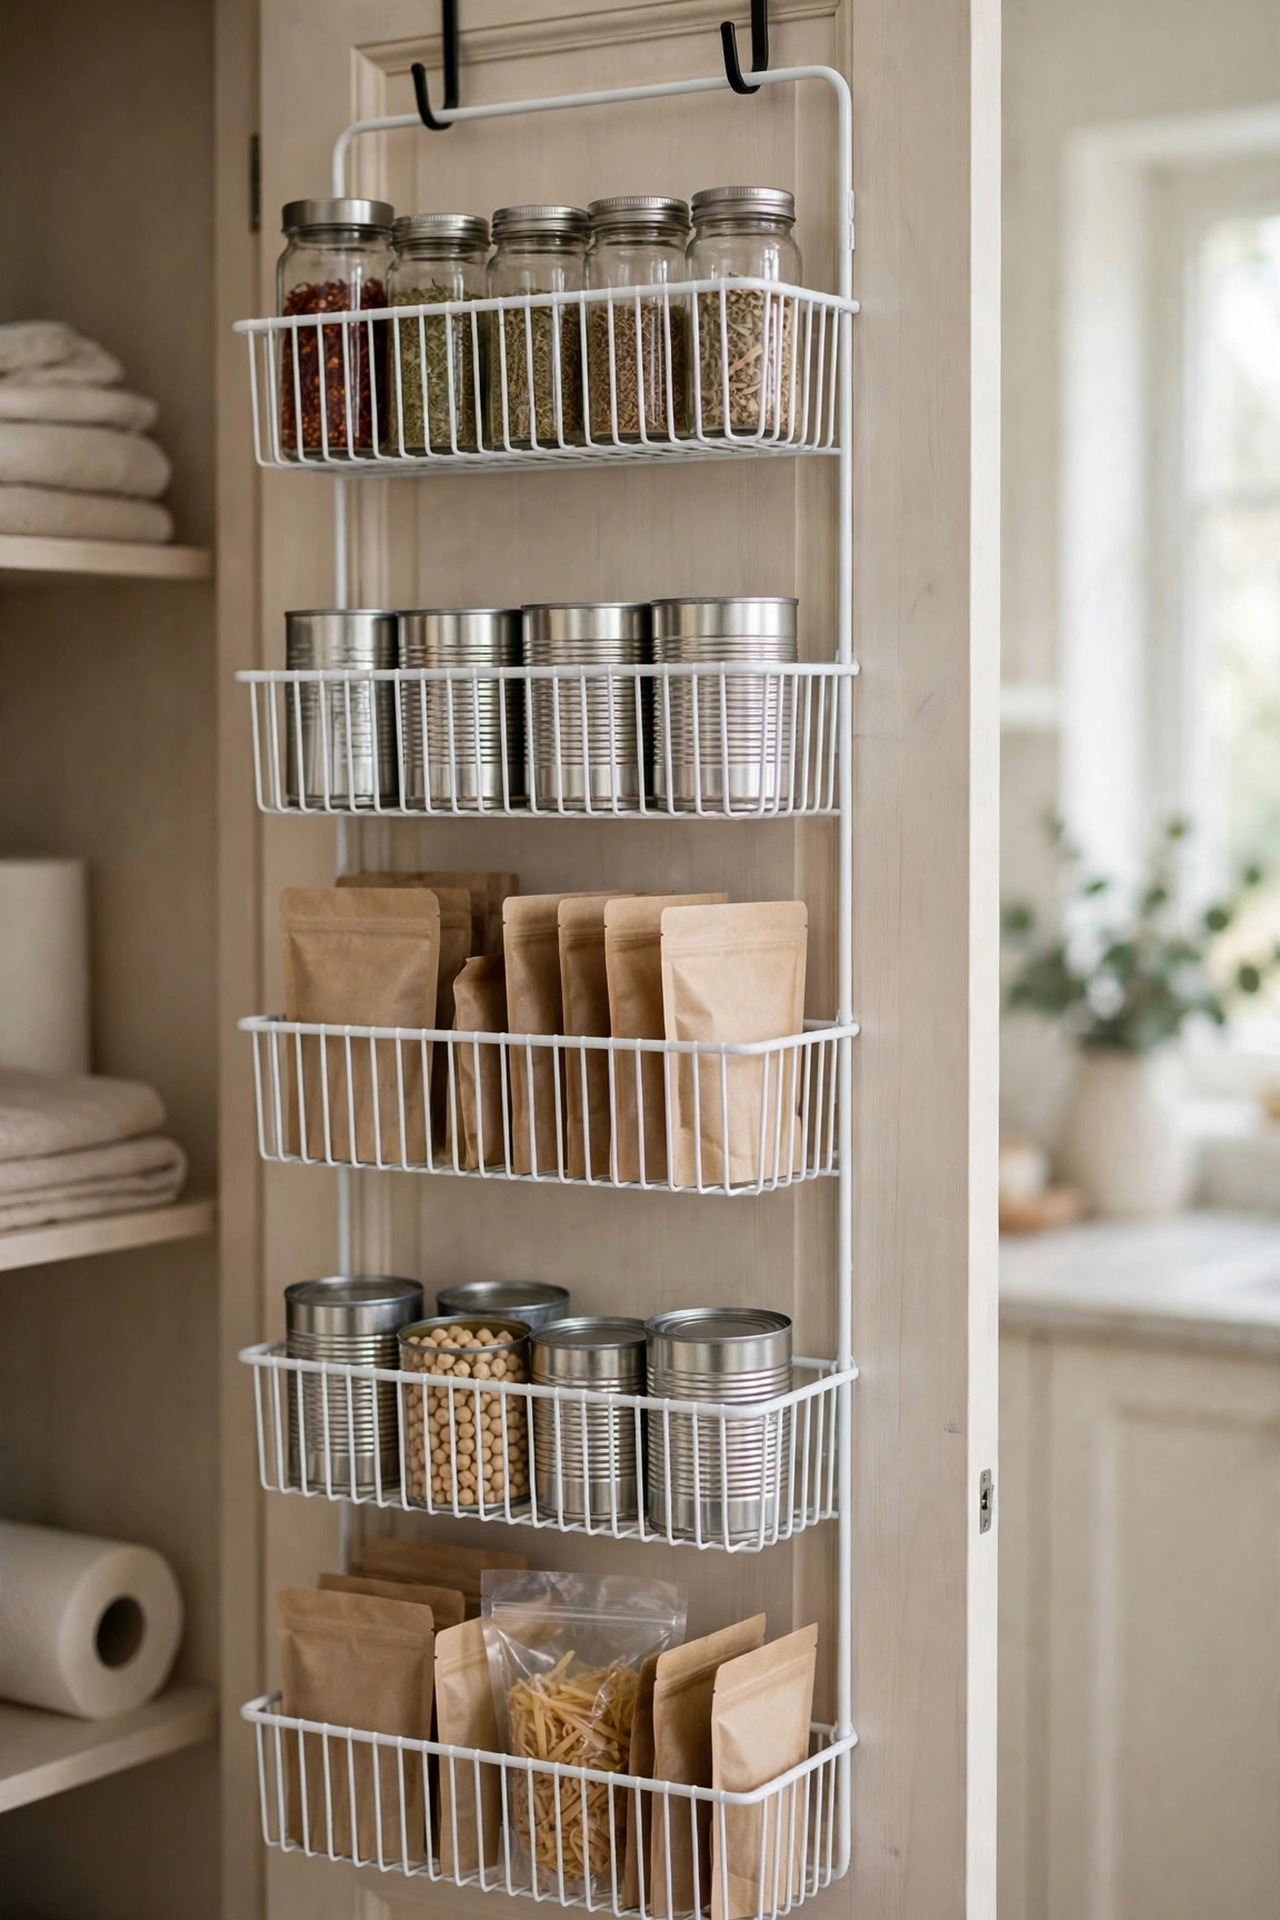
Description: A small kitchen with no pantry still has doors, and the inside face of a closet or kitchen door is flat storage going to waste. An over-door rack with adjustable baskets holds spices, cans and packets across six to eight tiers without taking one inch of floor or shelf. Two checks decide the fit: the door must still close with the rack loaded, which needs about 6.5 inches of clear space behind it, and the hooks must match your door thickness.
Best For: Apartments with a hall closet, laundry door or kitchen door near the cooking zone.
Not Ideal For: Doors that open against a fridge or shelves with less than 6.5 inches of clearance behind them.
Estimated Cost: $40-$65 (estimate) for an eight tier metal rack.
Budget Note: Adjustable baskets matter more than basket count; fixed tiers waste the tall spaces between bottles.
Renter Friendly: Yes
Renter Note: The rack hangs on hooks over the door with no screws; add the maker’s adhesive pads so it does not swing or rattle against the door.
What You Need
Over-door pantry rack with adjustable baskets, tape measure, felt or adhesive pads, spices and cans to load.
Product recommendation (verified): Moforoco Over The Door Pantry Organizer, White, 8-Tier, 16.5″W x 6.06″D x 74.8″H
Why it fits: The 16.5 inch width suits standard doors, the eight adjustable baskets are rated at 25 lb each, the hooks fit doors up to about 1.97 inches thick, and the listing confirms it ships from Amazon, sold by MOFOROCO.
Retailer/product page: https://www.amazon.com/dp/B0BX7NYGWB/ref=cm_sw_r_as_gl_api_gl_i_dl_DP54S1KQZAFAGF39BYMR
How To Do It
- Measure the door thickness, the door width, and the clear depth behind the door when it is closed.
- Hang the frame on its hooks and check the door still closes and latches without forcing.
- Clip the baskets on at heights matched to your tallest bottles, not at even spacing.
- Load heavy cans on the lowest baskets and light packets at the top, then add pads to stop any swing.
Pro Tip
Give the top two baskets to daily spices and keep bulk refills low; a door rack works best as a working store, not a warehouse.
10. Fold Down a Wall Table for Breakfast and Extra Prep
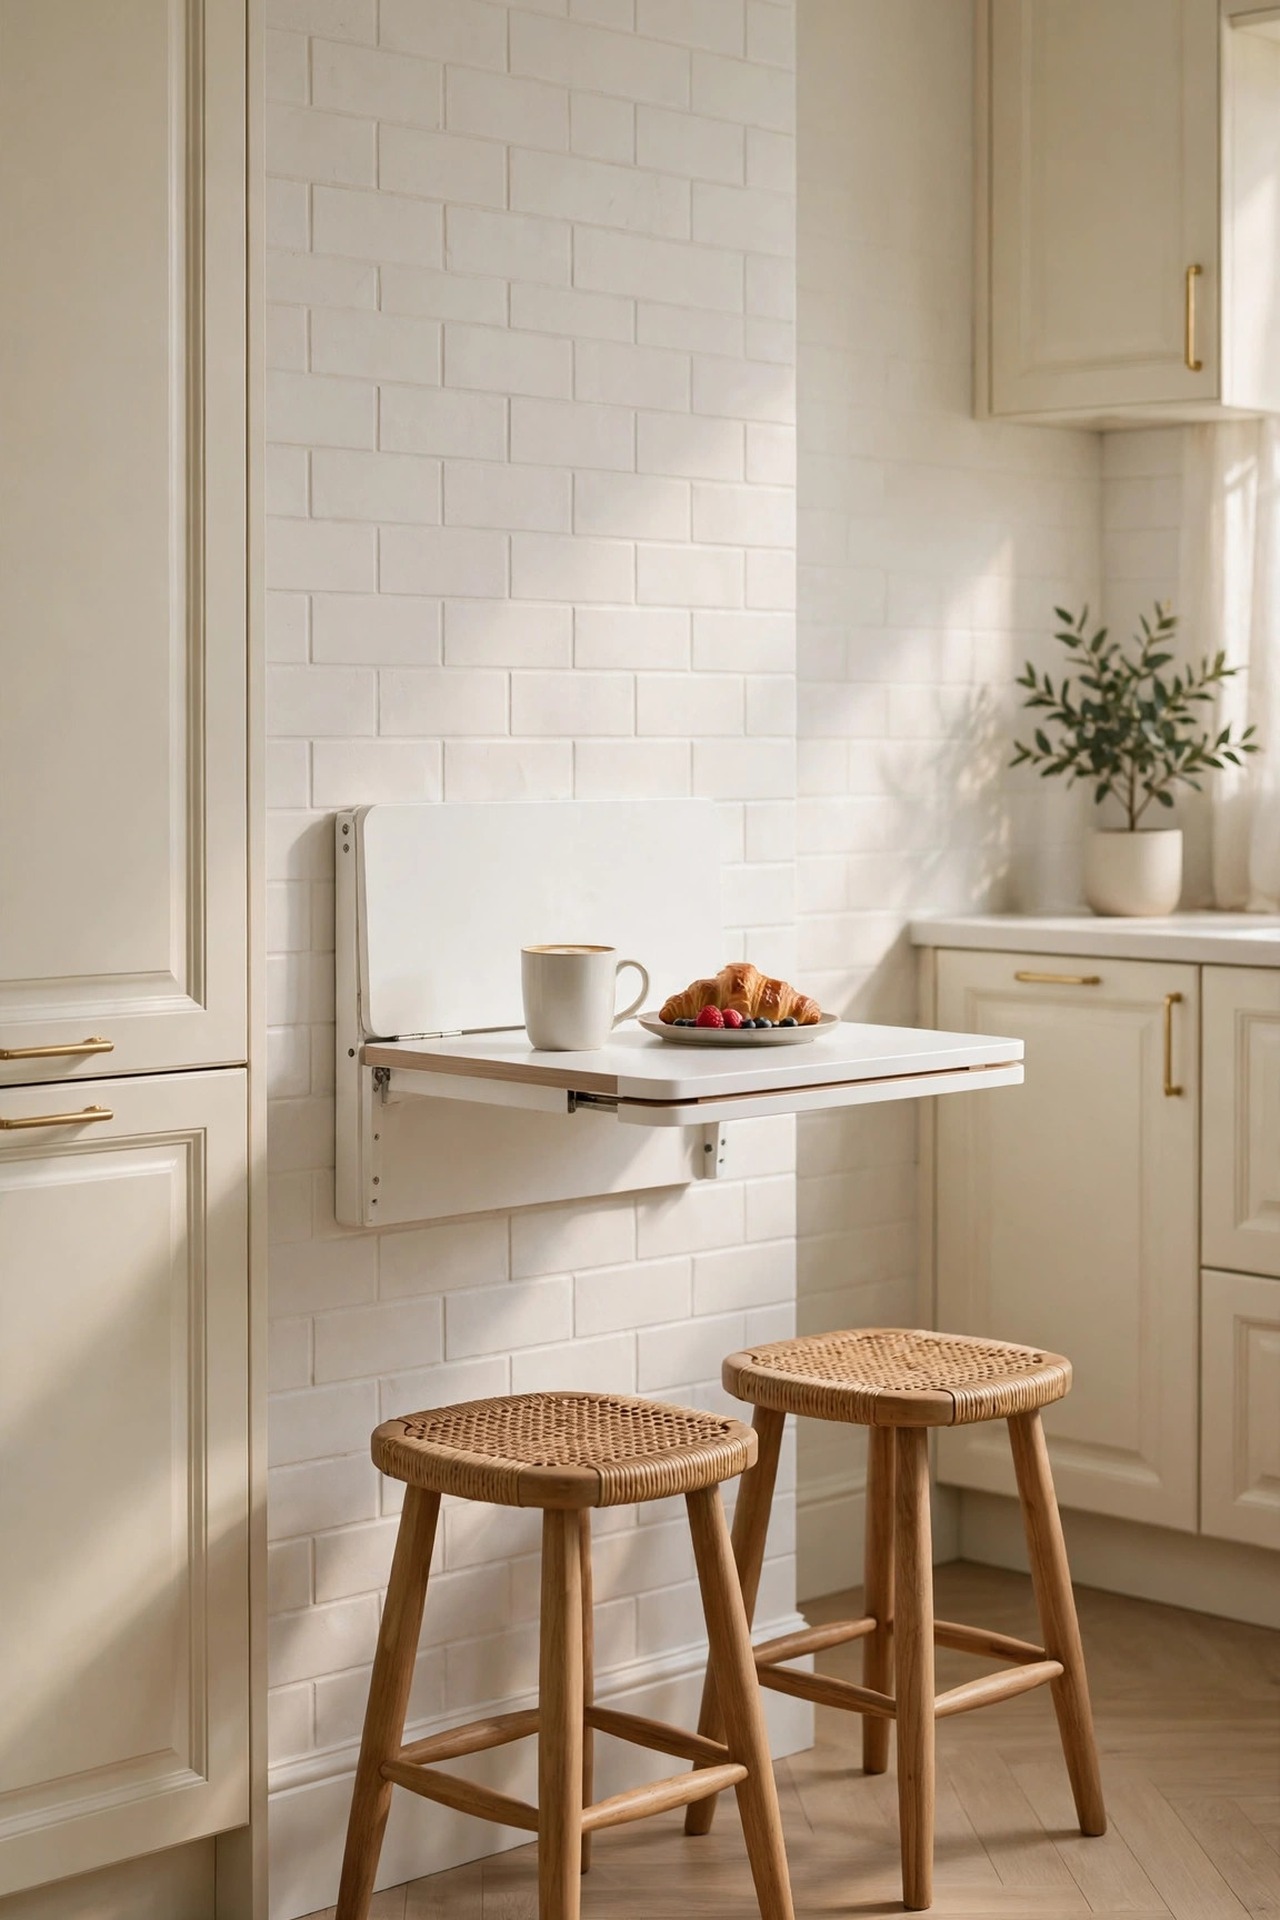
Description: A small kitchen often has no table and no spare counter at the same time. A wall mounted fold-down table gives you a breakfast spot for one or two and a second prep surface, then folds flat against the wall to about 6 inches deep. Be honest about the size: a top around 20 by 16 inches suits a laptop or a plate and mug, not a family dinner, and the brackets must fix into studs or solid anchors to carry weight.
Best For: Studio and one-bedroom apartments with one clear wall section and no dining space.
Not Ideal For: Walls of thin plasterboard with no stud where the table must go, or homes needing seating for three or more.
Estimated Cost: $35-$60 (estimate) for a small wall mounted folding table.
Budget Note: The hardware decides the safety of the whole idea, so buy the table with rated brackets rather than the cheapest top alone.
Renter Friendly: No
Renter Note: The brackets screw into the wall, so this one needs landlord permission; renters without it should use the rolling cart in idea 1 as the extra surface instead.
What You Need
Wall mounted folding table with iron brackets, stud finder, level, drill, screws and anchors rated for the load, two folding stools.
Product recommendation (partially verified): HOOBRO Folding Table, Wall Mounted Desk, Drop Leaf Table for Small Spaces, White, 19.6″L x 15.7″W (WT054BZ01)
Why it fits: The 19.6 x 15.7 inch top is honestly sized for breakfast for one or extra prep, the iron bracket folds the table flat against the wall, and the white finish suits the cream palette used through this list.
Retailer/product page: https://www.amazon.com/dp/B0D9Q3VDTX
How To Do It
- Find the studs on the chosen wall and mark the bracket positions at standard table height, about 29 to 30 inches.
- Fix the brackets into studs or solid anchors and check them with a level before fitting the top.
- Fit the top, open and close it several times, and confirm the latch holds in both positions.
- Test with a firm downward press before trusting it with a hot dish or a laptop.
Pro Tip
Mount the table on the wall nearest the kitchen’s natural light; a breakfast spot in the sun gets used daily, and one in a dark corner becomes a shelf.
11. Give the Trash a Slim 10 Inch Home
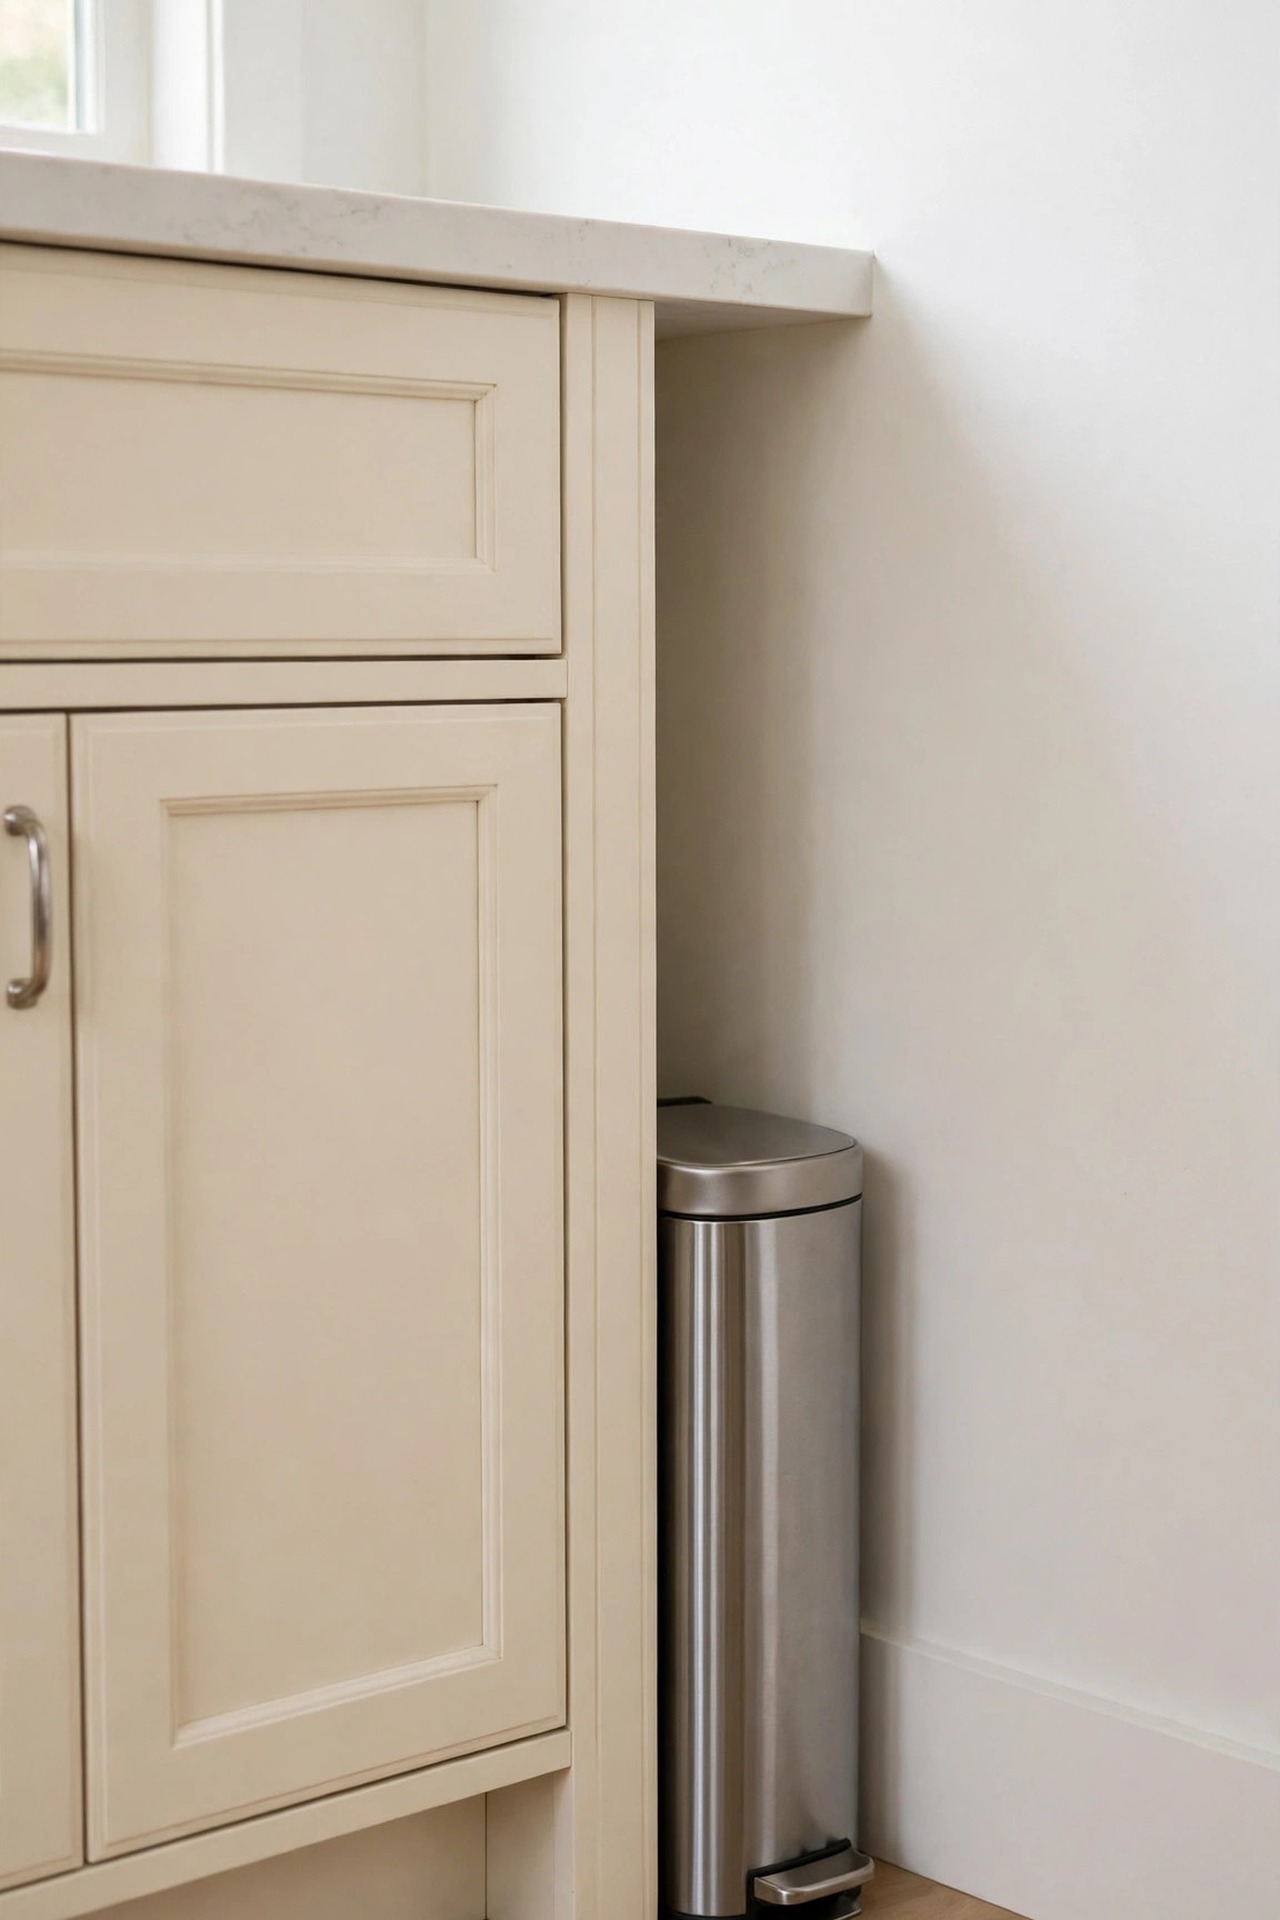
Description: A round trash can steals a circle of floor about 13 inches wide and still leaves dead corners around it. A slim rectangular can about 10 inches wide slides into the end gap of a cabinet run or beside the fridge and holds a full kitchen bag size. Check the lid swing before choosing the spot: the lid needs its full height again in clear space above, and the pedal needs a few inches of toe room in front.
Best For: Kitchens where the trash can currently blocks a cupboard door or the walkway.
Not Ideal For: Households filling more than a 10 gallon bag a day; a slim can needs emptying more often, not less.
Estimated Cost: $55-$85 (estimate) for a 40 litre slim step can.
Budget Note: A steel pedal and a close-fitting liner cost more up front but stop the bag slipping that makes cheap cans annoying daily.
Renter Friendly: Yes
Renter Note: It stands on the floor and moves with you; felt pads under the base protect rented floors from scuffs.
What You Need
Slim step can around 10 inches wide, tape measure, liners matched to the can size.
Product recommendation (verified): simplehuman 40 Liter / 10.6 Gallon Slim Kitchen Step Trash Can with Secure Slide Lock, Black Plastic
Why it fits: The body measures 18.6″L x 10.1″W x 24.9″H, so it fits the end gap of a standard cabinet run while still taking full size kitchen bags, and the slide lock keeps the lid shut against pets.
Retailer/product page: https://www.amazon.com/dp/B004L9L42O/ref=cm_sw_r_cso_cp_apin_dp_0P7D6HBF6TPNRDNFQ3RN
How To Do It
- Measure the gap’s width and depth, then check the height the open lid will need above the can.
- Set the can in place and test the pedal with the cupboard doors on both sides open and closed.
- Fit a liner and confirm the lid closes fully without catching the bag edge.
- Keep recycling in a separate small bin so the slim can is not emptied twice a day.
Pro Tip
Place the can at the end of the run nearest the prep zone, not beside the stove; peelings travel two steps, and the cooking walkway stays clear.
12. Step the Spices Up on a Bamboo Shelf
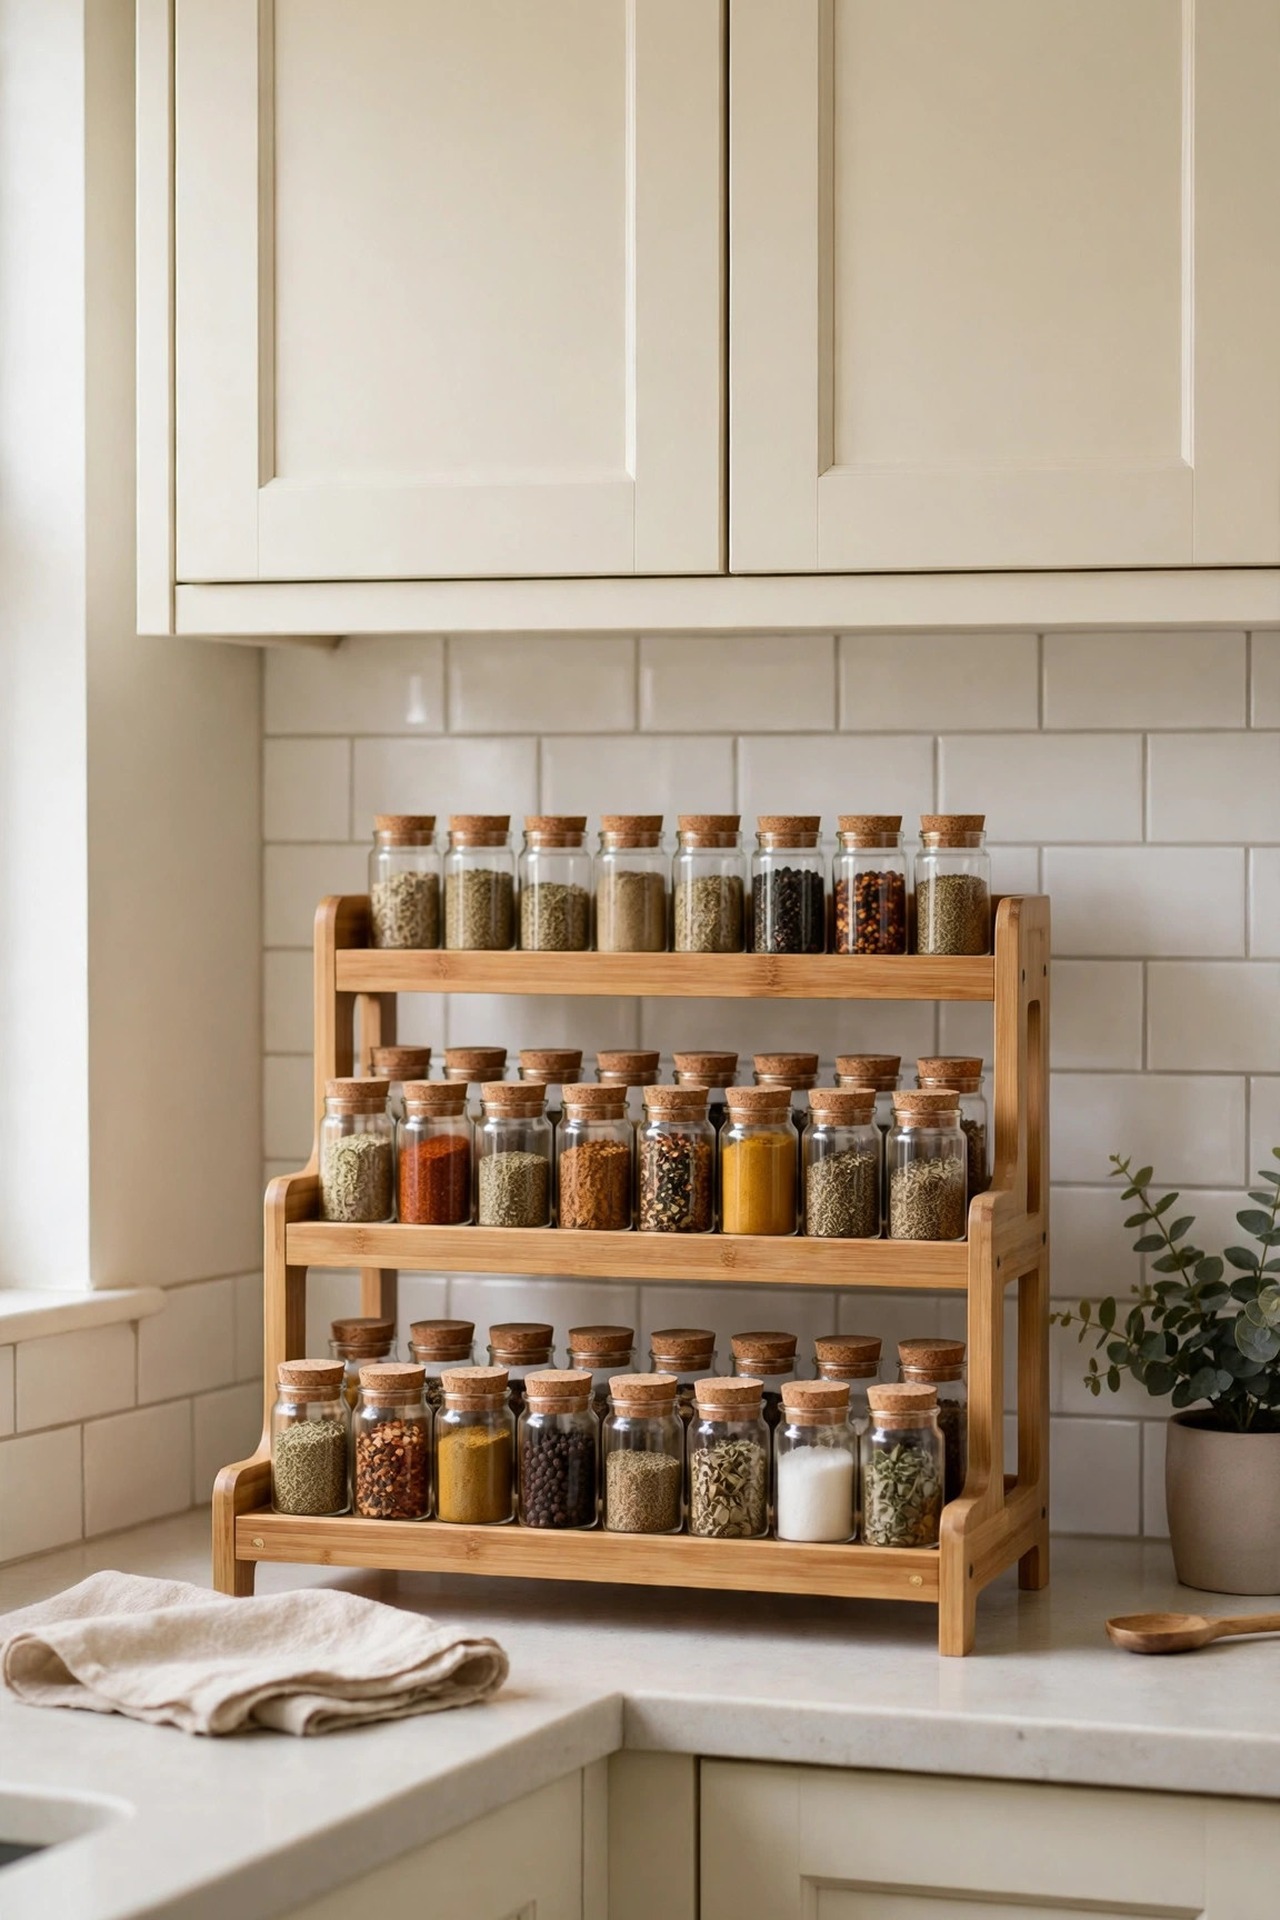
Description: Spices stored one layer deep in a cabinet mean you buy a third jar of cumin because the first two are hidden at the back. A three tier step shelf raises each row above the one in front, so every label reads at a glance, inside a footprint about 15 inches wide and 8 inches deep. An expandable shelf suits a growing collection better than a fixed one, because it starts narrow and widens only when the jars demand it.
Best For: Cooks with 15 or more spice jars sharing one cabinet shelf or a short counter section.
Not Ideal For: Very deep cabinets where a counter-depth step shelf still leaves a hidden row behind it; use the door rack in idea 9 there.
Estimated Cost: $20-$35 (estimate) for an expandable bamboo step shelf.
Budget Note: Bamboo wipes clean and does not rust near the sink, so one shelf lasts through several kitchen reorganizations.
Renter Friendly: Yes
Renter Note: It stands loose in the cabinet or on the counter and needs no fixing at all.
What You Need
Expandable three tier step shelf, the spice jars you own, a cloth for wiping the shelf.
Product recommendation (partially verified): Seville Classics Bamboo 3-Tier Step Shelf Spice Rack, Expandable 8.5″ to 15″ W (BMB17040)
Why it fits: The shelf expands from 8.75 to 15.5 inches wide with an 8.25 inch depth, so it fits a standard cabinet shelf or a short counter run, and the three steps keep back row labels visible above the front row.
Retailer/product page: https://www.amazon.com/dp/B001E2864K/ref=pfb_NUL_1_2_1431163990279Yl
How To Do It
- Count your jars and set the shelf width to hold them in three rows with a little room to grow.
- Place the shelf in the cabinet or on the counter where you season food, not where you store it.
- Load the tallest jars on the top step and the everyday spices at the front.
- Wipe the bamboo dry after sink-side use; it should not sit in standing water.
Pro Tip
Arrange by how often you cook with each spice, not alphabetically; the front row should be the five jars you reach for every week.
13. Swap Bulky Bowls for Collapsible Ones
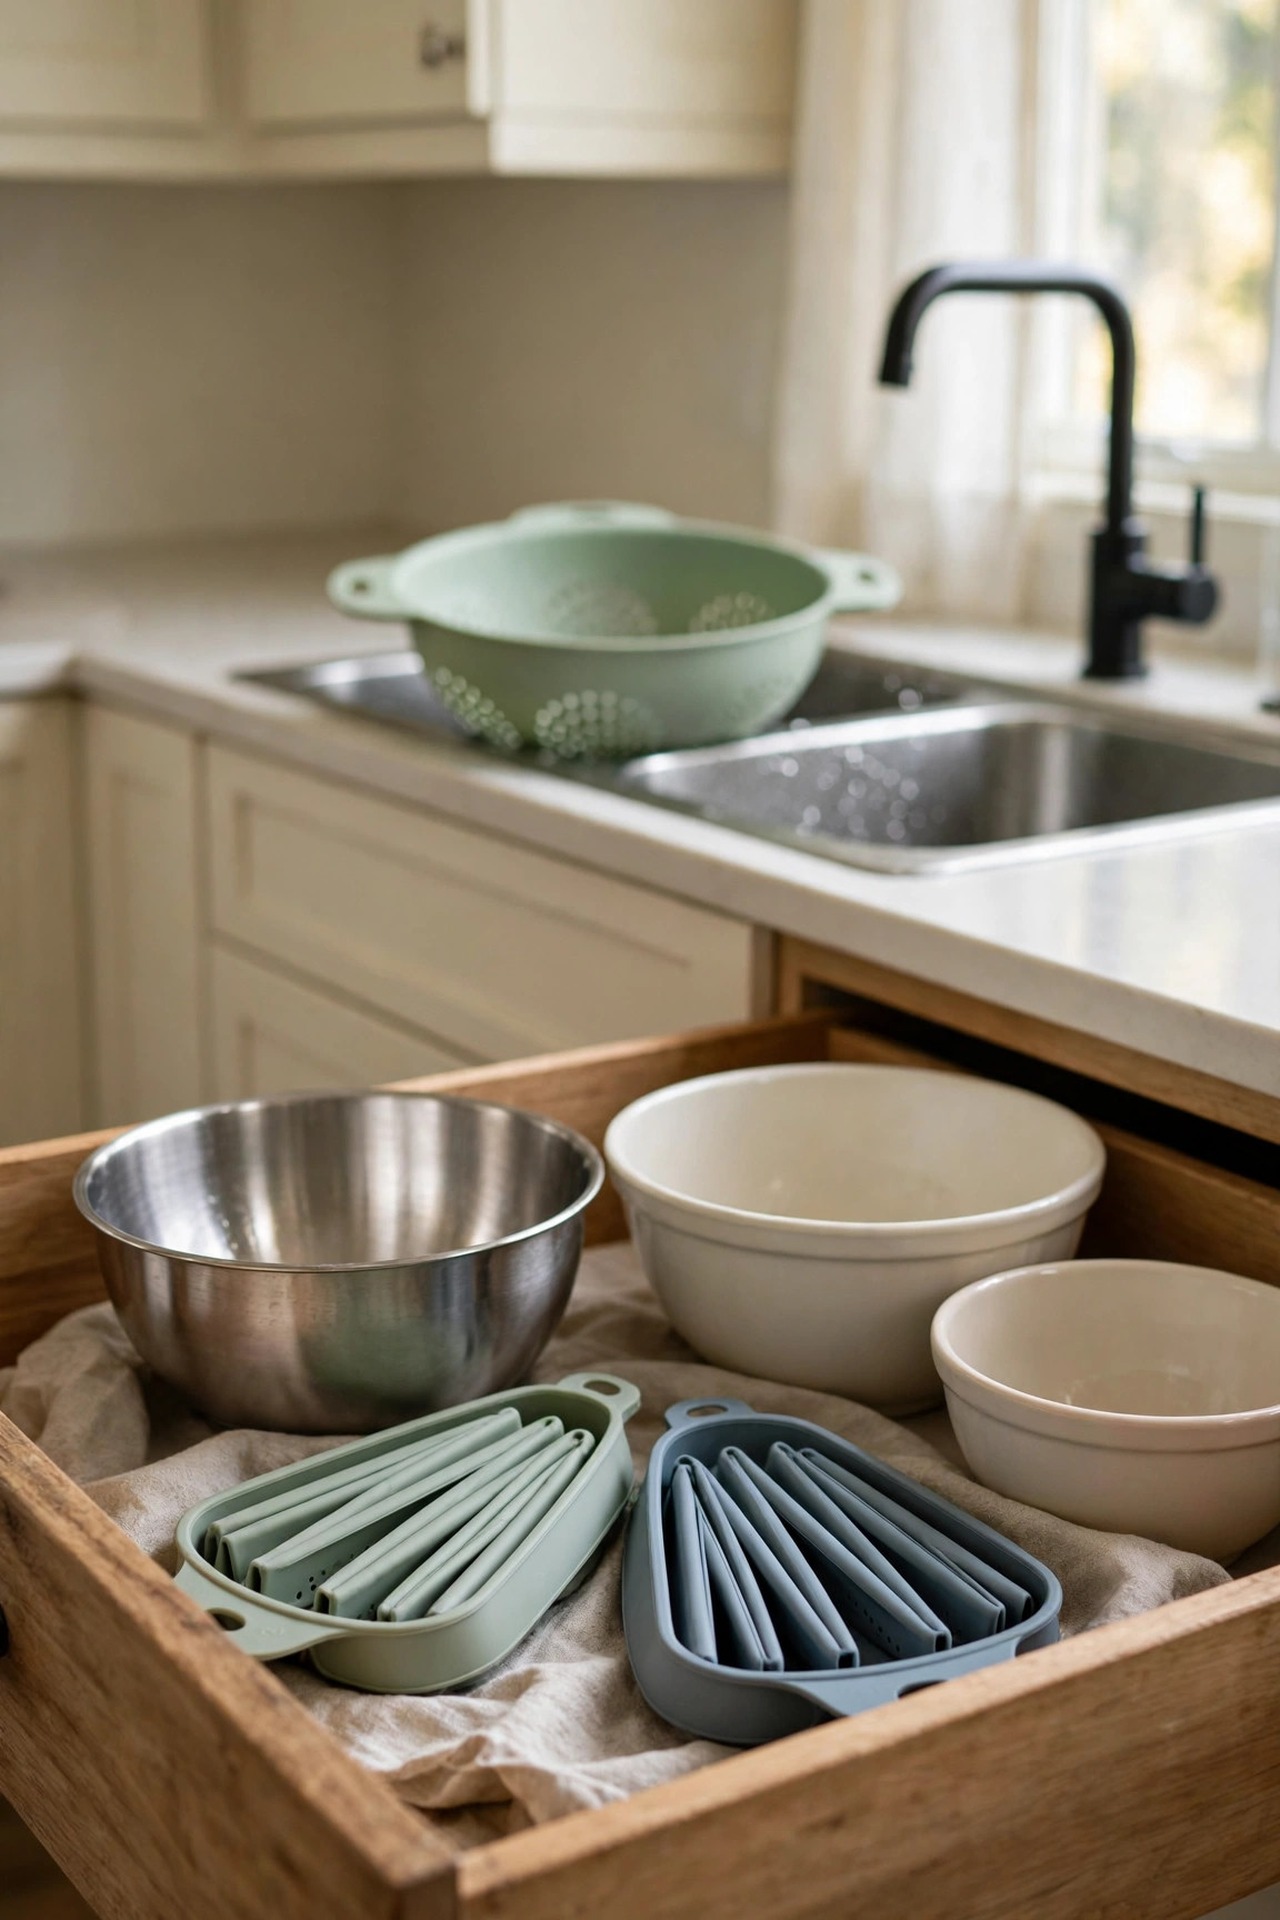
Description: A rigid colander is mostly air, and it claims the same cabinet space as a stack of bowls. Collapsible colanders fold to about 1.3 inches high, so two of them store in a drawer or hang flat inside a door, then open to full size for pasta and vegetables. Check the open size against your sink and your biggest pot of pasta; a 4 and 5 quart pair covers most small household cooking without a third bowl.
Best For: Kitchens where the colander and salad spinner together fill a whole cabinet.
Not Ideal For: Cooks who drain very large stockpots daily; a rigid steel colander handles heavy loads better.
Estimated Cost: $20-$30 (estimate) for a two pack with a draining tray.
Budget Note: Two sizes in one set replace the colander, the strainer and the salad bowl for most meals.
Renter Friendly: Yes
Renter Note: Loose kitchenware that packs flat; nothing to fit or fix.
What You Need
Two collapsible colanders with a draining tray, a drawer or door hook for flat storage.
Product recommendation (partially verified): Gevoli Collapsible Colanders, 2 Pack Set with Over-Sink Draining Base, 4 and 5 Quart, White Gray
Why it fits: The pair opens to 13.46 x 11.54 inches and 11.57 x 9.45 inches, collapses to 1.3 inches high for drawer storage, and the draining base lets water run into the sink even when the bowl is full.
Retailer/product page: https://www.amazon.com/dp/B0FM6KNRNJ/ref=cm_sw_r_as_gl_apa_gl_i_7C1BRWX5VPCVE4TK4SHT
How To Do It
- Open both colanders and check the large one fits your sink and your usual pasta pot load.
- Rinse and drain with the tray turned so its channel runs toward the sink.
- Dry the colanders before collapsing them; trapped water between the folds smells within days.
- Store them flat in a drawer or on a hook inside a cabinet door, never under heavy pans that bend the folds.
Pro Tip
Keep one colander permanently in the sink-side drawer and the second with baking gear; splitting the pair stops both living in the hardest drawer to open.
14. Put Light Under the Cabinets Where You Chop
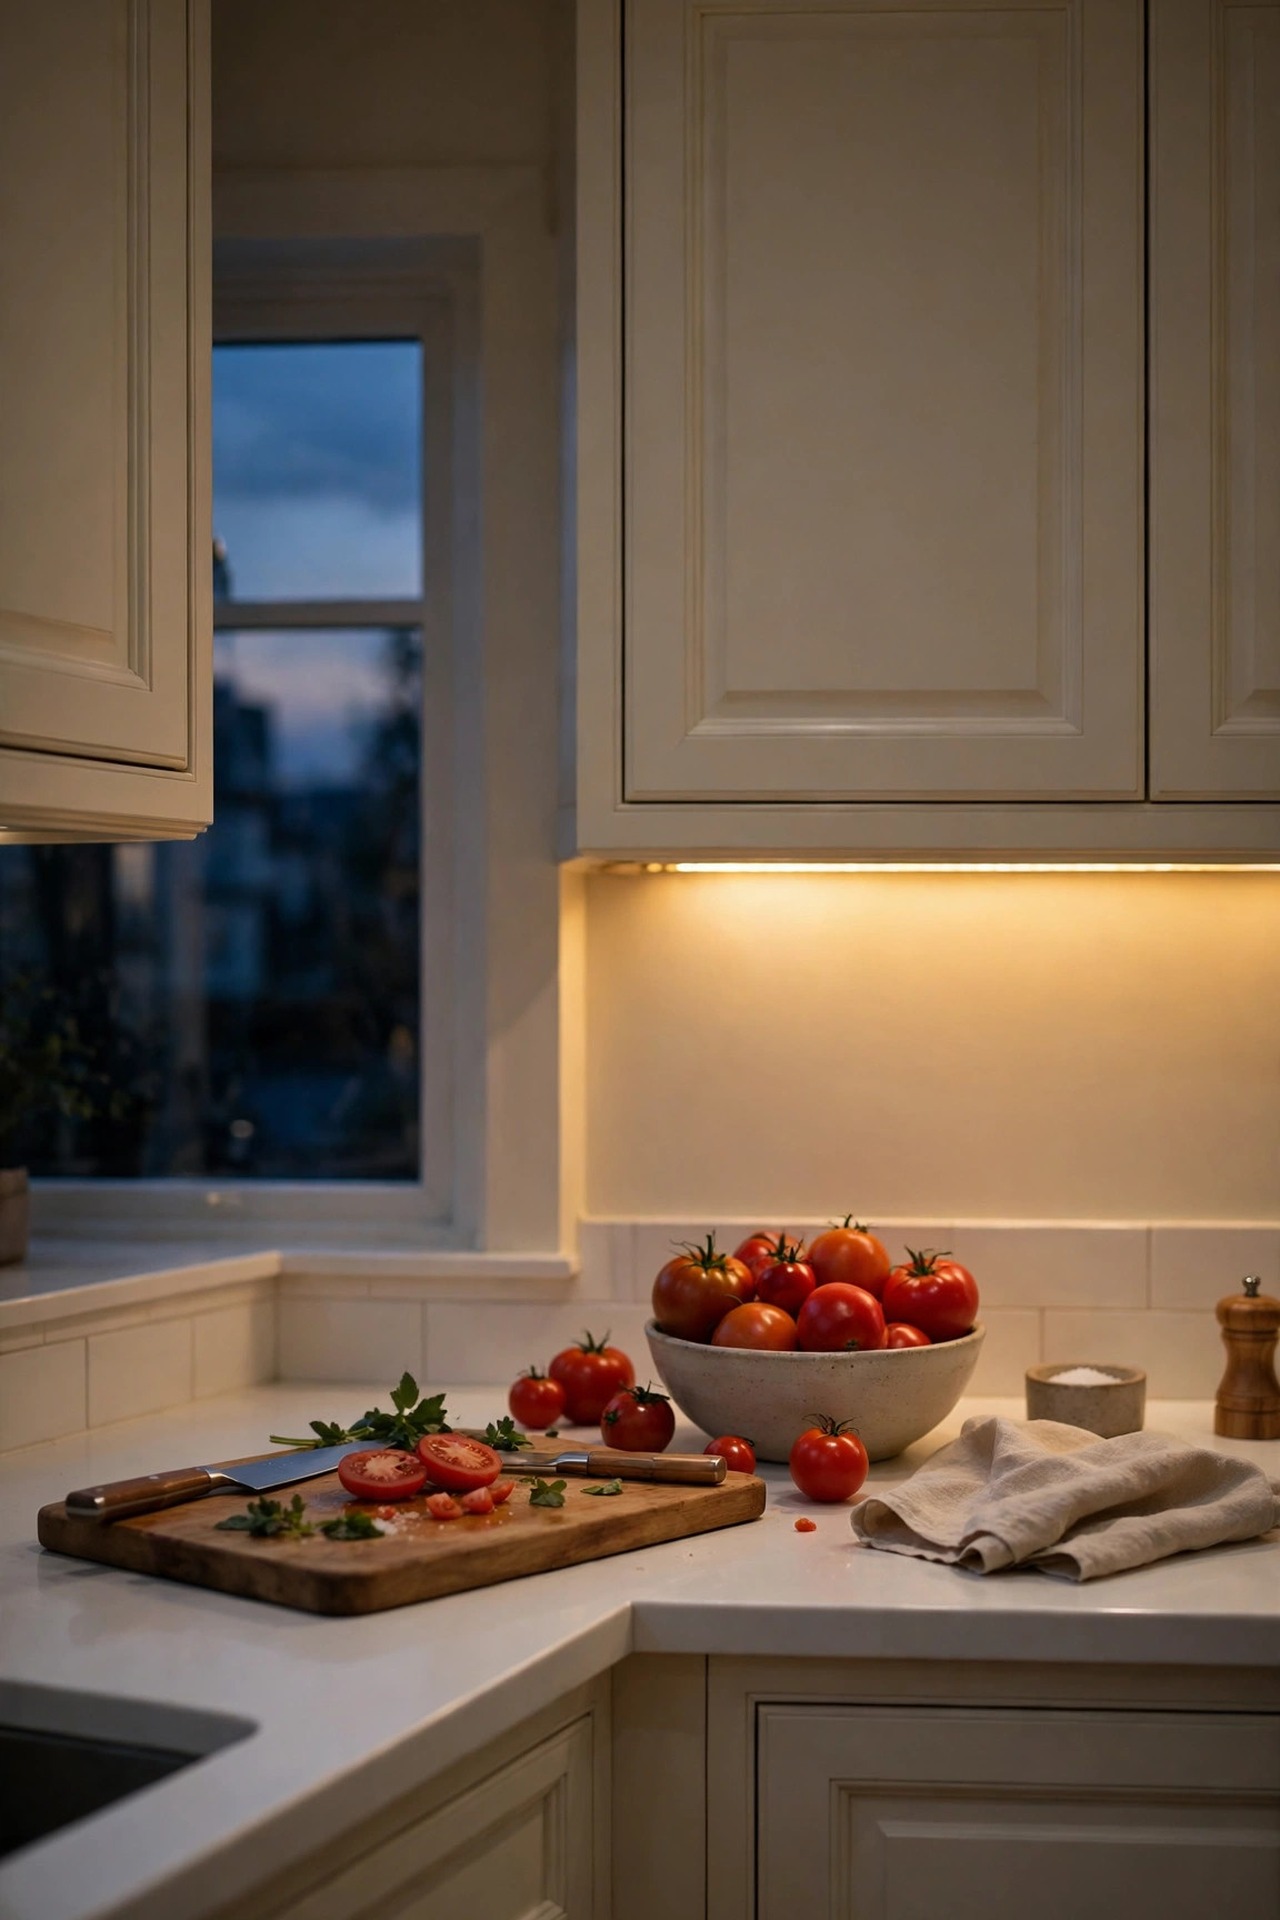
Description: One ceiling light in a small kitchen puts your own shadow on the board, and galley layouts are the worst for it because the cabinets line both sides. Slim LED bars under the upper cabinets light the counter directly, which makes the whole run feel wider and prep safer. A linked plug-in kit needs no wiring, and bars around 20 inches each cover a short run without dark gaps. Choose a natural white tone near 4000K so food colours read true.
Best For: Galley kitchens with one weak ceiling light and heavy evening cooking.
Not Ideal For: Cabinets with no outlet within reach of the run and no tidy cable route.
Estimated Cost: $35-$70 (estimate) for a six bar plug-in kit.
Budget Note: One linked kit costs less than separate battery lights for every cabinet and never needs batteries.
Renter Friendly: Yes
Renter Note: The bars mount with clips or adhesive pads and the kit plugs into an outlet; use removable strips on painted cabinet undersides.
What You Need
Plug-in LED bar kit with linking cables and a remote, removable adhesive strips or clips, tape measure, an outlet near the cabinets.
Product recommendation (verified): WOBANE Under Cabinet Lighting Kit, 6 LED bars, 24W adapter, RF remote, 4000K natural white
Why it fits: Six 20 inch bars link into one run under a full row of cabinets, the 4000K tone suits food prep, the remote dims the light for evening use, and the kit ships from Amazon, sold by Wobane.
Retailer/product page: https://www.amazon.com/dp/B0B2JLHJGX
How To Do It
- Measure the underside run of the upper cabinets and plan which outlet the adapter will use.
- Hold the bars in place with removable strips first and check the light spread at night.
- Fix the bars near the front edge of the cabinet underside so the light falls on the work zone.
- Route the cable flat along the underside, keep the adapter clear of the sink splash zone, and set the remote brightness.
Pro Tip
In a galley, light only the side you prep on first; matching light on both sides doubles the cost, and the second side usually holds storage, not work.
15. Brighten the Backsplash With Glossy Peel and Stick Tile
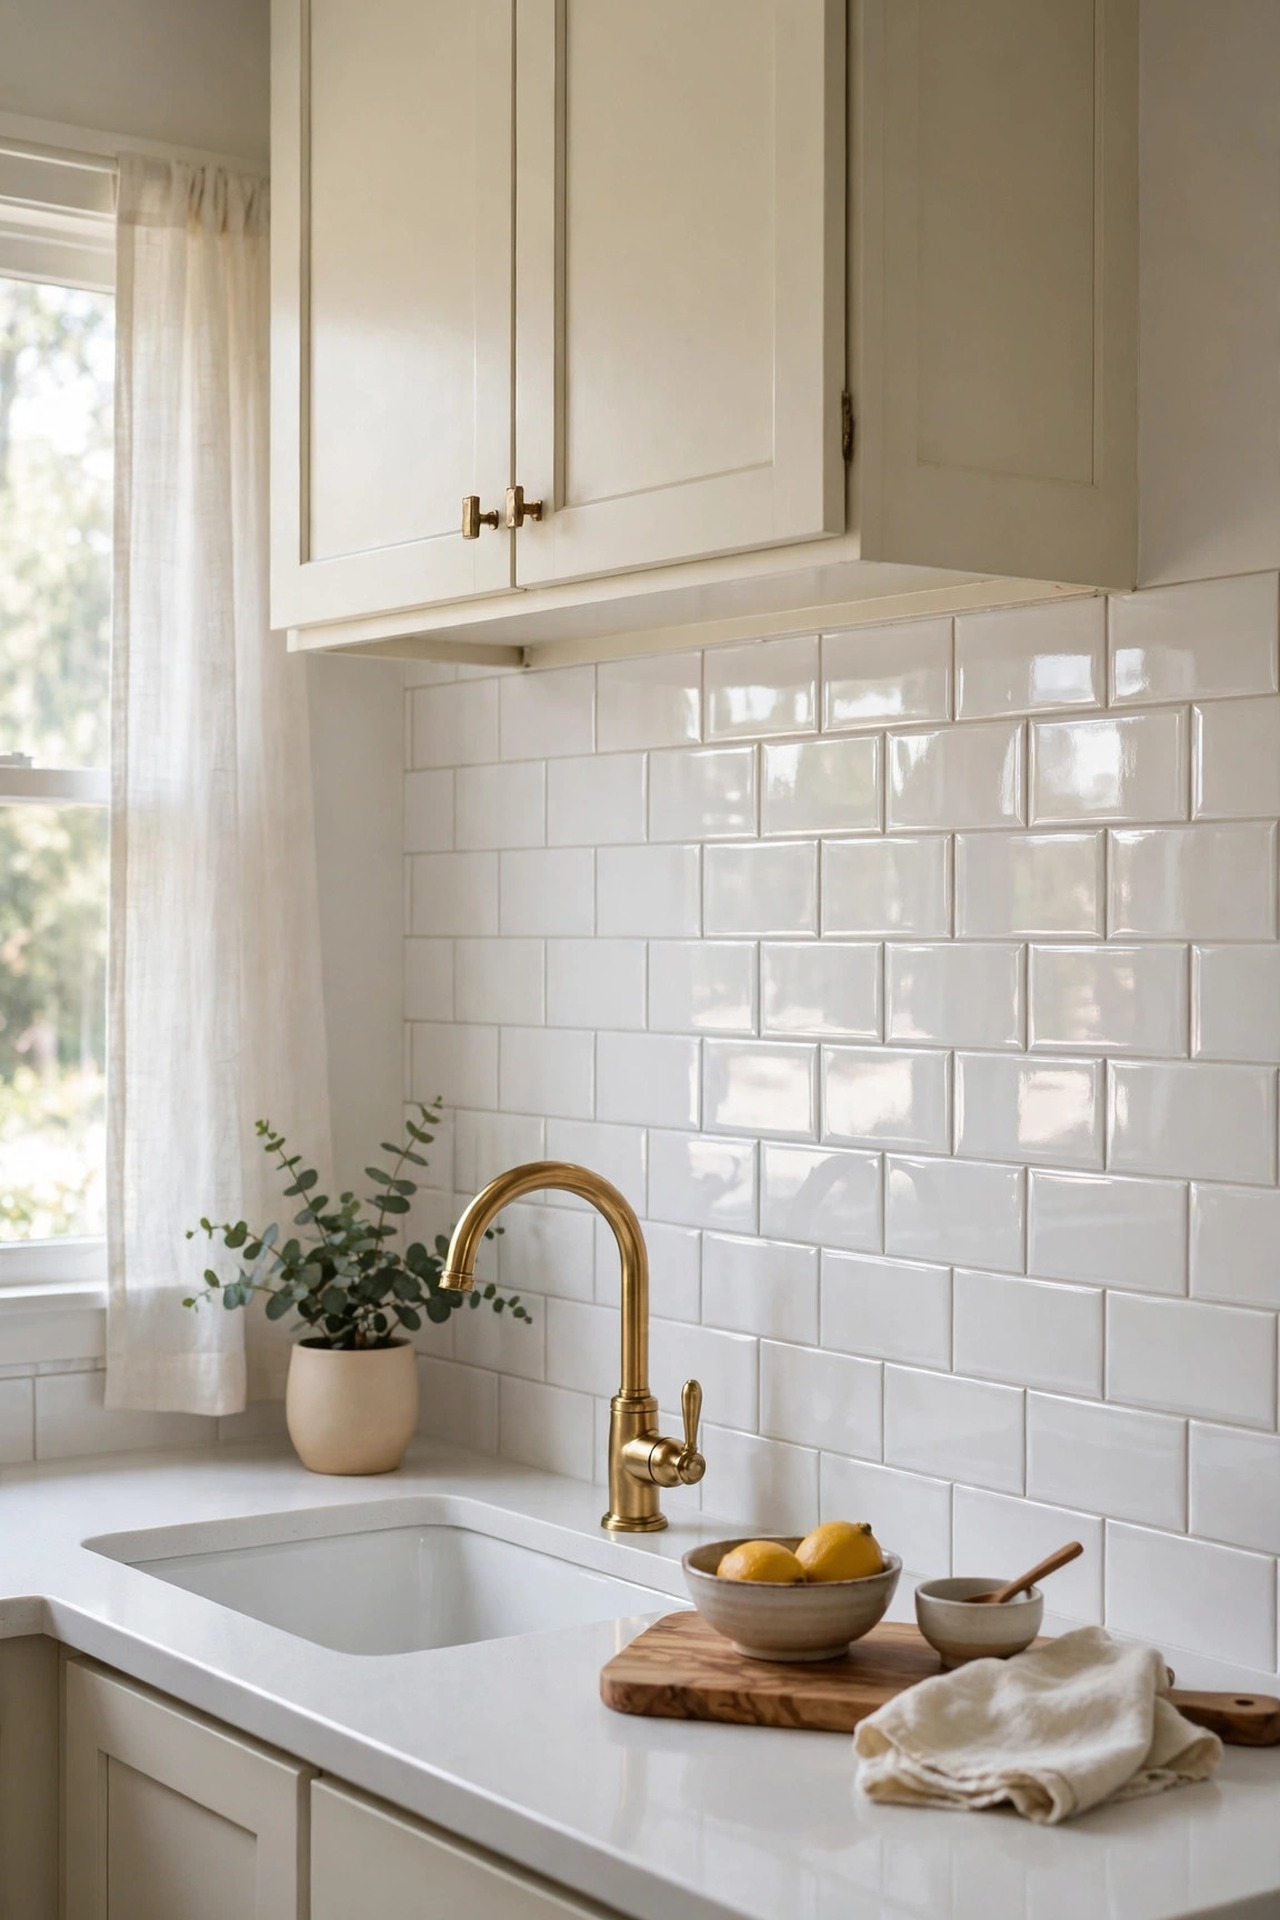
Description: Small kitchens are often short on windows, so the surfaces have to carry the light. A glossy white subway backsplash bounces daylight and under-cabinet light around the room instead of soaking it up the way matte paint does, and peel and stick sheets give that finish without a tiler. A small kitchen needs little coverage: measure the wall in square feet and divide by the pack coverage, because one 10 pack covers about 7 square feet, which is a full galley backsplash for many apartments.
Best For: Dark galley kitchens and rentals with a smooth painted wall behind the sink and stove.
Not Ideal For: Rough, damp or heavily textured walls, and any area closer to open burners than the maker allows.
Estimated Cost: $45-$90 (estimate) for one to two packs of premium sheets.
Budget Note: Small kitchens win here: the backsplash area is small, so a premium sheet costs less in total than it would in a large kitchen.
Renter Friendly: With Conditions
Renter Note: Premium gel sheets are made to remove without damage on sound paint, but test one sheet in a hidden corner for a week first and follow the maker’s heat clearance near the stove.
What You Need
Peel and stick glossy subway tile sheets, utility knife and metal ruler, level, degreasing cleaner, tape measure.
Product recommendation (verified): SMART TILES Peel and Stick Backsplash, Subway White, Pack of 10 sheets, 10.95″ x 9.70″ each (SM1020-10)
Why it fits: The glossy Gel-O finish reflects light like real glazed tile, each pack of 10 sheets covers about 7 square feet, the sheets are heat and humidity resistant for backsplash use, and they are made in North America by the brand that originated the format.
Retailer/product page: https://www.amazon.com/dp/B09QQKKWBL/ref=sspa_mw_detail_0
How To Do It
- Measure the backsplash wall and work out the packs you need from the coverage per pack.
- Wash the wall with degreaser and let it dry fully; adhesive fails on grease.
- Mark a level starting line above the counter and plan cuts around outlets before peeling.
- Press each sheet firmly from the centre outward, keep the maker’s clearance behind burners, and finish that strip in a heat-safe material if needed.
Pro Tip
Run the sheets up to the underside of the cabinets with no painted gap; a continuous glossy surface reads as one tall, bright wall and makes the run look longer. If you want the full method for other patterns and materials, see these kitchen backsplash ideas.
Practical Tips for Kitchen Ideas for Small Spaces
- Measure three numbers before buying anything: the walkway width, the fridge gap at its narrowest point, and the inside depth of your deepest cabinet. Ideas 1, 2 and 3 all succeed or fail on those three numbers alone.
- Work upward in this order: walls and doors first (ideas 5, 6, 9), cabinet interiors second (ideas 3, 4, 8), floor pieces last (ideas 1, 11). Vertical storage never blocks a doorway; floor pieces can, so they are chosen after the room is already working.
- Keep one clear landing strip of at least 18 inches beside the stove. Storage ideas that creep into that strip, like a spice shelf or a knife block, trade safety for tidiness and should move.
- The same vertical logic works in the smallest room of the house; these tiny bathroom ideas use door backs and wall height the same way.
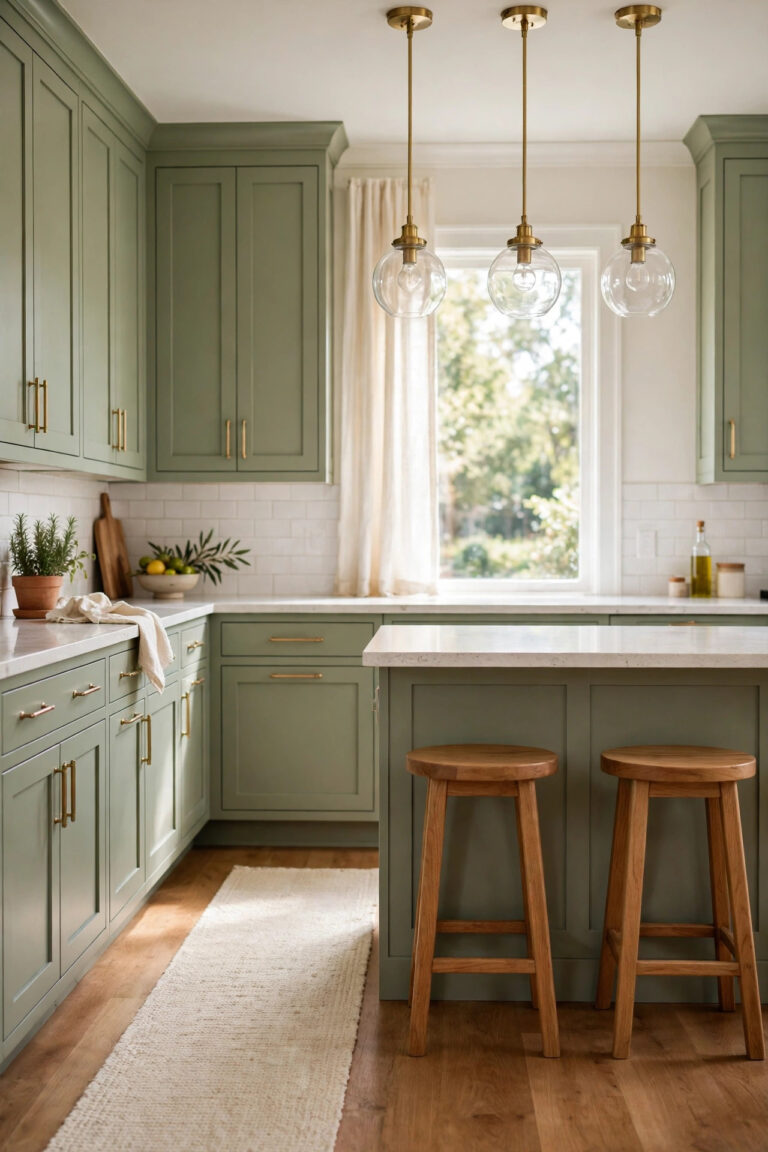
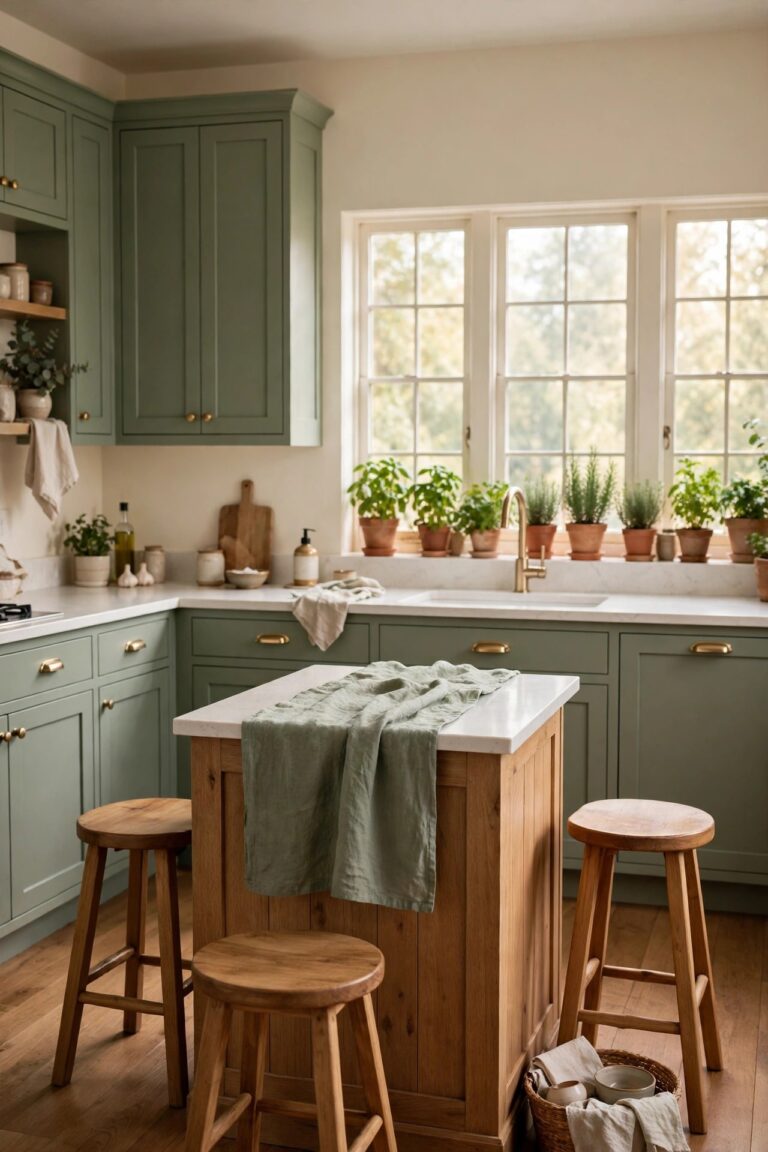
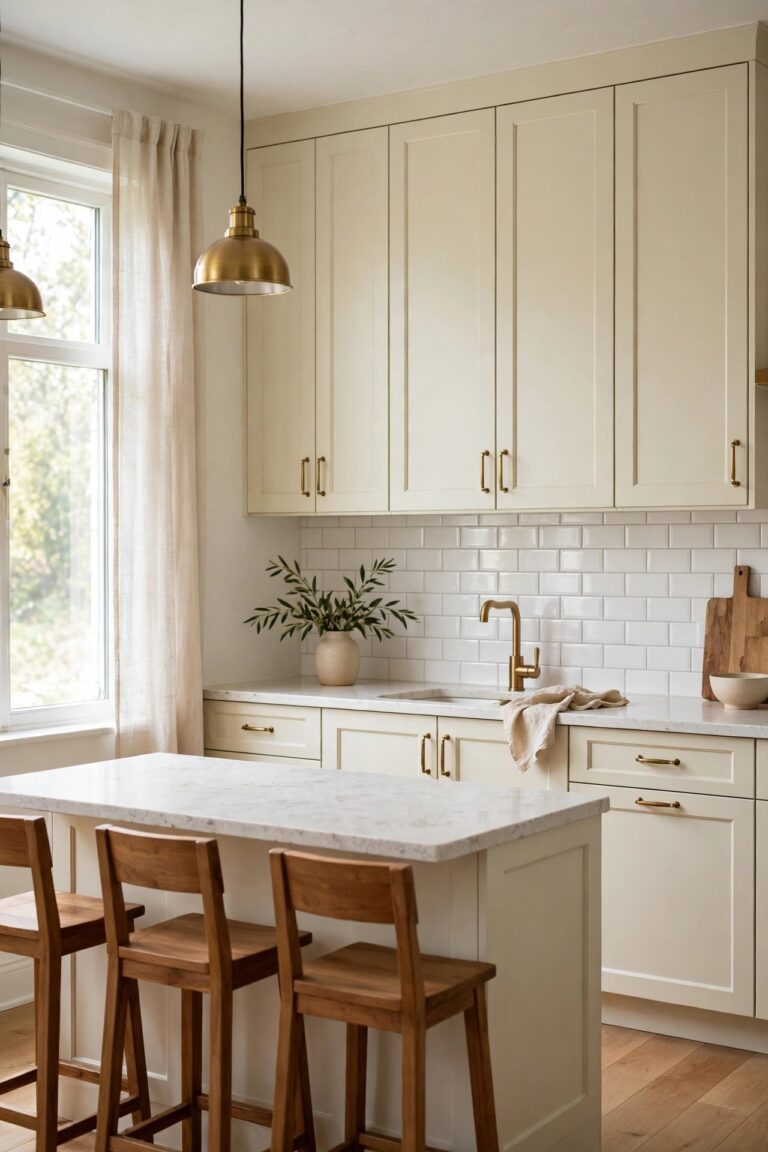
- Small rooms look calmer in one palette. Cream cabinets, warm wood and one metal, repeated, make a tiny kitchen read as planned rather than squeezed.
- Give every stored item a measured home before buying the organizer. Count the jars, boards and bottles first; storage bought for imaginary clutter ends up as clutter itself.
Frequently Asked Questions
What is the minimum walkway width for a kitchen cart or island?
About 36 inches between the cart and the opposite counter is the working minimum for one cook, and 42 inches is more comfortable if two people pass each other. Below 36 inches, skip the cart and use the fold-down table in idea 10 or the fridge-gap storage in idea 2 instead.
How do I add storage to a rental kitchen without drilling?
Use ideas 2, 3, 4, 5, 7, 8, 9, 11, 12 and 13: rolling carts, risers, clamp-on baskets, hook-on door racks, a roll-up sink rack, a standing under-sink organizer, an over-door rack, a slim can, a step shelf and collapsible bowls. None of them marks a wall, and all of them move out with you.
My cabinets are deep and things get lost at the back. What helps most?
Risers (idea 3) split the height so nothing hides under a stack, under-shelf baskets (idea 4) claim the dead space between levels, and the pull-out organizer (idea 8) fixes the worst cabinet of all, the one under the sink. Start with the cabinet you open most; one fixed cabinet changes daily cooking more than three tidy ones you rarely open.
Which idea makes a small kitchen look bigger, not just store more?
Light. The under-cabinet bars in idea 14 remove the shadow your body casts on the counter, and the glossy backsplash in idea 15 bounces that light around the room. Together they change how large the room feels for less than most single storage pieces cost.
How much should I budget to do most of this list?
The storage core of the list (ideas 2, 3, 4, 5, 7, 12 and 13) comes to roughly $140-$220 in total at the estimates given, because each piece is small. The cart, door rack, under-sink organizers and trash can are the larger pieces; add them one at a time, measuring as you go, rather than ordering everything at once.
Conclusion
A small kitchen works when every inch has a measured job: the fridge gap stores, the doors store, the sink works as a drying rack, and the counter keeps one clear landing strip for actual cooking. Start with the spot that annoys you daily, whether that is the lost under-sink cabinet or the knife block in the middle of your only worktop, and fix that one properly.