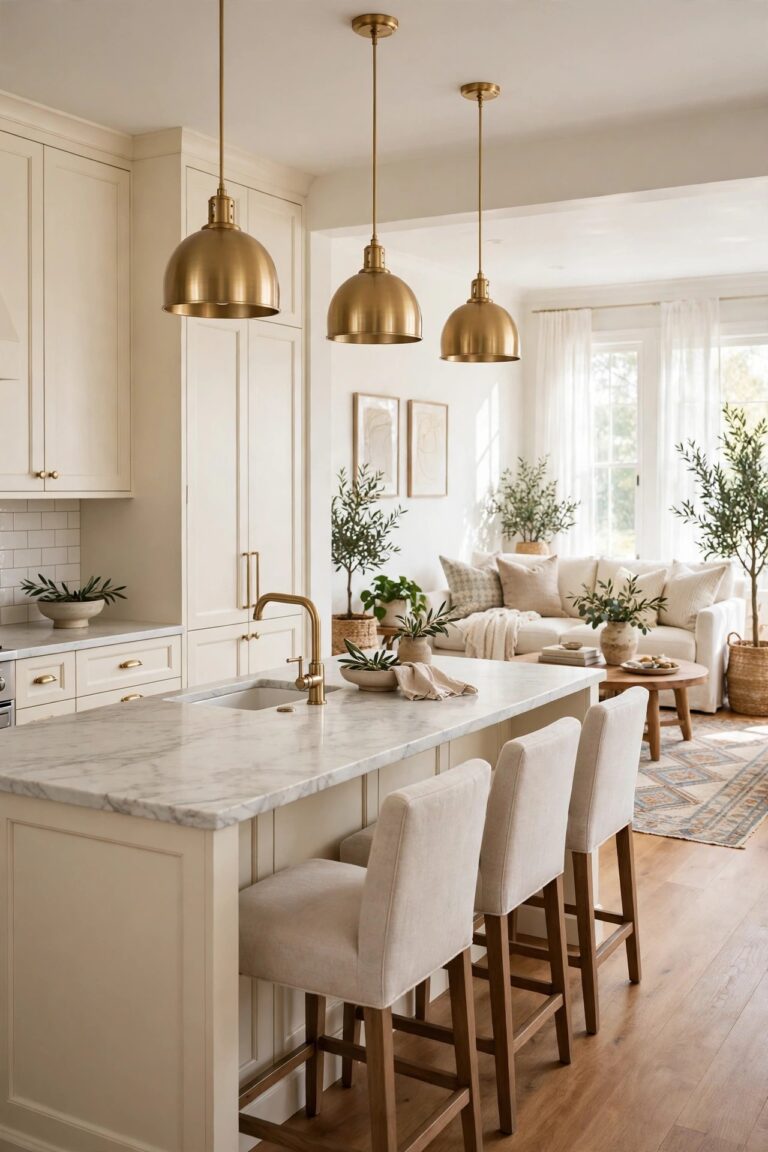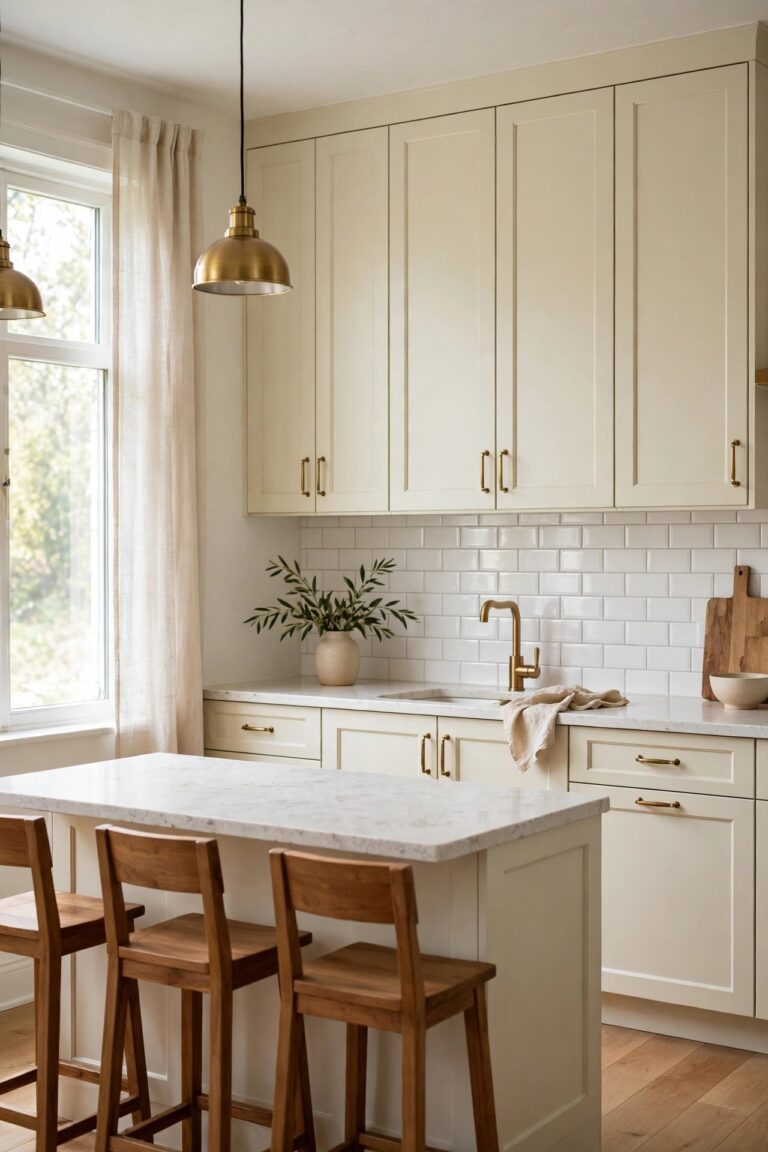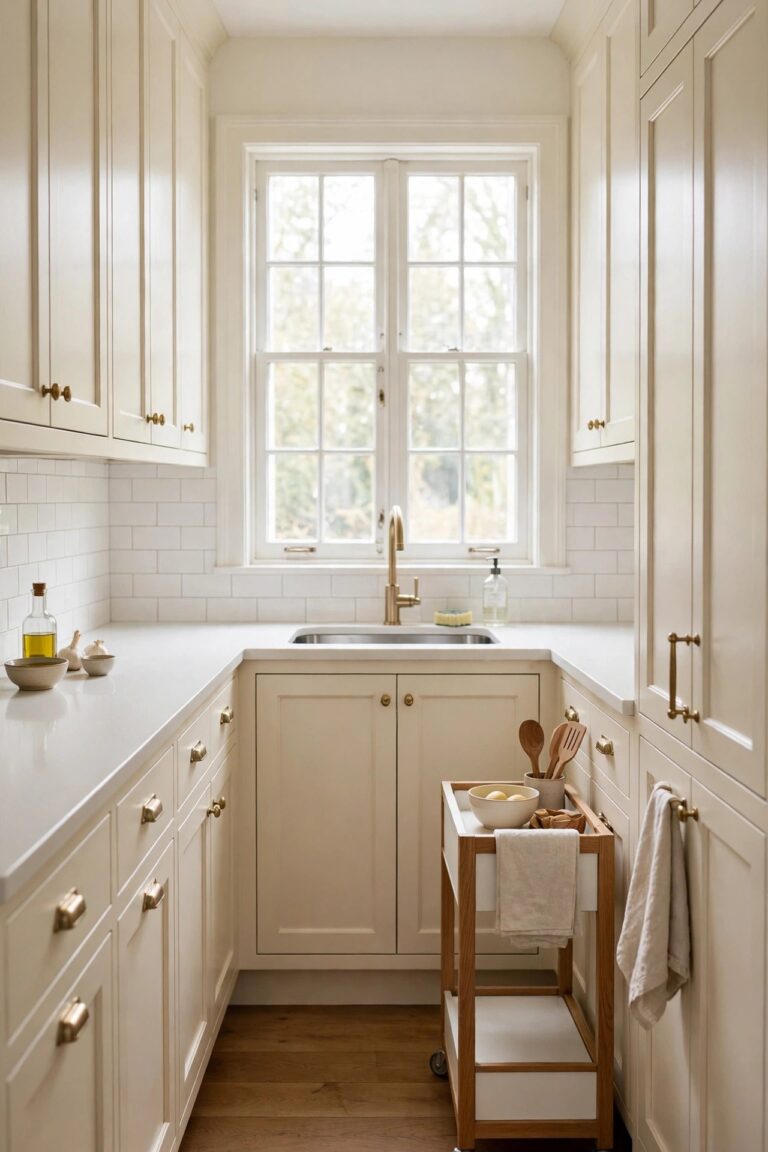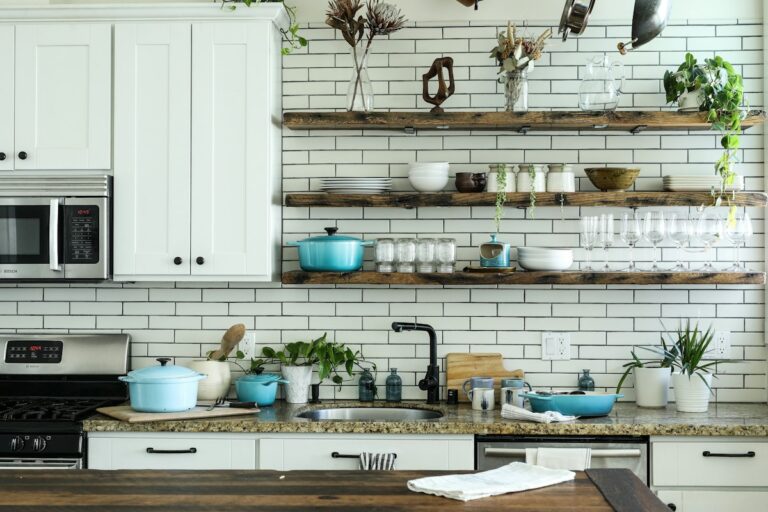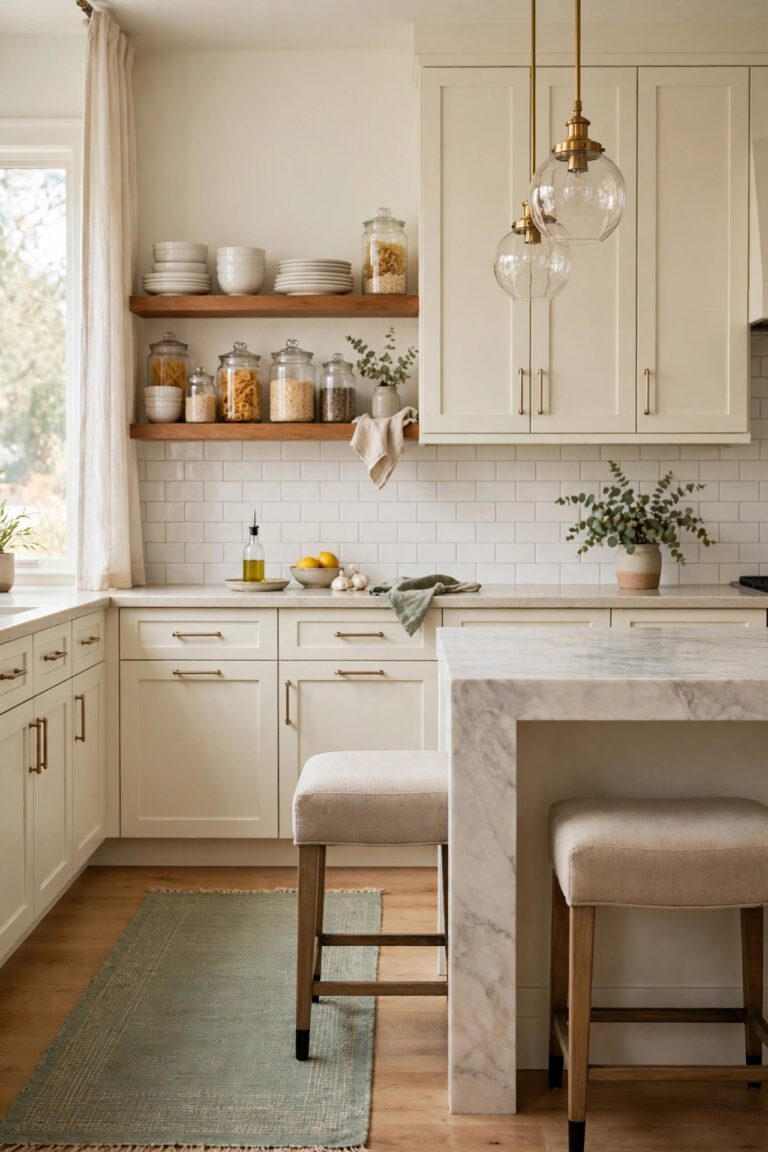
15 Sage Green Kitchen Ideas That Carry the Color Through the Whole Room
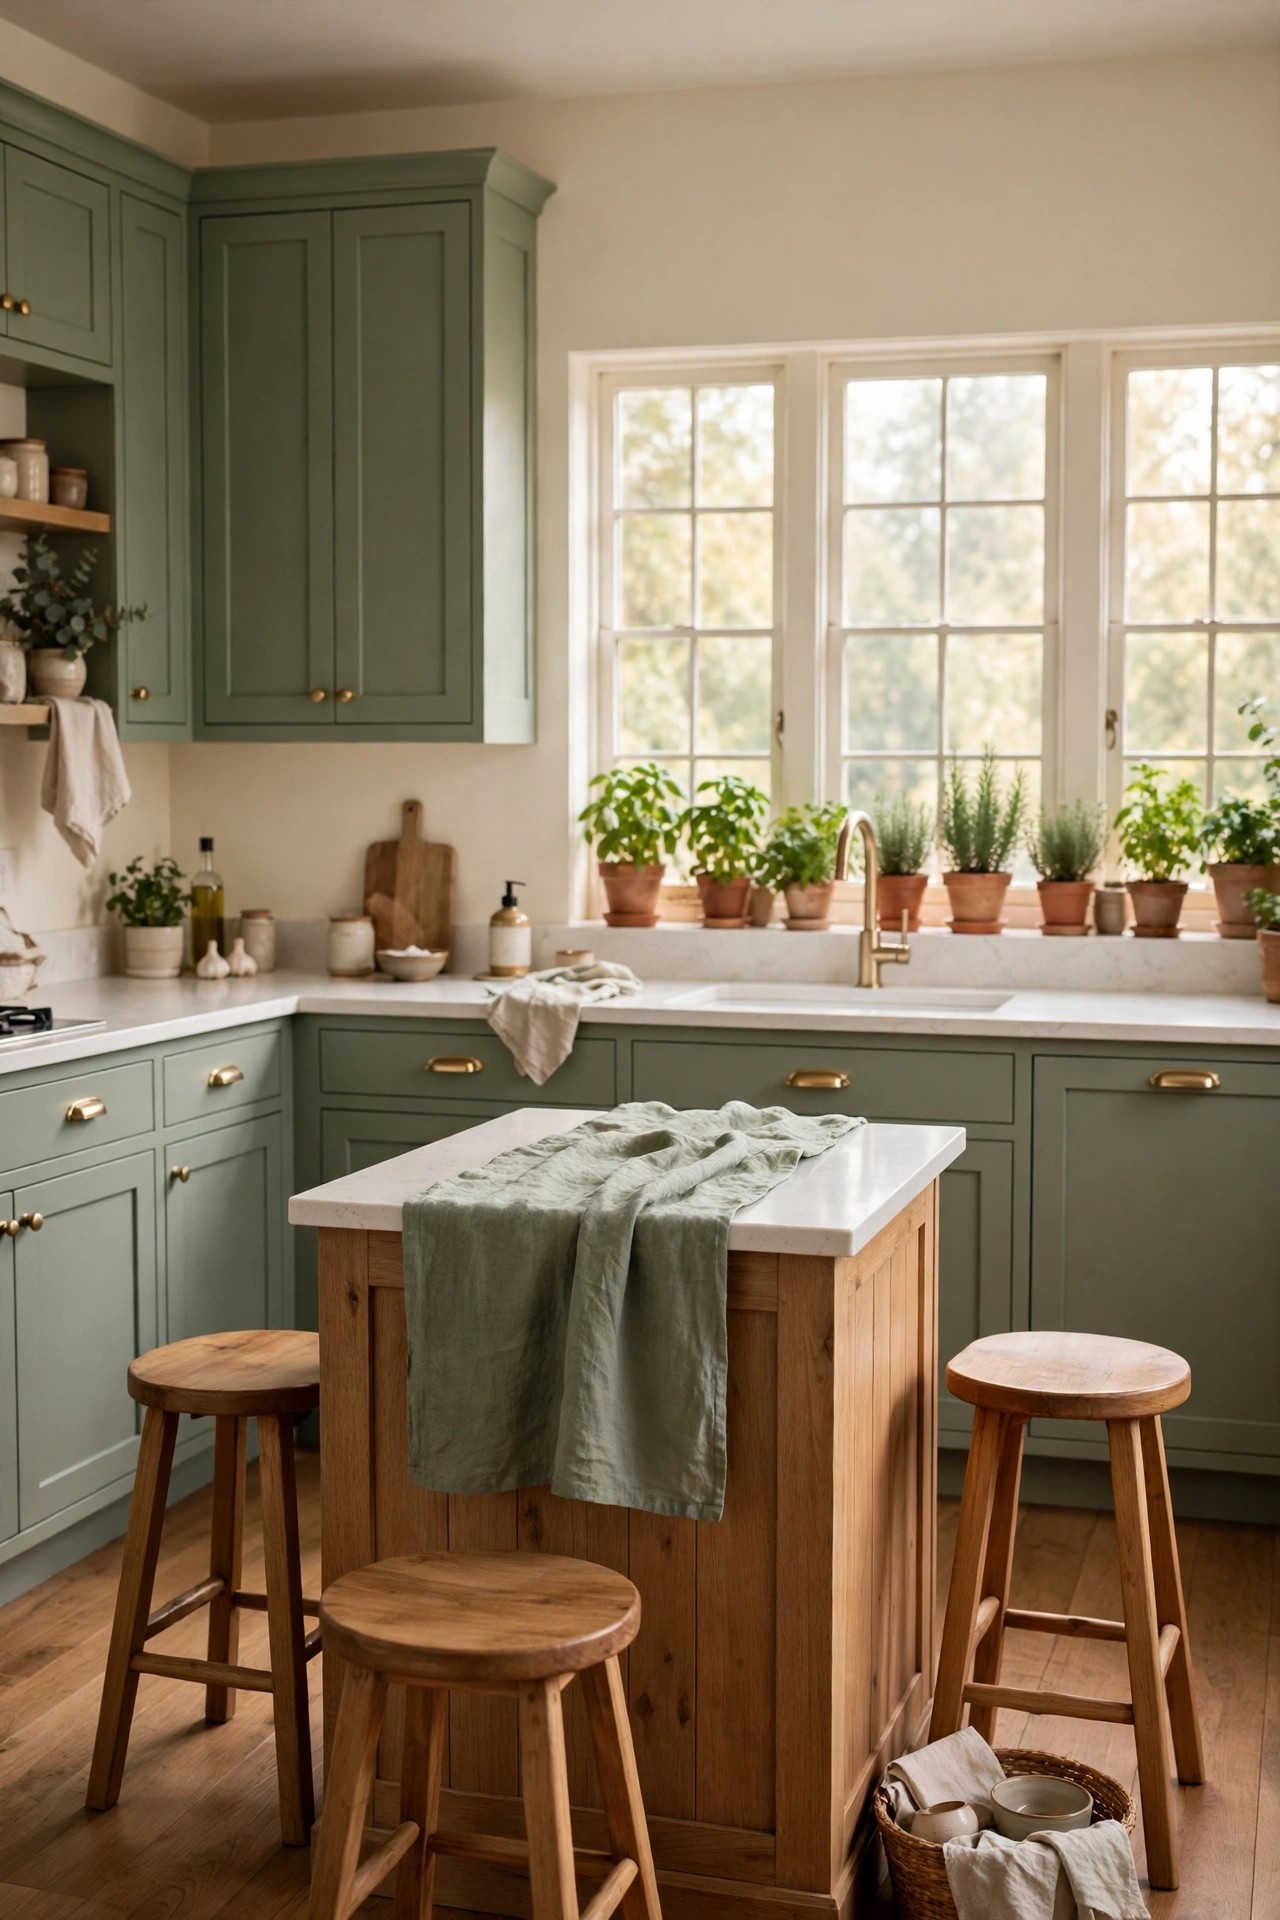
Sage is the green people choose when they want color that behaves like a neutral, and it is also the green most likely to disappoint, because the soft shade on a paint chip can turn grey in a north facing room or blue under cool bulbs. This collection of sage green kitchen ideas spreads the color the way it actually works in a finished room: on a few cabinets, yes, but also on walls, tile, the floor, stools, textiles, dinnerware and a row of herbs, so each idea can stand alone or combine with the others. Each idea carries an honest cost estimate, a renter note and one product checked against a live retailer page, so the shade you choose is one you can actually buy, paint or plant. If you are planning the whole room rather than one color, start with these kitchen ideas.
1. Sage Shaker Cabinets With Brushed Brass and White Quartz
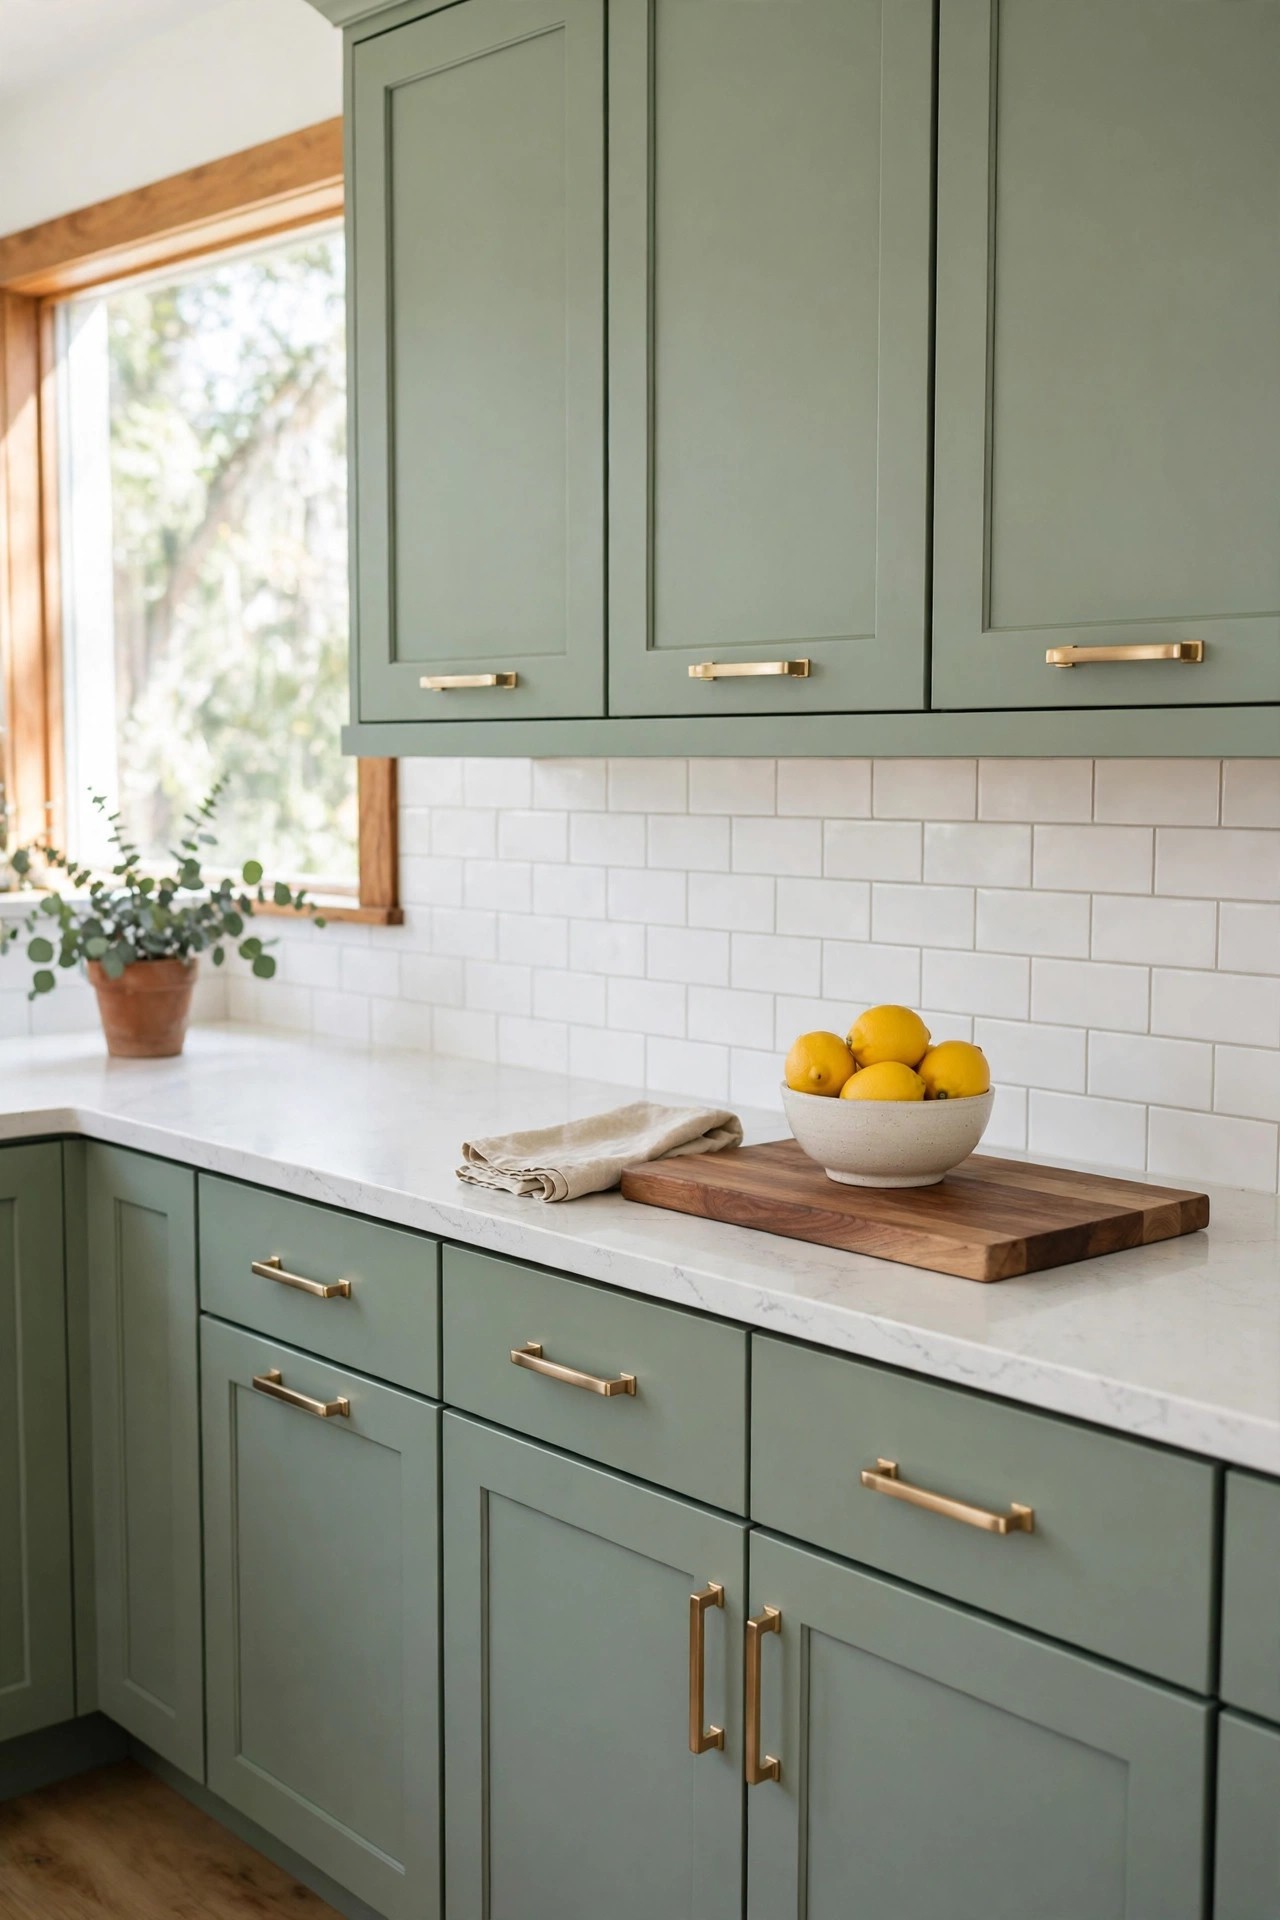
Description: Sage works on a full run because its grey undertone keeps the color quiet at large scale. Shaker fronts suit it best: the recessed panel holds a line of shadow, so the shade looks deeper on the doors than it does on a flat sample. Brushed brass pulls and a white quartz counter keep the pairing warm and bright. The risk is a north facing room, where the same paint can slide toward grey by mid afternoon, which is why the sample testing in idea 15 matters.
Best For: Owners ready for one calm color across the whole cabinet run.
Not Ideal For: Dark north facing kitchens, where sage loses its green and reads flat grey for much of the day.
Estimated Cost: $250-$550 (estimate) for cabinet paint, primer and hardware for an average kitchen; counters are not included.
Budget Note: Count every door and drawer front before ordering pulls, because hardware is usually the second largest cost after the paint itself.
Renter Friendly: No
Renter Note: Painting changes the landlord’s cabinets permanently; renters should start with ideas 7, 8, 10 and 14 instead.
What You Need
Sage green cabinet paint with built in primer and top coat, brushed brass bar pulls that match your existing hole spacing, degreasing cleaner, foam rollers, an angled brush, painter’s tape and drop cloths. For the full shade range beyond sage, see these green kitchen cabinets ideas.
Product recommendation (partially verified): Heirloom Traditions ALL-IN-ONE Paint, Simply Sage (gray green), Gallon
Why it fits: The listing describes Simply Sage as a gray green, the soft greyed tone this idea depends on, and the maker’s coverage figures (about 500 sq ft per gallon) suit a full cabinet run with two coats.
Retailer/product page: https://www.amazon.com/dp/B0CNRYSSV8
How To Do It
- Paint one door or drawer front first and check it in morning and evening light before committing the run.
- Remove doors and hardware, label each piece, degrease every surface, and let everything dry fully.
- Roll two thin coats with a foam roller, letting each coat dry as the tin directs.
- Refit the doors once cured and fit the brass pulls, hand tightening the screws.
Pro Tip
Keep the sheen low: a matte or low luster finish hides the small brush marks that a satin finish shows on wide shaker panels.
2. Two-Tone Cabinets: Sage Lowers With Cream Uppers
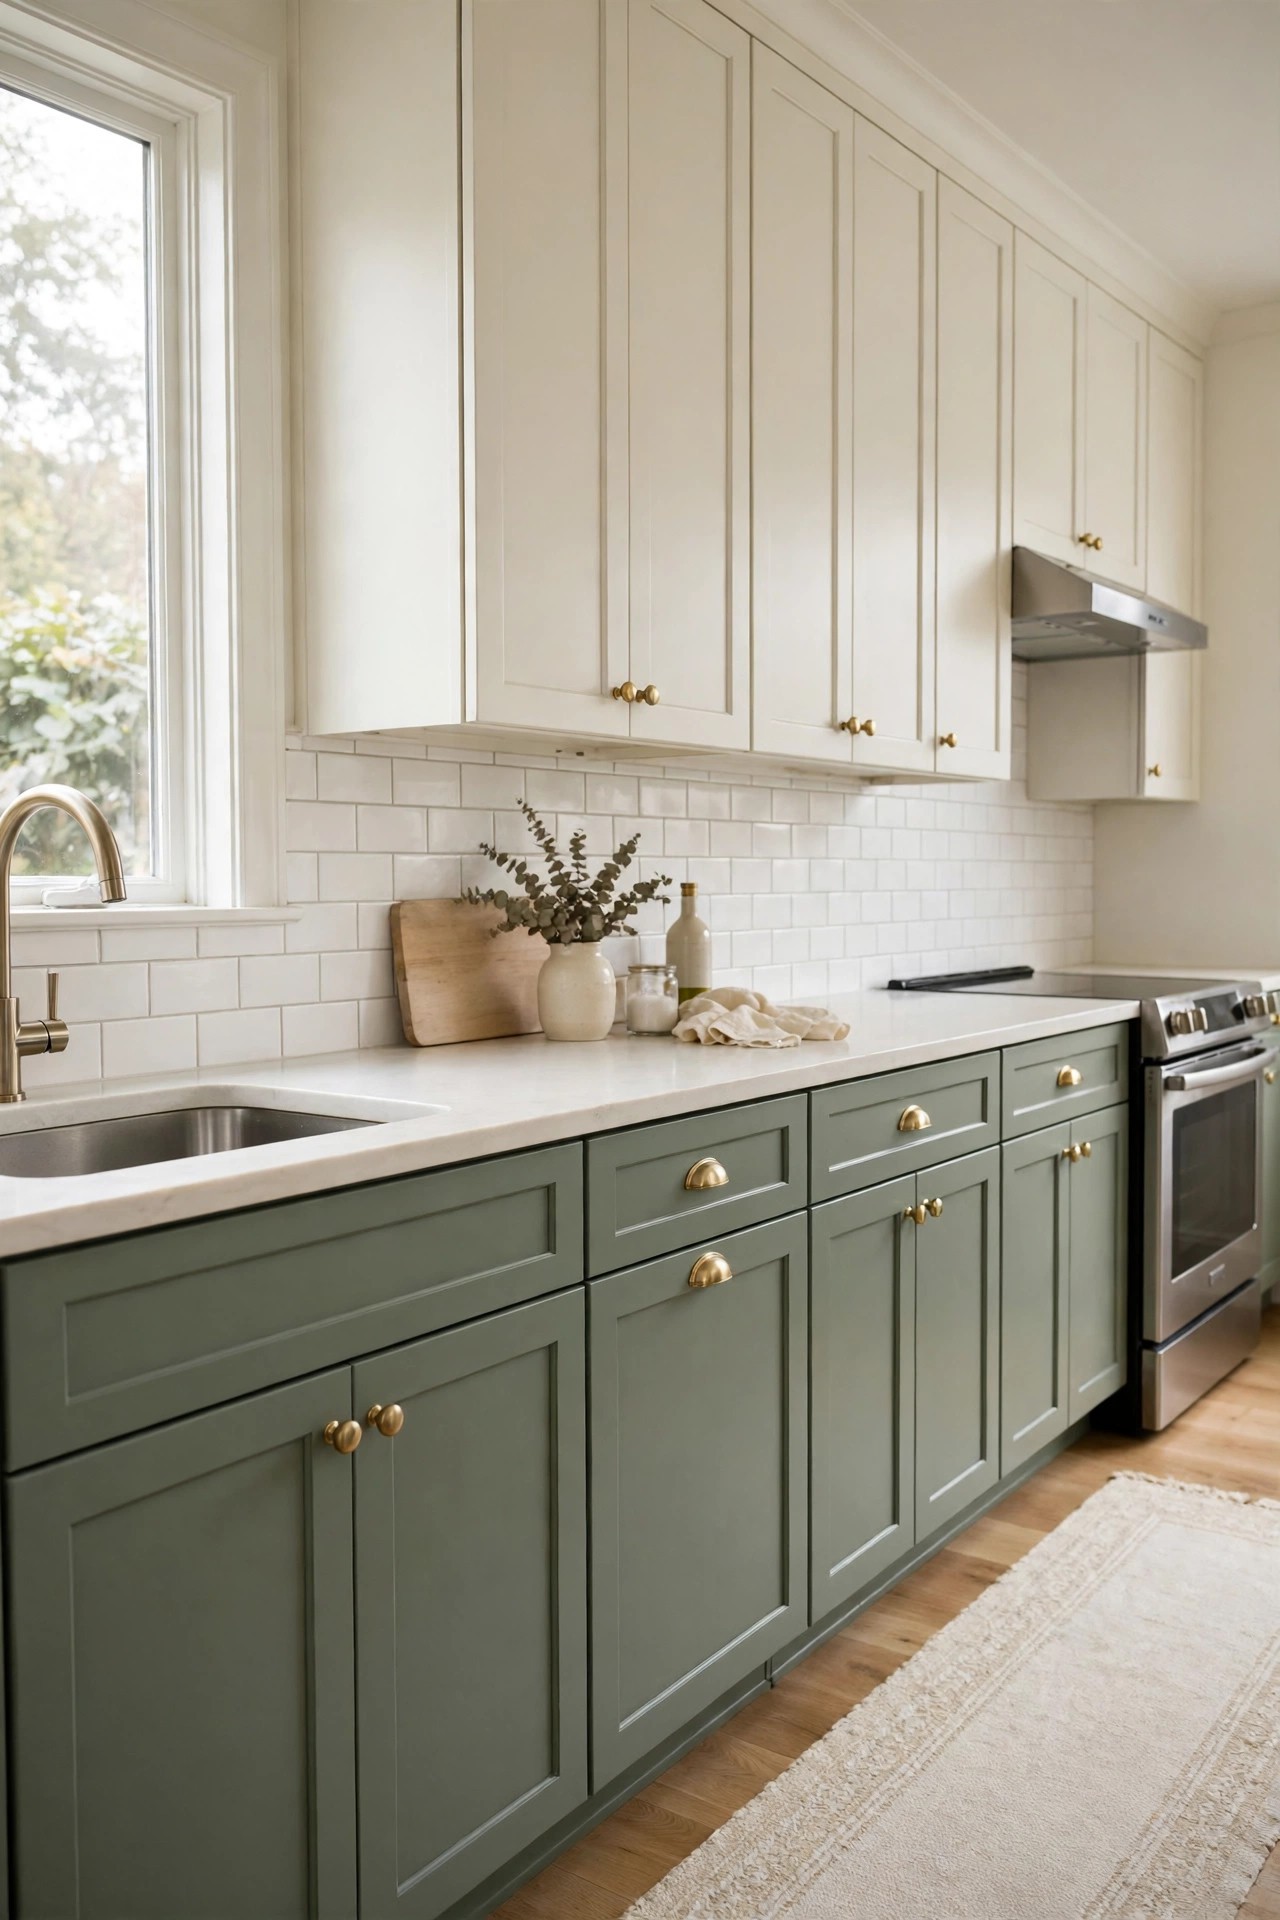
Description: Painting only the lower cabinets sage and the uppers a creamy white splits the room at counter height, where color is easiest to live with. The cream keeps the eye level light and reflects more daylight than a blue toned white, softening the contrast so the sage reads gentle rather than graphic. It is also the cheaper two color route, because the uppers often need only a refresh coat. The two paints must share a warm undertone, or the cream will look yellow beside the green.
Best For: Small or low light kitchens that want sage without darkening the eye level.
Not Ideal For: Kitchens with very tall wall cabinets, where a wide cream band can look top heavy above the sage base.
Estimated Cost: $180-$400 (estimate) for both paints and supplies.
Budget Note: The sage only needs a quart or two for the lowers, so the gallon sizes sold for whole kitchens are more than this job requires.
Renter Friendly: No
Renter Note: Painting either half is a permanent change to the landlord’s cabinetry, so this is an owner’s project.
What You Need
Sage green cabinet paint for the lowers, creamy off white cabinet paint for the uppers, painter’s tape for the split line, one hardware finish used across both colors, foam rollers and an angled brush.
Product recommendation (partially verified): Heirloom Traditions ALL-IN-ONE Paint, Manor House (creamy off white), Quart
Why it fits: The listing describes Manor House as a creamy off white, the warm white this pairing needs; a blue toned white would push the sage toward mint, and the quart covers about 140 sq ft, enough for a run of uppers.
Retailer/product page: https://www.amazon.com/dp/B01N0HAXIY
How To Do It
- Tape the split line at the underside of the upper cabinets and remove all doors, labelling each one.
- Paint the uppers cream first, so any drips land on lowers that are not yet painted.
- Degrease and paint the lowers sage in two thin coats, then let everything cure.
- Refit all doors with one hardware finish across both colors so the two halves read as one kitchen.
Pro Tip
Use the same sheen for both paints; a matte sage under glossier cream uppers makes the split look accidental instead of planned.
3. A Sage Painted Island in an Otherwise White Kitchen
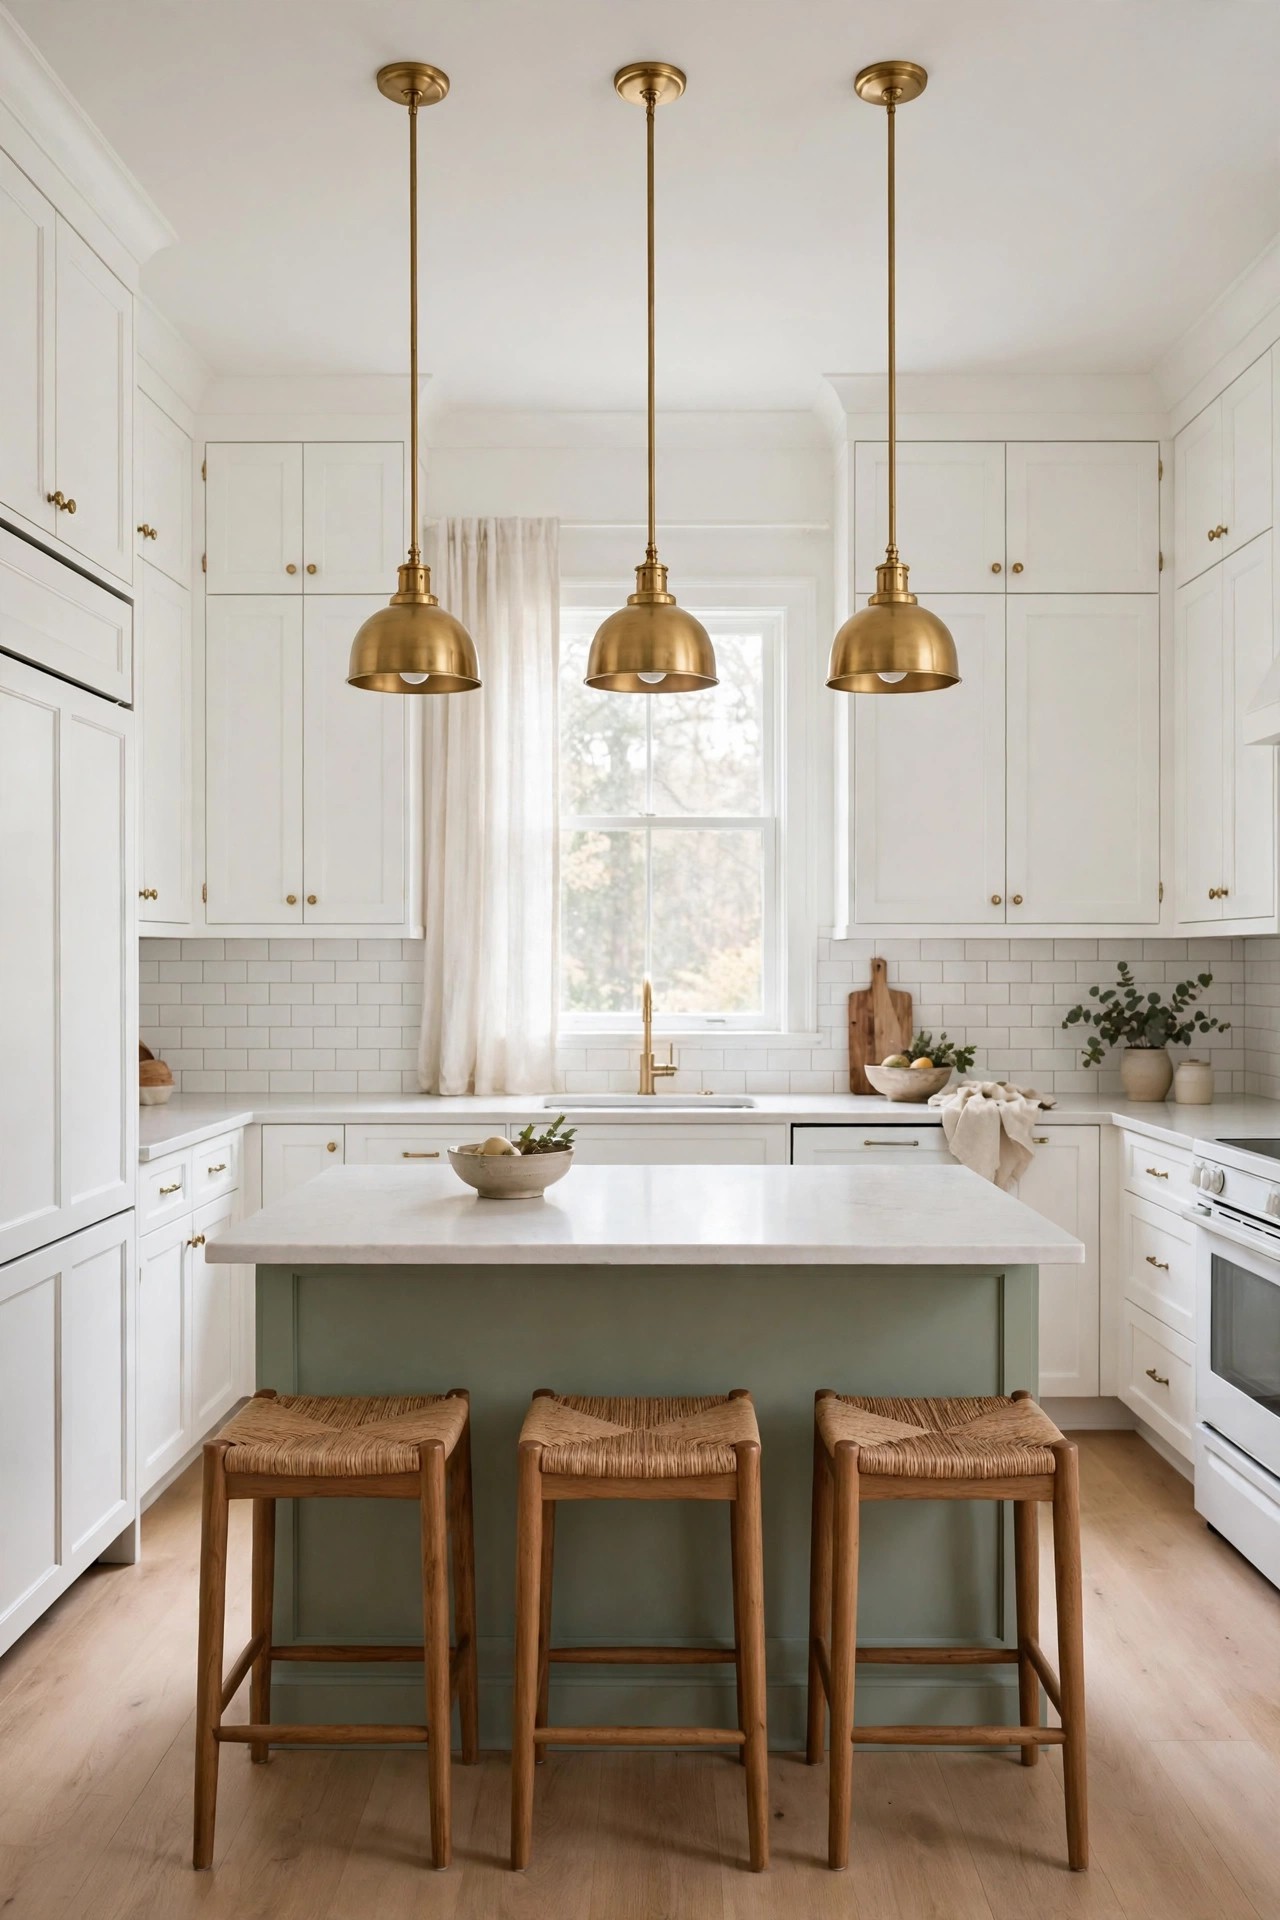
Description: A single sage island gives a white kitchen its color without touching the perimeter cabinets, and it is the one cabinet change that can be repainted in a weekend if tastes shift. The island faces the room, takes the light, and anchors the stools, pendants and runner around it. Choose a sage with slightly more green than grey here, because a small surface shows less color than a full run. Panels and drawer fronts are the whole job, so one quart of paint is usually enough.
Best For: Open plan kitchens where the island faces the living space and works as the focal point.
Not Ideal For: Peninsula layouts, where the colored section joins the main run and the break can look like a mistake.
Estimated Cost: $80-$220 (estimate) for paint and supplies for one island.
Budget Note: One quart normally covers an island’s panels and drawer fronts with two coats, so do not buy the gallon.
Renter Friendly: No
Renter Note: A built in island is the landlord’s cabinetry; if your island is a freestanding piece you own, painting it is your own decision.
What You Need
Sage green cabinet paint in a quart size, small foam roller, angled brush, degreasing cleaner, painter’s tape for the counter edge and drop cloths.
Product recommendation (partially verified): Heirloom Traditions ALL-IN-ONE Paint, Simply Sage (gray green), Quart
Why it fits: The same gray green as idea 1 in the quart size this smaller job needs; the listing gives coverage of about 140 sq ft per quart, and the built in primer and top coat keep a one piece project simple.
Retailer/product page: https://www.amazon.com/dp/B0CNRY5MC4
How To Do It
- Remove the island’s doors and drawer fronts and label them; leave the perimeter cabinets untouched.
- Degrease the island panels, tape the counter edge and floor line, and drop cloth the floor.
- Roll two thin coats of sage, letting each dry fully, and refit the fronts once cured.
- Repeat the green in one or two small pieces nearby, such as stool cushions or a runner, so the island looks chosen.
Pro Tip
Paint the island’s kick plate the same sage; a white kick left behind makes the island look as if it is floating in someone else’s kitchen.
4. Sage Green Walls Behind White Cabinets
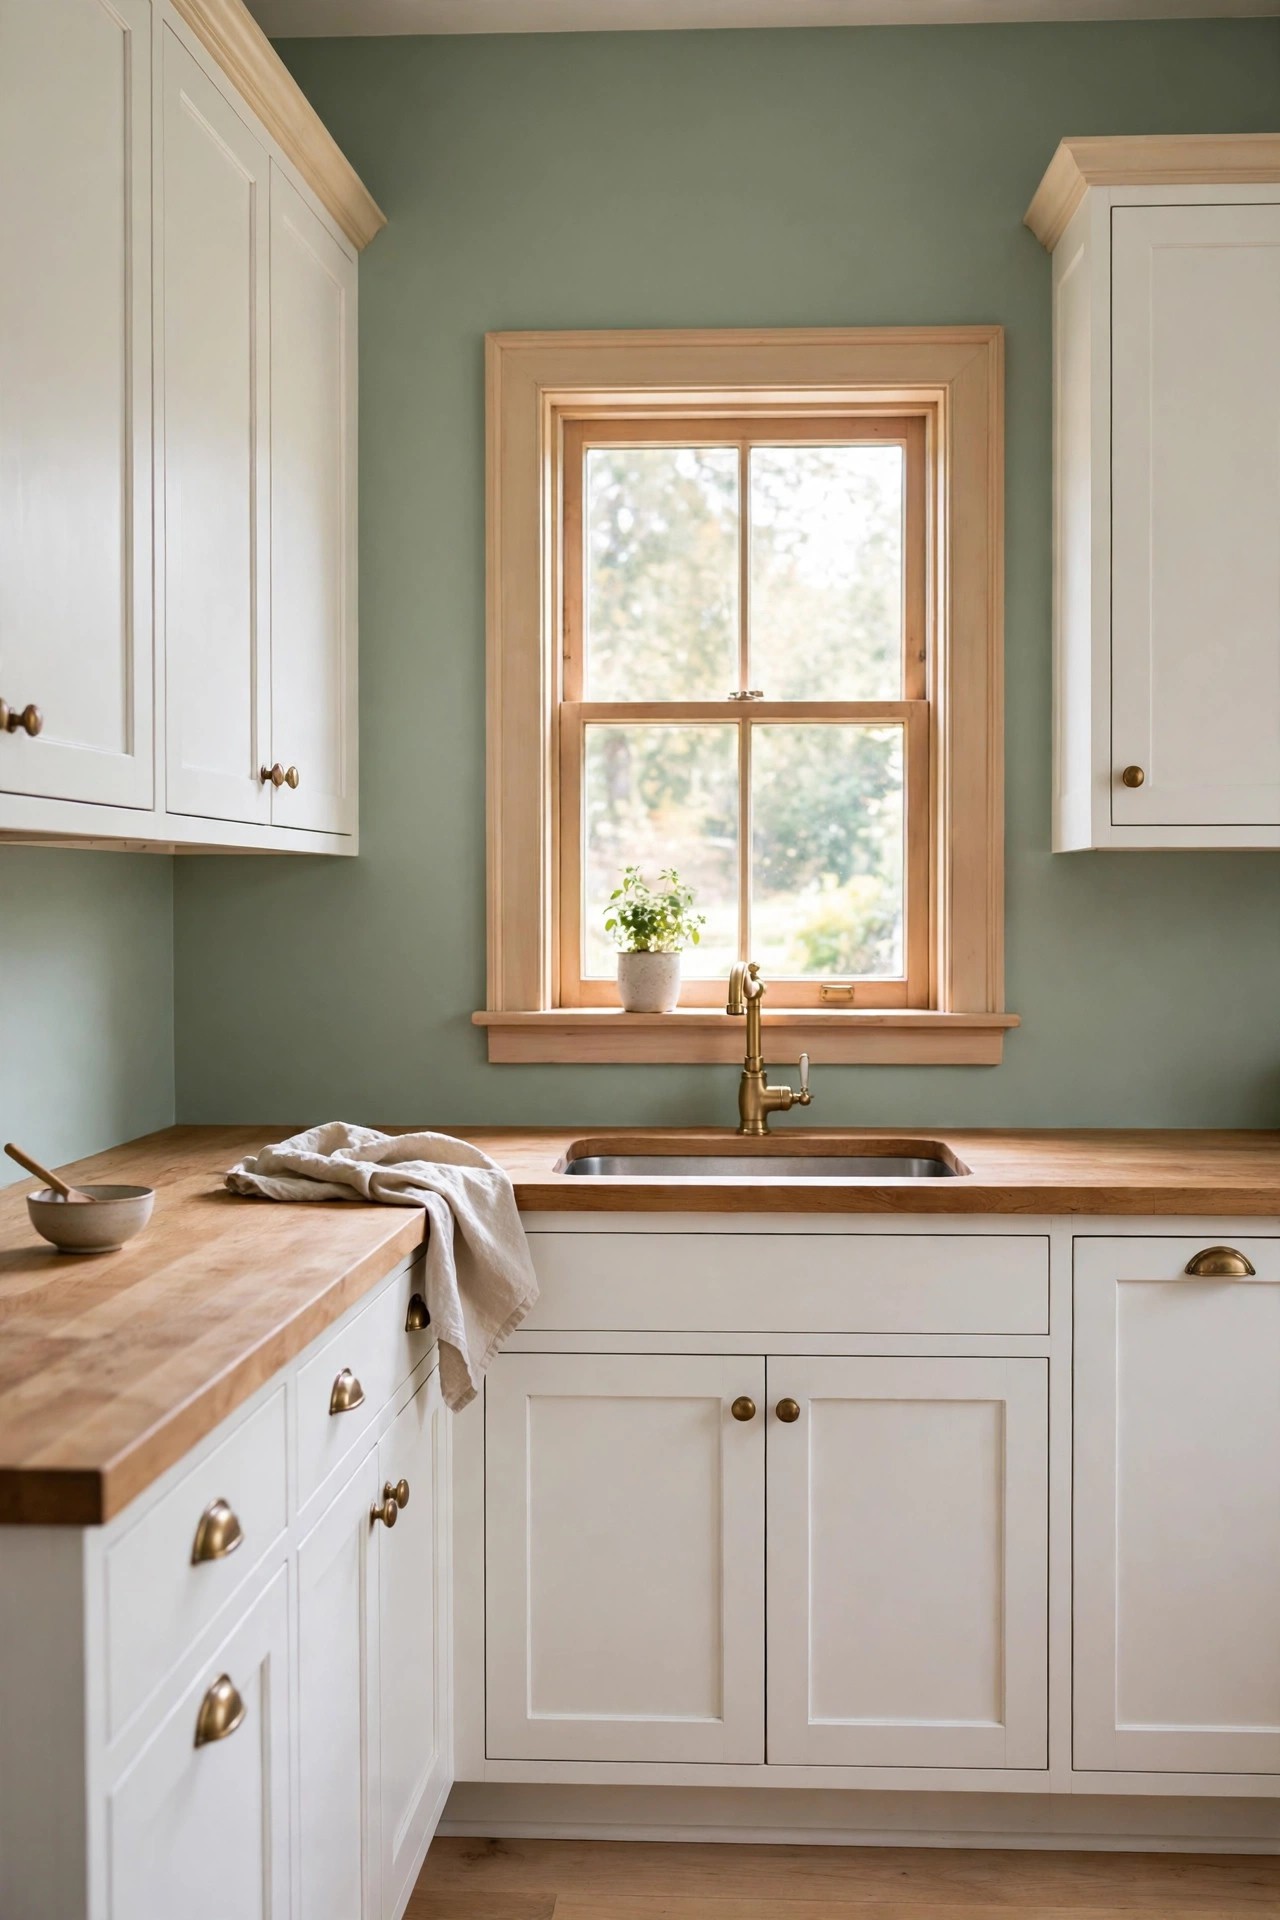
Description: If the cabinets are already white or pale wood, sage can go on the walls instead, and the effect is softer than colored cabinets because the color sits behind the cabinetry rather than on it. Walls take the shade at its gentlest: large, flat and lit evenly across the day. Keep the ceiling and trim a warm white so the sage reads green rather than mint. This is also the fastest idea here to reverse: one coat of good primer covers it when you move.
Best For: White or pale wood kitchens that need color without a cabinet project.
Not Ideal For: Kitchens where the wall area is mostly covered by cabinets and tile, leaving too little visible wall for the color to register.
Estimated Cost: $60-$160 (estimate) for a gallon of interior paint, roller kit and tape.
Budget Note: Most kitchens need one gallon for two coats of the visible wall area; buy the second gallon only if the room is large or the old color is dark.
Renter Friendly: With Conditions
Renter Note: Wall paint needs the landlord’s written permission in most leases; with permission, this is one of the easier colors to paint back out.
What You Need
Sage green interior wall paint in a satin finish, warm white trim paint, roller and tray, angled brush for edges, painter’s tape, drop cloths and a step stool.
Product recommendation (partially verified): PRESTIGE Paints Interior Paint and Primer in One, 1 Gallon, Satin, Dried Herbs
Why it fits: The listing shows the color name Dried Herbs with the color code #59715F on the product page itself, a muted sage green, and the satin finish wipes clean behind a sink or stove; stated coverage is 250 to 400 sq ft per gallon.
Retailer/product page: https://www.amazon.com/dp/B00QF5QMVA
How To Do It
- Stick a large sample on the wall first and check it for a full day, as idea 15 describes.
- Move appliances out from the wall, wash the walls with a degreasing cleaner and let them dry.
- Tape the trim, ceiling line and cabinet edges, then cut in with the brush and roll two coats.
- Pull the tape while the second coat is still slightly wet for the cleanest line.
Pro Tip
Choose satin rather than flat for kitchen walls: flat paint shows every splash mark behind a sink, and sage in flat can read chalky and paler than the sample.
5. A Sage Zellige-Look Backsplash
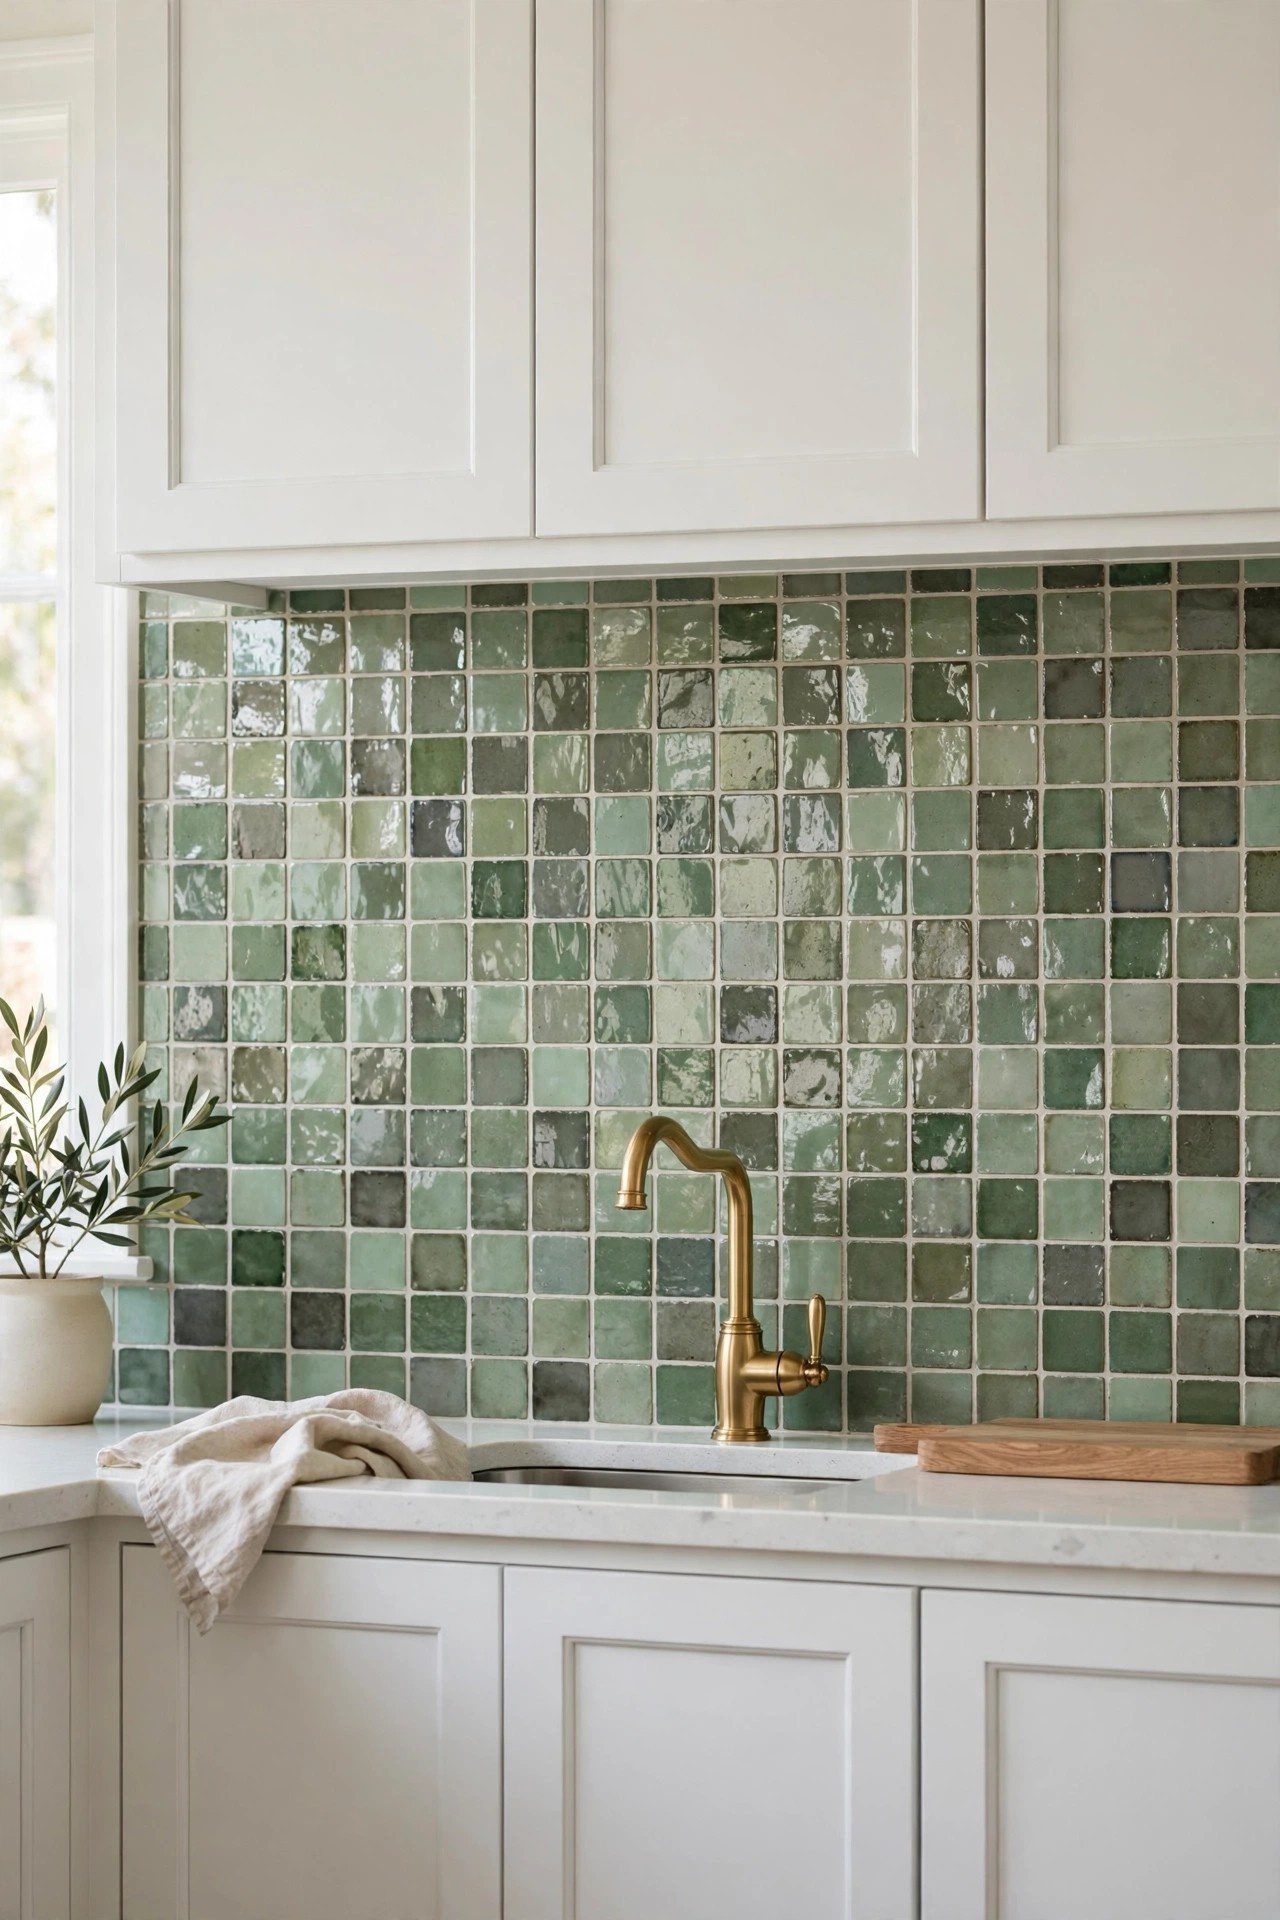
Description: Handmade look tiles in layered sage tones bring the color up the wall behind the range and sink, where it catches light and splashes. The variation between tiles is the point: no two squares share the same glaze, so the wall reads as tiled rather than printed. Peel and stick sheets copy the look for a fraction of the cost and suit renters, while real ceramic or glass tile is the permanent route. Keep the cabinets white or cream so the wall stays the feature.
Best For: White kitchens that need one strong surface of color and texture.
Not Ideal For: Kitchens with busy patterned counters, where a varied glaze adds a second competing pattern.
Estimated Cost: $90-$450 (estimate), peel and stick sheets at the low end and real tile with setting materials at the high end.
Budget Note: The main cost driver is area: a stove only splash costs a third of a full wall run, so measure before choosing the material.
Renter Friendly: With Conditions
Renter Note: Only the peel and stick version is removable, and only on smooth, sound paint; real tile is a permanent change.
What You Need
Zellige look tile sheets or real tiles in mixed sage tones, adhesive or thinset to suit the type, grout in a warm white, a level, spacers, a tile cutter or utility knife for sheets, and a sponge for grout haze. More tile patterns and layouts are in these kitchen backsplash ideas.
Product recommendation (partially verified): Smart Tiles Morocco Sefrou Peel and Stick Backsplash Tiles, Green
Why it fits: The maker’s description calls out layered shades of green inspired by Moroccan zellige, which is exactly the varied glaze this idea needs, and the sheets suit a renter or a first tile job because they need no grout.
Retailer/product page: https://www.target.com/p/smart-tiles-morocco-sefrou-peel-and-stick-backsplash-tiles-green/-/A-1010547980
How To Do It
- Measure the splash area and order 10 percent extra for cuts and mistakes.
- Degrease the wall thoroughly; adhesive and thinset both fail early on greasy paint.
- Start from the counter line at the most visible corner and work outward, checking level every few rows.
- Keep the maker’s stated heat clearance behind burners, and grout or seal edges once the tiles have set.
Pro Tip
Lay three or four tiles loose on the counter first and shuffle them until the light and dark squares are scattered evenly; a cluster of the darkest tiles in one corner looks like a stain.
6. A Sage and Cream Checkerboard Floor
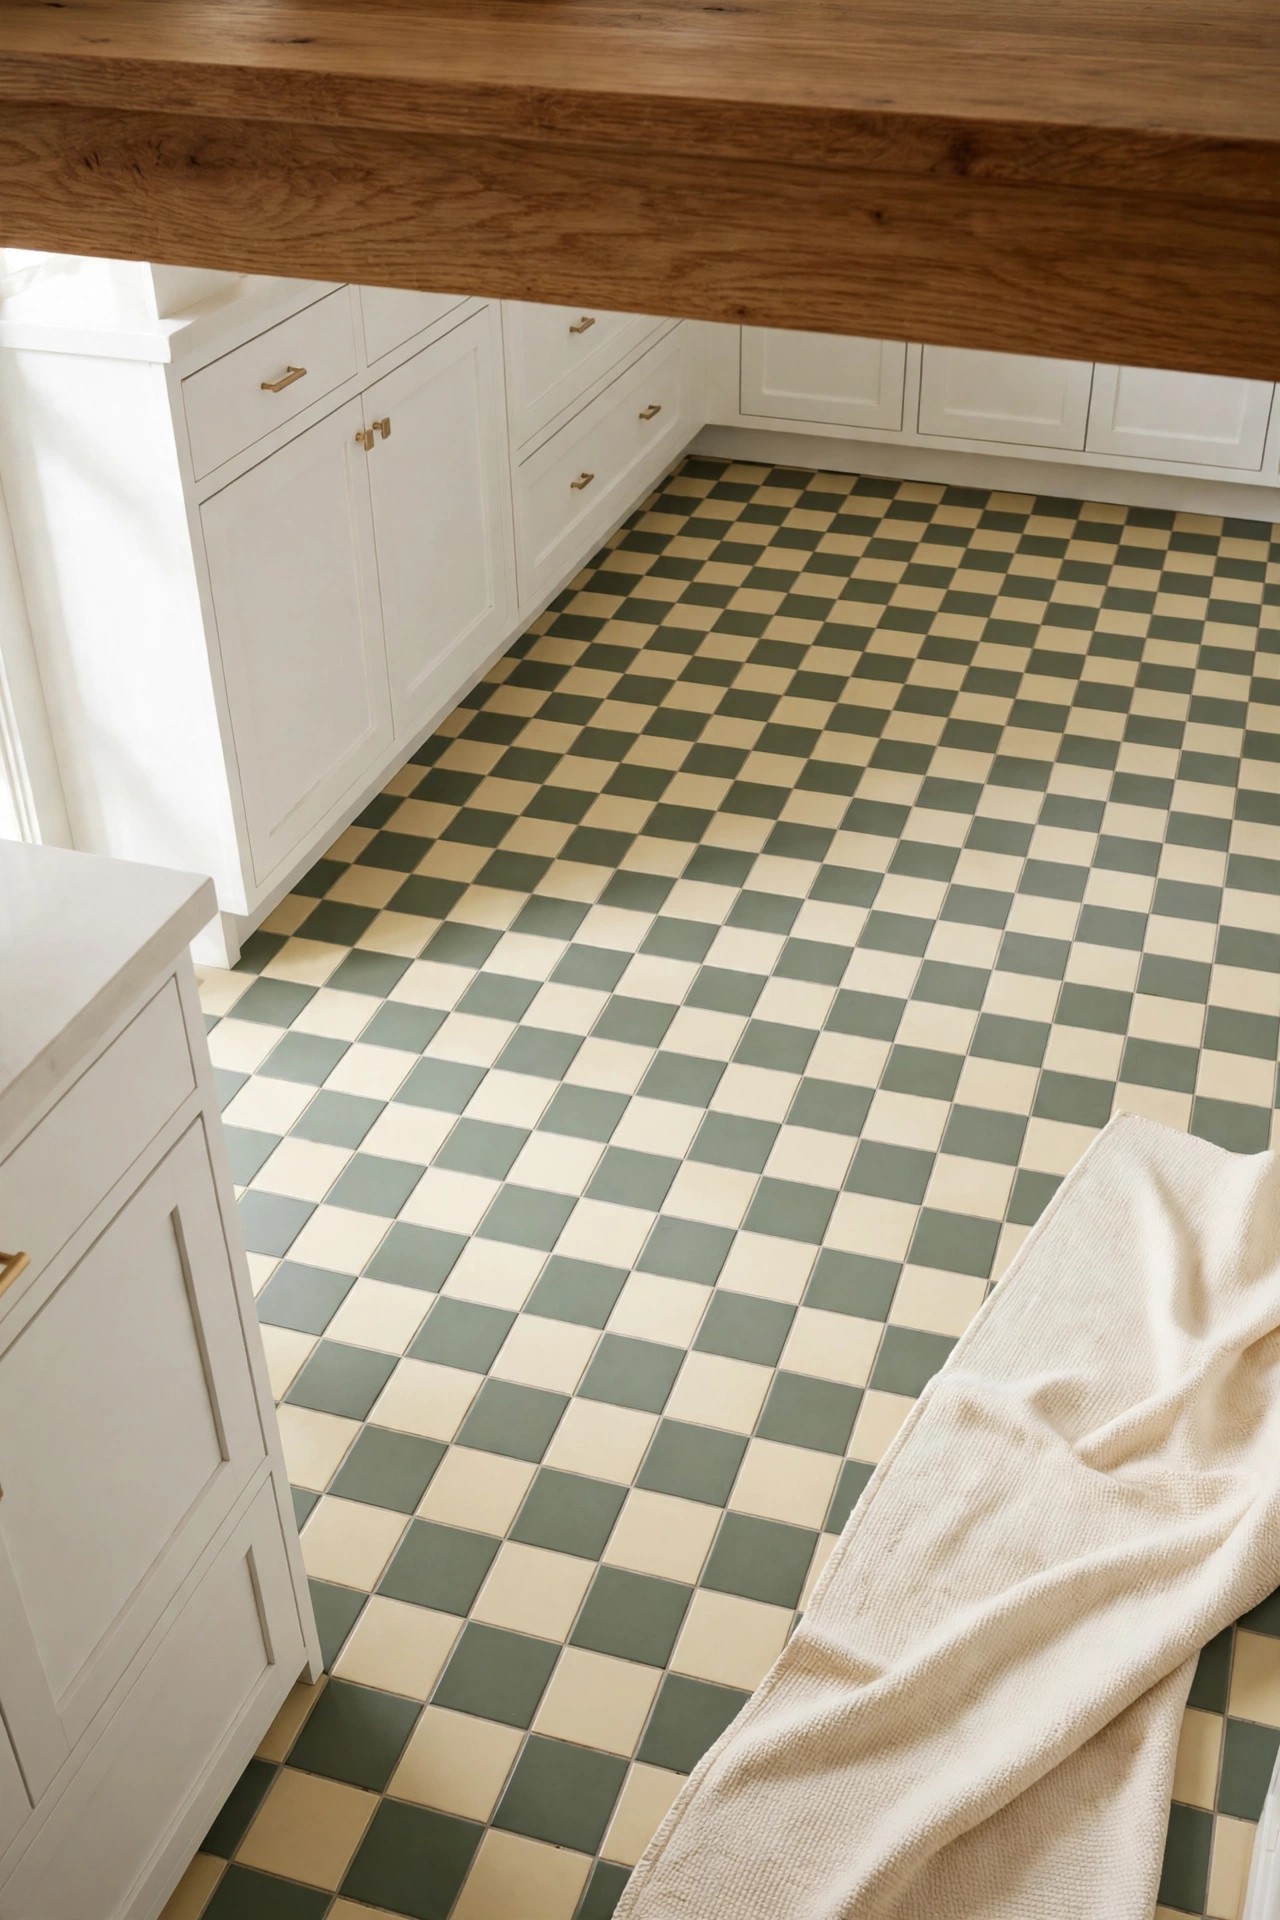
Description: A checkerboard floor in sage and cream gives a plain kitchen its pattern at ground level, where it changes the room without touching a wall or a cabinet. The sage square must stay muted: a bright green check reads playful instead of calm. Twelve inch tiles keep the pattern in scale for most kitchens, and a matte finish hides the scuffs a kitchen floor collects. Lay the pattern square to the room in a narrow galley; the diagonal layout only earns its extra cuts in a wide floor.
Best For: Plain kitchens with a sound, smooth existing floor and dated cabinets you are keeping.
Not Ideal For: Uneven or textured floors, where peel and stick tiles telegraph every bump and lift at the edges.
Estimated Cost: $120-$400 (estimate) for peel and stick vinyl tiles for an average kitchen floor.
Budget Note: Cost scales directly with floor area, so a galley kitchen gets this look for roughly half the tiles of an open plan room.
Renter Friendly: No
Renter Note: Floor tiles use strong adhesive that can mark the floor beneath; this is not a reversible renter project.
What You Need
Solid sage and solid cream peel and stick vinyl floor tiles in equal numbers, a tape measure, a chalk line, a utility knife and straightedge, a floor roller and a degreasing floor cleaner.
Product type to look for: 12 x 12 inch peel and stick vinyl floor tiles sold as solid colors, so you can alternate a muted sage with a warm cream from the same range; confirm both colors share the same thickness and finish, choose a matte water resistant tile made for kitchen floors, and order 10 percent extra for cuts.
How To Do It
- Find the center of the room with a chalk line and dry lay a row each way to check the border width.
- Degrease and dry the floor completely; adhesive lets go first in the greasy corners near the range.
- Stick tiles from the center outward, alternating colors, and roll each one firmly.
- Cut border tiles with the straightedge, keeping the pattern balanced on both sides of the room.
Pro Tip
Buy all the tiles in one order: the sage can shift noticeably between production batches, and a checkerboard shows a batch change more than any other pattern.
7. Sage Velvet Counter Stools With Brass Legs
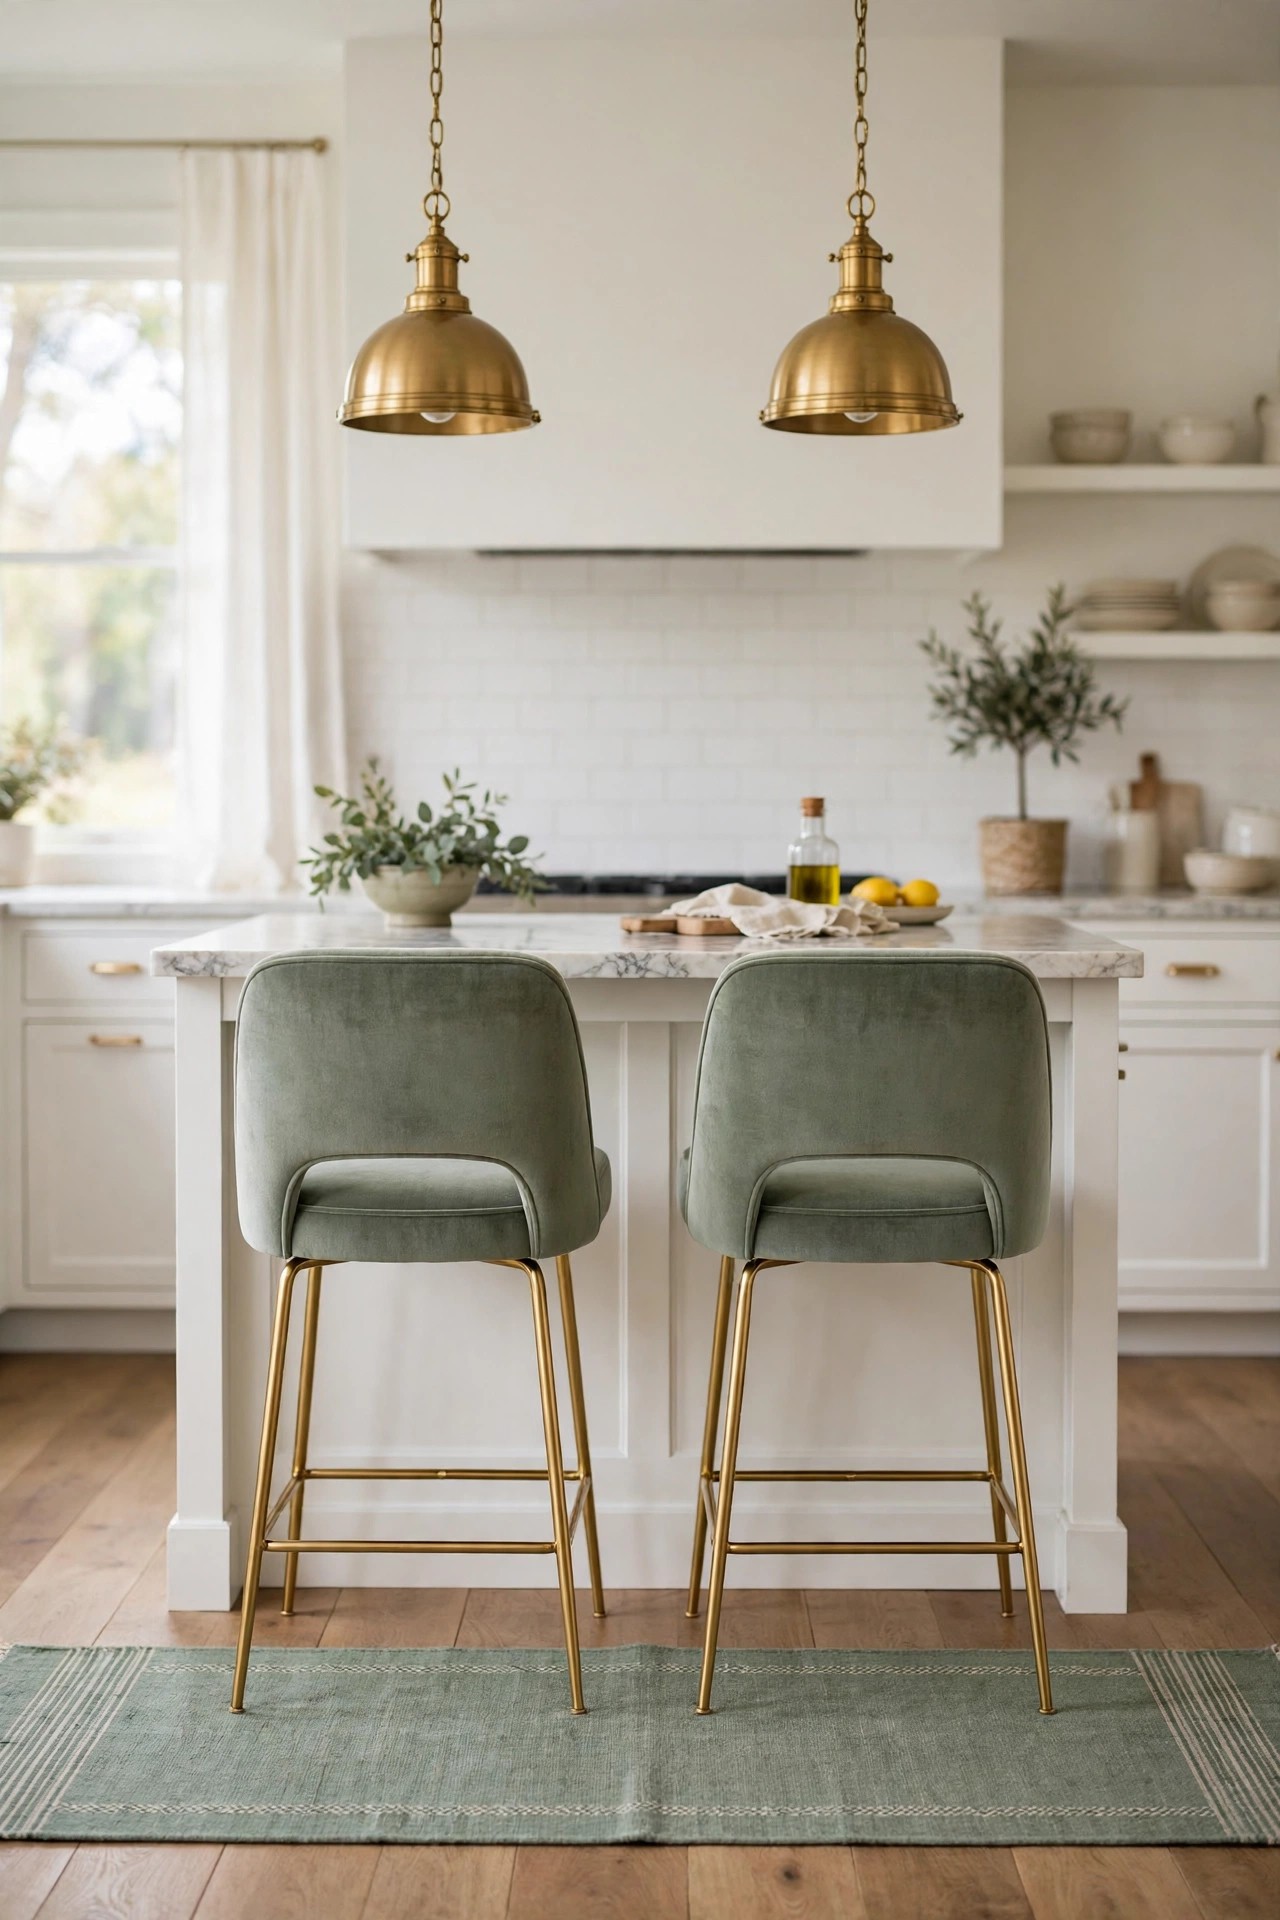
Description: Two sage stools at an island or counter bring the color into the room at sitting height, where fabric softens it. Velvet in a grey green reads closest to painted sage and pairs naturally with brass legs that echo cabinet hardware across the room. Measure before you buy: a standard counter needs a seat height near 24 to 26 inches. Stools are also the easiest idea here to move, sell or re-cover when tastes change, which makes them a low risk first step into the color.
Best For: Kitchens with an island or counter overhang and no budget for paint or tile.
Not Ideal For: Homes with cats that scratch upholstery, unless you choose a tight weave performance fabric instead of velvet.
Estimated Cost: $120-$350 (estimate) for a pair of upholstered counter stools.
Budget Note: A pair is usually sold as a set of two; a third stool for a long island is often the awkward extra purchase, so count your seats first.
Renter Friendly: Yes
Renter Note: Freestanding furniture needs no permission and leaves with you.
What You Need
A pair of counter height stools in a grey green fabric with brass or gold toned legs, felt pads for the feet and a tape measure to confirm seat height against your counter.
Product recommendation (partially verified): SEYNAR Velvet Counter Height Bar Stools, Set of 2, 26 inch, Matcha Green
Why it fits: The listing’s Matcha Green is a soft grey green close to sage, the 26 inch seat height suits standard counters, and the gold chrome plated legs repeat the brass used on cabinets and faucets in this list.
Retailer/product page: https://www.amazon.com/dp/B0DZBK4LGW
How To Do It
- Measure your counter height and confirm the stool seat sits 10 to 12 inches below it.
- Assemble the pair on a rug or blanket so the legs do not scratch the floor.
- Fit the felt pads, set the stools at the island and check the spacing: about 24 inches of counter per seat.
- Brush the velvet pile in one direction so both seats catch the light the same way.
Pro Tip
Photograph the stool fabric beside your wall or cabinet color before unwrapping the second box; screen colors run cool, and a stool that looked sage online can arrive closer to mint.
8. A Sage Washable Runner and Linen Towels
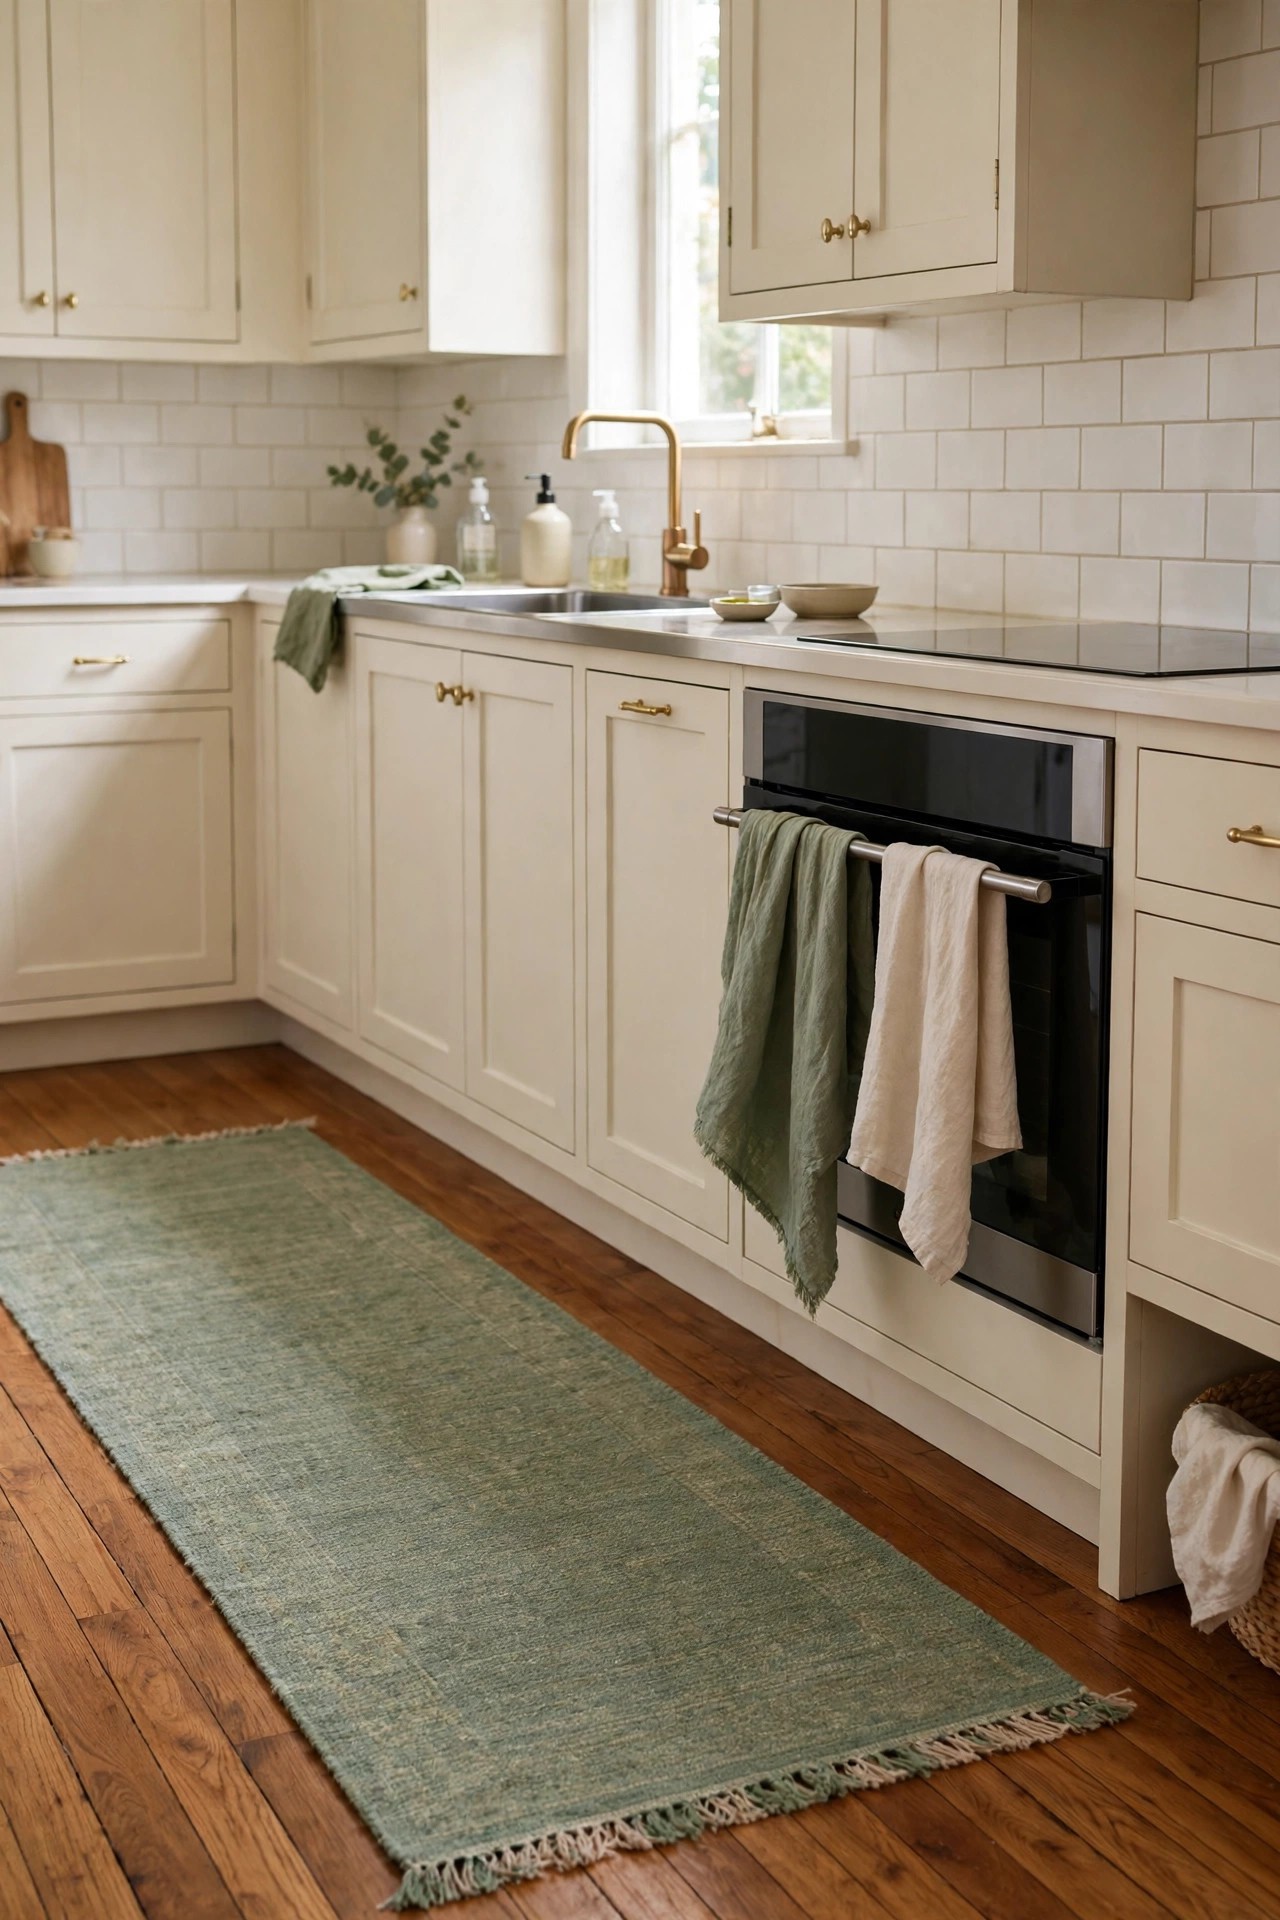
Description: Textiles carry sage onto the floor and the work surfaces in the softest way in this list: a washable runner along the sink run, linen towels on the oven rail and a plain sage cushion on a breakfast chair. The runner does real work too, catching splashes and easing tired feet, so choose one that goes in the washing machine rather than a decorative rug that cannot. Keep the pattern minimal or vintage and faded; sage works best as a near solid against wood and white.
Best For: Renters and anyone testing the color before a bigger commitment.
Not Ideal For: Very small kitchens where a runner crowds the walkway and catches on appliance doors.
Estimated Cost: $40-$120 (estimate) for a washable runner and a set of linen towels.
Budget Note: The runner is nearly all of the cost; towels in the same shade family are a small add on that makes the runner look planned.
Renter Friendly: Yes
Renter Note: Nothing here fixes to the building, and everything washes or packs away.
What You Need
A washable non slip runner in sage in the length of your sink run, linen or cotton towels in sage and cream, and a tape measure for the gap between the cabinets and the island.
Product recommendation (partially verified): TOWN & COUNTRY EVERYDAY Walker Modern Diamond Everwash Washable Runner, Sage Green, 24 x 72 inch
Why it fits: The listing gives the color as Sage Green in a 24 x 72 inch runner, a standard sink run length, with a non slip backing and machine wash care, which is what a kitchen runner beside a sink actually needs.
Retailer/product page: https://www.amazon.com/dp/B0CGLGTKZS
How To Do It
- Measure the run and choose the runner length that leaves a hand’s width of floor showing at both ends.
- Wash the runner once before placing it; washable rugs settle flatter after the first wash.
- Lay it flat, smooth the corners down and check that appliance doors open clear of its edge.
- Hang the towels in an alternating sage and cream order so the color repeats at working height.
Pro Tip
In a kitchen the runner will be washed often, so buy the color slightly deeper than your target sage: repeated washing fades printed rugs a shade lighter over the first year.
9. Sage Linen Curtains at the Sink Window
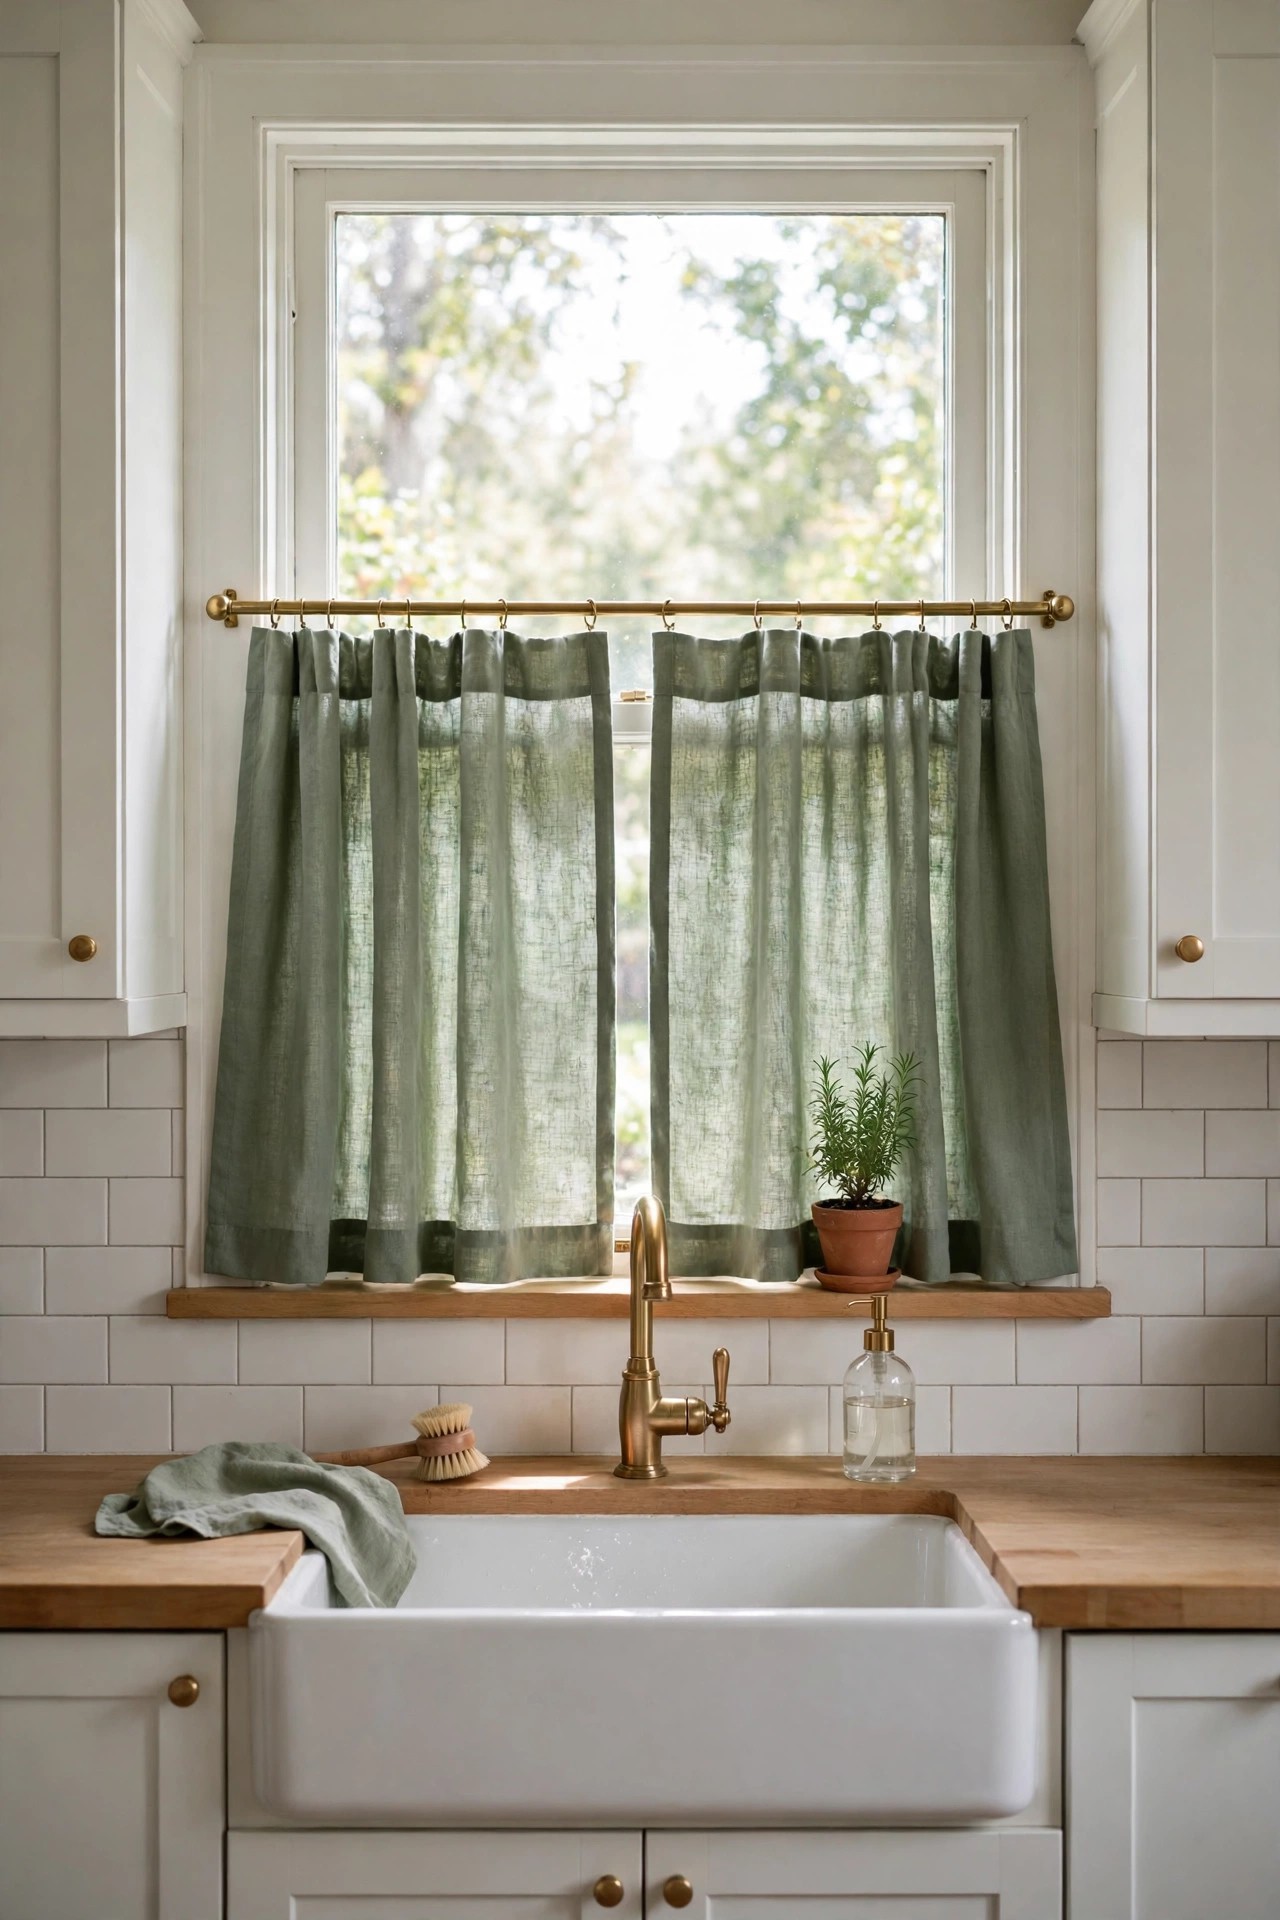
Description: A pair of sage linen panels at the kitchen window spreads the color at the exact point where the light comes in, and linen treats light kindly: it diffuses the glare over the sink without darkening the room. Panels that cover the lower half of the window keep privacy while the top stays open to the sky. Hang them on a slim brass rod to repeat the metal used on the cabinets. Because linen softens with washing, the shade will mellow slightly over the first year.
Best For: Kitchens overlooked by neighbors, where the sink window needs privacy without blinds.
Not Ideal For: Windows directly behind a gas range, where loose fabric near burners is a fire risk; use a shade fitted inside the frame there instead.
Estimated Cost: $30-$90 (estimate) for two linen panels and a slim rod.
Budget Note: Two shorter panels cost far less than full length curtains and suit a kitchen window better, so measure height before defaulting to standard lengths.
Renter Friendly: Yes
Renter Note: A tension rod inside the window frame holds the panels with no drilling and no marks.
What You Need
Two sage linen light filtering panels sized to your window, a slim brass rod or a tension rod, a tape measure and a step stool.
Product recommendation (partially verified): LAMIT Sage Green Linen Semi Sheer Curtains, 2 panels, 38 x 63 inch
Why it fits: The listing gives the color as Sage Green in a linen blend with a light filtering weave, and the 38 x 63 inch panels suit a standard kitchen window cut down to café length; the back tab and rod pocket give two hanging options.
Retailer/product page: https://www.amazon.com/dp/B0CZHQ3BN8
How To Do It
- Measure the window and decide the drop: sill length for a working sink window, so fabric stays clear of splashes.
- Fit the rod or tension rod and thread or clip the panels on.
- Adjust the gathers evenly so both panels fall in matching folds.
- Wash on a gentle cycle before the first hanging if the fabric arrives creased, and hang it slightly damp so the folds set.
Pro Tip
Hold the fabric against the window in daylight before cutting or hemming: backlit linen reads a full shade lighter than the same fabric against a wall.
10. Sage Stoneware Dinnerware on Open Shelves
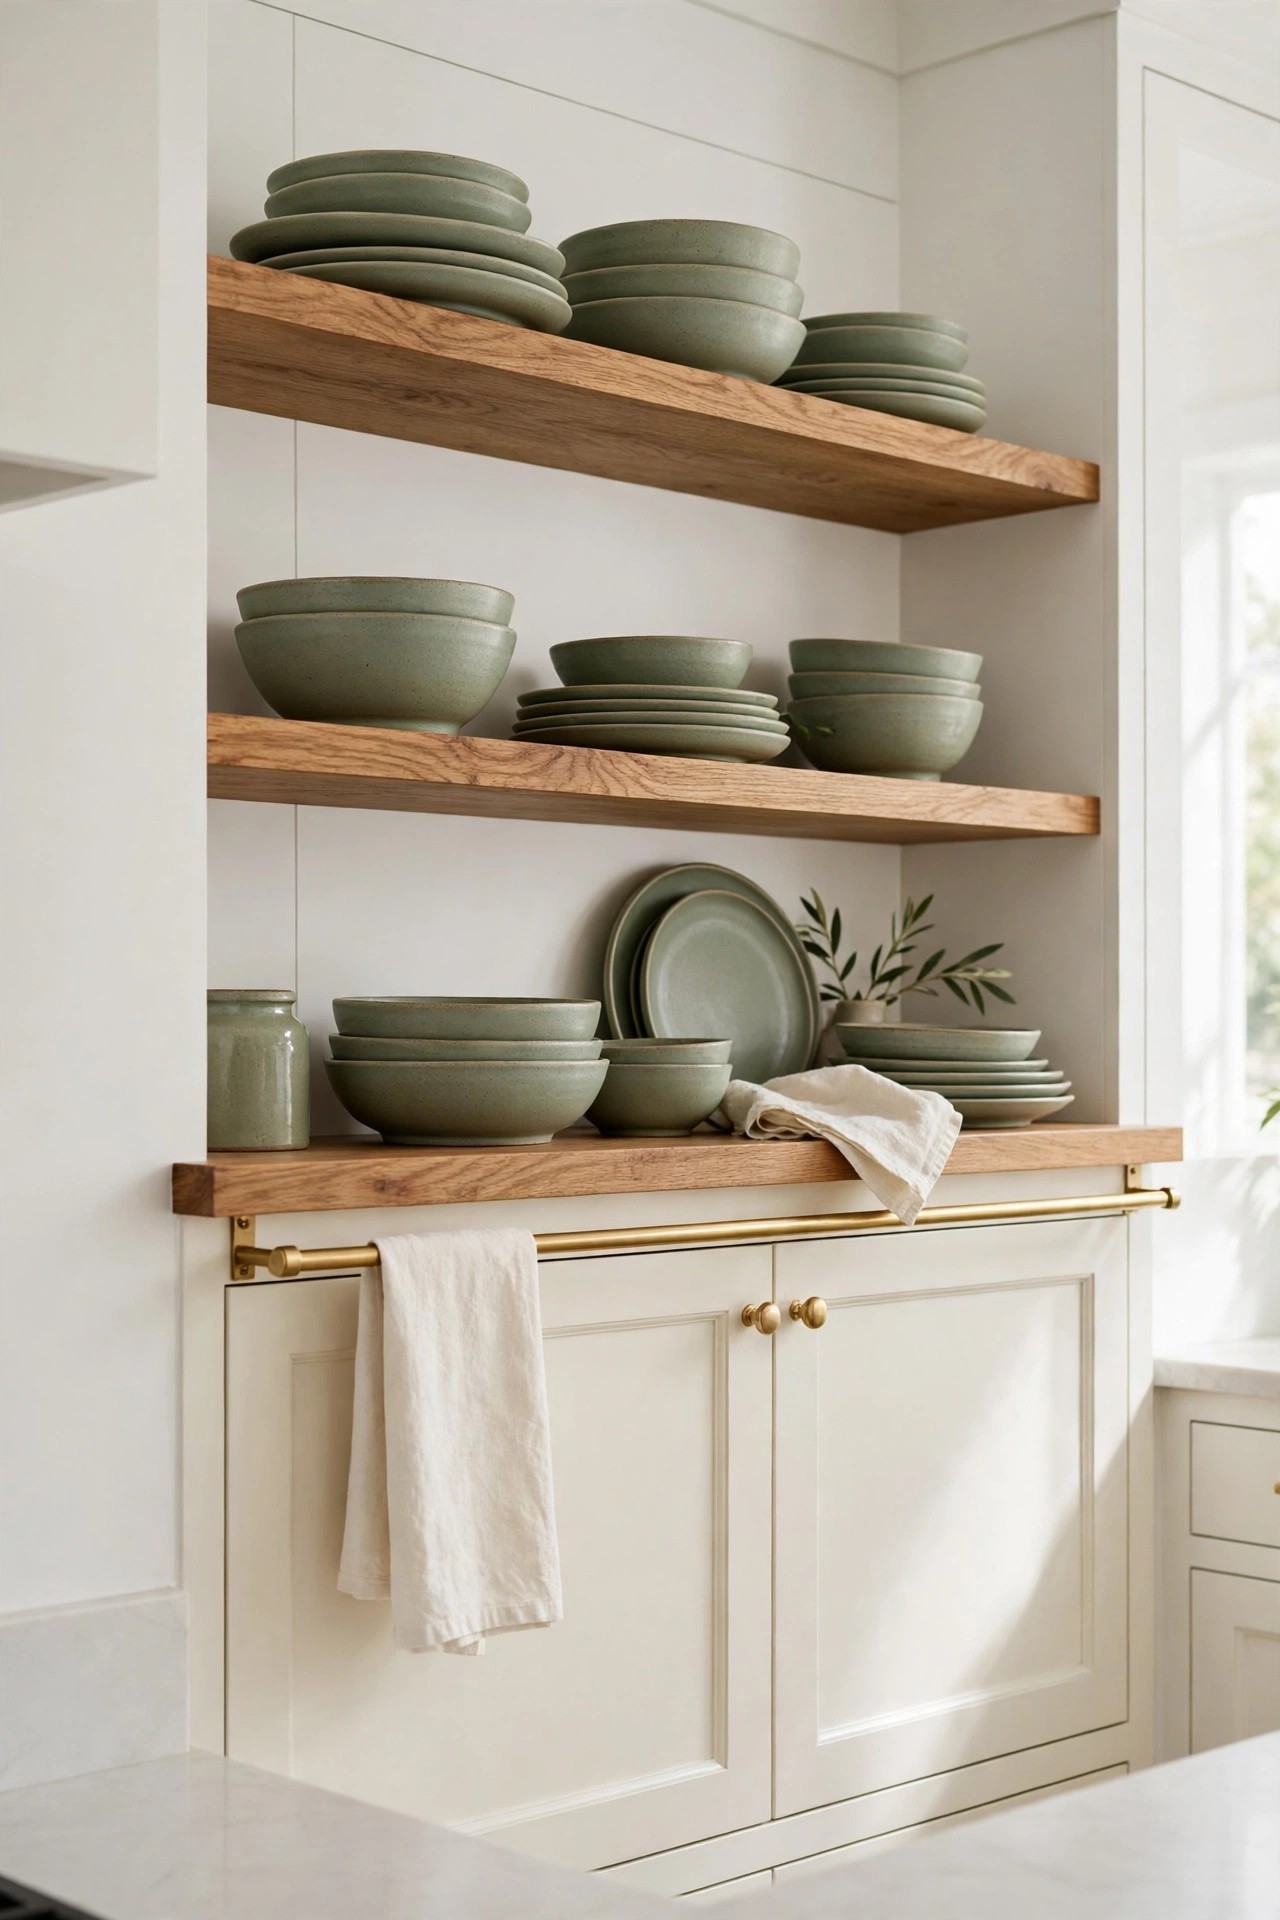
Description: Sage dinnerware earns its place on open shelves or behind glass doors, where plates and bowls become the color in an otherwise white kitchen. A reactive glaze stoneware set varies gently from piece to piece, which keeps a full shelf from looking flat. Service for four is enough for display and daily use in most homes. The trade off is dust and grease: open shelves near a range collect film, so keep the shelf run away from the stove and rinse pieces before guests arrive.
Best For: White kitchens with open shelves or glass front cabinets that currently look empty.
Not Ideal For: Open shelves directly beside or above the stove, where cooking grease settles on stored dishes.
Estimated Cost: $60-$140 (estimate) for a stoneware dinnerware set for four.
Budget Note: One set for four covers daily use and the shelf display at once; buying open stock singles for display only usually costs more per piece.
Renter Friendly: Yes
Renter Note: The dinnerware is yours to keep; the shelves need no alteration, just styling.
What You Need
A sage stoneware dinnerware set for four, shelf space away from the range, a plate stand or two for one upright plate, and a soft cloth for a quick dust before guests.
Product recommendation (partially verified): GBHOME Stoneware Dinnerware Set for 4, 12 pieces, Sage Green
Why it fits: The listing gives the color as Sage Green in a 12 piece service for four with a ribbed, reactive glaze finish, and states dishwasher and microwave safe care, which suits dishes that are used daily rather than only displayed.
Retailer/product page: https://www.amazon.com/dp/B0FW4MBYQ8
How To Do It
- Clear the shelf and group the set by type: plates stacked, bowls nested, one plate upright at the back.
- Keep the heaviest stacks on the lowest shelf and within easy reach of the dishwasher’s side of the room.
- Leave small gaps of empty shelf between groups so the color reads as a display, not storage overflow.
- Rotate the pieces in use so the same plates are not washed daily while others sit untouched.
Pro Tip
Check the shelf depth before ordering: dinner plates near 10.5 inches need a shelf at least 11 inches deep, or they will overhang the edge.
11. A Sage Dutch Oven as the Countertop Anchor
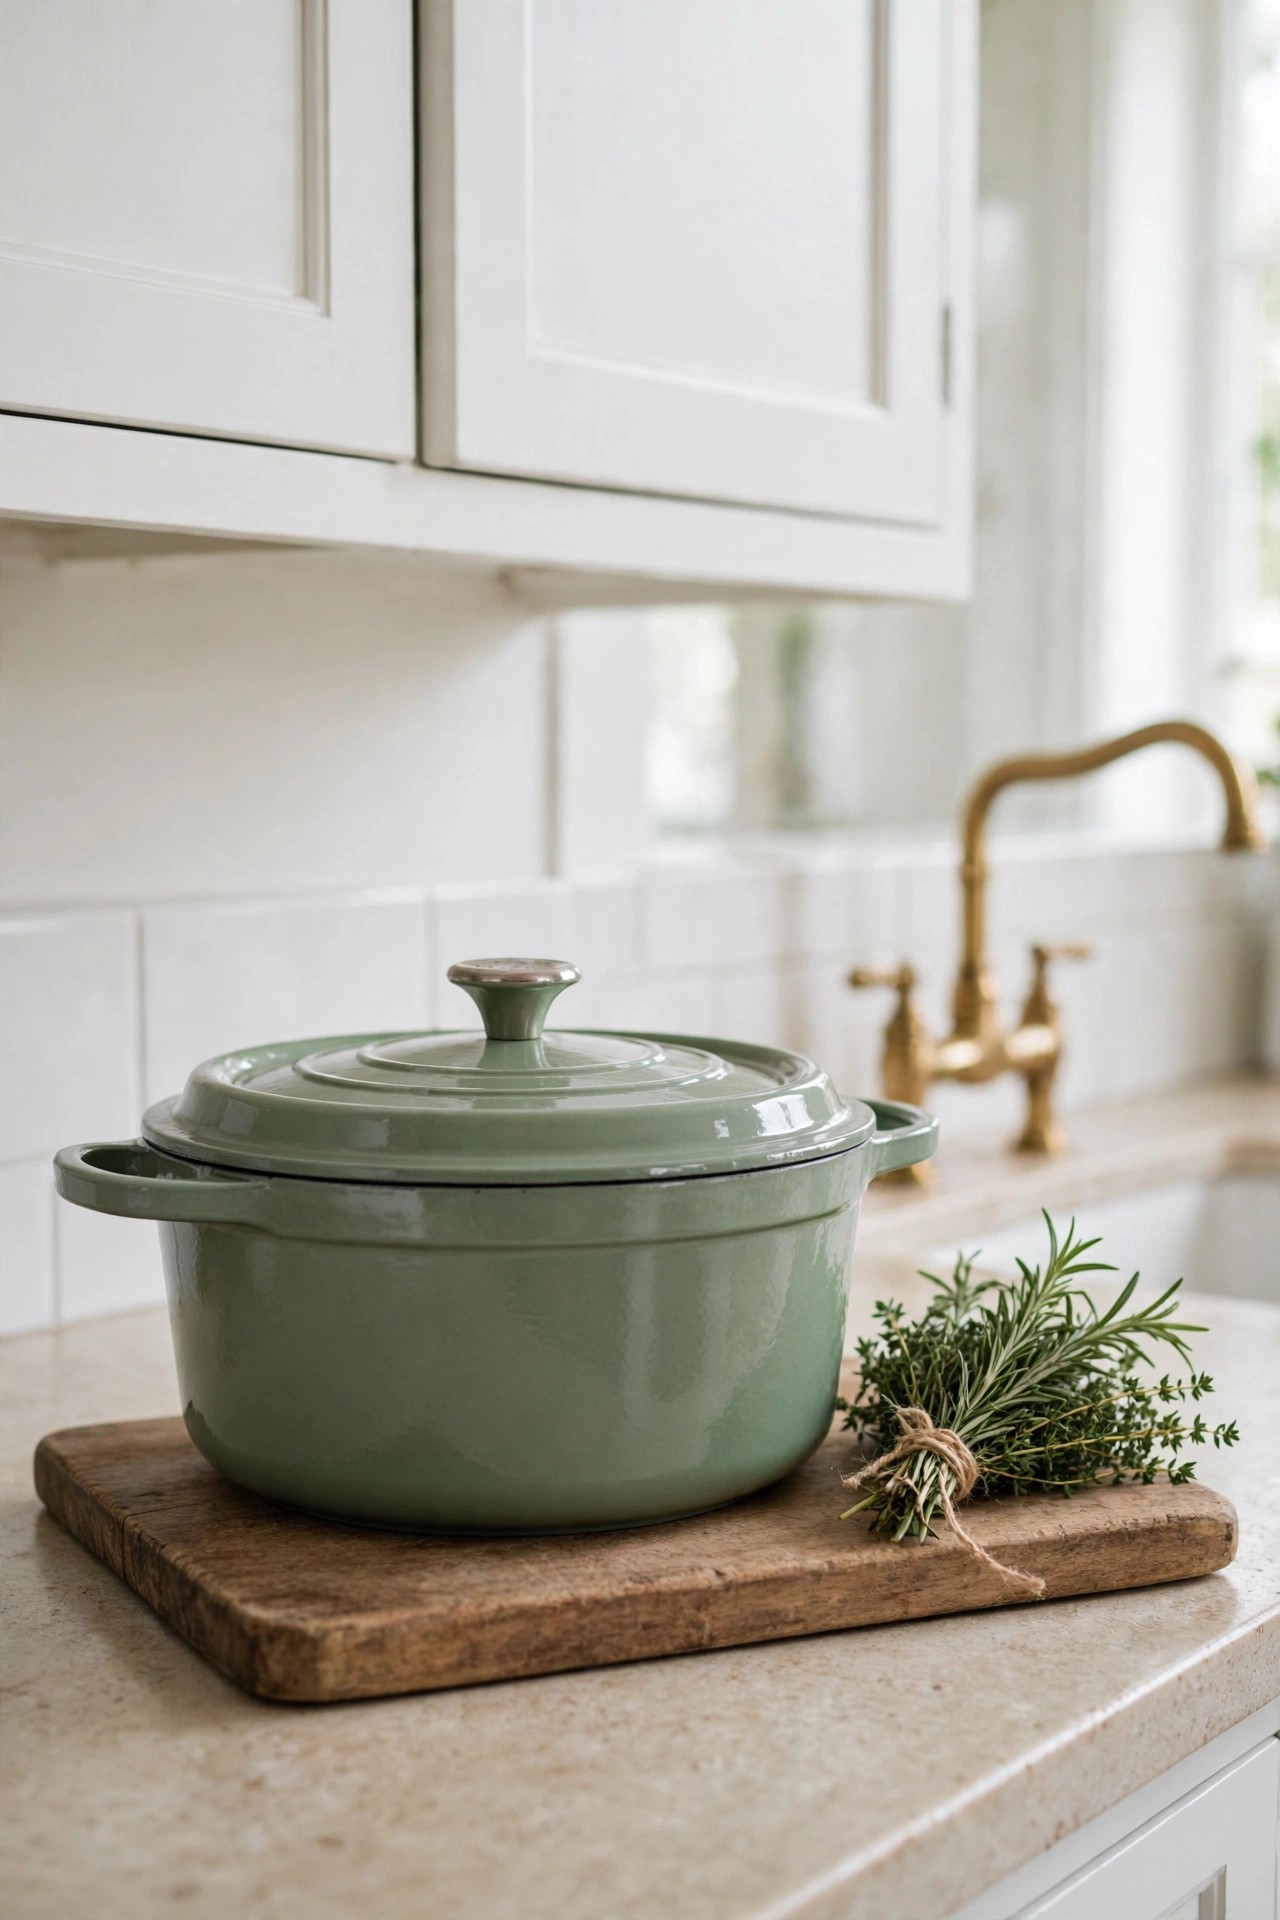
Description: A sage Dutch oven left on the stove or set on a wood board on the counter is the smallest commitment in this list: one object, in daily use, carrying the whole color. Enameled cast iron earns its counter space because it cooks as well as it looks, moving from stove to oven to table. The sage enamel sits calmly beside brass, wood and white. It is heavy, so decide its home once rather than lifting it in and out of a low cupboard every day.
Best For: Cooks who use a Dutch oven weekly and want the color with zero installation.
Not Ideal For: Anyone who dislikes visual clutter on counters, or small kitchens where one large pot takes a real share of the worktop.
Estimated Cost: $45-$120 (estimate) for an enameled cast iron Dutch oven around 5.5 quarts.
Budget Note: This is a working tool rather than decor, so judge the price against a plain colored pot you would buy anyway, not against ornaments.
Renter Friendly: Yes
Renter Note: A pot is a possession, not an alteration; it suits every tenancy.
What You Need
An enameled cast iron Dutch oven in sage around 5.5 quarts, a wood board or trivet to sit it on, and a soft cloth for the enamel.
Product recommendation (partially verified): Figmint 5.5 Quart Enamel Dutch Oven, Sage Green
Why it fits: The Target listing names the color Sage Green on a 5.5 quart enameled cast iron pot, the family size that covers soups, stews and a loaf of bread, so it can live on the stove without looking staged.
Retailer/product page: https://www.target.com/p/5-5qt-enamel-dutch-oven-sage-green-figmint-8482/-/A-87713580
How To Do It
- Choose its permanent spot first: a back burner or a board on the counter beside the range.
- Wash and dry the pot before first use, and check your stove spacing against its width.
- Use wood or silicone tools on the enamel and let the pot cool before washing to protect the finish.
- Keep the lid slightly ajar in storage so the interior stays fresh.
Pro Tip
If the rest of your kitchen is white, this single pot reads as the room’s color decision; add one small echo, a sage towel on the oven rail, and the effect doubles.
12. A Living Herb Row in Sage Green Pots
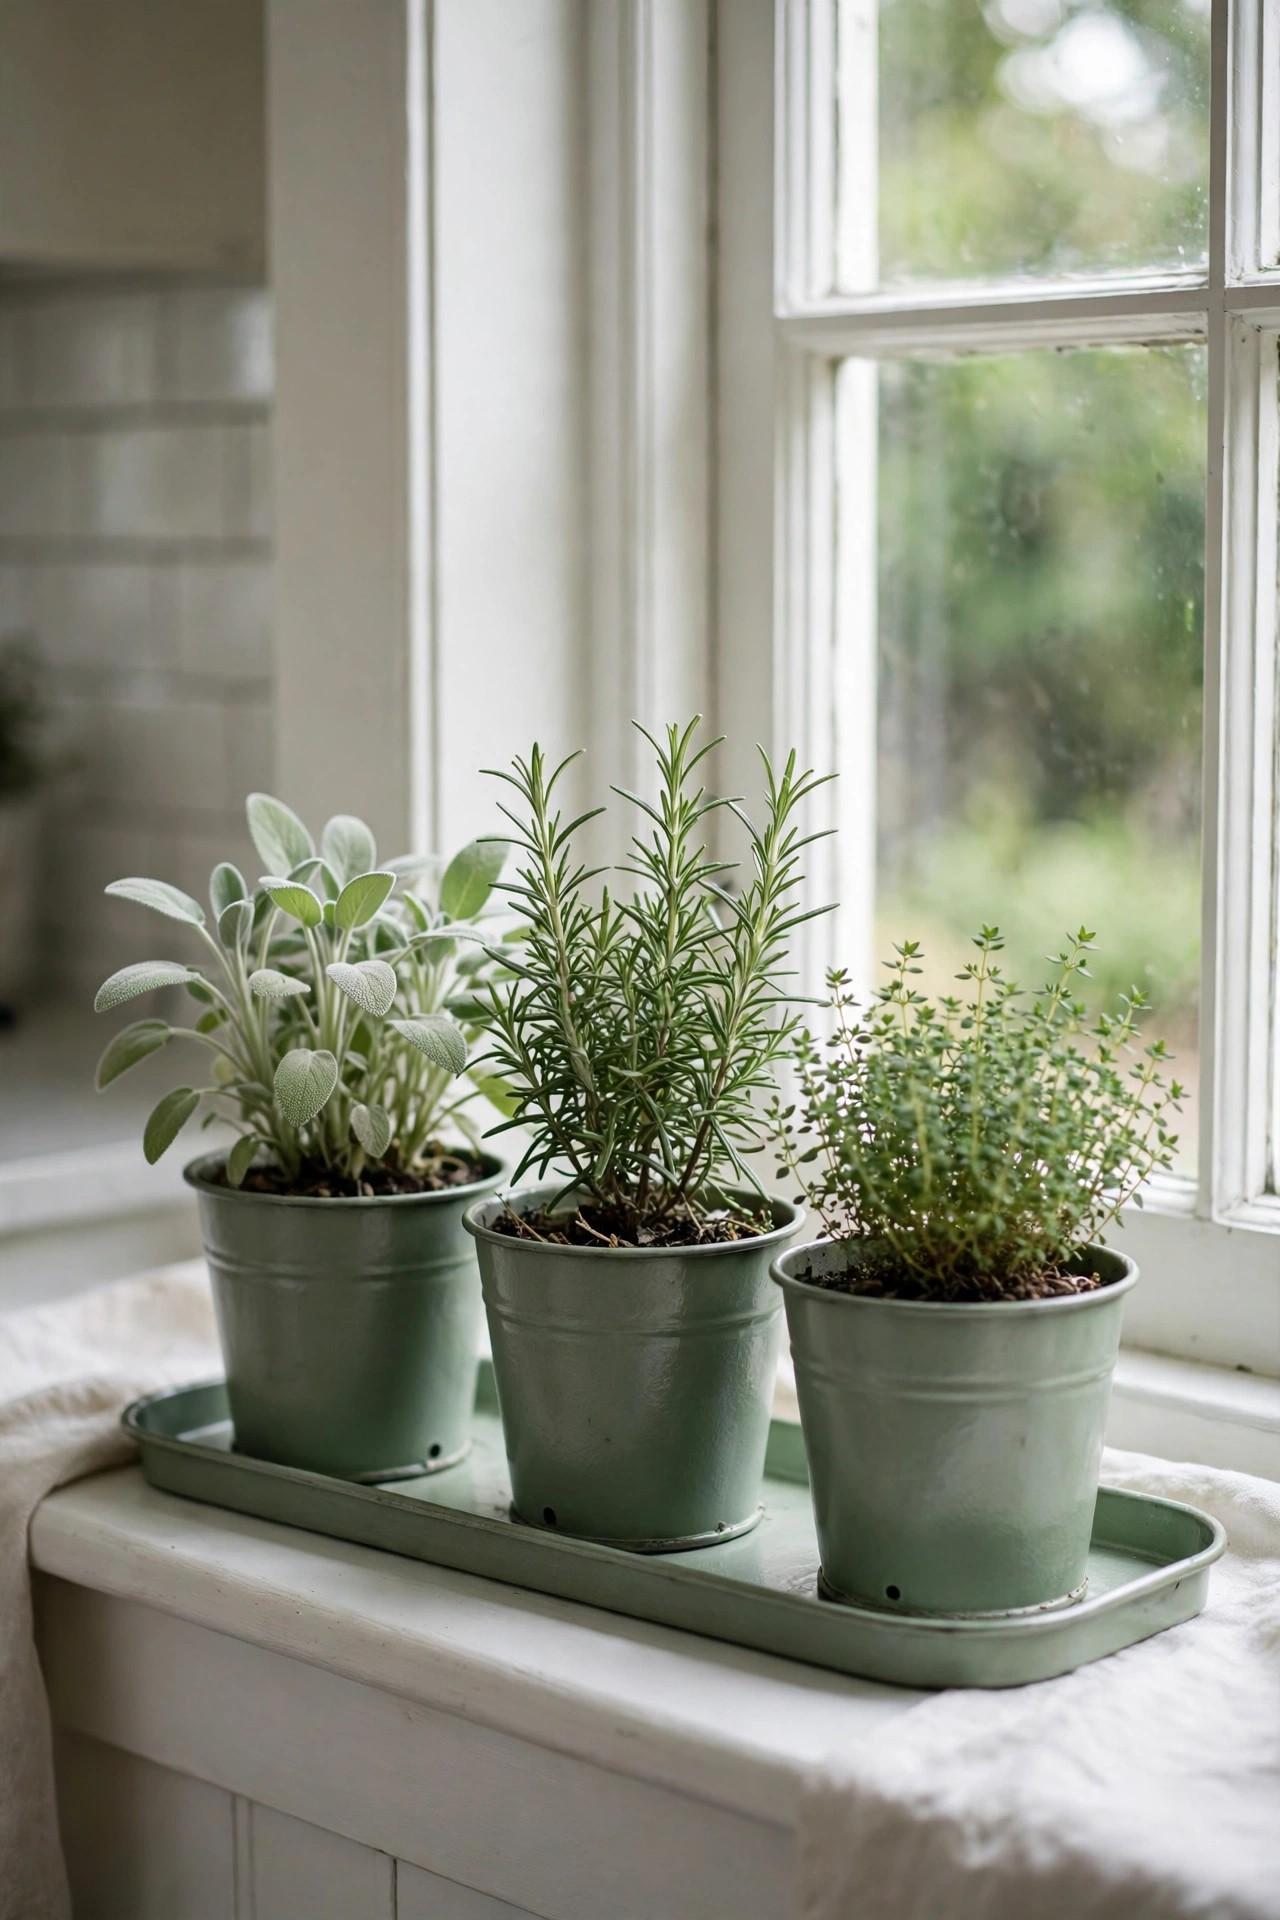
Description: A row of herbs on the windowsill is the one place sage appears as a plant as well as a color: the herb sage has soft grey green leaves that match painted sage closely. Grow it with rosemary and thyme, which share its preference for bright light and modest watering, in green metal pots on a tray that catches the drips. The pots repeat the color at the brightest point in the room. Herbs need long hours of light, so a dark window limits this idea to the brighter months.
Best For: Sunny kitchen windows above the sink, where watering is easy to remember.
Not Ideal For: North facing or shaded windows with fewer than about six hours of light, where culinary herbs grow leggy and pale.
Estimated Cost: $35-$90 (estimate) for a three pot planter set with tray, three herb plants and potting mix.
Budget Note: Supermarket herb plants in small pots are the cheapest start and transplant well; seeds cost less but take weeks to fill the pots.
Renter Friendly: Yes
Renter Note: Pots on a sill alter nothing; use the tray so water never sits on the landlord’s paintwork.
What You Need
A three pot windowsill planter set with a tray in a soft green finish, potting mix for herbs, and young plants of sage, rosemary and thyme.
Product recommendation (partially verified): SORANGEUN Metal Herb Garden Planter Set with Tray, 3 pack, Green
Why it fits: The listing describes three green zinc coated metal pots of about 4.7 inches with drainage holes on a 13.8 inch handled tray, a size made for a kitchen sill, and the green finish ties the plants to the room’s color.
Retailer/product page: https://www.amazon.com/dp/B0G5XSM4FP
How To Do It
- Check the sill depth against the tray before ordering; many sills are narrower than they look.
- Fill the pots with herb potting mix, transplant the herbs at their original depth and water them in.
- Set the tray on the sunniest sill and turn it a quarter turn every few days so the plants grow evenly.
- Water into the pots, empty the tray after half an hour, and pinch the sage tips often so it bushes out instead of climbing.
Pro Tip
Keep mint out of this row: it is the one common herb that will crowd out its neighbors, and it belongs in a pot of its own on the counter.
13. Inside the Pantry: Sage Liner and Cream Canisters
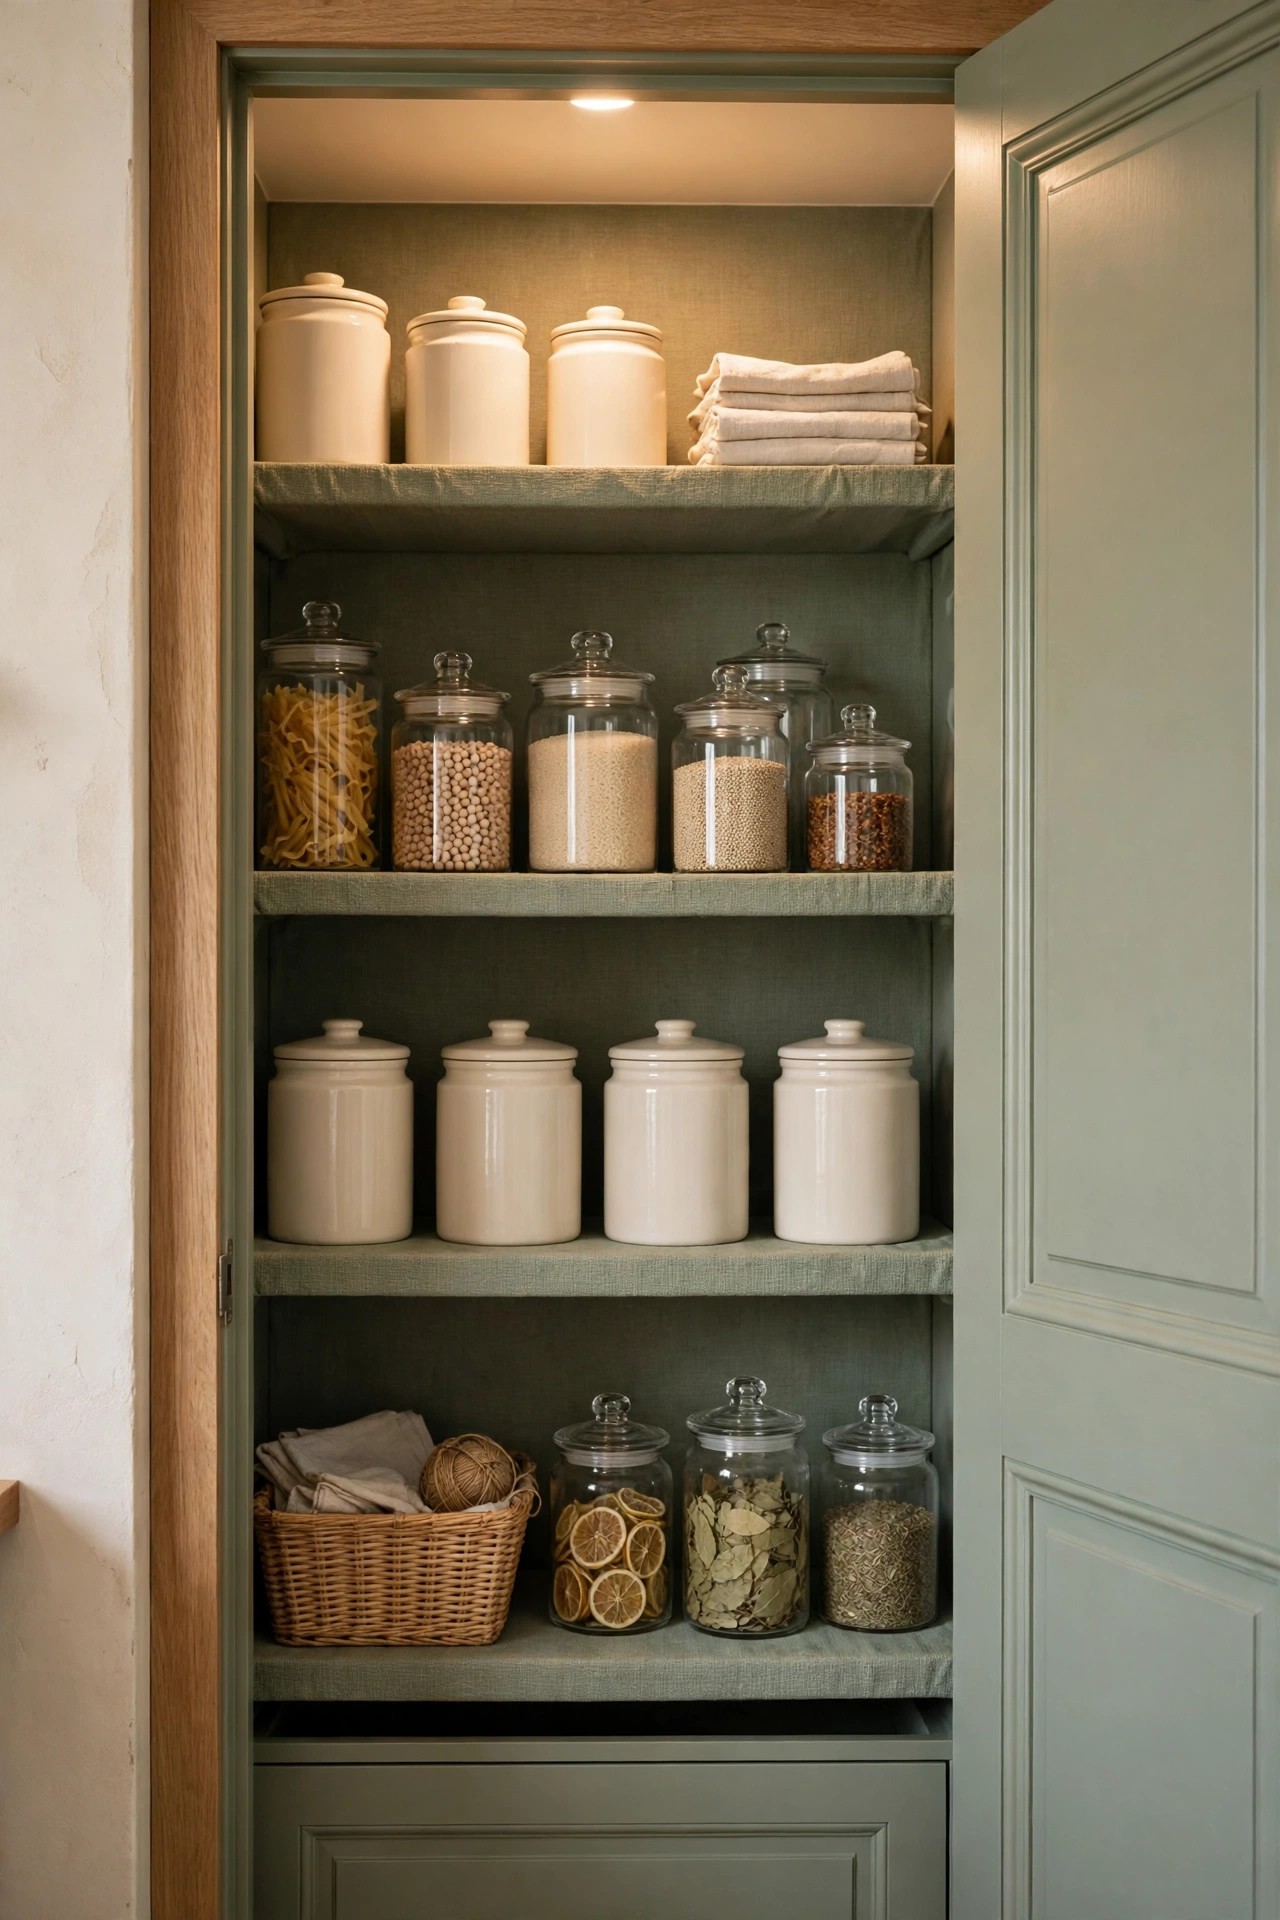
Description: The inside of a pantry is easy to forget, which is exactly why color works there: open the door and sage lined shelves make plain jars and cream canisters look deliberate. A non adhesive liner cuts to size with scissors, protects the shelves from oil rings and flour dust, and lifts straight out for washing. If the pantry is yours to alter, paint the inside of the door the same sage for the full effect. Clear containers keep the look calm; a jumble of bright packaging fights the color.
Best For: Reach in pantries and larder cupboards that look tired inside tidy kitchens.
Not Ideal For: Walk in pantries with wire shelving, where flat liner has nothing smooth to sit on.
Estimated Cost: $25-$80 (estimate) for shelf liner and a small set of plain canisters.
Budget Note: The liner roll covers several shelves from one purchase, so the pantry and the utensil drawers can share a single roll.
Renter Friendly: Yes
Renter Note: A non adhesive liner lifts out without a mark; skip the painted door unless you have permission.
What You Need
A roll of non adhesive sage shelf liner wide enough for your shelves, plain cream or glass canisters, scissors, a tape measure and a damp cloth.
Product recommendation (partially verified): MIAONET Sage Green Shelf Liner, 12 x 240 inch
Why it fits: The listing gives the color as Sage Green in a 12 x 240 inch non adhesive roll, described as waterproof, washable and non slip, which is the combination a food shelf needs: grip for jars, and easy cleaning after a flour spill.
Retailer/product page: https://www.amazon.com/dp/B0F31X65G3
How To Do It
- Empty one shelf at a time, wash it and let it dry fully before lining.
- Measure and cut the liner a fraction short of the shelf edges so it lies flat without curling.
- Smooth it down from the center outward and reload the shelf with the plainest containers at the front.
- Repeat shelf by shelf, keeping heavy tins on the lowest shelf.
Pro Tip
Date dry goods on a small piece of masking tape on the base of each canister, where the note stays invisible from the front but saves guessing later.
14. A Sage Wrapped Refrigerator for Renters
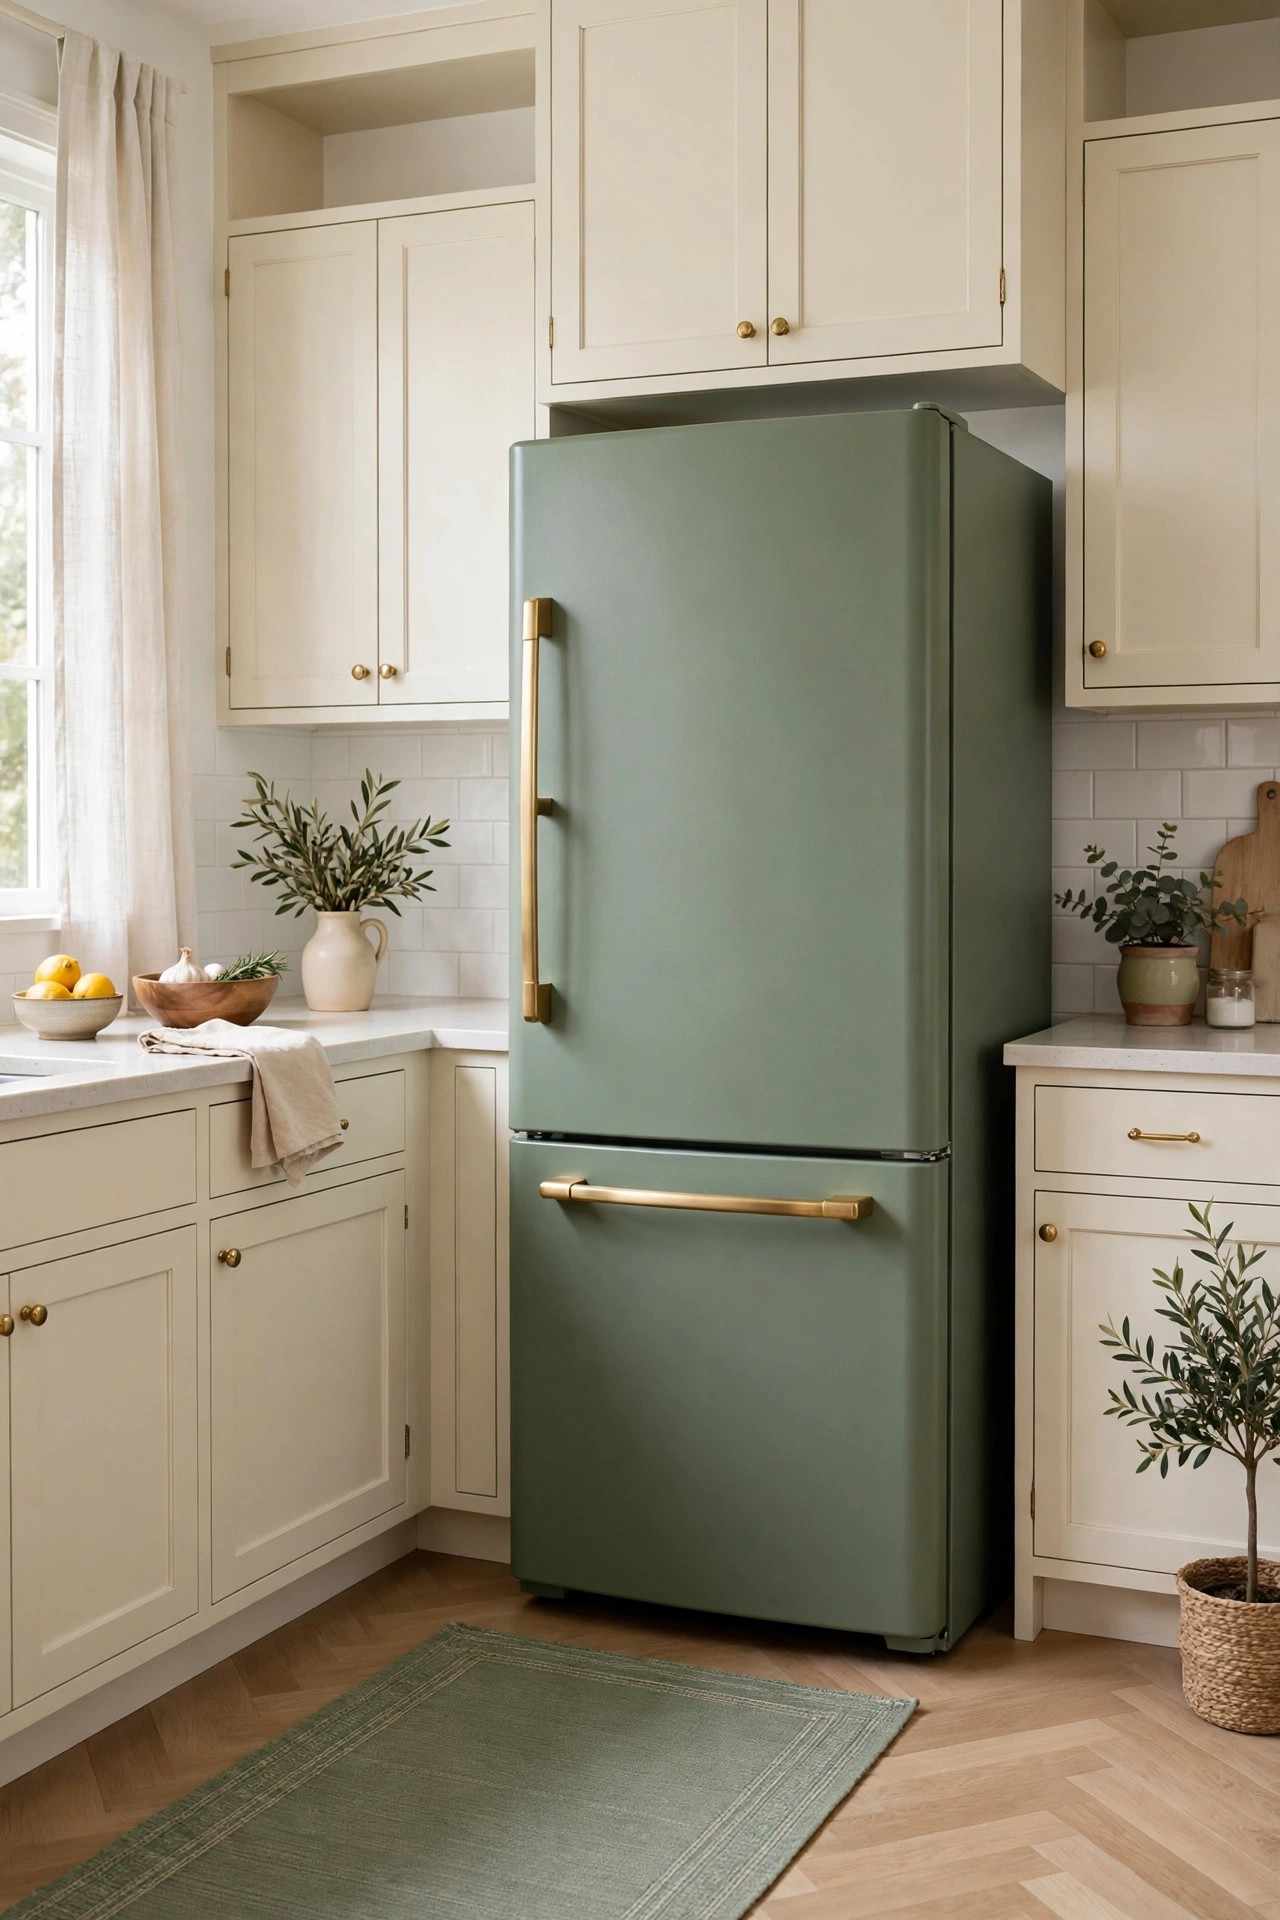
Description: Wrapping the refrigerator in matte sage vinyl gives renters and cautious owners the big color moment without paint. The wide rolls cover a standard fridge front in two vertical passes, and the matte finish matches painted sage far better than a glossy one. Work slowly with a squeegee, because trapped bubbles and stretched corners are where wraps fail. Check the lease first, and test a small patch behind the handle: most wraps peel off cleanly, but adhesive behavior varies with the age and finish of the appliance.
Best For: Renters whose lease allows removable films, and owners testing sage before painting cabinets.
Not Ideal For: Fridges with heavy texture, deep dents or failing paint, where vinyl will telegraph every flaw and may lift the finish on removal.
Estimated Cost: $35-$110 (estimate) for wide sage vinyl rolls to cover a standard fridge front and doors.
Budget Note: The wide 32 inch rolls cost more per roll but halve the seams on a fridge door, which is where cheap narrow rolls end up costing time instead.
Renter Friendly: With Conditions
Renter Note: Only with the lease checked and a test patch done; keep the wrap away from oven heat, and never cover vents or the ice dispenser workings.
What You Need
Matte sage peel and stick vinyl in a wide roll, a squeegee, a utility knife, a tape measure, a spray bottle of water with a drop of soap and a microfiber cloth.
Product recommendation (partially verified): VaryPaper Sage Green Peel and Stick Contact Paper, 32 x 118 inch, Matte
Why it fits: The listing gives the color as Sage Green with a matte finish in a 32 x 118 inch roll, about 26 sq ft of coverage, and the width is the point: one pass covers most of a fridge door with no seam down the middle.
Retailer/product page: https://www.amazon.com/dp/B09QKW2G1Y
How To Do It
- Test a small patch in a hidden spot for a day and check it peels away cleanly.
- Remove handles if they unbolt simply, clean the doors with a degreaser and dry them fully.
- Apply each pass from the top down, squeegeeing from the center out, and pop any bubble with a pin rather than stretching the film.
- Trim the edges with the knife, refit the handles, and keep heat guns and ovens away from fresh seams for the first day.
Pro Tip
Wrap the side of the fridge that faces the room before the front: it is the panel guests actually see in most layouts, and it is flat, forgiving practice for the doors.
15. Test the Shade First: Big Samples in Your Own Light
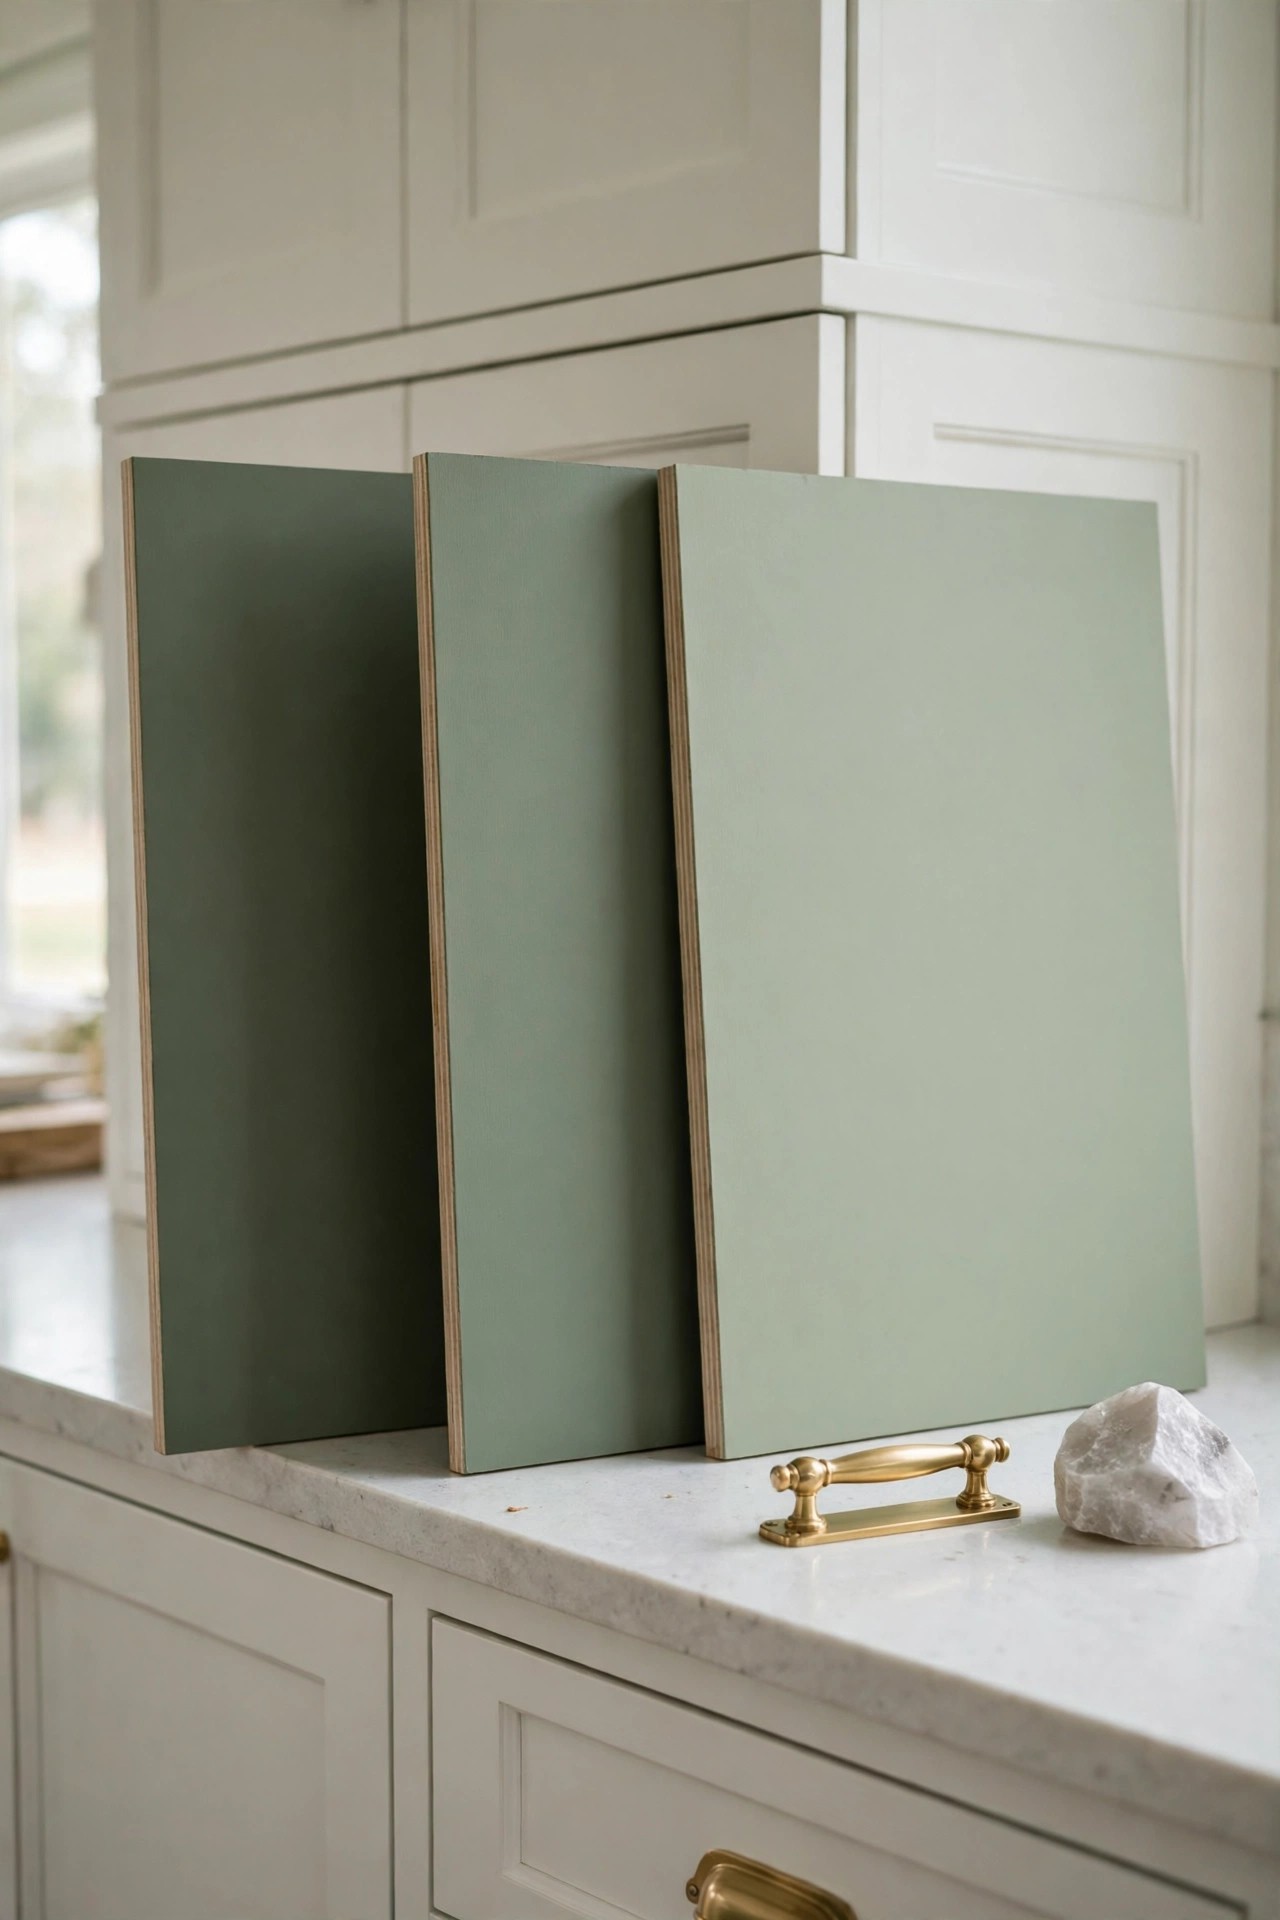
Description: Sage fails more often at the choosing stage than at the painting stage, because a two inch chip cannot show how the shade behaves at scale. Large peel and stick samples made with real paint solve this: stick one on a cabinet door and one on the wall, then judge both in morning light, flat afternoon light and under your evening lamps. A sage that turns blue carries too much blue undertone for your bulbs; one that disappears into grey needs more green in the mix or a lighter value.
Best For: Anyone about to commit paint to cabinets or walls, especially in a north facing room.
Not Ideal For: Small accents such as stools or dinnerware, where the cost of sampling outweighs the cost of the item itself.
Estimated Cost: $20-$60 (estimate) for three to five large peel and stick samples.
Budget Note: Samples feel expensive per sheet and are cheap per decision: one wrong gallon and a repaint costs several times the whole sample set.
Renter Friendly: Yes
Renter Note: Peel and stick samples are made to move around the room and come off cleanly; test that claim on a hidden patch first in an older rental.
What You Need
Three to five large peel and stick samples in different sage shades, a notebook or phone note for the time of day verdicts, and your room’s actual light bulbs fitted rather than daylight bulbs borrowed for the test.
Product recommendation (partially verified): Samplize Peel and Stick Paint Sample, Benjamin Moore October Mist 1495, 9 x 15 inch
Why it fits: Samplize makes its samples with two coats of real paint, so the color and sheen are true, and the 9 x 15 inch sheet is large enough to judge beside a floor and a counter; the maker’s Benjamin Moore range lists October Mist 1495, a soft sage with a grey undertone, alongside deeper sages for comparison.
Retailer/product page: https://samplize.com/products/october-mist-1495-12×12
How To Do It
- Order two or three sages that differ by undertone, not only by depth: one grey leaning, one green leaning, one warmer.
- Stick each sample in two places, one on a cabinet door and one on the wall beside the window.
- Check all samples at breakfast, mid afternoon and under evening lamps, and note which still reads green at every hour.
- Live with the winner for a second day next to your floor, counter and hardware before buying paint.
Pro Tip
Never judge a sage sample against a white wall alone: hold it against the floor and the counter too, because those two fixed surfaces decide whether the undertone fight happens.
Practical Tips for a Sage Green Kitchen
- Choose the undertone before the shade name. Grey leaning sages suit bright south facing rooms; green leaning and warmer sages survive north facing light. Decide which family your room needs first, and every later choice gets easier.
- Pair sage only with warm whites. A blue toned white or a cool grey counter pushes sage toward mint or washes it out; cream, warm white and pale wood keep it reading as the soft green you chose.
- Repeat the color at three heights. Sage at floor level (a runner or check floor), at counter level (stools, a pot, dinnerware) and at eye level (tile, walls or curtains) makes a room look planned; sage in one place only looks like an accident.
- In an open plan room, carry one piece across the line. A sage cushion or throw on the living side stops the kitchen color from ending abruptly at the island; the same joined up thinking shapes these open kitchen design layouts.
- Keep the winning sample board. Tape the chosen sample, the paint name and the batch details inside a cabinet door; touch ups two years later then match, instead of starting the whole shade hunt again.
Frequently Asked Questions
Why does my sage green look grey, or sometimes blue?
Light is usually the reason. Sage carries a grey undertone by design, and in a north facing room or under cool white bulbs the grey or blue side wins. Test large samples at different hours, as idea 15 describes, choose a warmer or greener sage for cool light, and check that your bulbs are warm white before blaming the paint.
What colors go with a sage green kitchen?
Warm metals and warm neutrals. Brushed brass and gold warm the shade, white quartz and cream keep it bright, and pale wood counters or stools add the natural note sage expects. Matte black sharpens it in small doses, on a faucet or rail. Cool greys and blue whites are the pairings to avoid, because they pull the green out of the color.
Can renters have a sage green kitchen?
Yes, more easily than with most colors, because sage works in small doses. Stools, a washable runner, linen curtains on a tension rod, dinnerware, a Dutch oven and a herb row change the room without touching its surfaces, and a vinyl wrapped fridge or peel and stick splashback can work where the lease allows removable films, with a test patch first.
Will sage green cabinets date quickly?
Sage is one of the safer color choices for cabinets because it is a greyed, natural tone rather than a bright fashion color, and painted cabinets can be repainted when tastes change. The deeper risk is not fashion but light: a shade chosen without testing can annoy you daily for years, which is a stronger reason to sample properly than any trend.
What finish should sage paint be on cabinets and walls?
Low luster or matte on cabinets hides brush marks and suits the soft character of the color; reserve satin for walls, where it wipes clean behind sinks and stoves. Very flat paint on walls can make sage read chalky and paler than the sample, so compare finishes on the sample board before deciding.
Conclusion
Sage rewards a slow start. Test the shade properly, as idea 15 sets out, then take the smallest step that changes the room: two stools, a runner, or a pot that lives on the stove. If the color still pleases you after a month of ordinary days, give it a wall, a run of cabinets or the island.