15 Black and White Kitchen Ideas That Feel Bright and Glam
A black and white kitchen sounds simple until you have to choose where the black stops and the white begins, and that is where most kitchens go wrong. Too much black and the room feels dark and small; too much white and it looks like every other kitchen on the feed. These black and white kitchen ideas solve the balance room by room: one strong black note leads, a bright white base holds the light, and warm wood, brushed gold and soft blush keep the contrast from feeling cold. The list moves in order, cabinets and island first, then the floor, walls and light, then the smaller layers that make the scheme feel finished. If you want a broader starting point first, our guide to classic kitchen looks is a useful companion read
Disclosure: This article may contain affiliate links. If you buy through a link on this page, GlamNStyle may earn a small commission at no extra cost to you. Product links in this article are plain links; each one is checked on the retailer’s own page before it is added.
1. Pair Black Lower Cabinets With White Uppers
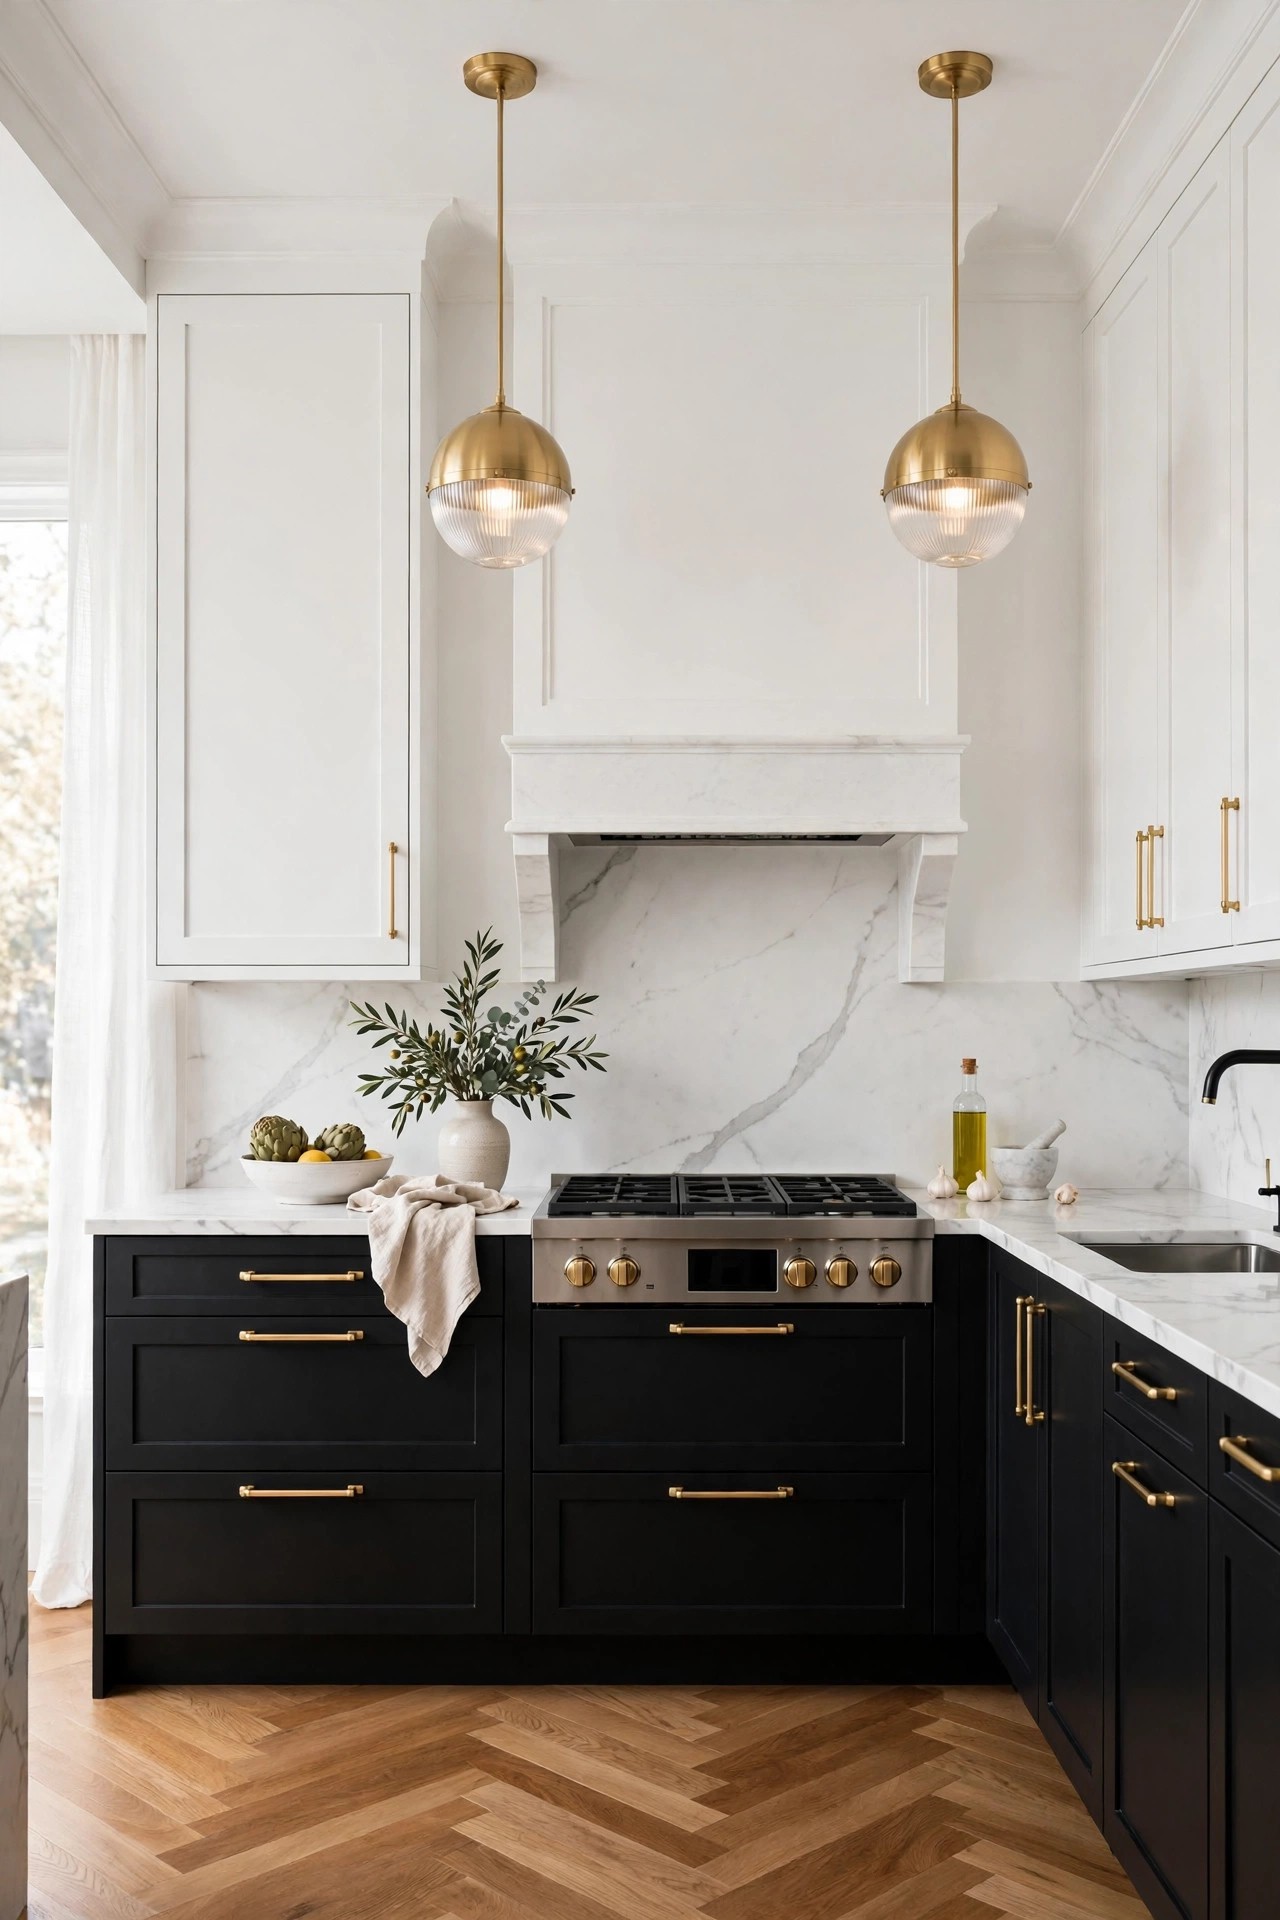
Two-tone cabinets are the safest way into a black and white kitchen, and the reason they work is simple: the dark colour sits low, where it grounds the room, and the light colour sits high, where it keeps the ceiling feeling tall. Matte black lower cabinets in a flat or shaker front, white uppers in the same door style, and one shared handle finish tie the two halves together. Keep the countertop white and the backsplash quiet so the cabinets carry the contrast. The black will show dust and fingerprints more than the white, so a matte finish that hides marks is worth the search.
Best For: Kitchens of any size, and anyone who wants a bold black note without darkening the whole room.
Not Ideal For: Very dark kitchens with little natural light, where even black lowers can feel heavy; a deep charcoal softens the same idea there.
Estimated Cost: $4,000-$12,000 (estimate) for painted or new two-tone cabinet fronts, depending on kitchen size.
Budget Note: Repainting sound cabinets in two tones costs far less than replacing them, and the paint is the whole change.
Renter Friendly: No
Renter Note: Painting cabinets is a landlord decision; renters can use the black hardware and open shelf ideas instead.
What You Need
Matte black paint or cabinet fronts for the lowers, white paint or fronts for the uppers, white marble-look countertop, brushed gold or matte black handles, degreaser and primer.
Product type to look for: A hard-wearing cabinet paint in a true matte black, with handles in one metal tone used across both cabinet colours.
How To Do It
- Remove the doors and drawers, label each one, and clean and prime every surface before painting.
- Paint the lowers matte black and the uppers white, in two thin coats, and let each coat dry fully.
- Refit the doors with the same handle style on both colours, keeping the spacing even.
- Step back to the doorway and check the split line; the black should end at the countertop, not wander up the wall.
Pro Tip
Keep the handle metal the same on black and white doors. One shared metal is what makes two cabinet colours read as one plan.
2. Add a White Marble Waterfall Island on a Black Base
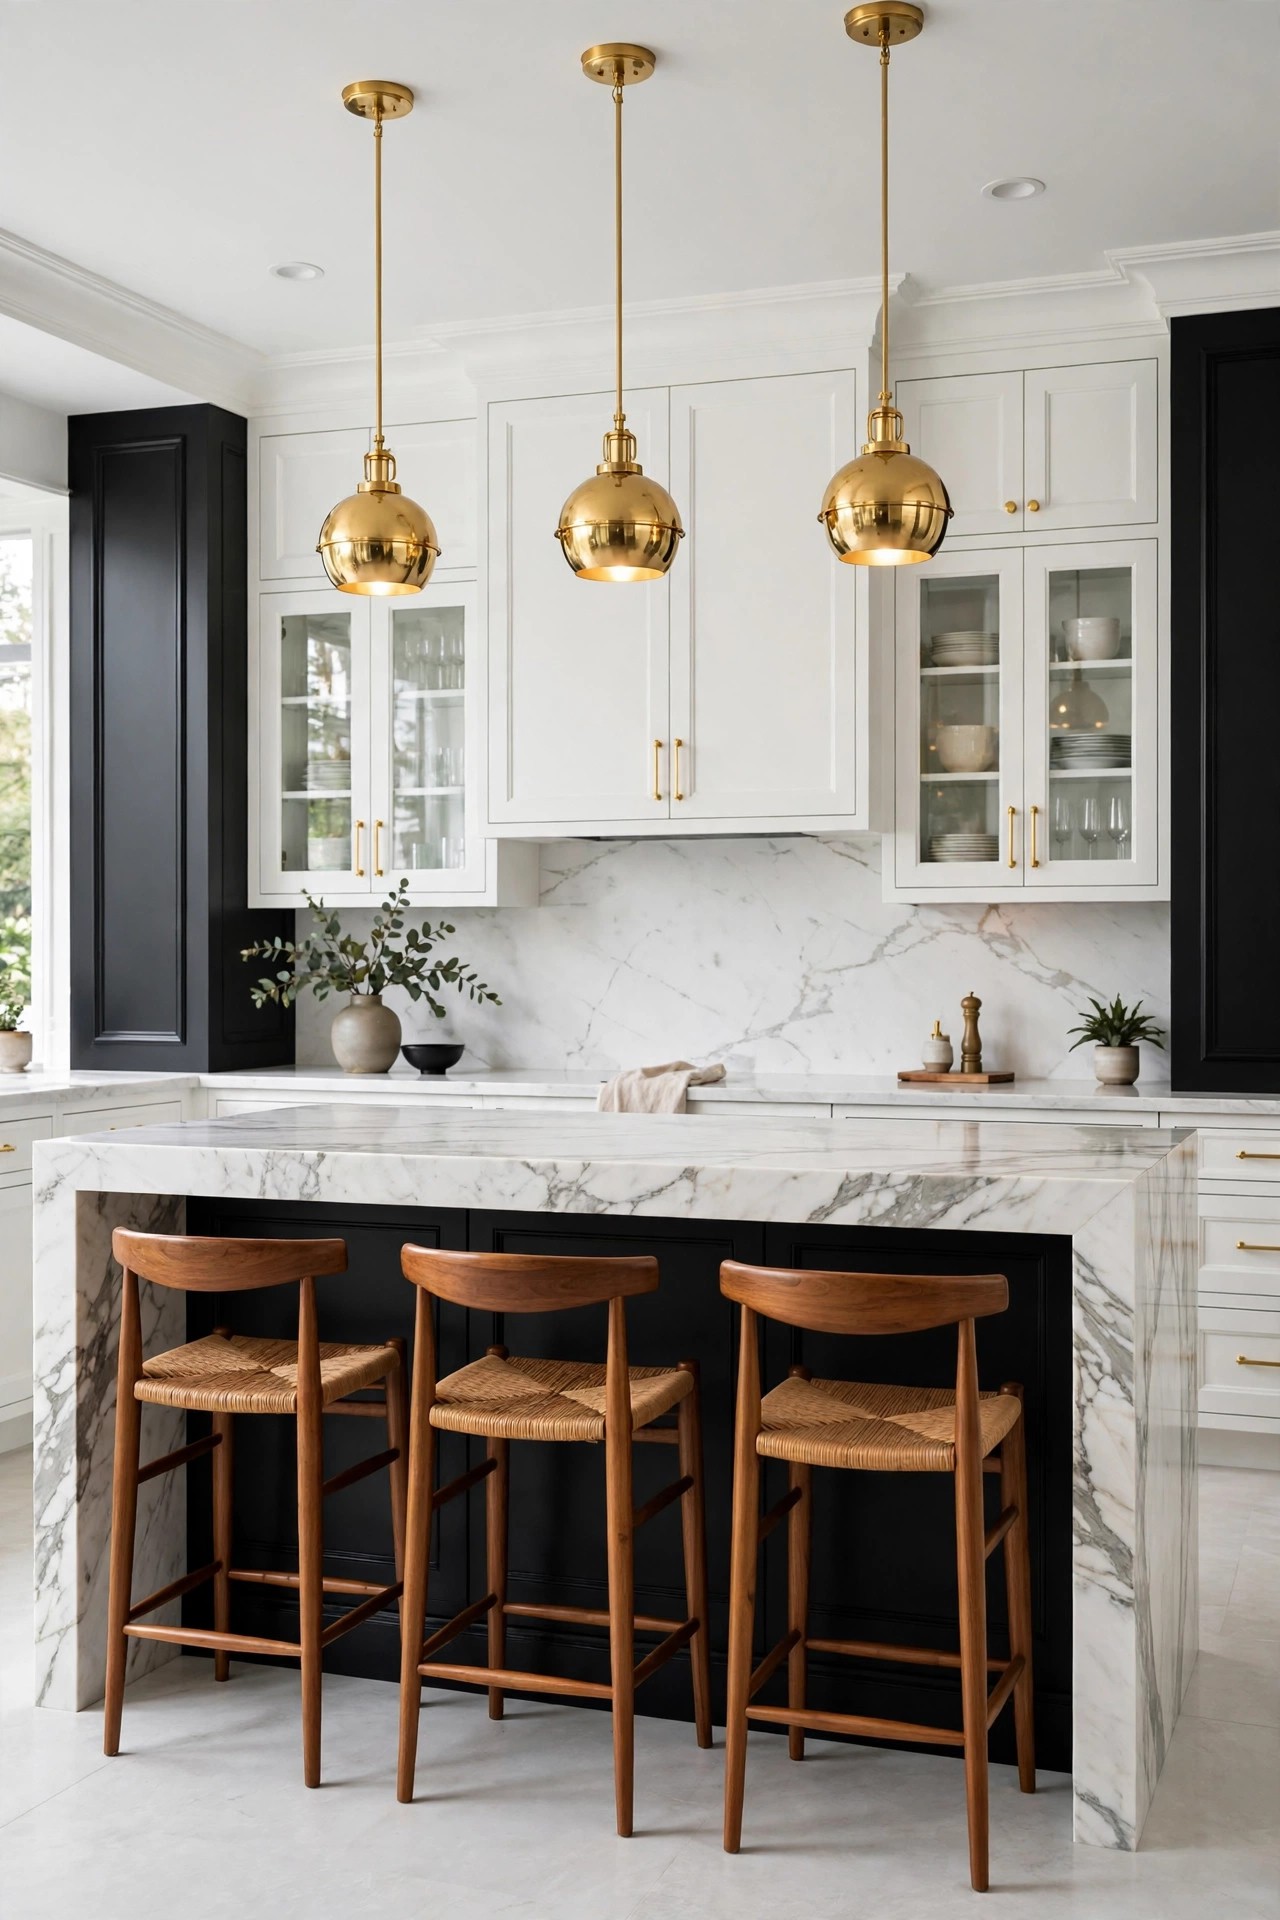
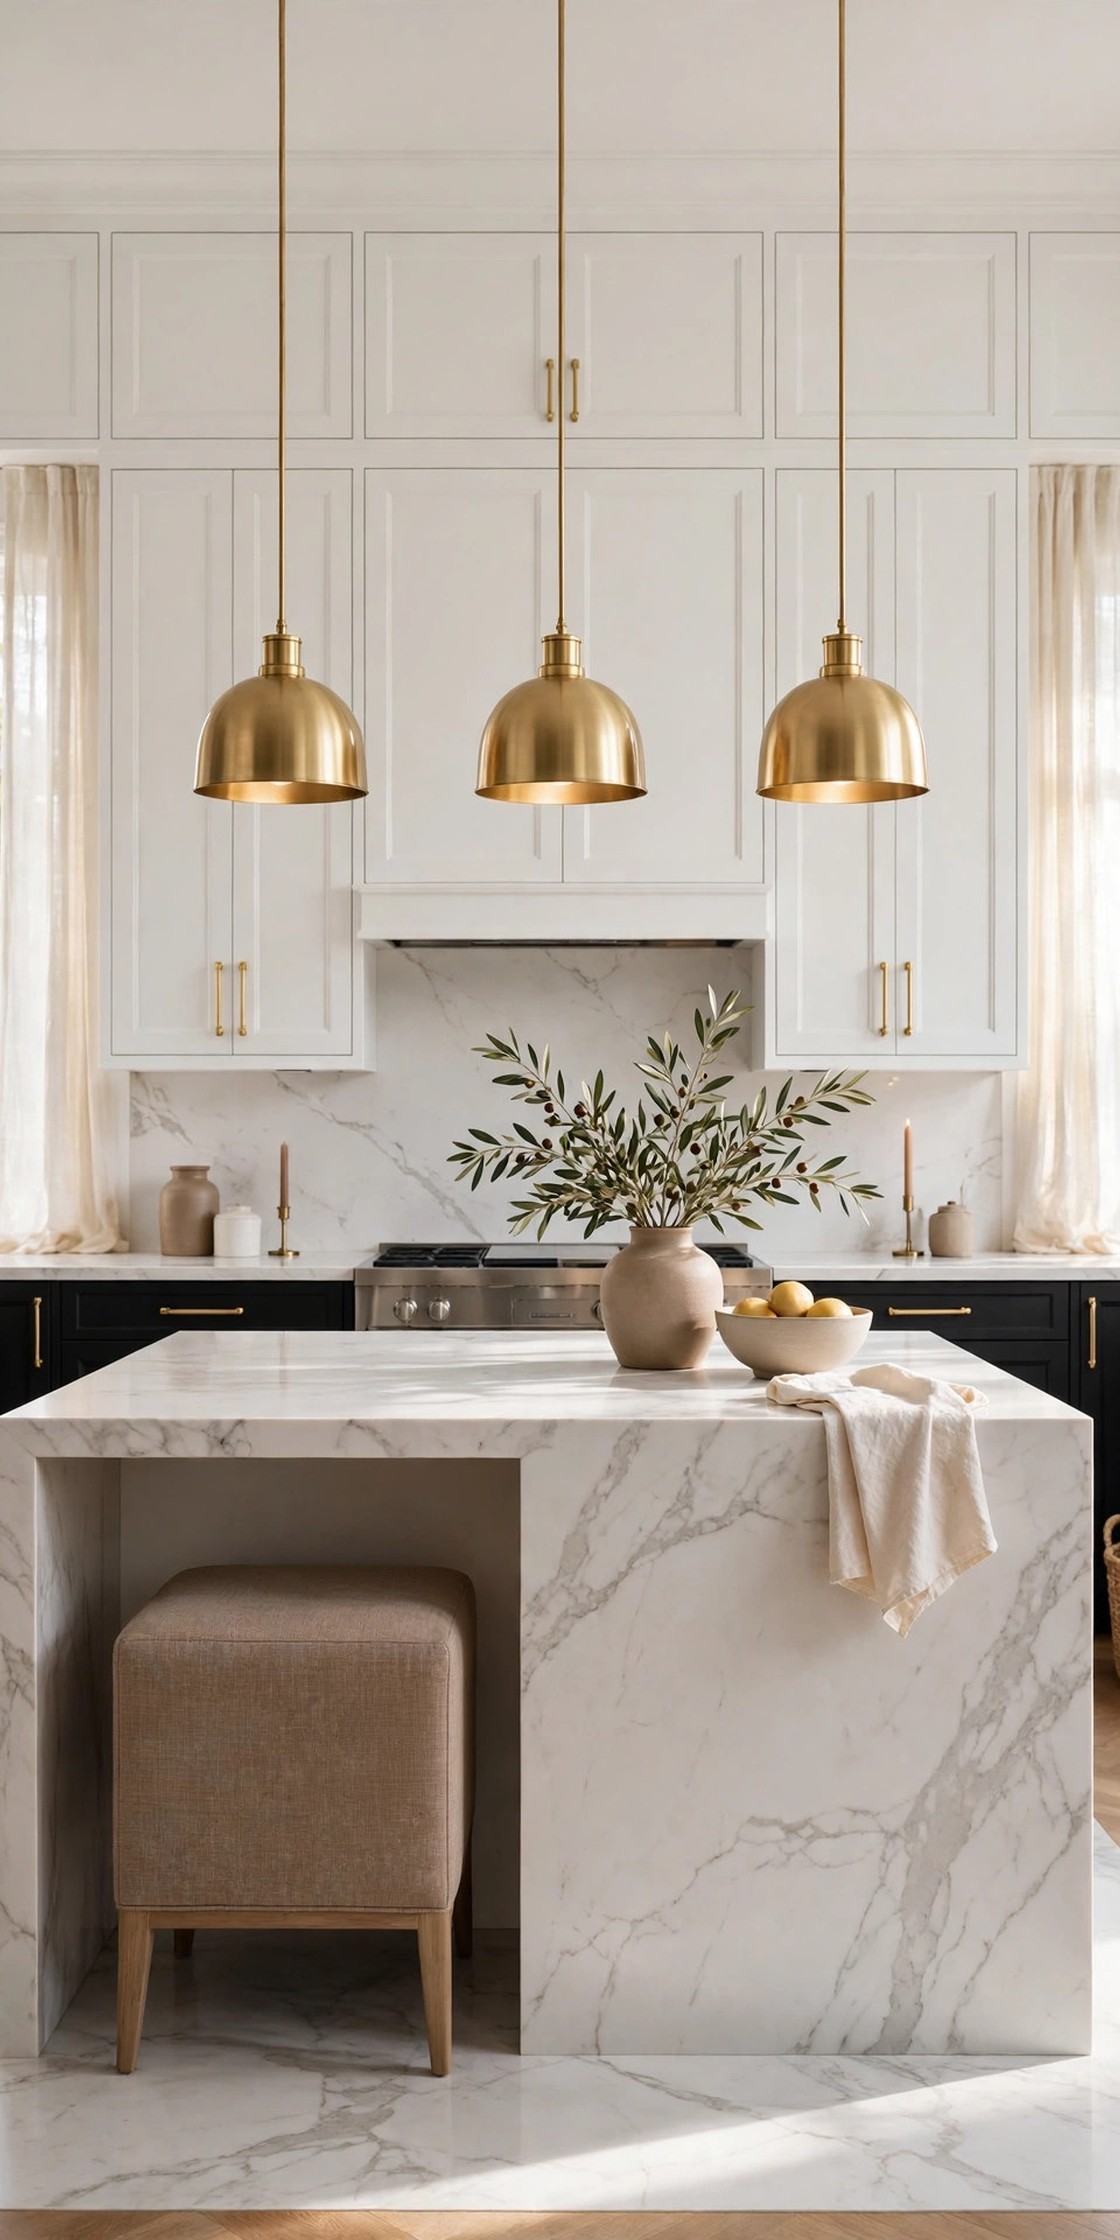
A waterfall island is where the kitchen’s black and white story becomes a showpiece. White marble, or a good marble-look quartz, runs over the top and down both ends of the island, while the base underneath stays matte black, so the white reads like a frame around the dark core. Keep the rest of the kitchen quiet: white cabinets, a plain backsplash and one metal only, brushed gold in the pendants and stools. The island needs room to breathe, at least three feet of walkway on every working side, and the stone edge should be sealed if real marble is used, because marble stains faster than quartz.
Best For: Open-plan kitchens with room for a large island, and anyone who wants one luxury surface to define the room.
Not Ideal For: Small kitchens where a waterfall island blocks the walkway; a straight white island top is the calmer version there.
Estimated Cost: $2,500-$7,500 (estimate) for a marble-look quartz waterfall island top and a black base.
Budget Note: Quartz with a marble pattern gives the look without the sealing and staining care real marble needs.
Renter Friendly: No
Renter Note: An island is a fixed build; renters can use the black island cart idea in spirit with a freestanding table instead.
What You Need
Marble-look quartz slab for the waterfall top, matte black island base cabinet, brushed gold pendant lights, two or three wood and black stools, stone sealer if real marble is used.
Product type to look for: A quartz slab with soft grey veining and a stated thickness that suits a waterfall edge, plus stools at counter height that tuck fully under the overhang.
How To Do It
- Measure the island footprint and tape it on the floor, walking all four sides for a day.
- Set the black base level, then fit the quartz top so the waterfall edges drop straight and flush.
- Hang the gold pendants centred over the island, spaced evenly above the seating side.
- Place the stools, sit on each one, and check knees clear the base and feet reach the footrest.
Pro Tip
Let the waterfall edge be the only veined marble in the room. A second veined surface, on the counters or the backsplash, competes with it.
3. Make a Matte Black Range Hood the Focal Point
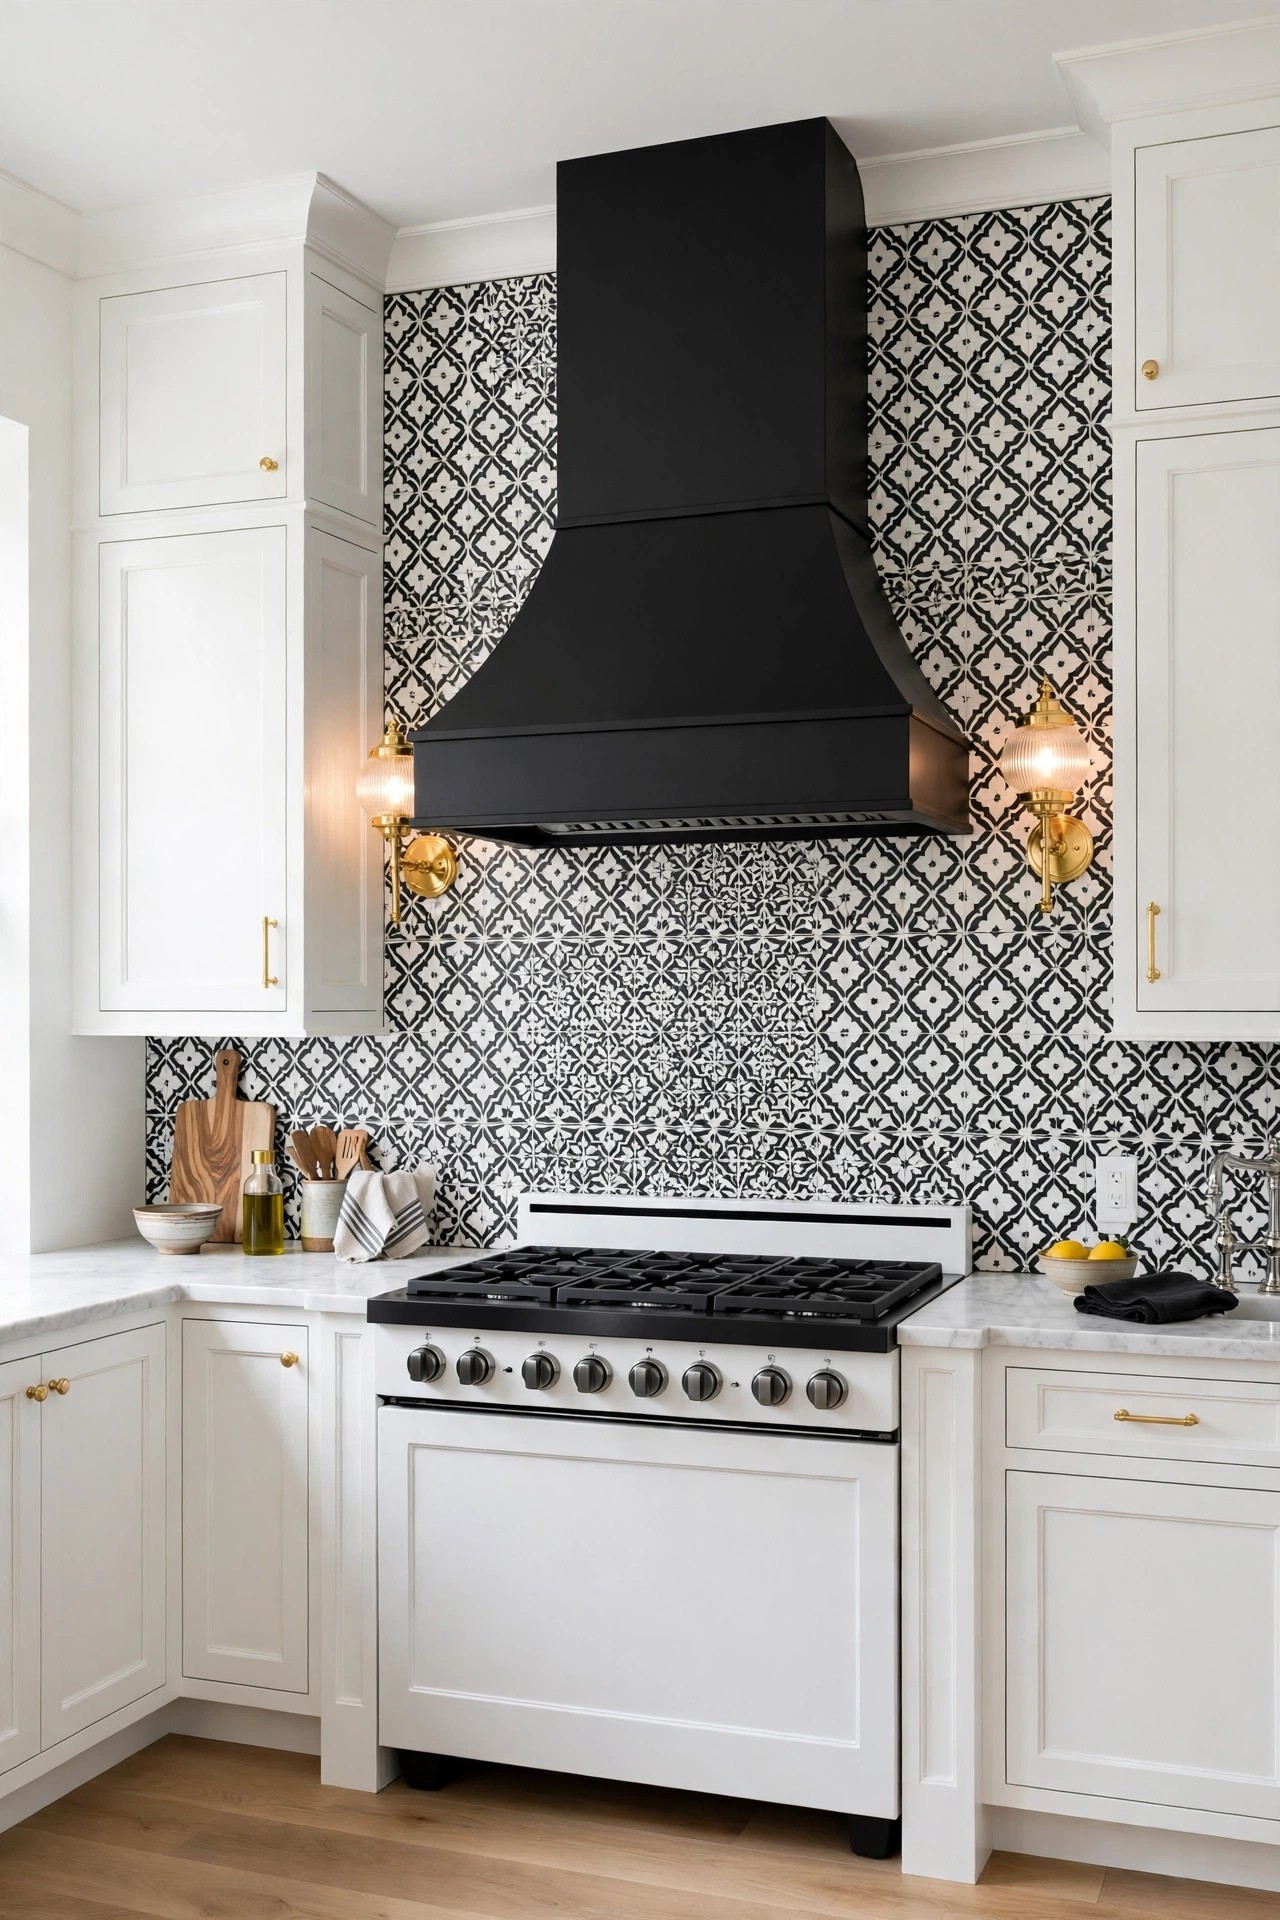
A matte black range hood gives the kitchen a single dark anchor at eye level, which is exactly where the eye lands first. A simple box or gently tapered hood in matte black, set on a white stove wall with a quiet backsplash, reads as architecture rather than an appliance, and it pulls the black from the lower cabinets up to the ceiling in one move. Keep the rest of the wall plain so the hood stays the lead, and match its black to the lowers, not to a second black that fights it. Hoods move hot air and grease, so the ducting and the fan size need to suit the hob before anything is ordered.
Best For: Kitchens with a clear stove wall and anyone who wants one bold black shape without repainting cabinets.
Not Ideal For: Kitchens where the hob sits on an island, where a black hood hangs over the centre and crowds the room.
Estimated Cost: $800-$2,500 (estimate) for a matte black range hood, plus fitting and ducting.
Budget Note: The hood and its ducting are the spend; a plain white backsplash behind it keeps the rest of the wall cheap.
Renter Friendly: No
Renter Note: A fixed hood and ducting belong to the property owner.
What You Need
Matte black range hood sized to the hob, ducting and fixings to suit the wall, white backsplash tile, two gold wall sconces if the wall allows, degreaser for the hood filter.
Product type to look for: A hood with a stated extraction rate matched to the hob size, a washable filter, and a matte black finish that resists fingerprints.
How To Do It
- Measure the hob width and choose a hood at least as wide, centred on the hob.
- Check the duct route and the fan size with the fitter before the hood is ordered.
- Fit the hood level, then finish the white backsplash around it in plain tile so the black stays the lead.
- Test the fan on its highest setting and check the light falls on the hob, not into the room.
Pro Tip
Paint the wall behind the hood the same white as the cabinets. A cream wall beside a white hood makes the black read as a mistake.
4. Lay a Classic Checkerboard Floor
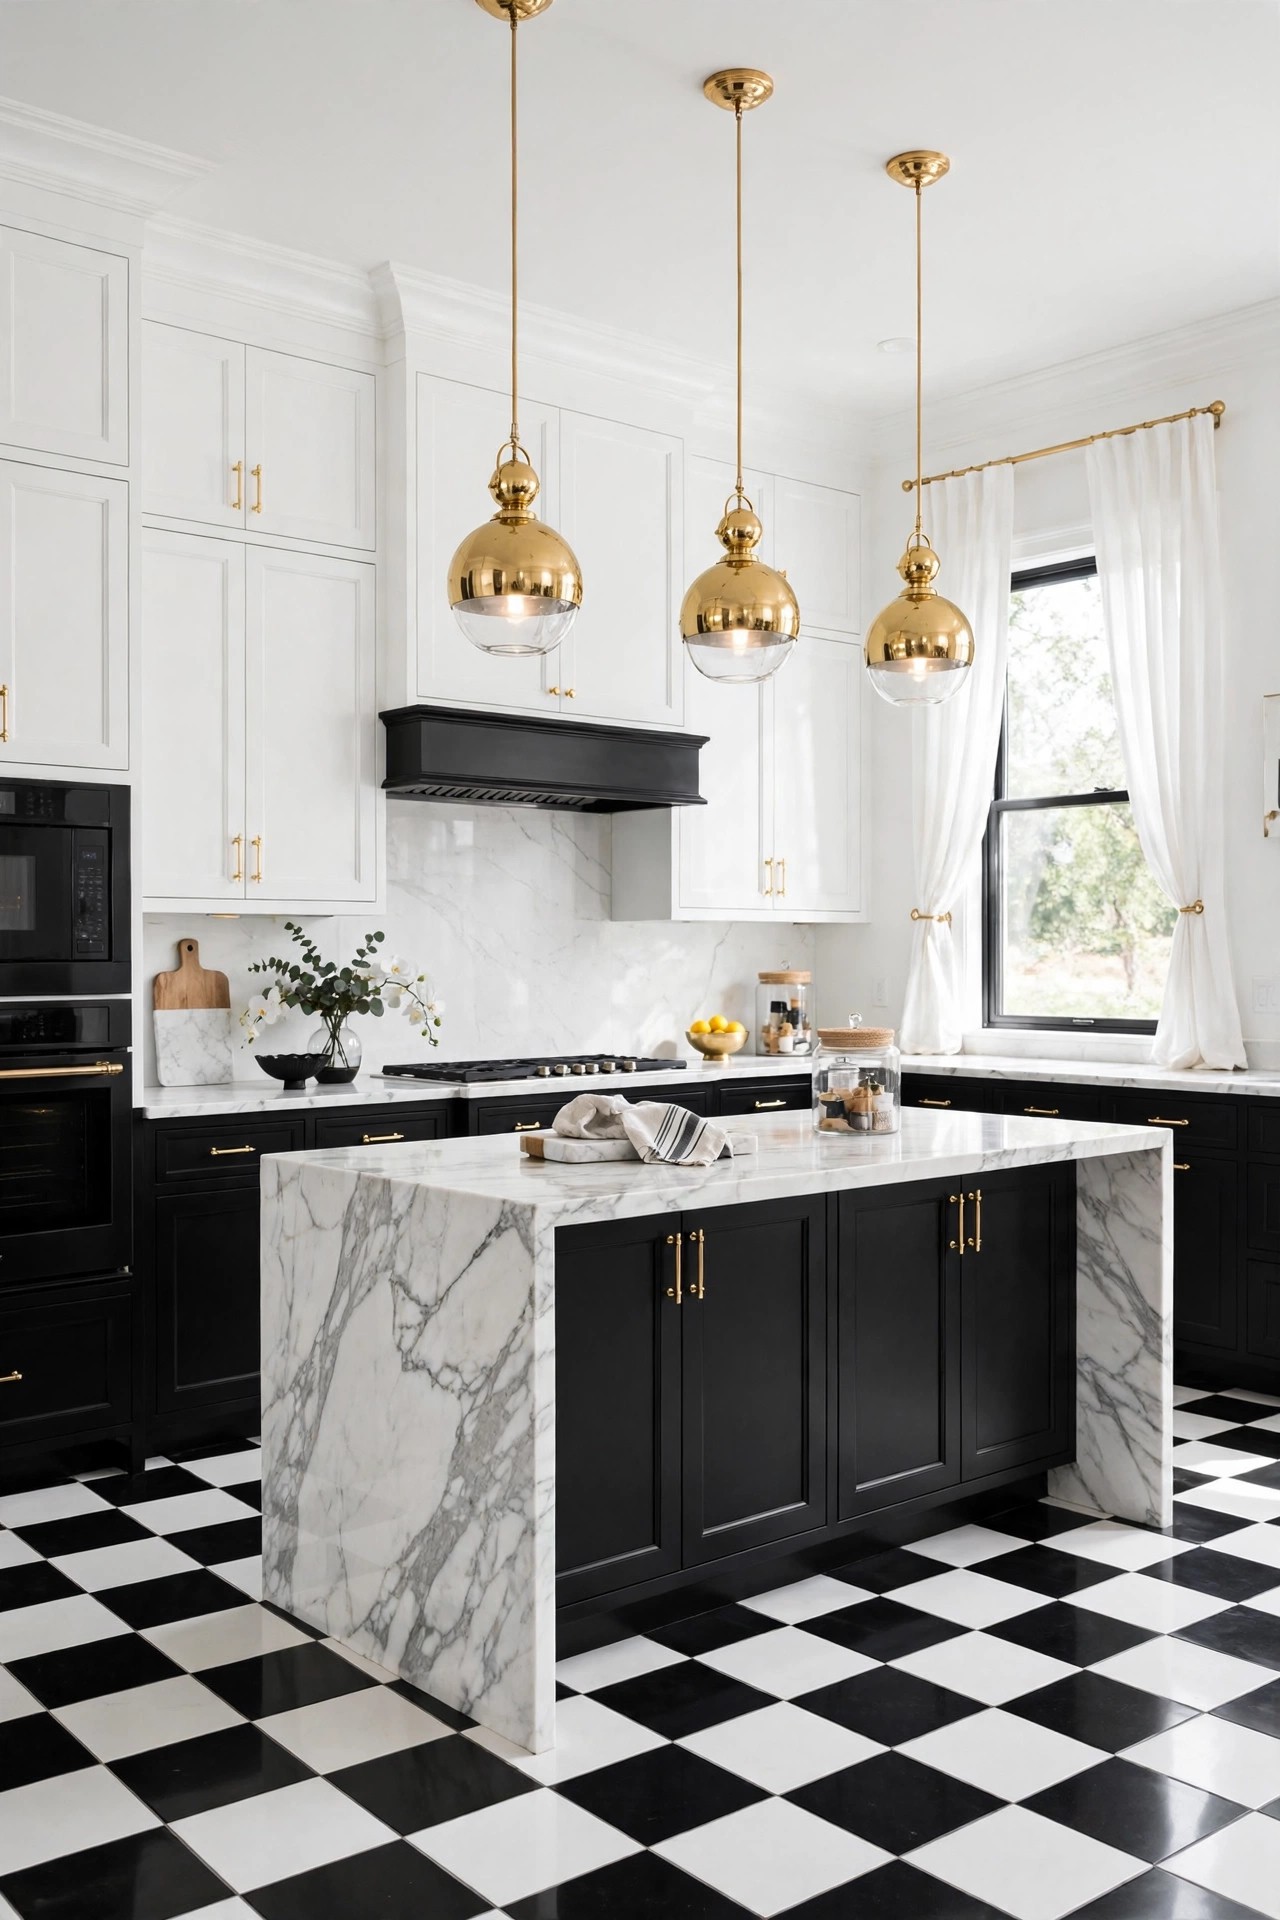
A checkerboard floor is the oldest black and white kitchen idea, and it still works because the pattern does the decorating while everything else stays calm. Large black and white tiles in a checkerboard, laid straight or on the diagonal, give the floor a rhythm that suits white cabinets and a black island without any extra colour. Keep the walls and counters plain, because the floor is already the pattern in the room, and choose a tile with a little grip underfoot, since kitchen floors get wet. A diagonal lay makes a small kitchen feel wider, while a straight lay suits a long galley best.
Best For: Kitchens with plain white cabinets and anyone who wants pattern underfoot rather than on the walls.
Not Ideal For: Kitchens with a busy patterned backsplash, where two patterns fight for attention; pick the floor or the wall, not both.
Estimated Cost: $1,200-$4,500 (estimate) for black and white floor tiles and fitting, depending on floor size.
Budget Note: Large-format tiles cost less to lay per square foot than small ones, and fewer grout lines are easier to clean.
Renter Friendly: No
Renter Note: A tiled floor is a fixed change; renters can use a black and white checkerboard rug over the existing floor instead.
What You Need
Black and white floor tiles in one size, tile adhesive and grout in pale grey, a level, tile spacers, a non-slip sealant if the tile needs it.
Product type to look for: A floor tile rated for kitchen use with a stated slip rating, in a size that suits the room, with matching black and white pieces from the same range.
How To Do It
- Dry-lay a row of tiles from the centre of the room and check the pattern meets the walls evenly.
- Lay the tiles from the centre out, keeping the checkerboard true with spacers.
- Grout in pale grey, not white, so the grout lines stay neat between uses.
- Clean the floor and step back to the doorway to check the pattern reads evenly from the entrance.
Pro Tip
Use the same tile size as the backsplash tile in idea 5. Shared sizing ties the floor and the wall together without matching patterns.
5. Choose a White Subway Tile Backsplash With Black Grout
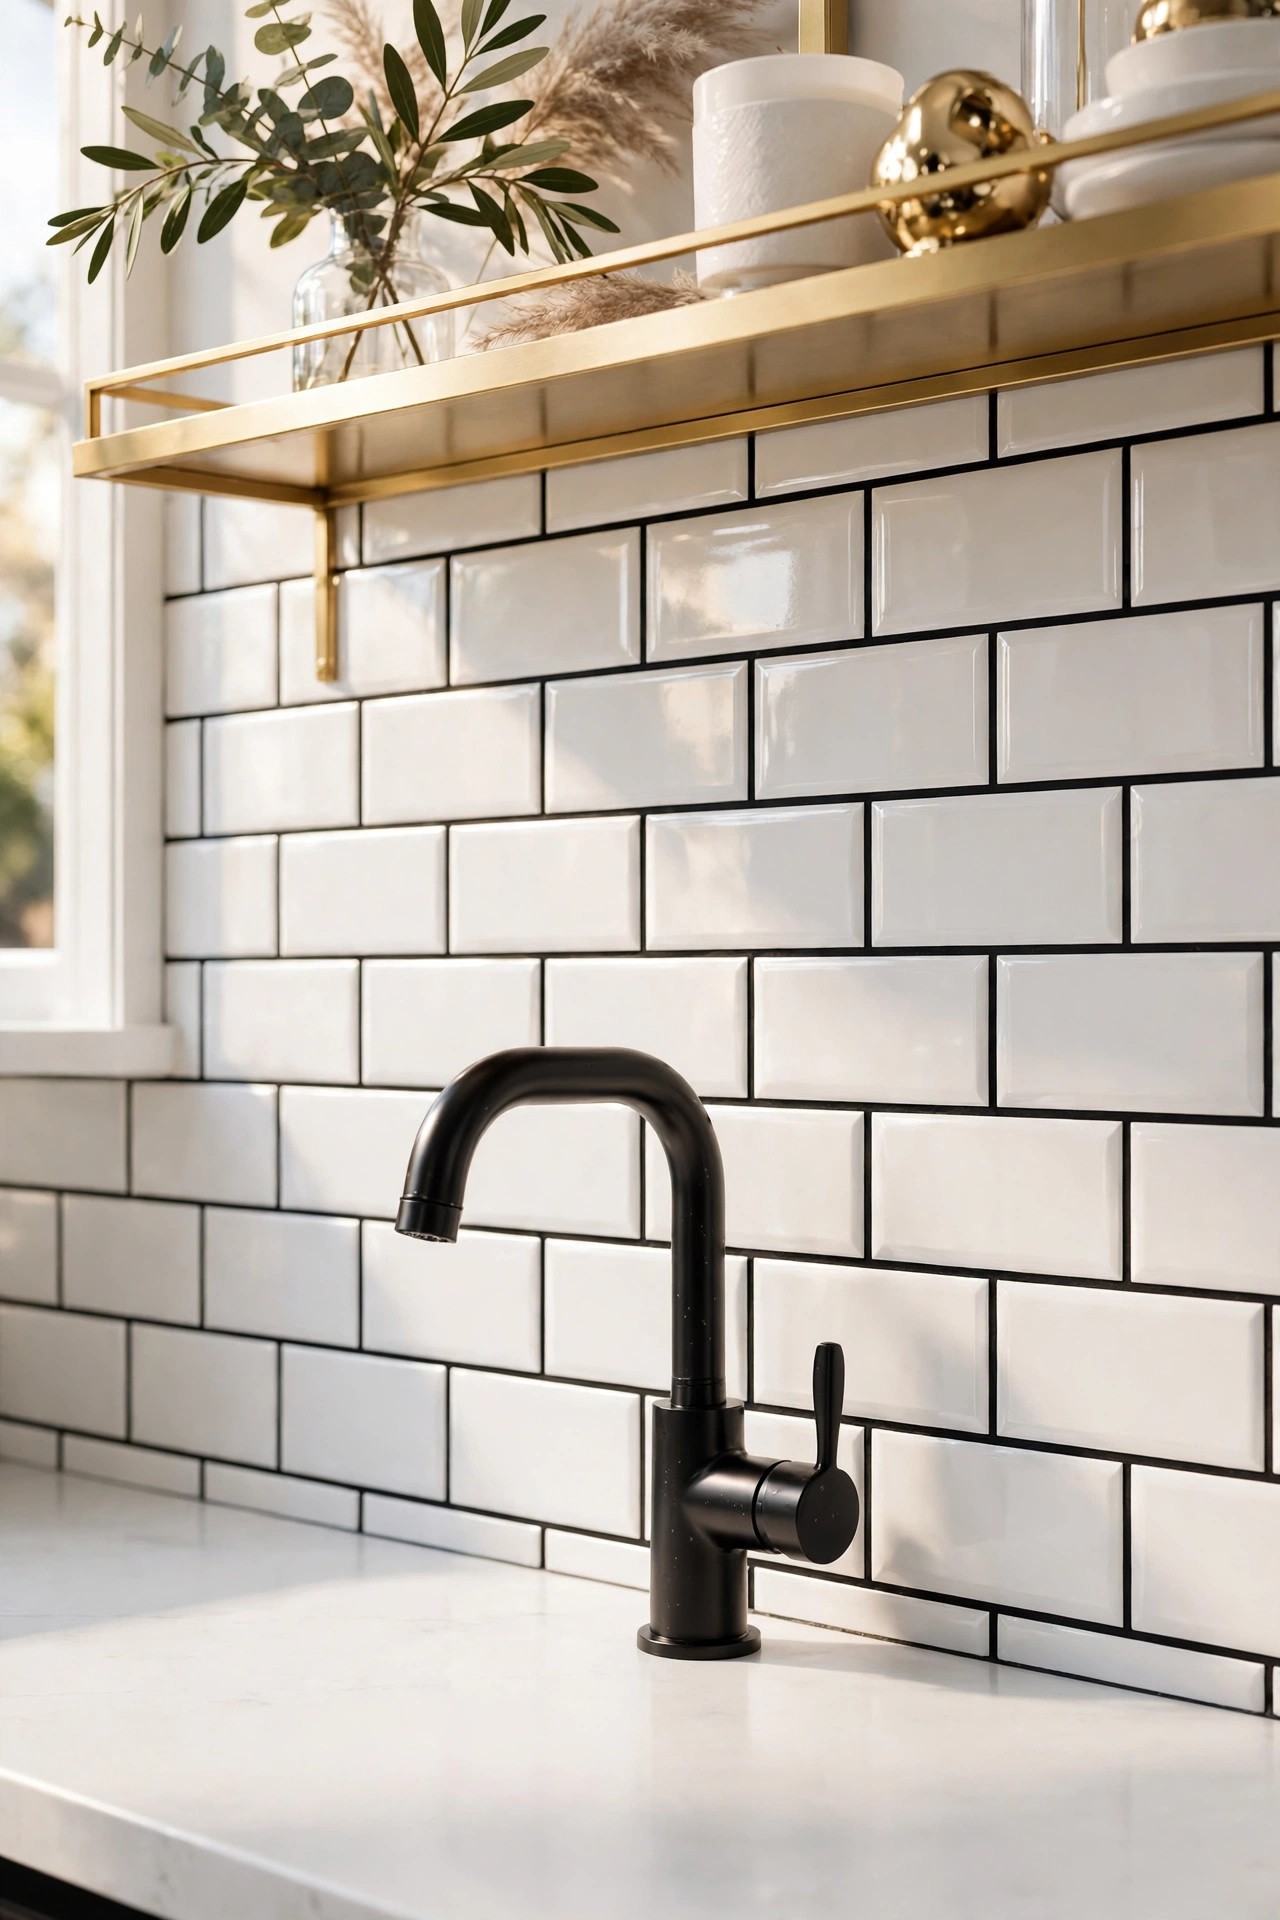
White subway tile with black grout is the cheapest way to make a black and white kitchen feel designed rather than assembled. The tile itself is plain and bright, and the dark grout draws a neat grid that echoes the cabinets and the floor without adding a second pattern. Run the tile in a brick pattern to the underside of the upper cabinets, keep the grout lines even, and let one metal, matte black, carry the tap and the handles. Black grout shows splashes less than white grout, which is a practical win behind a hob, but it needs sealing so cooking stains do not settle into the lines.
Best For: Kitchens with plain cabinets and anyone who wants a graphic note on the wall for tile cost only.
Not Ideal For: Kitchens where the wall behind the hob is already tiled in a bold pattern; one wall pattern is enough.
Estimated Cost: $300-$900 (estimate) for white subway tile, black grout and fitting for one backsplash run.
Budget Note: The tile is cheap and the grout is the design; spend the care on straight lines and even spacing.
Renter Friendly: With Conditions
Renter Note: Only tile with the owner’s permission; renters can use a peel-and-stick subway tile in the same look.
What You Need
White subway tiles, black grout, tile adhesive, spacers, a level, grout sealer, matte black tap and handles to match.
Product type to look for: A glazed subway tile that wipes clean, with a grout made for kitchens and a sealer that suits dark grout.
How To Do It
- Clean the wall and mark a level line at the countertop, then dry-lay the first row of tiles.
- Tile in a brick pattern from the centre out, keeping the spacing even with spacers.
- Grout in black, wipe the tile faces clean as you go, and seal the grout once it has cured.
- Fit the matte black tap last so it sits against the finished tile, not through a half-done wall.
Pro Tip
Keep the grout lines thin. Wide black lines look heavy on a small backsplash; thin lines read as a neat grid.
6. Style Black Open Shelves on a White Wall
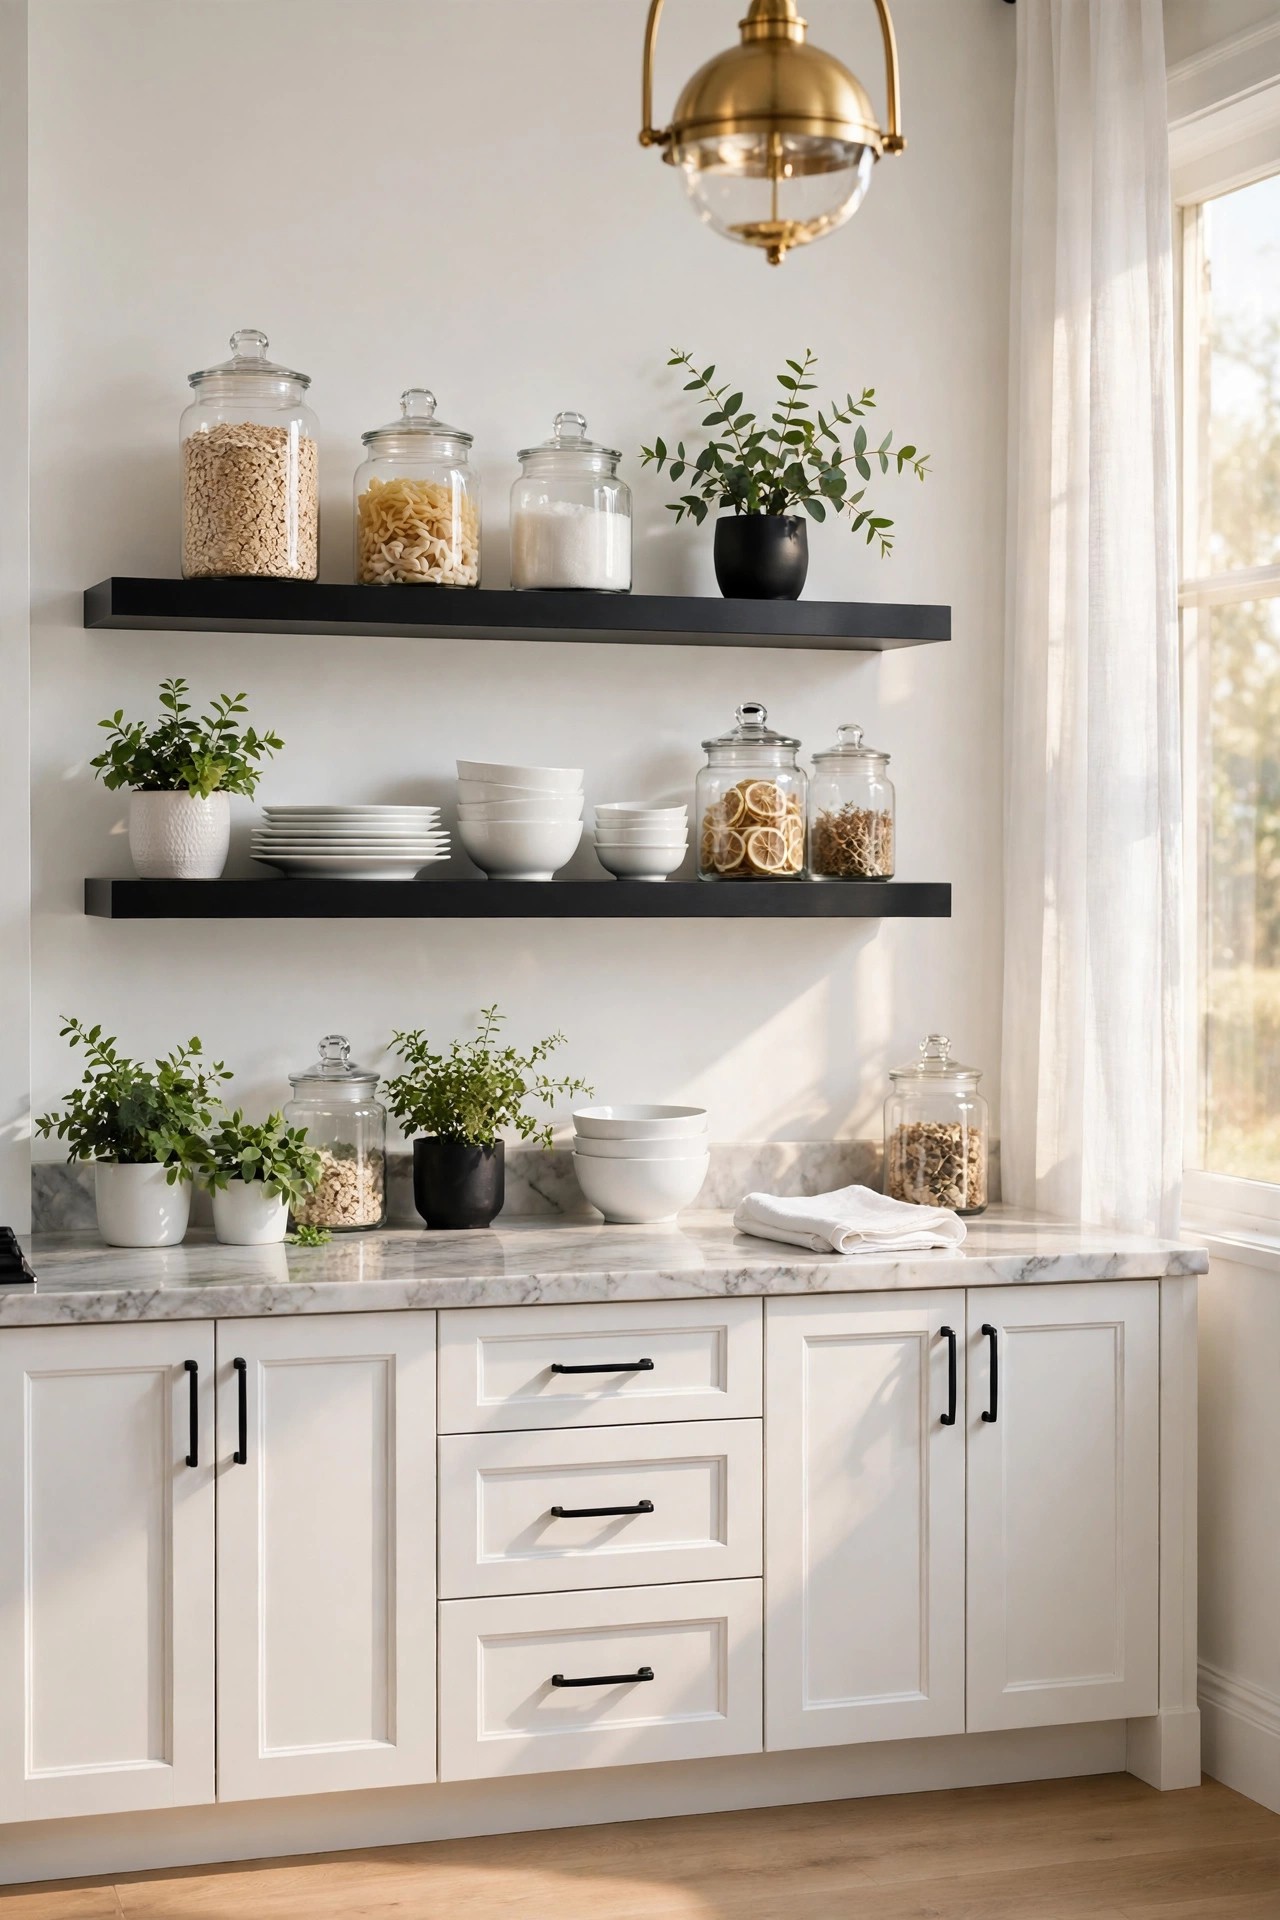
Black open shelves on a white wall give a black and white kitchen its lightest dark note: the shelves frame white dishes and glass, and the wall behind them stays bright, so the black never crowds the room. Use two or three shelves in matte black, styled with white plates and bowls, clear glass jars and one small plant, and leave a third of each shelf empty so the display reads as a shelf, not a cupboard with no doors. Shelves hold real weight, so the fixings must match the wall type and the load, and heavy stacks of plates belong on the lowest shelf. For a fuller take on this open-storage balance, our guide to airy kitchen storage shows how the mix stays calm
Best For: Kitchens with one long empty wall and anyone who uses the same dishes every day.
Not Ideal For: Dusty kitchens or homes with cats that walk shelves; closed cabinets are calmer there.
Estimated Cost: $120-$450 (estimate) for two or three matte black open shelves and fixings.
Budget Note: The shelves are the spend; the styling is dishes and jars the kitchen already owns.
Renter Friendly: With Conditions
Renter Note: Only hang shelves if the lease allows fixings rated for the weight; a freestanding black shelf unit avoids wall holes.
What You Need
Two or three matte black open shelves, fixings rated for the shelf load and wall type, white plates and bowls, clear glass jars, one small plant, level and tape.
Product type to look for: Shelves with a stated load per shelf, deep enough for standard plates without overhang, in a matte black that matches the tap and handles.
How To Do It
- Tape the shelf outlines on the wall and check the spacing from the countertop and from each other.
- Fix the lowest shelf first with rated fixings, checking it with a level.
- Style the shelves with white dishes grouped by size, glass jars in the middle and the plant at one end.
- Step back and remove one item from each shelf; a shelf that looks full from the doorway is overfilled.
Pro Tip
Keep the shelf styling white and clear only. One black object on a black shelf disappears; the white dishes are what make the shelves read.
7. Fit Black-Framed Glass-Front Cabinets
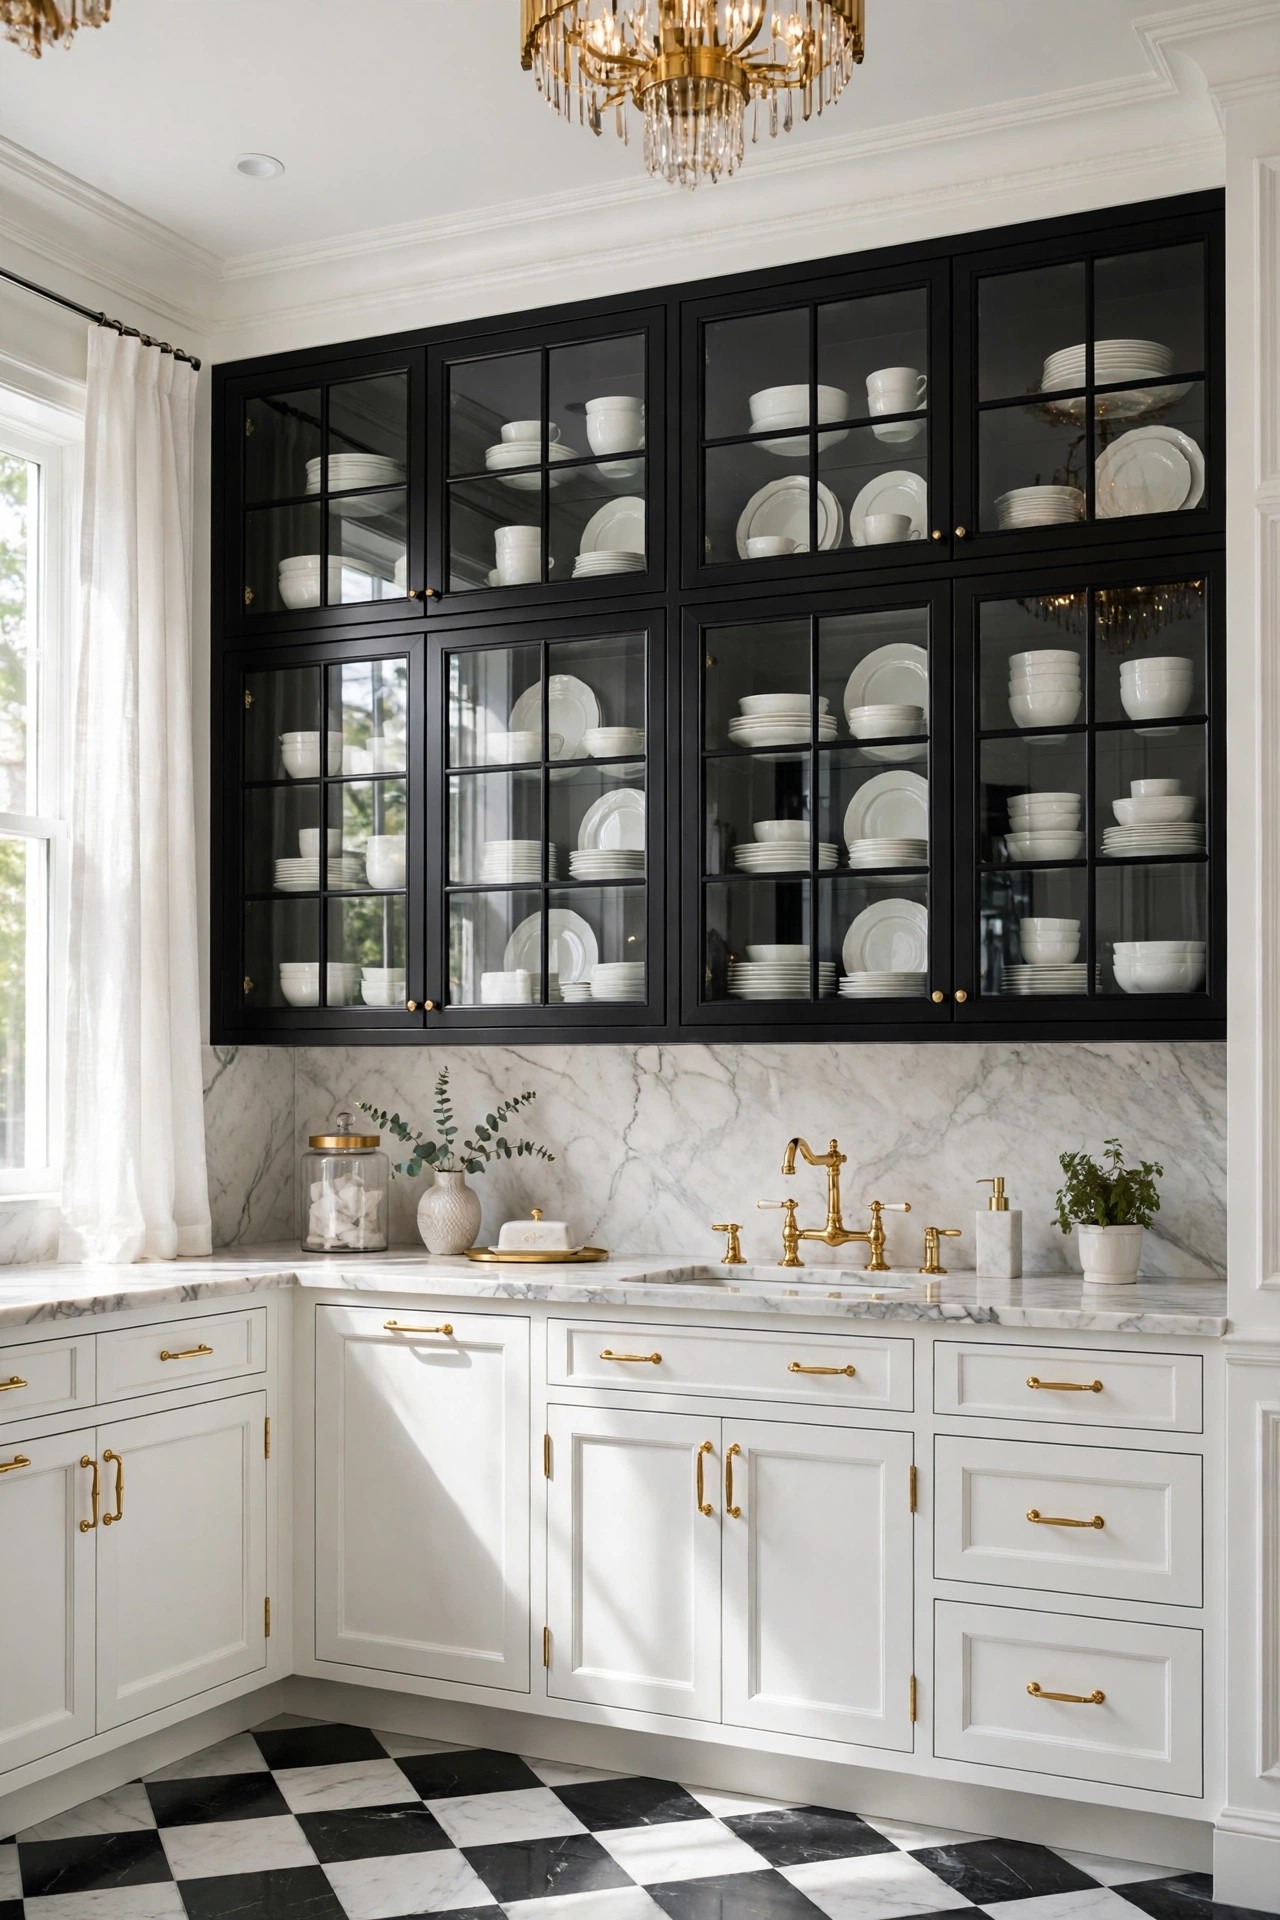
Black-framed glass-front cabinets are the glam version of a display cabinet: slim black steel-style frames around clear glass, showing white dishes and glassware inside, set against white lower cabinets. They lighten a wall of upper cabinets, because the eye reads through the glass instead of stopping at a solid door, and they repeat the black window frames from idea 11 in a smaller, softer form. Keep the contents white and tidy, since everything inside is on show, and use one or two glass cabinets only, so the wall keeps some solid doors for the everyday clutter. Glass doors need a soft close so they do not rattle when the room is busy.
Best For: Kitchens with a plain upper wall and anyone who owns white dishes worth showing.
Not Ideal For: Kitchens where the glass would face a messy worktop; solid doors hide daily clutter better.
Estimated Cost: $900-$3,000 (estimate) for two black-framed glass-front cabinet doors and fitting.
Budget Note: Replacing two doors with glass fronts costs far less than a full cabinet refit.
Renter Friendly: No
Renter Note: Changing cabinet doors is a landlord decision; renters can use the open shelves in idea 6 instead.
What You Need
Black-framed glass-front cabinet doors to fit, soft-close hinges, white dishes and glassware for display, glass cleaner and a microfibre cloth.
Product type to look for: Frames in a slim matte black with clear toughened glass, sized to the existing cabinet boxes, with hinges rated for the glass weight.
How To Do It
- Measure the cabinet boxes and order the glass doors to fit, checking the frame colour against the tap and handles.
- Fit the soft-close hinges, hang the doors level, and adjust them until the gaps read even.
- Style the inside with white dishes stacked by size and glassware in one row, leaving space at the top.
- Clean the glass inside and out, then check the display from the doorway in daylight.
Pro Tip
Light the inside of one glass cabinet with a small warm strip. Lit white dishes behind black frames are the prettiest view in the kitchen at night.
8. Seat a Black Island With Gold Pendants and Leather Stools
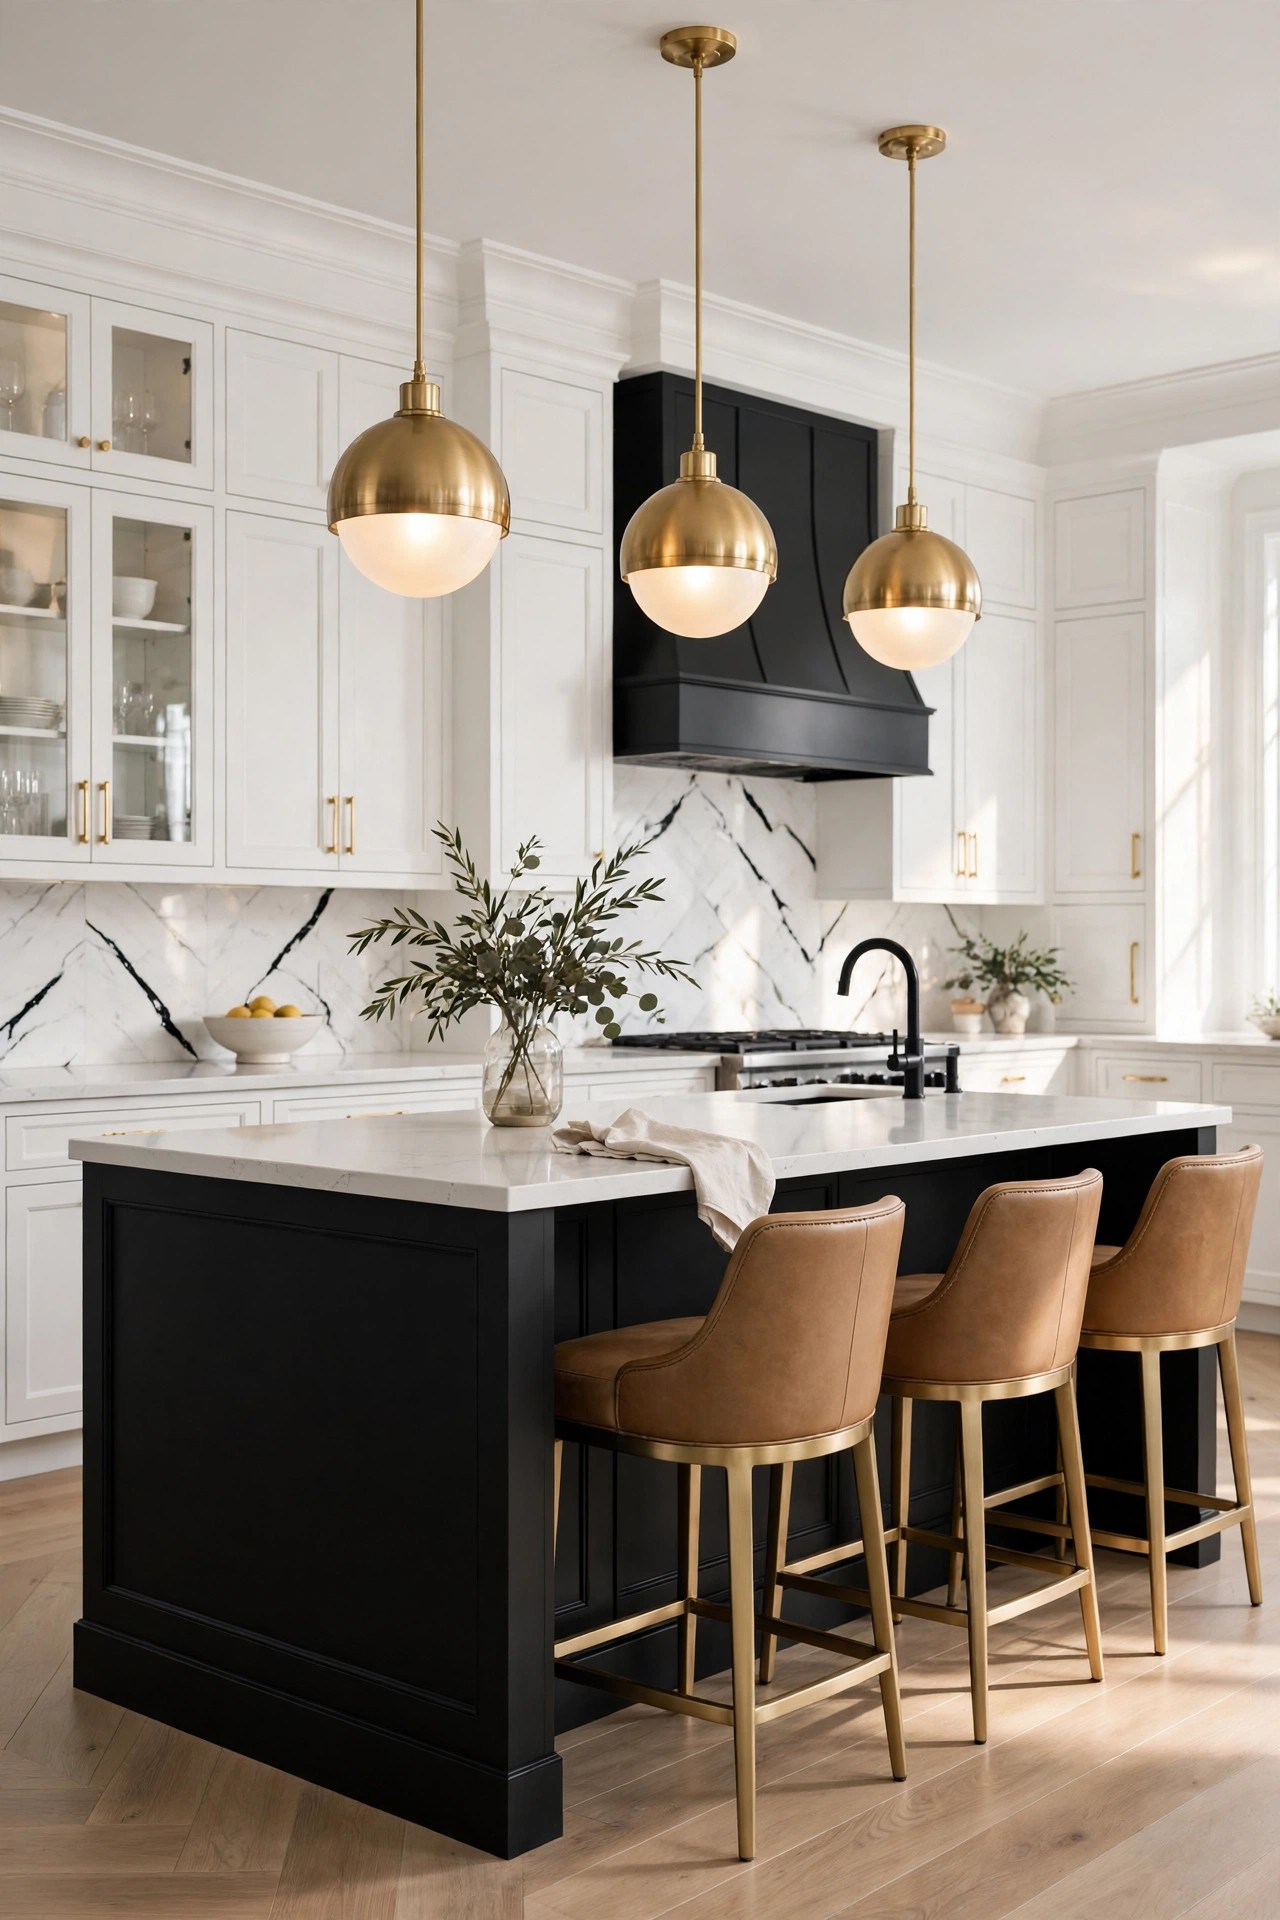
This island is about sitting, not stone: a matte black island with a plain white quartz top, three brushed gold pendants above it and tan leather stools tucked underneath, so the black, the gold and the warm leather do the talking instead of veined marble. The island reads as the room’s dining table and its worktop in one, which suits open-plan kitchens where the family gathers while food is cooked. Keep the stools low-backed or backless so they tuck fully under the overhang, and leave a clear footrest on the island side, because stools without one are tiring within minutes. The leather warms the black and white scheme in a way no second colour can.
Best For: Open-plan kitchens where the island is the gathering spot, and families who eat at the counter.
Not Ideal For: Narrow kitchens where stools block the walkway; a slim island with no seating is the honest version there.
Estimated Cost: $1,800-$5,500 (estimate) for a black island base, white quartz top, three gold pendants and stools.
Budget Note: The pendants and stools are the visible spend; a plain white quartz top costs less than veined marble.
Renter Friendly: No
Renter Note: A fixed island belongs to the property owner; a freestanding black table with stools gives the same seating.
What You Need
Matte black island base with overhang, plain white quartz top, three brushed gold pendant lights, two or three tan leather stools, dimmer switch where permitted.
Product type to look for: Stools at counter height with a footrest and a wipe-clean leather or leather-look seat, and pendants with warm bulbs matched across all three.
How To Do It
- Measure the island footprint and tape the seating side, checking the walkway behind the stools stays clear.
- Set the black base level, fit the white top with a comfortable overhang for knees.
- Hang the three pendants evenly above the island, centred on the seating side.
- Place the stools, sit on each one, and check feet reach the footrest and knees clear the base.
Pro Tip
Match the pendant gold to the tap and handles. One gold tone across the island is what keeps black, white and leather reading as one room.
9. Build a Tall Black Pantry Wall
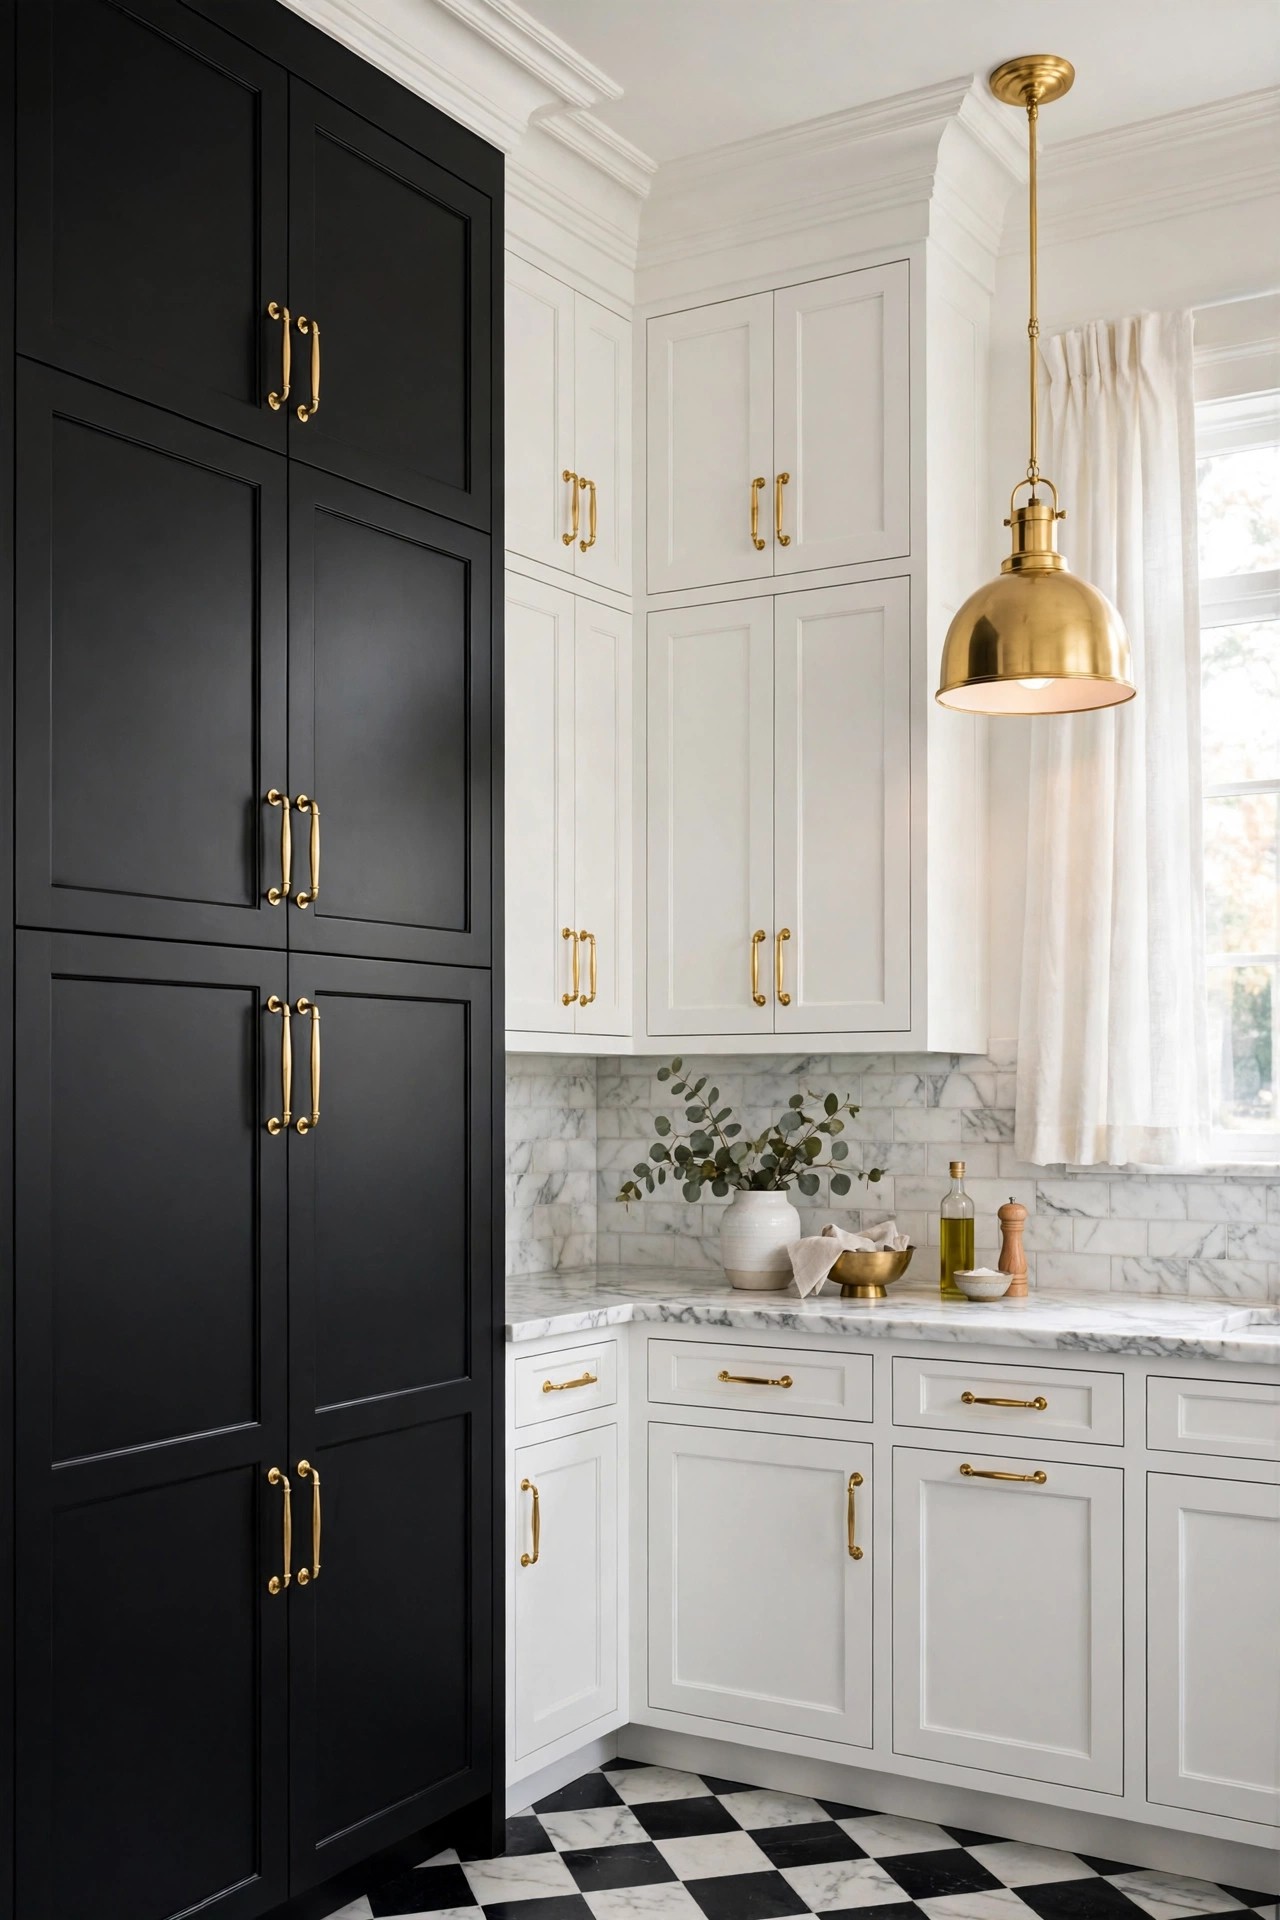
A tall black pantry wall gives a black and white kitchen its storage and its drama in one move: floor-to-ceiling matte black cabinets on one wall, fitted with pull-out shelves inside, so the food, the small appliances and the baking trays all hide behind one calm dark surface. The black wall reads as a piece of furniture, not a cupboard run, especially with slim brass handles and a white countertop breaking it at waist height. Keep the rest of the kitchen white so the pantry wall stays the one dark vertical, and plan the inside before the doors are fitted, because a tall cupboard with fixed shelves wastes its own height. Heavy tall units need fixing to the wall so they cannot tip.
Best For: Kitchens short on storage and anyone who wants the food and appliances hidden behind one wall.
Not Ideal For: Kitchens with low ceilings where a tall dark wall crowds the room; a half-height black dresser is the softer version there.
Estimated Cost: $2,000-$6,000 (estimate) for tall black pantry cabinets with pull-out shelves and fitting.
Budget Note: Pull-out shelves are the spend that makes the pantry usable; plain tall shelves cost less and waste more.
Renter Friendly: No
Renter Note: A fitted pantry wall belongs to the property owner.
What You Need
Tall matte black pantry cabinets with pull-out shelves, slim brass handles, wall fixings rated for the unit weight, white countertop section if the run breaks, labels for the shelves.
Product type to look for: Units with adjustable pull-out shelves, a stated load per shelf, and handles in the same brass tone as the pendants.
How To Do It
- Measure the wall and plan the inside first: pull-outs for food, a tall slot for trays, a shelf for small appliances.
- Fix the tall units to the wall, level them, and check the doors open without hitting the island or the tap.
- Fit the brass handles at one consistent height across the whole wall.
- Load the pantry from the bottom up, heaviest items low, and label the pull-outs for the first month.
Pro Tip
Keep one pull-out shelf empty on purpose. A pantry that starts full has nowhere to grow, and the empty shelf is where new staples land.
10. Add a Patterned Black and White Cement Tile Backsplash
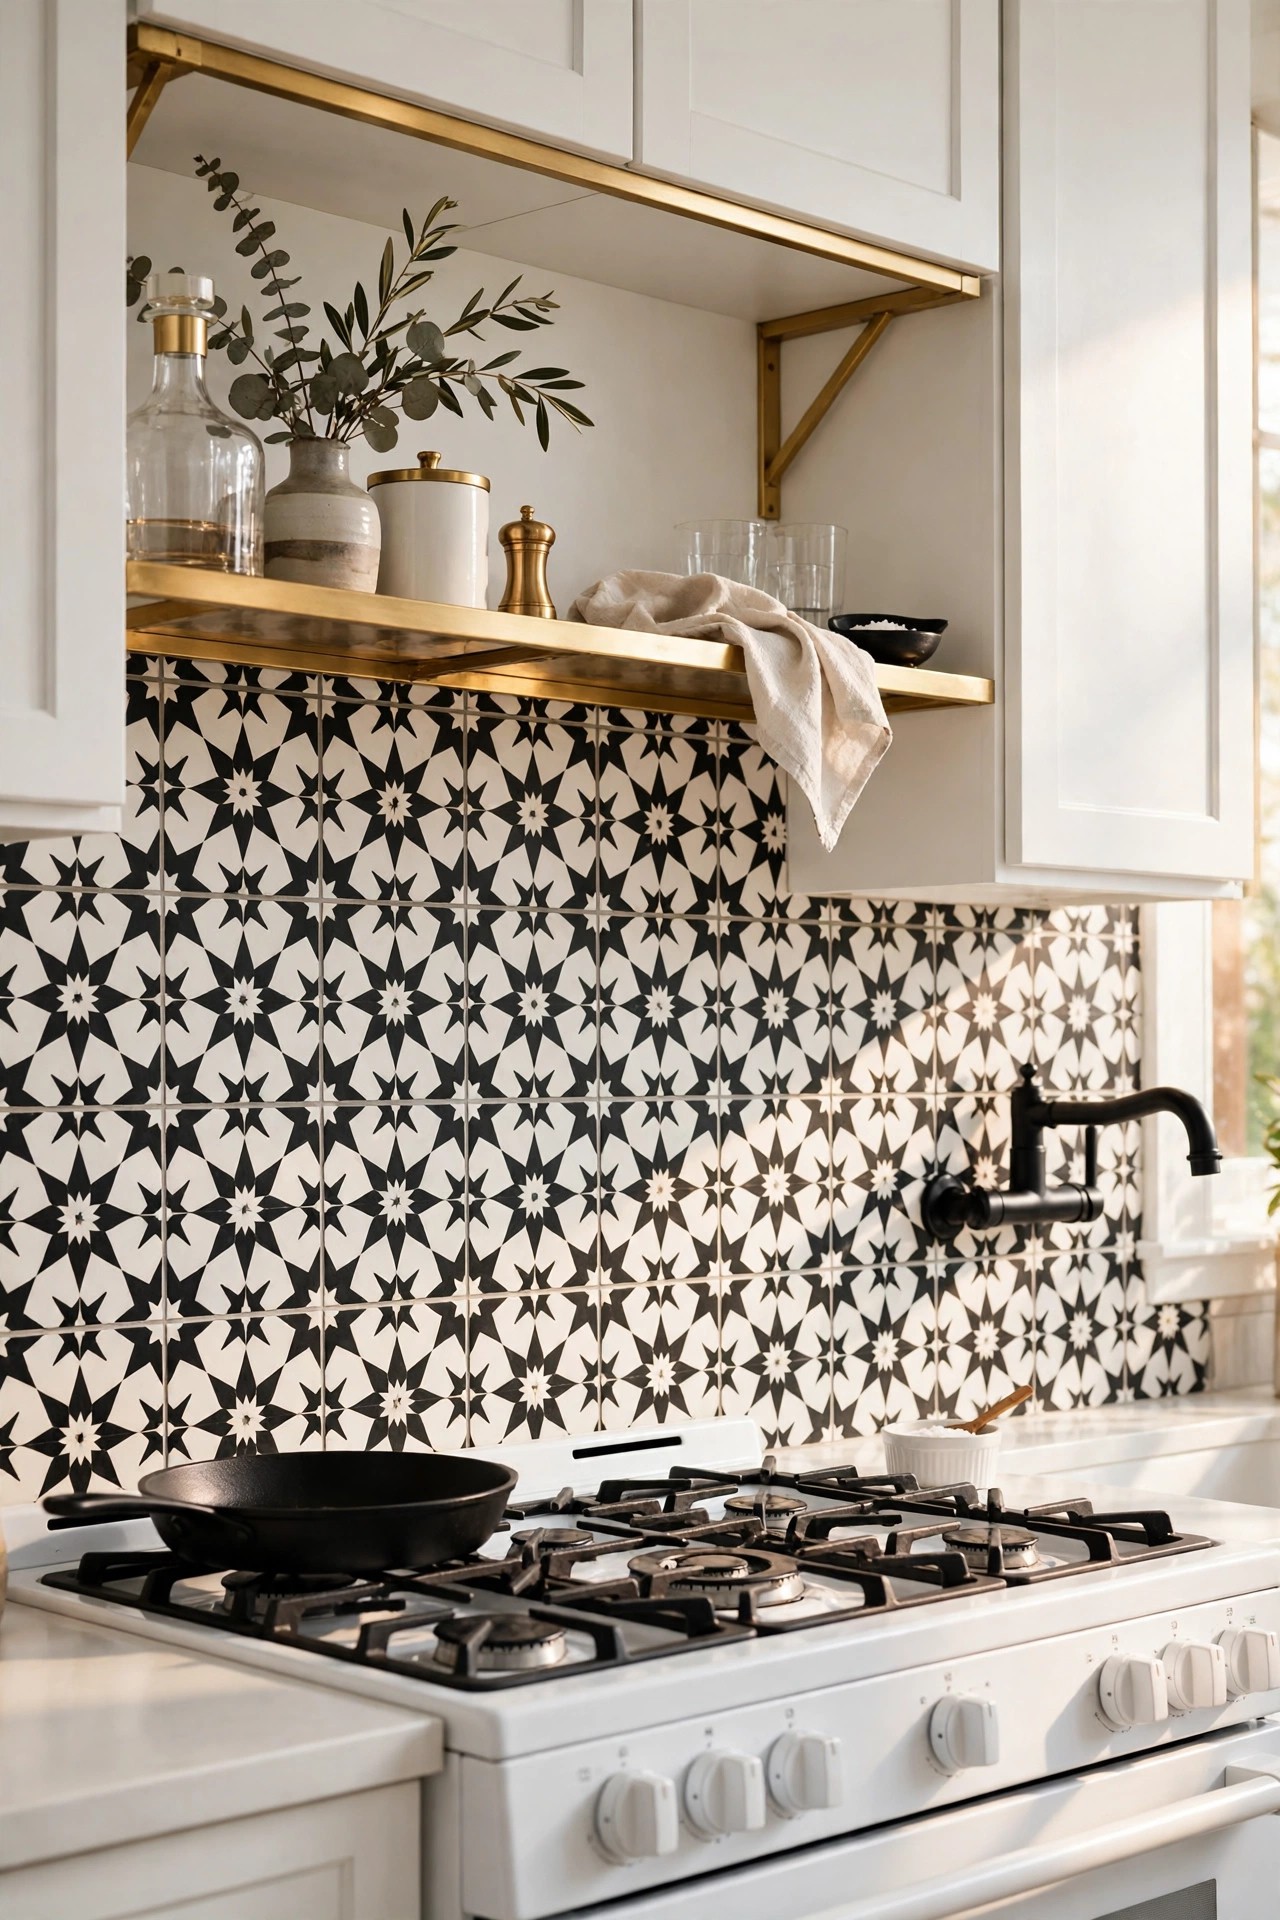
A patterned cement tile backsplash is the one place in a black and white kitchen where pattern is allowed to be bold. One run of black and white patterned cement tiles behind the hob, framed by plain white tile or plain paint on either side, gives the stove wall a framed picture effect, and the pattern carries the whole room’s personality while the cabinets stay quiet. Keep the pattern to the stove wall only, choose a tile with a clear repeat that reads from the doorway, and seal cement tile before it is grouted, because unsealed cement stains on first contact with cooking splashes. The same calm, framed-pattern idea works in a smaller, characterful cooking space too
Best For: Kitchens with plain white cabinets and a clear stove wall, and anyone who wants one bold pattern.
Not Ideal For: Kitchens that already have a checkerboard floor, where two bold patterns compete; pick the floor or the wall, not both.
Estimated Cost: $400-$1,200 (estimate) for patterned cement tiles, sealer and fitting for one stove wall.
Budget Note: The tile is the spend; framing it with plain white tile keeps the area small and the cost in reach.
Renter Friendly: With Conditions
Renter Note: Only tile with the owner’s permission; renters can use a peel-and-stick patterned tile in the same look.
What You Need
Patterned black and white cement tiles, cement tile sealer, tile adhesive and grout, spacers, a level, plain white tile for the framing runs.
Product type to look for: A cement tile with a stated pattern repeat and a sealer made for cement tile, sampled in the room light before ordering the full run.
How To Do It
- Tape the stove wall area and dry-lay the pattern on the floor first, checking the repeat meets the hob evenly.
- Seal the tiles before fitting, then tile from the centre of the hob outward.
- Grout, wipe the faces clean, and seal again once the grout has cured.
- Finish the framing runs in plain white tile so the pattern reads as one framed panel.
Pro Tip
Photograph the dry-laid pattern from the doorway before fitting. A pattern that looks gentle on a sample board can dominate a small wall.
11. Frame the Room With Black Window Frames and a Glass Door
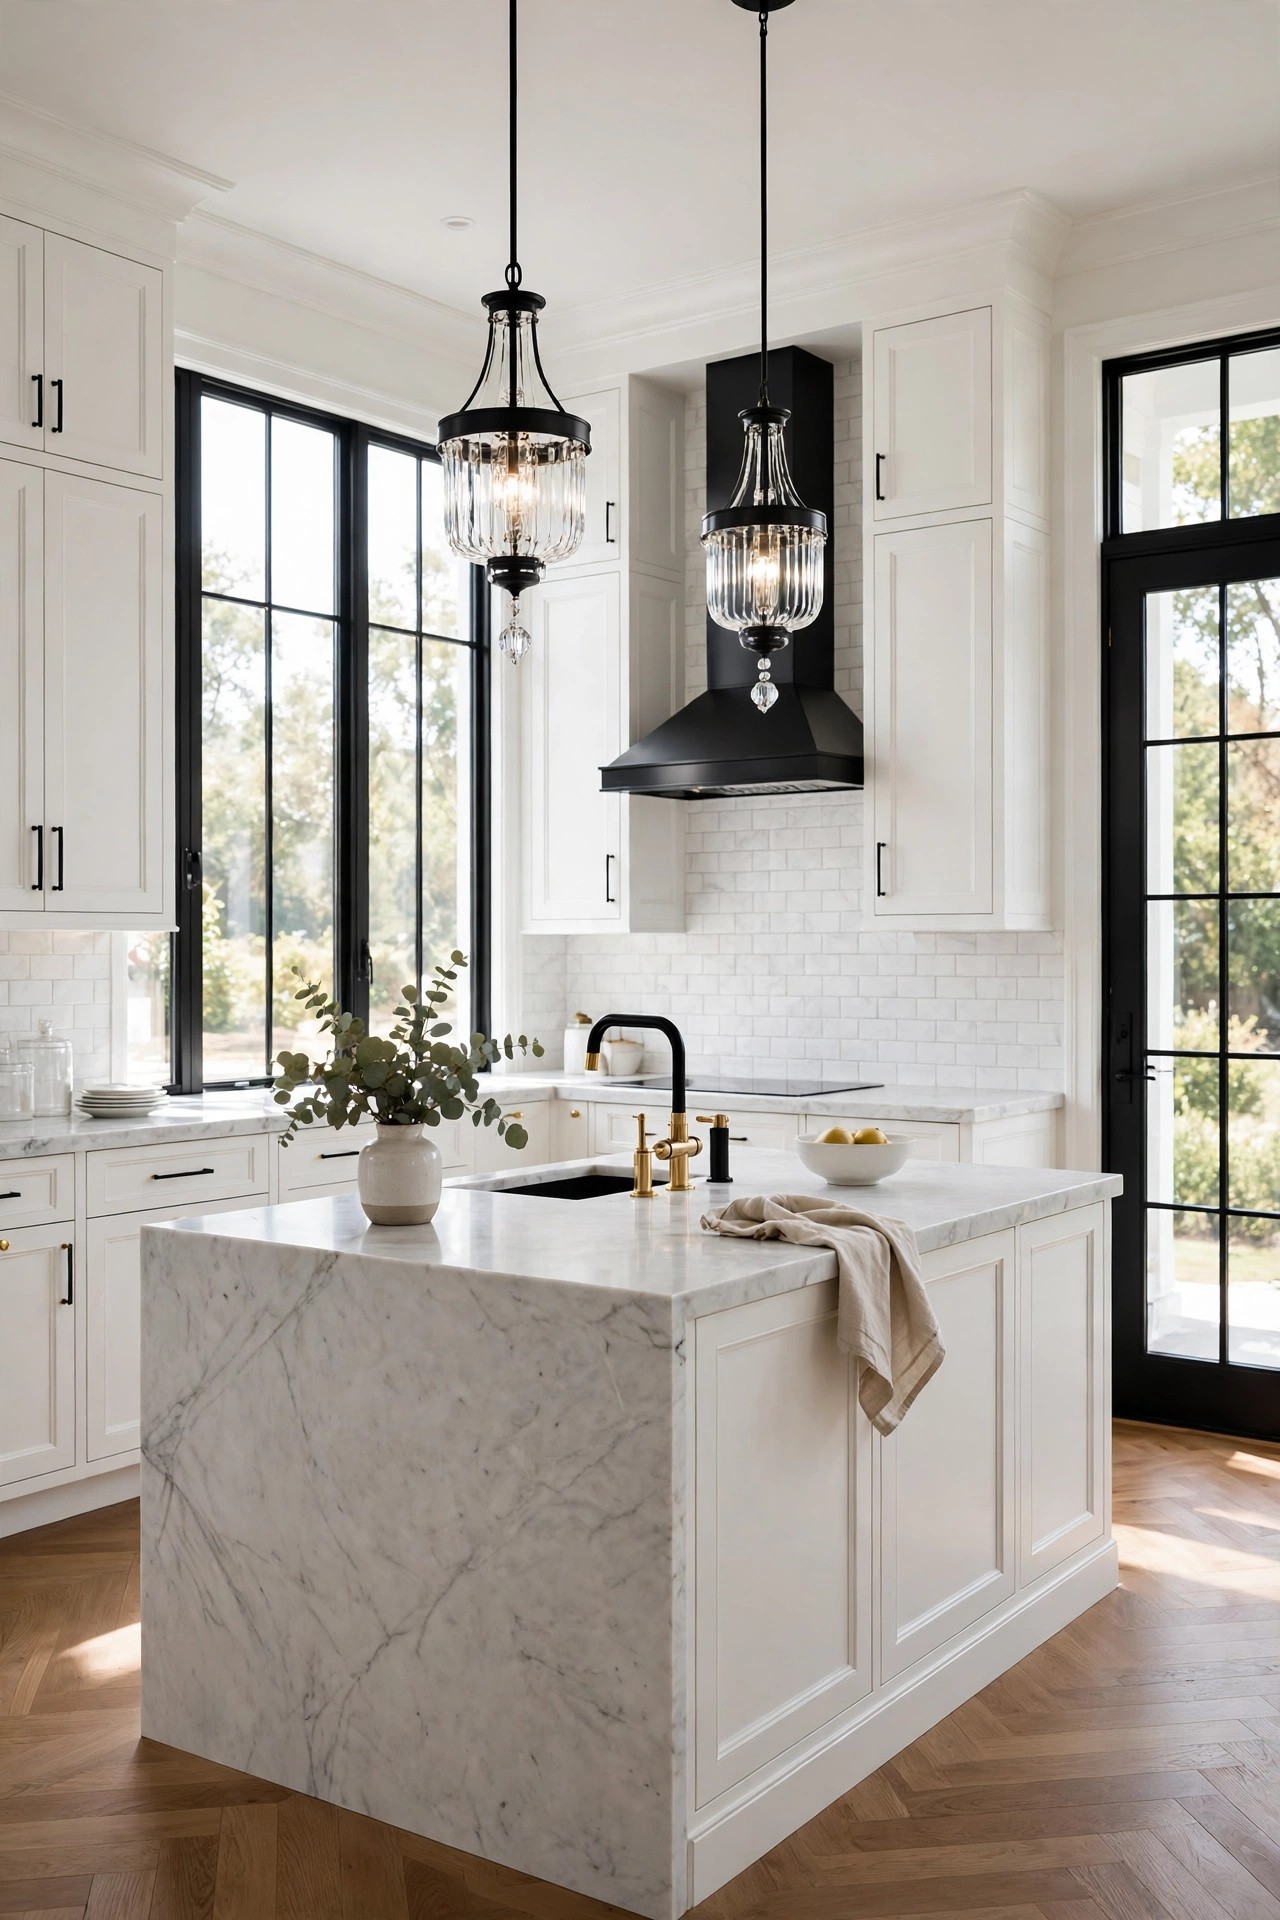
Slim black window frames are the quietest black note in this list, and they change the whole room because they frame the daylight itself. Black-framed windows and a black-framed glass door, set into white walls with white cabinets below, draw the eye to the garden and make the white read brighter by contrast. Keep the frames slim, in a matte black that matches the tap and handles, and let the glass stay clear, because frosted glass turns the black frame into a dark panel. Window work is a bigger job than it looks, so the frame size, the glass and the fitting all need measuring by the supplier before anything is ordered.
Best For: Kitchens with a garden view or a glass door to the dining room, and anyone replacing windows already.
Not Ideal For: Kitchens where the window faces a brick wall or a neighbour, where a black frame draws attention to a poor view.
Estimated Cost: $1,500-$5,000 (estimate) for slim black window frames and a black-framed glass door, fitted.
Budget Note: The frames are the spend; painting existing frames black is a cheaper change where the frames suit it.
Renter Friendly: No
Renter Note: Replacing windows and doors belongs to the property owner.
What You Need
Slim black window frames and a black-framed glass door to measure, clear glass panels, white walls and cabinets to set them against, a fitter for measuring and fitting.
Product type to look for: Frames in a slim matte black with a stated glass thickness, matched to the tap and handle black in the same room.
How To Do It
- Have the supplier measure every opening, since kitchen windows are rarely square.
- Choose slim frames and clear glass, and check the black against the tap and handles in daylight.
- Fit the windows and the door, then touch up the white wall around the frames so the black reads clean.
- Hang no curtain on the glass door; a sheer panel on the window only keeps the frame visible.
Pro Tip
Keep the window sill white. A black sill beside a black frame reads as one heavy block; a white sill lets the frame float.
12. Top White Cabinets With Honed Black Countertops
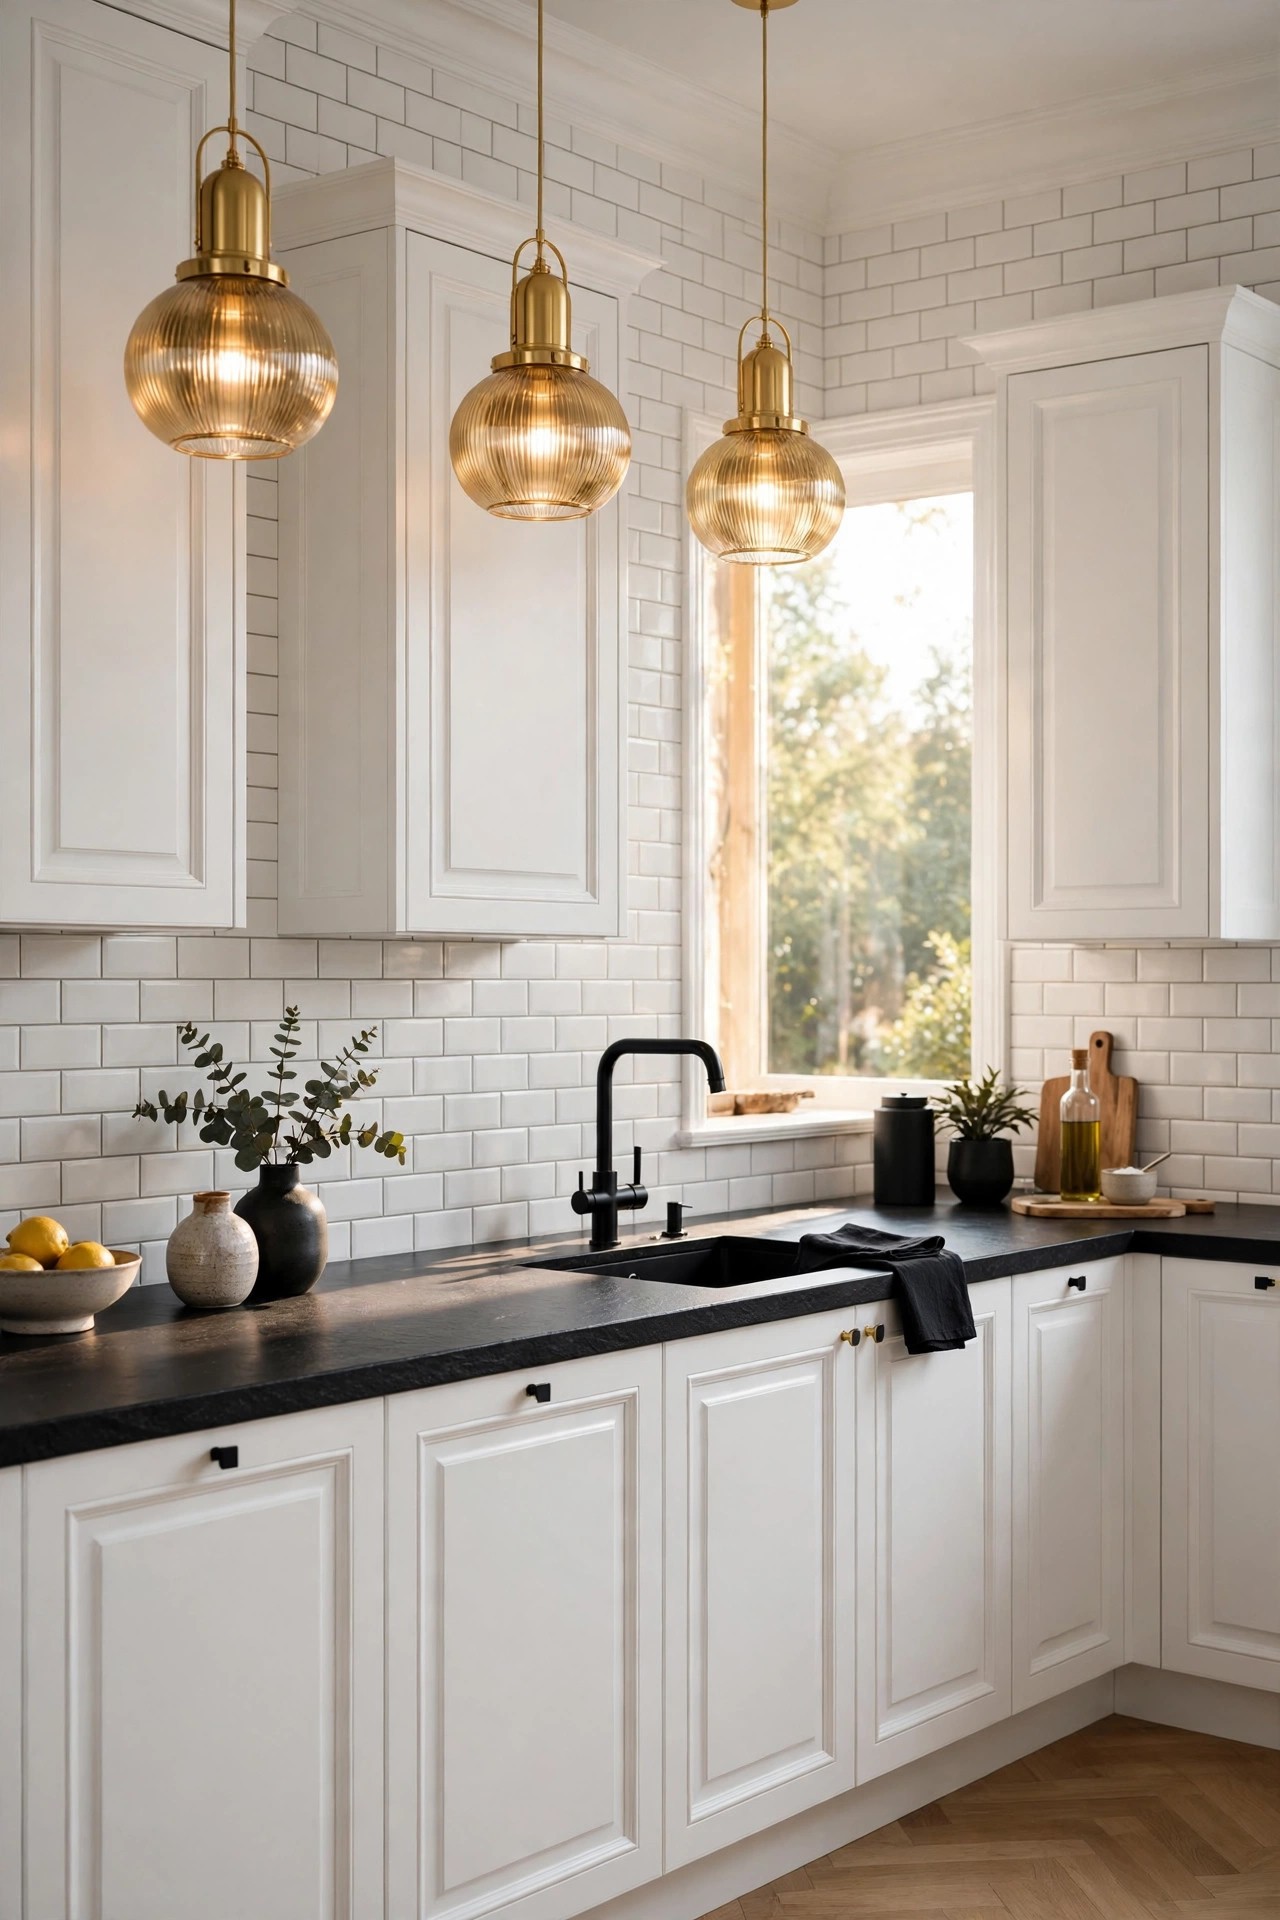
Honed black countertops flip the usual black and white kitchen upside down: the cabinets stay white, the worktop carries the black, and the room feels bright from the walls and dark where hands actually work. A honed finish, soft and matte rather than polished, hides fingerprints and water marks far better than a shiny black surface, and it suits white shaker cabinets with a plain white backsplash. Keep the island top in the same black so the two worktops read as one, and choose a quartz or granite that resists stains, because a black worktop shows every pale crumb and every water ring. The same white-cabinet, dark-top balance suits a calm, classic cooking space too
Best For: Kitchens with white cabinets in good shape and anyone who wants black at worktop level only.
Not Ideal For: Very small kitchens where a black worktop darkens the only bright surface; a white top with black edges is the lighter version there.
Estimated Cost: $1,500-$4,500 (estimate) for honed black quartz or granite countertops, fitted.
Budget Note: The stone is the spend; keeping the existing white cabinets is what makes this a one-change idea.
Renter Friendly: No
Renter Note: Replacing countertops belongs to the property owner.
What You Need
Honed black quartz or granite countertop slabs, matte black tap and handles, white subway tile for the backsplash, stone sealer if the stone needs it.
Product type to look for: A honed black stone with a stated stain resistance, in a thickness that suits the cabinet run, with a sample checked in the room light.
How To Do It
- Measure the cabinet runs and the island, and order the stone with the tap hole cut to size.
- Fit the countertops level, checking the overhang reads even from the doorway.
- Fit the matte black tap and handles, then finish the white subway backsplash in idea 5 style.
- Seal the stone if the supplier advises it, and wipe the tops dry after use for the first month.
Pro Tip
Keep the chopping boards light wood. A pale board on a black top is easy to see and easy to find, and the wood warms the scheme.
13. Build a Black and White Breakfast Nook With a Banquette
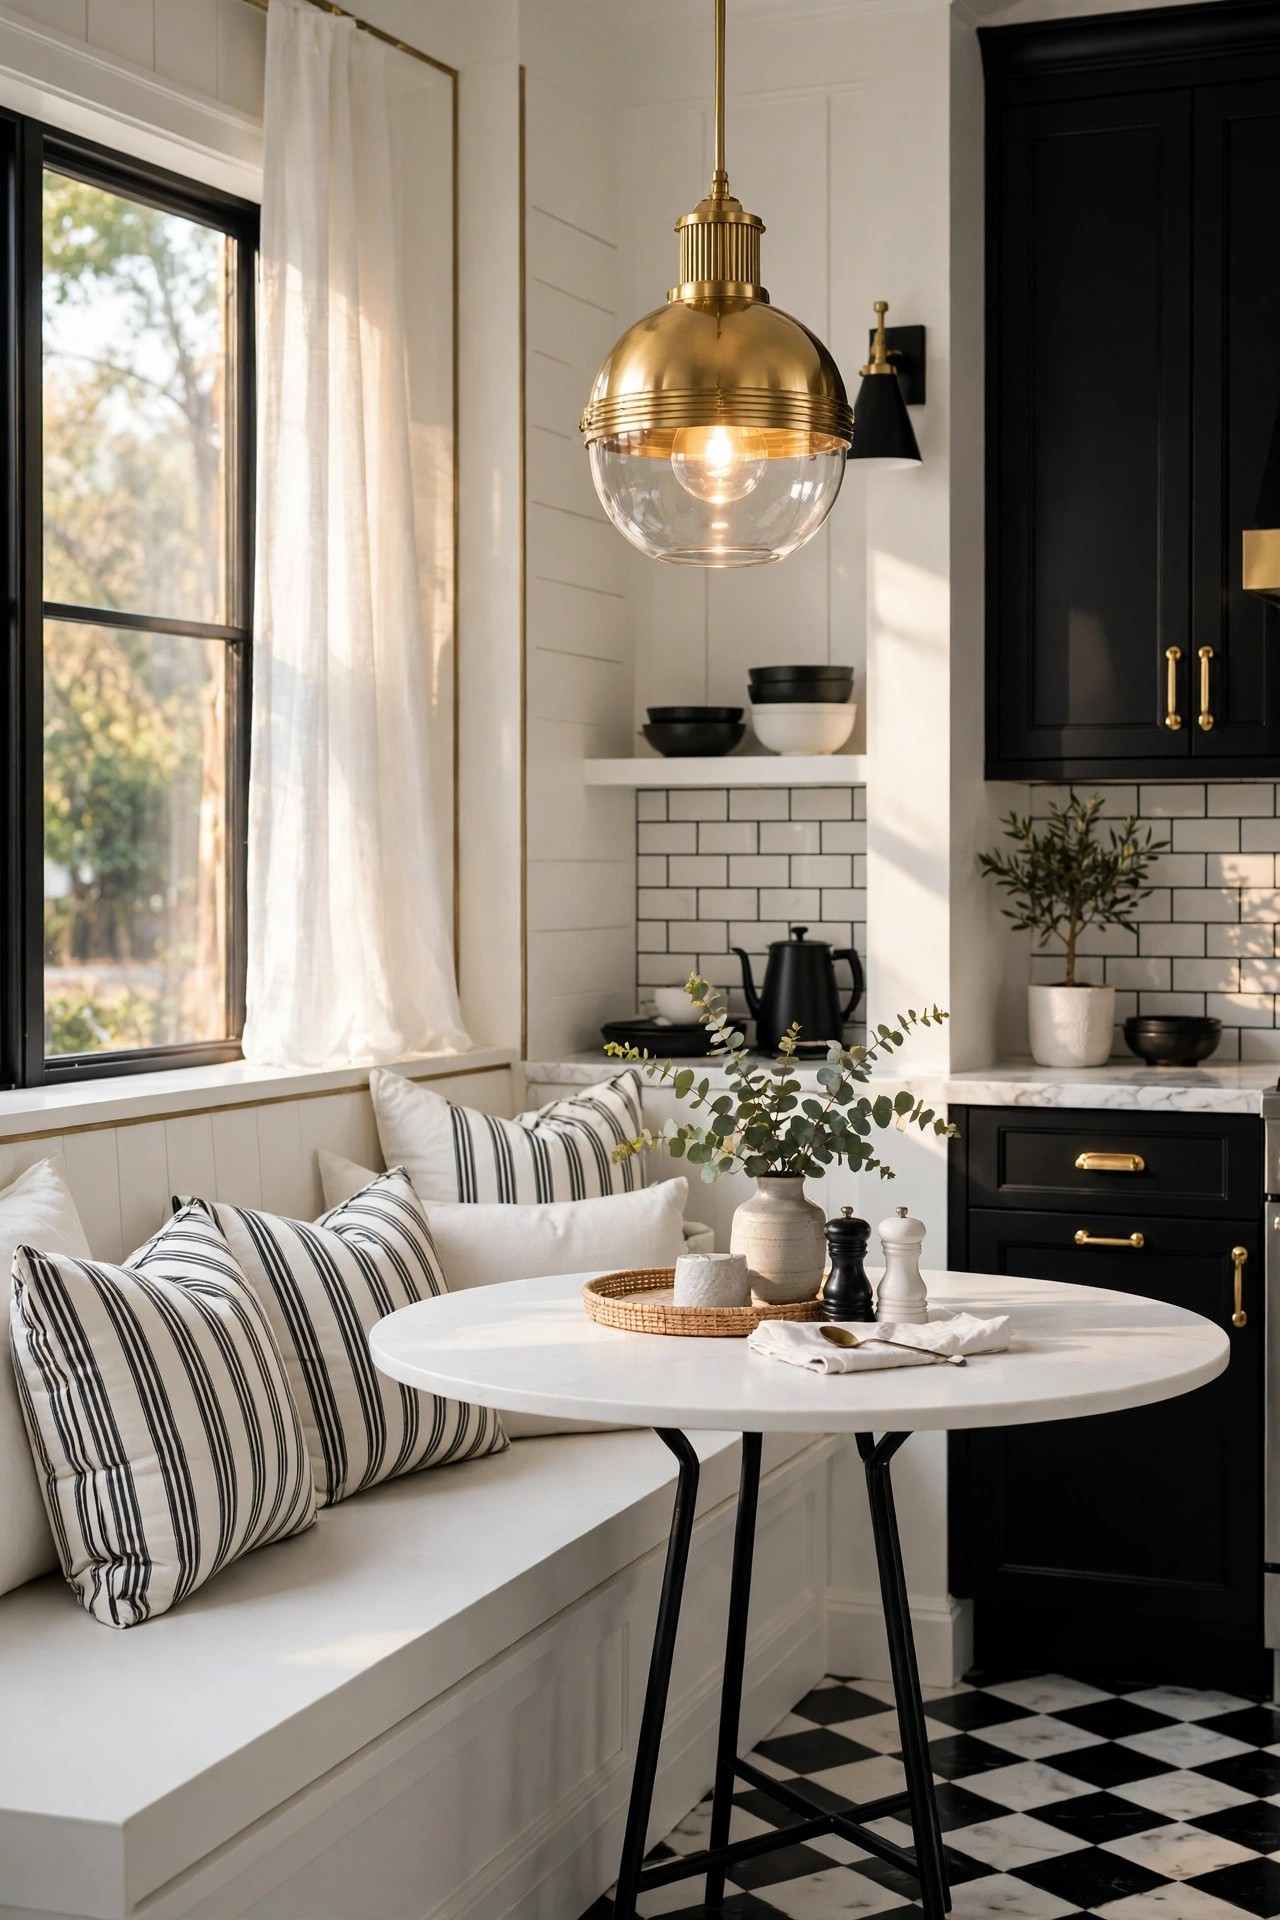
A breakfast nook is where a black and white kitchen gets its softest corner: a white banquette bench built into the wall, black and white striped cushions along the back, a round white table with slim black legs, and one gold pendant above it. The nook seats four in the space a table and chairs would waste, and the banquette hides storage inside for table linen and board games. Keep the table round so nobody sits at a corner, and keep the cushions washable, because a breakfast seat earns its stains honestly. The pendant should hang low enough to light the table and high enough to clear heads when people slide in.
Best For: Kitchens with an unused corner or a bay, and families who eat breakfast together daily.
Not Ideal For: Corners beside a radiator, where a banquette blocks the heat; a freestanding bench with a gap is the honest choice there.
Estimated Cost: $800-$2,500 (estimate) for a banquette bench with storage, cushions, a round table and a pendant.
Budget Note: The bench build is the spend; the cushions and table can be simple pieces in the black and white palette.
Renter Friendly: No
Renter Note: A fitted banquette is a landlord decision; renters can use a freestanding bench in the same spot.
What You Need
Banquette bench with hinged storage, washable black and white striped cushions, round white table with black legs, one brushed gold pendant light, two loose chairs for the open side.
Product type to look for: A bench built to the exact corner measurements, with washable cushion covers and a table at a height that suits the bench seat.
How To Do It
- Measure the corner at three points, since corners are rarely square, and tape the bench outline on the floor.
- Build or order the bench to fit, with the storage lid hinged at the back.
- Set the cushions, place the round table, and hang the pendant centred over the table.
- Add the loose chairs on the open side and sit in every seat to check the table height suits the bench.
Pro Tip
Store table linen inside the banquette, not books. Heavy books in a hinged bench are awkward to reach and warp the lid over time.
14. Plan a Compact Galley Kitchen in Black and White
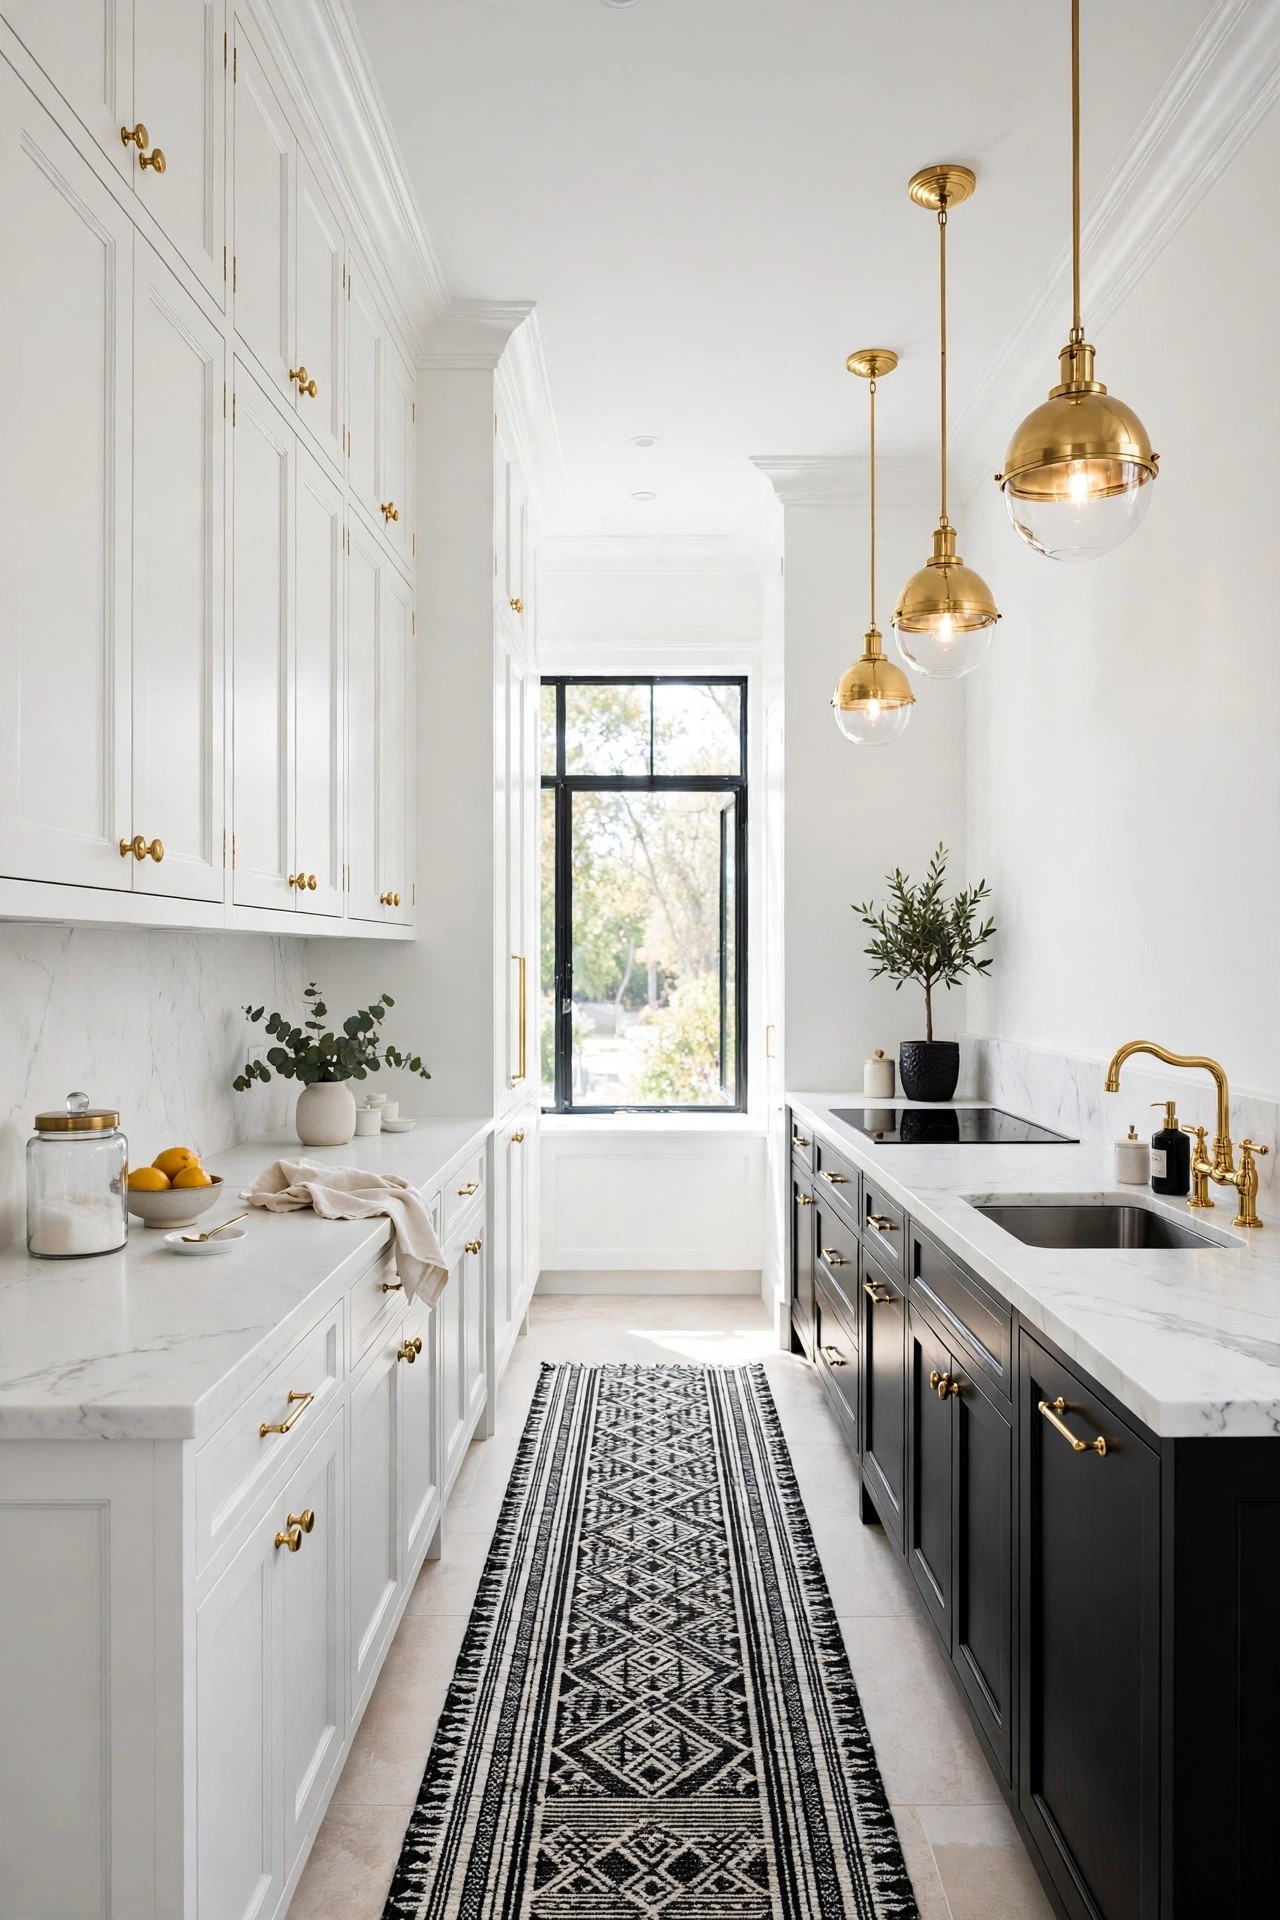
A galley kitchen suits black and white better than most layouts, because the two parallel runs are already a contrast waiting to happen. Put white cabinets on the side with the window and black lowers on the opposite run, keep the countertops white on both sides, and let a black and white runner rug lead the eye down the middle. The scheme works in a small space only if the black stays low and the uppers stay white on both sides, so the ceiling feels tall and the walkway feels wide. Keep the far end of the galley for the tall black pantry in idea 9 or a single window, never for a second dark wall. For a fuller take on this small-space balance, our guide to compact cooking rooms shows how the same rules scale down
Best For: Narrow kitchens and galley layouts, and anyone who wants the contrast to do the work of a bigger room.
Not Ideal For: Galleys narrower than about four feet, where even black lowers crowd the walkway; all-white cabinets with black hardware are calmer there.
Estimated Cost: $3,000-$9,000 (estimate) for two-tone cabinets, white countertops and a runner, depending on galley length.
Budget Note: The cabinets are the spend; the runner and the hardware are the cheap notes that tie the two runs together.
Renter Friendly: No
Renter Note: Repainting cabinets is a landlord decision; renters can use the hardware and rug notes instead.
What You Need
White upper cabinets for both runs, black lower cabinets for one run, white countertops, matte black handles and tap, black and white washable runner rug, two gold pendants if the ceiling allows.
Product type to look for: A washable runner rug in a size that suits the galley length, with a non-slip backing, and handles in one metal tone across both runs.
How To Do It
- Measure the galley width and tape both runs, walking the middle for a day with the doors open.
- Set the white run on the window side and the black lowers on the opposite run, with white uppers above.
- Fit the white countertops on both sides, then the matte black handles and tap.
- Lay the runner down the middle, leaving a clear gap at each end so the door swings stay free.
Pro Tip
Keep the far end of the galley white. A dark wall at the end of a narrow kitchen reads as a dead end; a white end keeps the room moving.
15. Warm the Scheme With a Pale Wood Floor
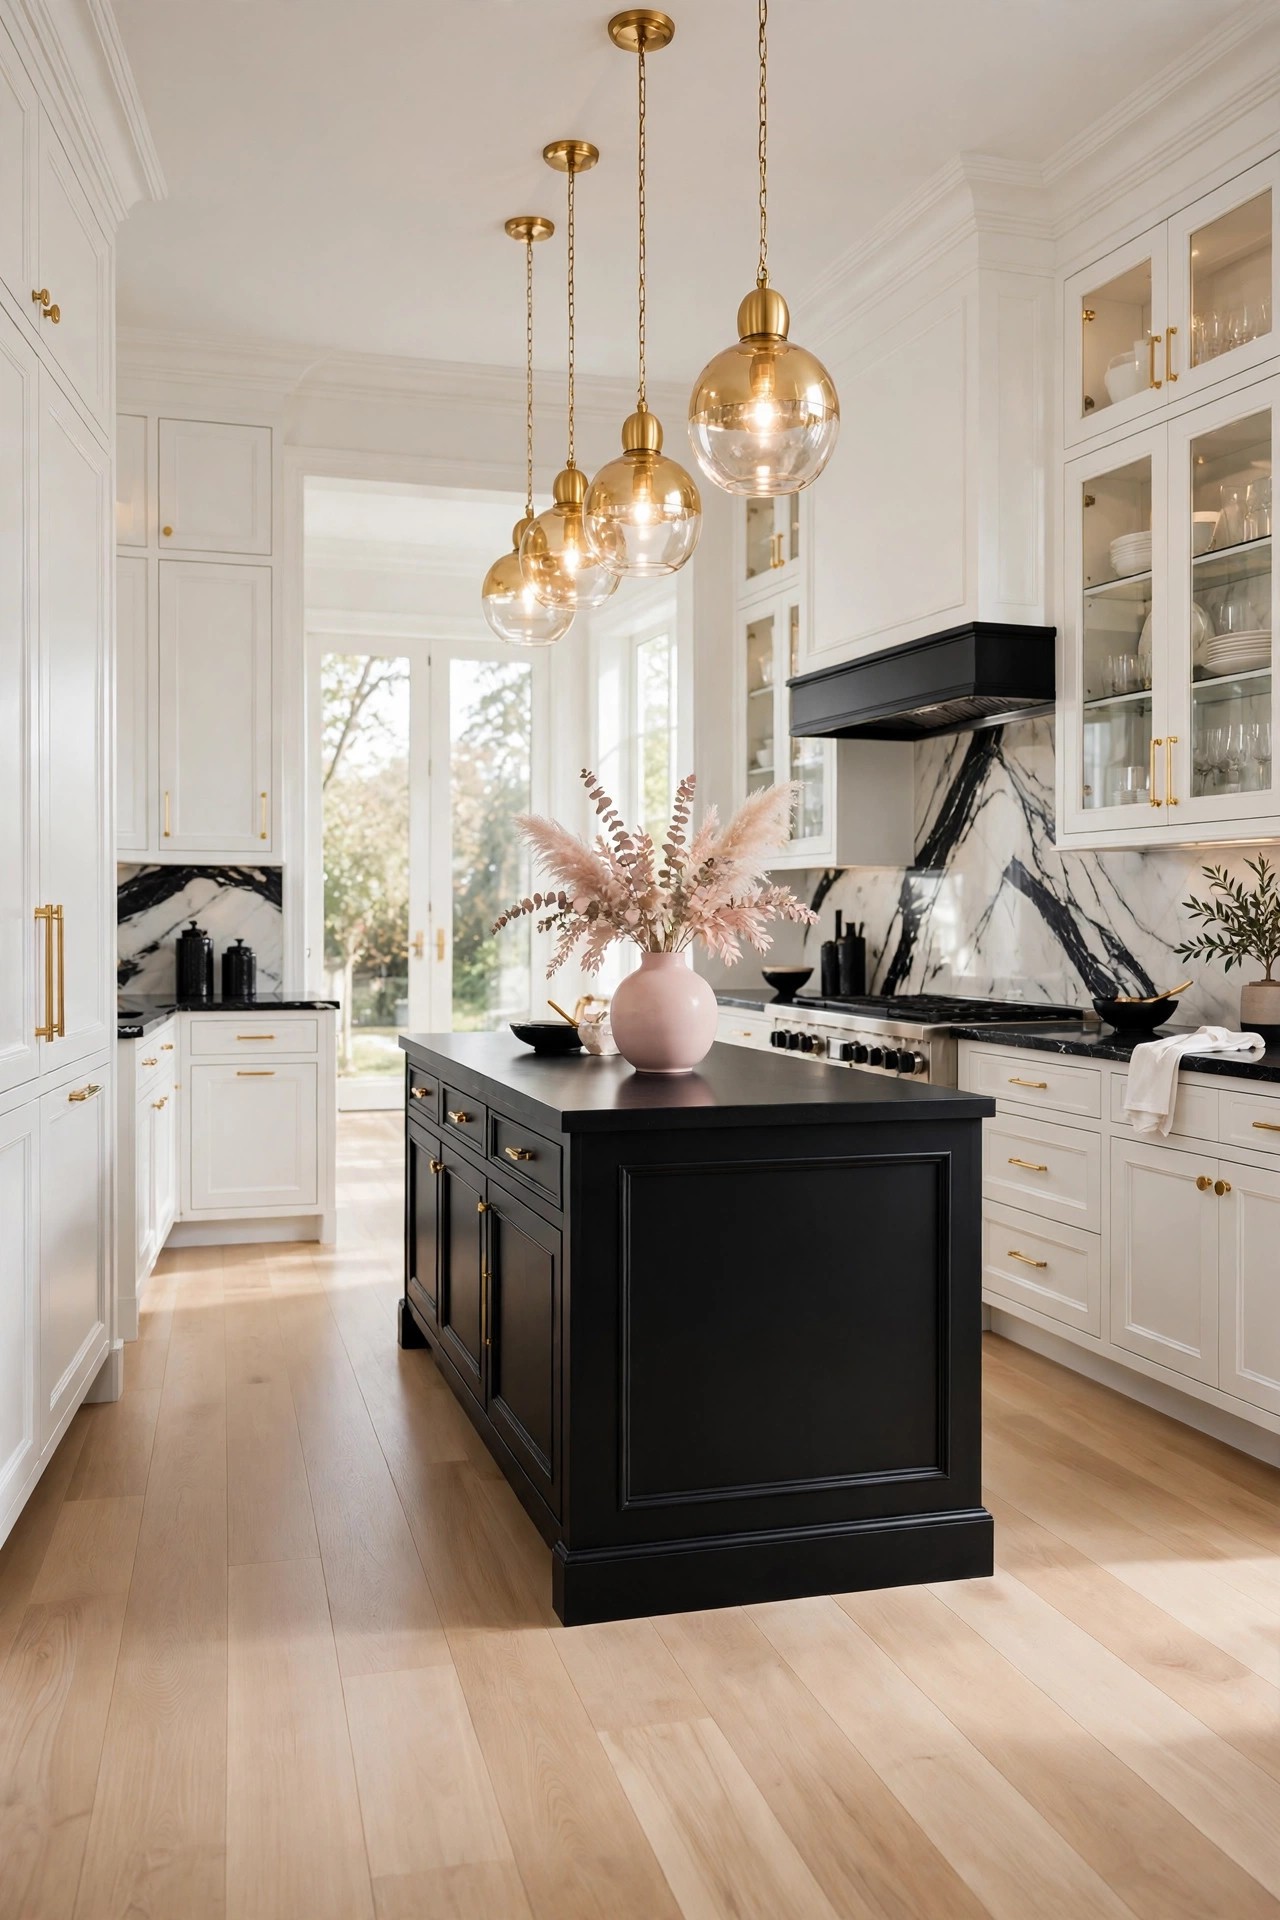
A pale warm wood floor is the note that stops a black and white kitchen feeling cold. White oak or pale ash, laid in wide planks, brings a warm honey tone under the black and white, and the wood grain softens every hard edge in the room, from the island to the checkerboard in idea 4. Keep the wood pale, not honey dark, so it reads as warmth rather than a third colour, and seal it well, because kitchen floors meet water daily. The wood also ties the kitchen to the rest of the house, which matters in open-plan homes where the kitchen floor meets the living room. One blush vase on the island is enough of a colour note; the floor is the warmth.
Best For: Open-plan kitchens and anyone who finds pure black and white too stark.
Not Ideal For: Kitchens with a checkerboard floor already, where two floor stories compete; pick the wood or the tile, not both.
Estimated Cost: $1,500-$5,000 (estimate) for pale wood flooring and fitting, depending on floor size.
Budget Note: The flooring is the spend; a pale wood floor outlasts most other kitchen changes and suits every later update.
Renter Friendly: No
Renter Note: Replacing flooring belongs to the property owner; renters can use a pale wood-look rug instead.
What You Need
Pale warm wood flooring in wide planks, a sealant suited to kitchens, a non-slip rug for the sink area if needed, felt pads for the stools and chairs.
Product type to look for: A wood floor rated for kitchen use with a stated water resistance, in a pale tone sampled against the black island and white cabinets.
How To Do It
- Check the subfloor is level and dry, and acclimatise the planks in the room for a few days.
- Lay the planks in the direction of the longest wall, keeping the joints staggered.
- Seal the floor and check the finish at the island base and the cabinet kick plates.
- Add felt pads to every stool and chair leg, then place the blush vase on the island as the one colour note.
Pro Tip
Keep the wood one tone only across the kitchen. Mixed wood tones on the floor and the stools scatter the warmth; one pale wood reads as a plan.
Practical Tips for Black and White Kitchen Design
Hold the black to one or two strong notes and let white carry the light. The cabinets, the island and the floor are the three big surfaces, and only one of them should be bold black at a time, with the other two staying white or pale wood, so the room never feels dark from the doorway. Repeat the black at least twice: the lowers and the tap, the island and the pendants, the floor and the hood, so the contrast reads as a plan rather than an accident. Keep brushed gold as the only metal and match its tone across pendants, handles, tap and tray, because mixed metals scatter the glam note. Add one warm material, pale wood or tan leather, and one soft colour, blush in a vase or cushions, so the scheme feels lived in rather than stark. Finally, edit seasonally: black shows dust and white shows splashes, so a quick wipe of the black lowers and the white counters keeps the contrast looking fresh. Start the room in the order of this list, cabinets and island first, then floor and walls, then the small layers.
Frequently Asked Questions
How do I stop a black and white kitchen feeling cold?
Add one warm material and one soft colour. A pale wood floor, tan leather stools or warm wood handles bring warmth under the contrast, and a blush vase or striped cushions soften it, as in ideas 8, 13 and 15. Keep the lighting warm too, so the white reads as cream in the evening.
What is the best black and white split for a small kitchen?
Keep the black low and the white high: black lower cabinets, white uppers, white countertops and a pale floor, as in ideas 1 and 14. A small kitchen can carry one more black note, a tap or a hood, but a black wall or a black ceiling will crowd it.
Does a black and white kitchen suit a rental?
Mostly yes, if the black notes are removable. Black hardware, a black tap, open black shelves on a freestanding unit, a checkerboard rug and black and white cushions all come with you when you move. Repainting cabinets, tiling and replacing countertops need the owner’s permission, and each idea in this list states its own position.
How much should I spend on a black and white kitchen?
Start with the cabinets, since they set the split, and budget the rest around them. The cheapest large change in this list is the subway tile backsplash with black grout in idea 5, at tile cost, while a full two-tone cabinet refit or a waterfall island is the largest spend. Costs here are labelled estimates; check a product page before buying.
Which black finish is best for kitchen cabinets?
Matte black hides fingerprints and dust better than gloss, and it suits the glam style in this list. A satin finish is the middle ground if matte feels too flat. Whichever finish you choose, use the same black on the lowers, the island and the hood so the room reads as one plan.
Can I mix black and white with gold and wood?
Yes, and this list is built on it. Brushed gold is the single metal across pendants, handles and tap, pale wood is the warm floor or stool material, and blush is the one soft colour. Keep the gold to one tone and the wood to one pale shade, and the black and white stays the lead.
Conclusion
A black and white kitchen stays bright and glam when the contrast is planned: black lower cabinets and a black island ground the room, white uppers and white countertops hold the light, and a checkerboard floor or a patterned tile backsplash gives the scheme its one bold pattern. Warm wood underfoot, brushed gold in the pendants and one blush note on the island keep the contrast from feeling cold. Start with the cabinets, add the island or the hood next, then the floor and the walls, and the kitchen will feel like a designed room rather than a two-colour experiment.